概述
开源软件tomcat,目前几乎已经是Java web开发的必备软件了,目前有很多关于tomcat的书籍,但是里面介绍的大多是关于tomcat的配置,已经通过配置对tomcat进行一些跟应用业务功能的调优,作为一个Java开发人员,感觉如果仅仅只是了解一些配置,可能稍微少了一点什么,最好能够深入到源代码中进行学些和了解。
在Google上搜索了很多关于tomcat源码环境搭建的文章,发现按照文章的步骤,几乎都启动不了,于是自己尝试搭建,下面是搭建的方法。
基础环境搭建

生成maven工程
我的代码本地目录是:C:\Users\rank\Downloads\google\github\apache-tomcat8.5。先在该目录下生成一个pom.xml文件,pom文件的内容为:
<?xml version="1.0" encoding="UTF-8"?>
<project xmlns="http://maven.apache.org/POM/4.0.0"
    xmlns:xsi="http://www.w3.org/2001/XMLSchema-instance"
    xsi:schemaLocation="http://maven.apache.org/POM/4.0.0 http://maven.apache.org/xsd/maven-4.0.0.xsd">

    <modelVersion>4.0.0</modelVersion>
    <groupId>org.apache.tomcat</groupId>
    <artifactId>Tomcat8.0</artifactId>
    <name>Tomcat8.0</name>
    <version>8.0</version>

    <build>
        <finalName>Tomcat8.0</finalName>
        <sourceDirectory>java</sourceDirectory>
        <testSourceDirectory>test</testSourceDirectory>
        <resources>
            <resource>
                <directory>java</directory>
            </resource>
        </resources>
        <testResources>
            <testResource>
                <directory>test</directory>
            </testResource>
        </testResources>
        <plugins>
            <plugin>
                <groupId>org.apache.maven.plugins</groupId>
                <artifactId>maven-compiler-plugin</artifactId>
                <version>2.3</version>
                <configuration>
                    <encoding>UTF-8</encoding>
                    <source>1.8</source>
                    <target>1.8</target>
                </configuration>
            </plugin>
        </plugins>
    </build>

    <dependencies>
        <dependency>
            <groupId>junit</groupId>
            <artifactId>junit</artifactId>
            <version>4.12</version>
            <scope>test</scope>
        </dependency>
        <dependency>
            <groupId>org.easymock</groupId>
            <artifactId>easymock</artifactId>
            <version>3.4</version>
        </dependency>
        <dependency>
            <groupId>ant</groupId>
            <artifactId>ant</artifactId>
            <version>1.7.0</version>
        </dependency>
        <dependency>
            <groupId>wsdl4j</groupId>
            <artifactId>wsdl4j</artifactId>
            <version>1.6.2</version>
        </dependency>
        <dependency>
            <groupId>javax.xml</groupId>
            <artifactId>jaxrpc</artifactId>
            <version>1.1</version>
        </dependency>
        <dependency>
            <groupId>org.eclipse.jdt.core.compiler</groupId>
            <artifactId>ecj</artifactId>
            <version>4.5.1</version>
        </dependency>
    </dependencies>
</project>在这里,我把java和test这两个模块到加载到pom工程里,你也可以选择将test工程移除,这样可以省不少事情。
在idea中导入tomcat pom工程
将tomcat的pom工程导入到idea中,这个时候,你可以找到tomcat的启动类org.apache.catalina.startup.Bootstrap, 找到main方法,尝试启动tomcat,这个时候肯定是报错的,因为你还有很多后面的步骤没有完成。
1.需要设置一个运行时的CATALINA_HOME目录,你需要下载一个tomcat软件的压缩包,由于我选择的是tomcat-8.5.5的源代码,下载对应的tomcat版本,tomcat下载地址
2.和tomcat-8.5.5-sourcecode这个目录的上层目录上,建一个和该目录平行的目录catalina-home,将tomcat软件解压后,在解压的目录下,将以下目录拷贝到catalina-home中:
bin
conf
lib
logs
temp
webapps
work
在本地的目录结构是这样的:

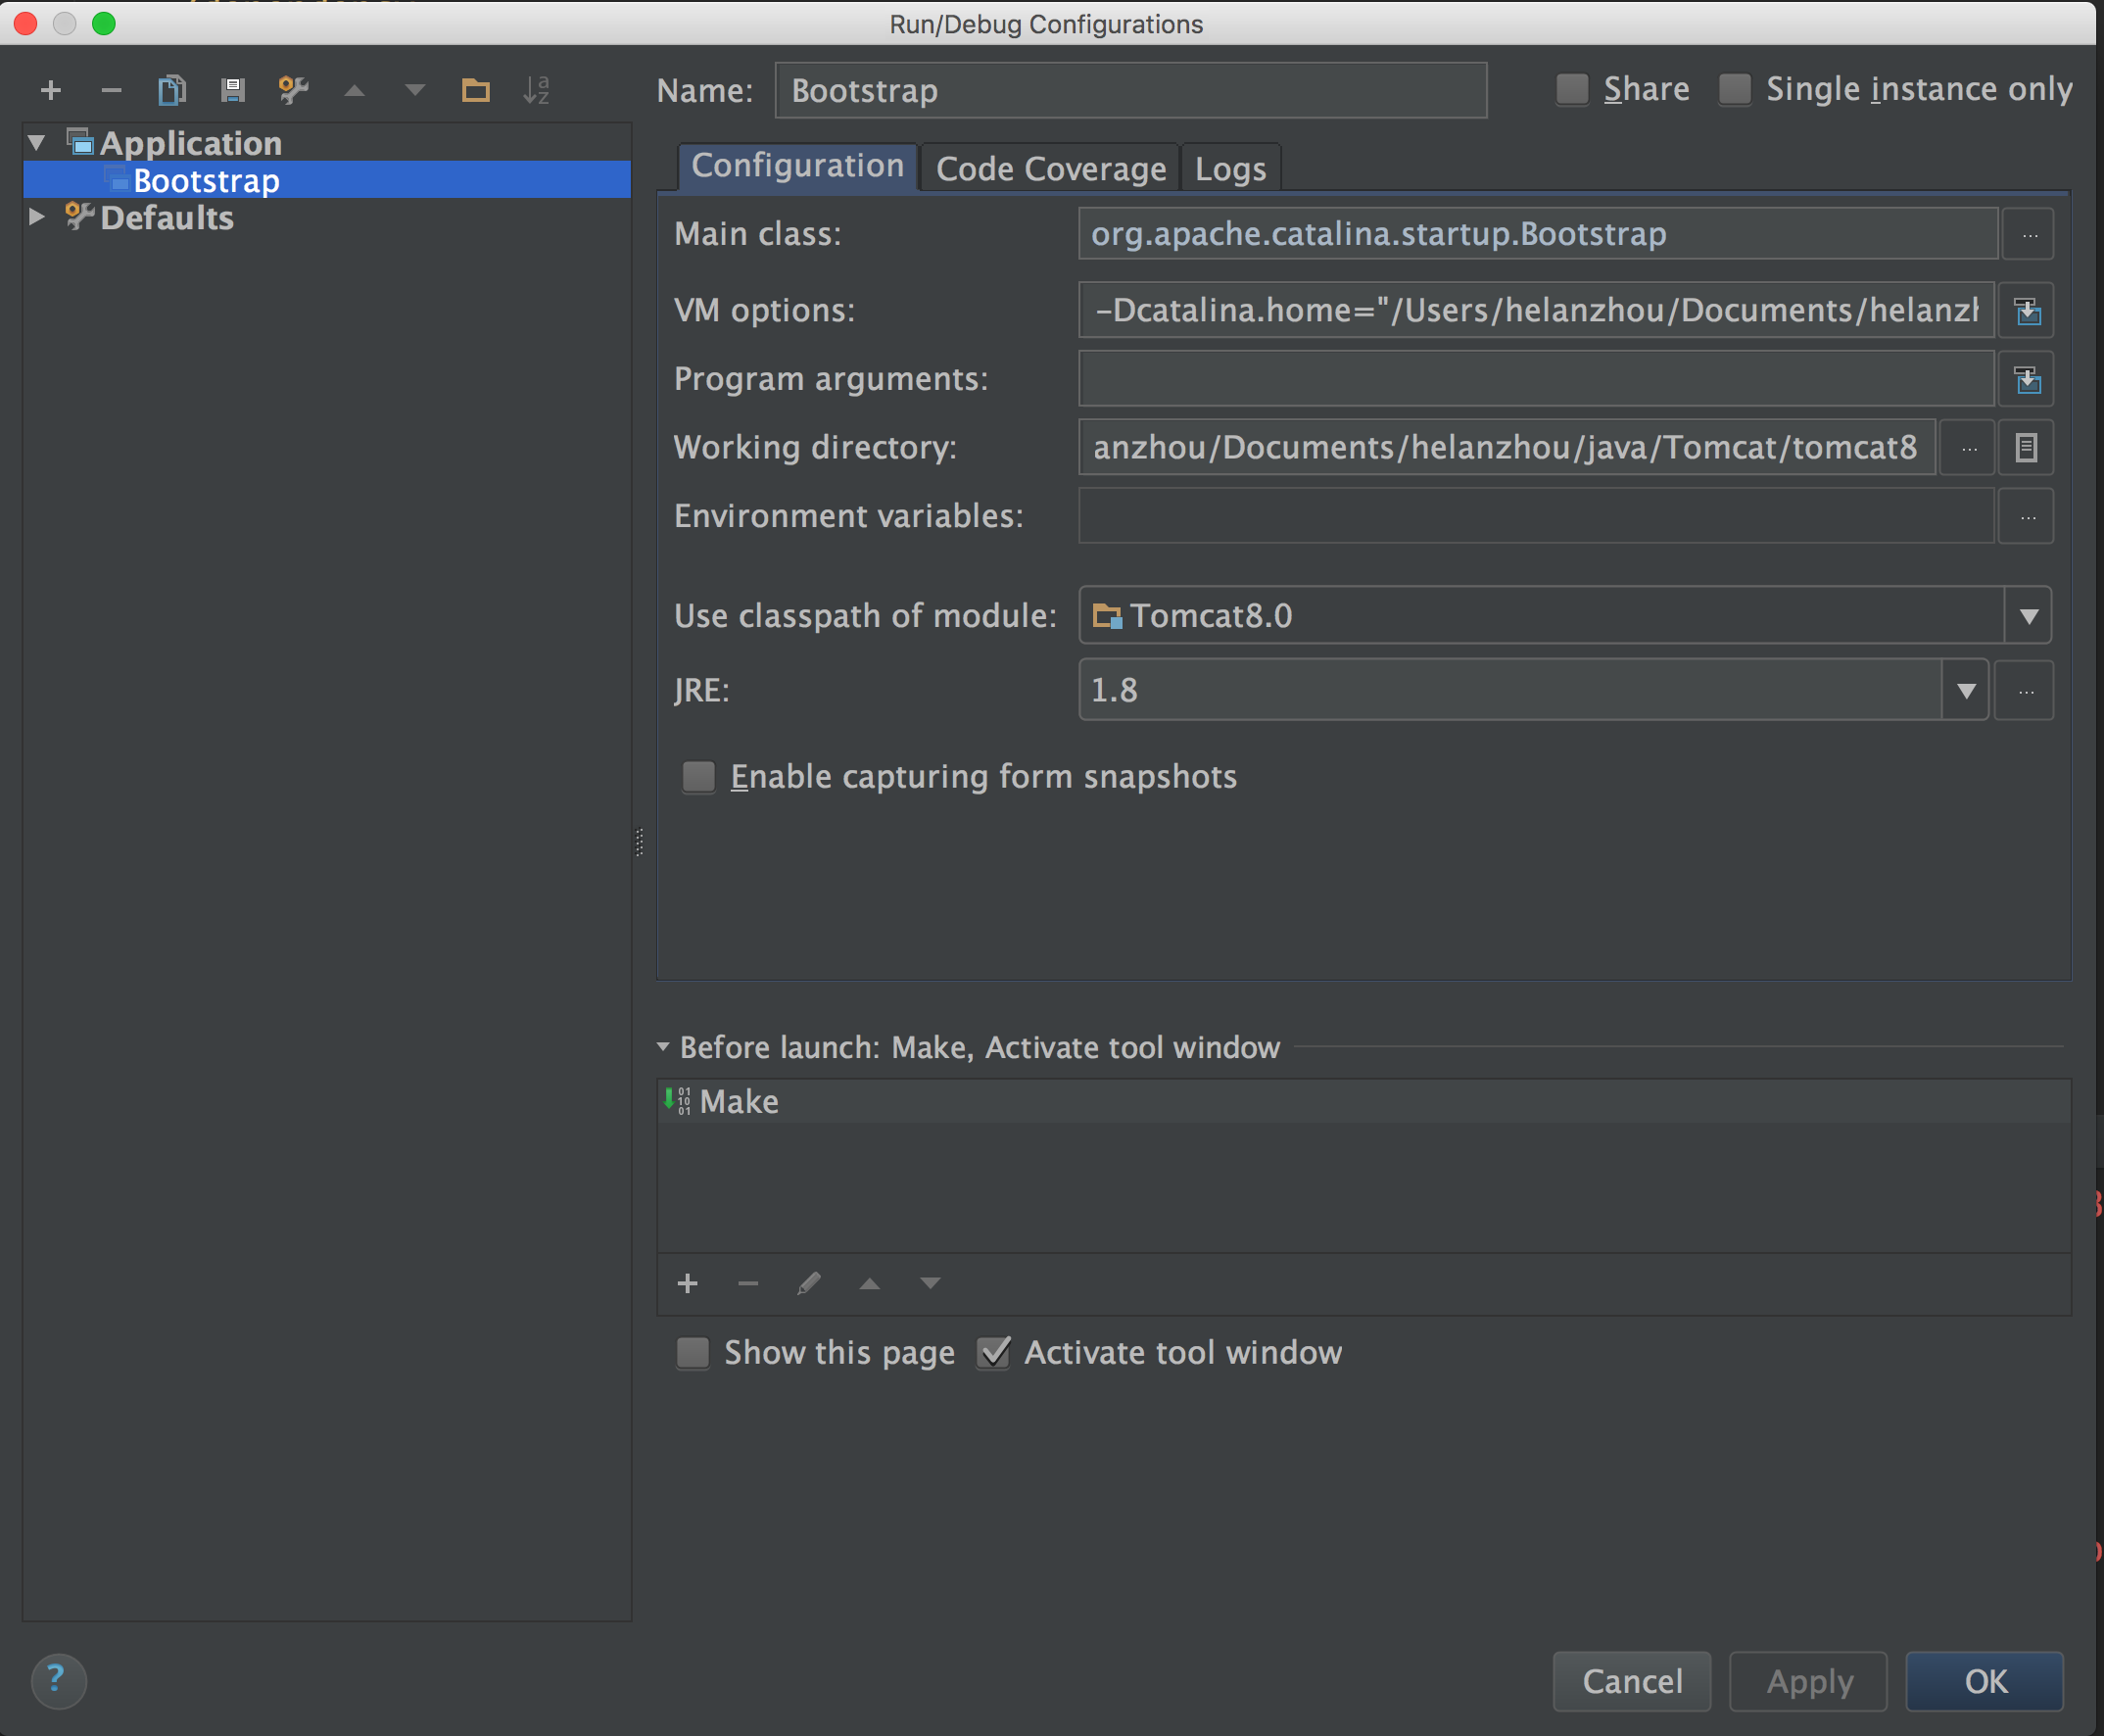
3.在idea的右上角找到run这个按钮,旁边有Edit Configurations...这个选项,点击它。得到一个弹出框。
在
Man class:中填入,org.apache.catalina.startup.Bootstrap
在VM options:中填入,你刚刚设置catalina-home路径,我的是:-Dcatalina.home="C:\Users\rank\Downloads\google\github\apache-tomcat8.5"Working directory是默认的,不用管Use class path of module里选择Tomcat8.0,这个和你在pom.xml中的配置有关JRE,我选择的是1.8
如下图:
4.保存上面的配置,然后在右上角选择run,这个时候,可以启动起来了,你可以在控制台上看到下图的启动日志:
如果你将test工程也包含在pom工程里,有可能你会启动失败,报错的类是:TestCookieFilter.java 报里面的CookieFilter.java类不存在,你可以选择注释,也可以选择实现该filter,我是注释掉的。

5.打开chrome浏览器,输入127.0.0.1:8080,这时候,你能够得到下面的页面:
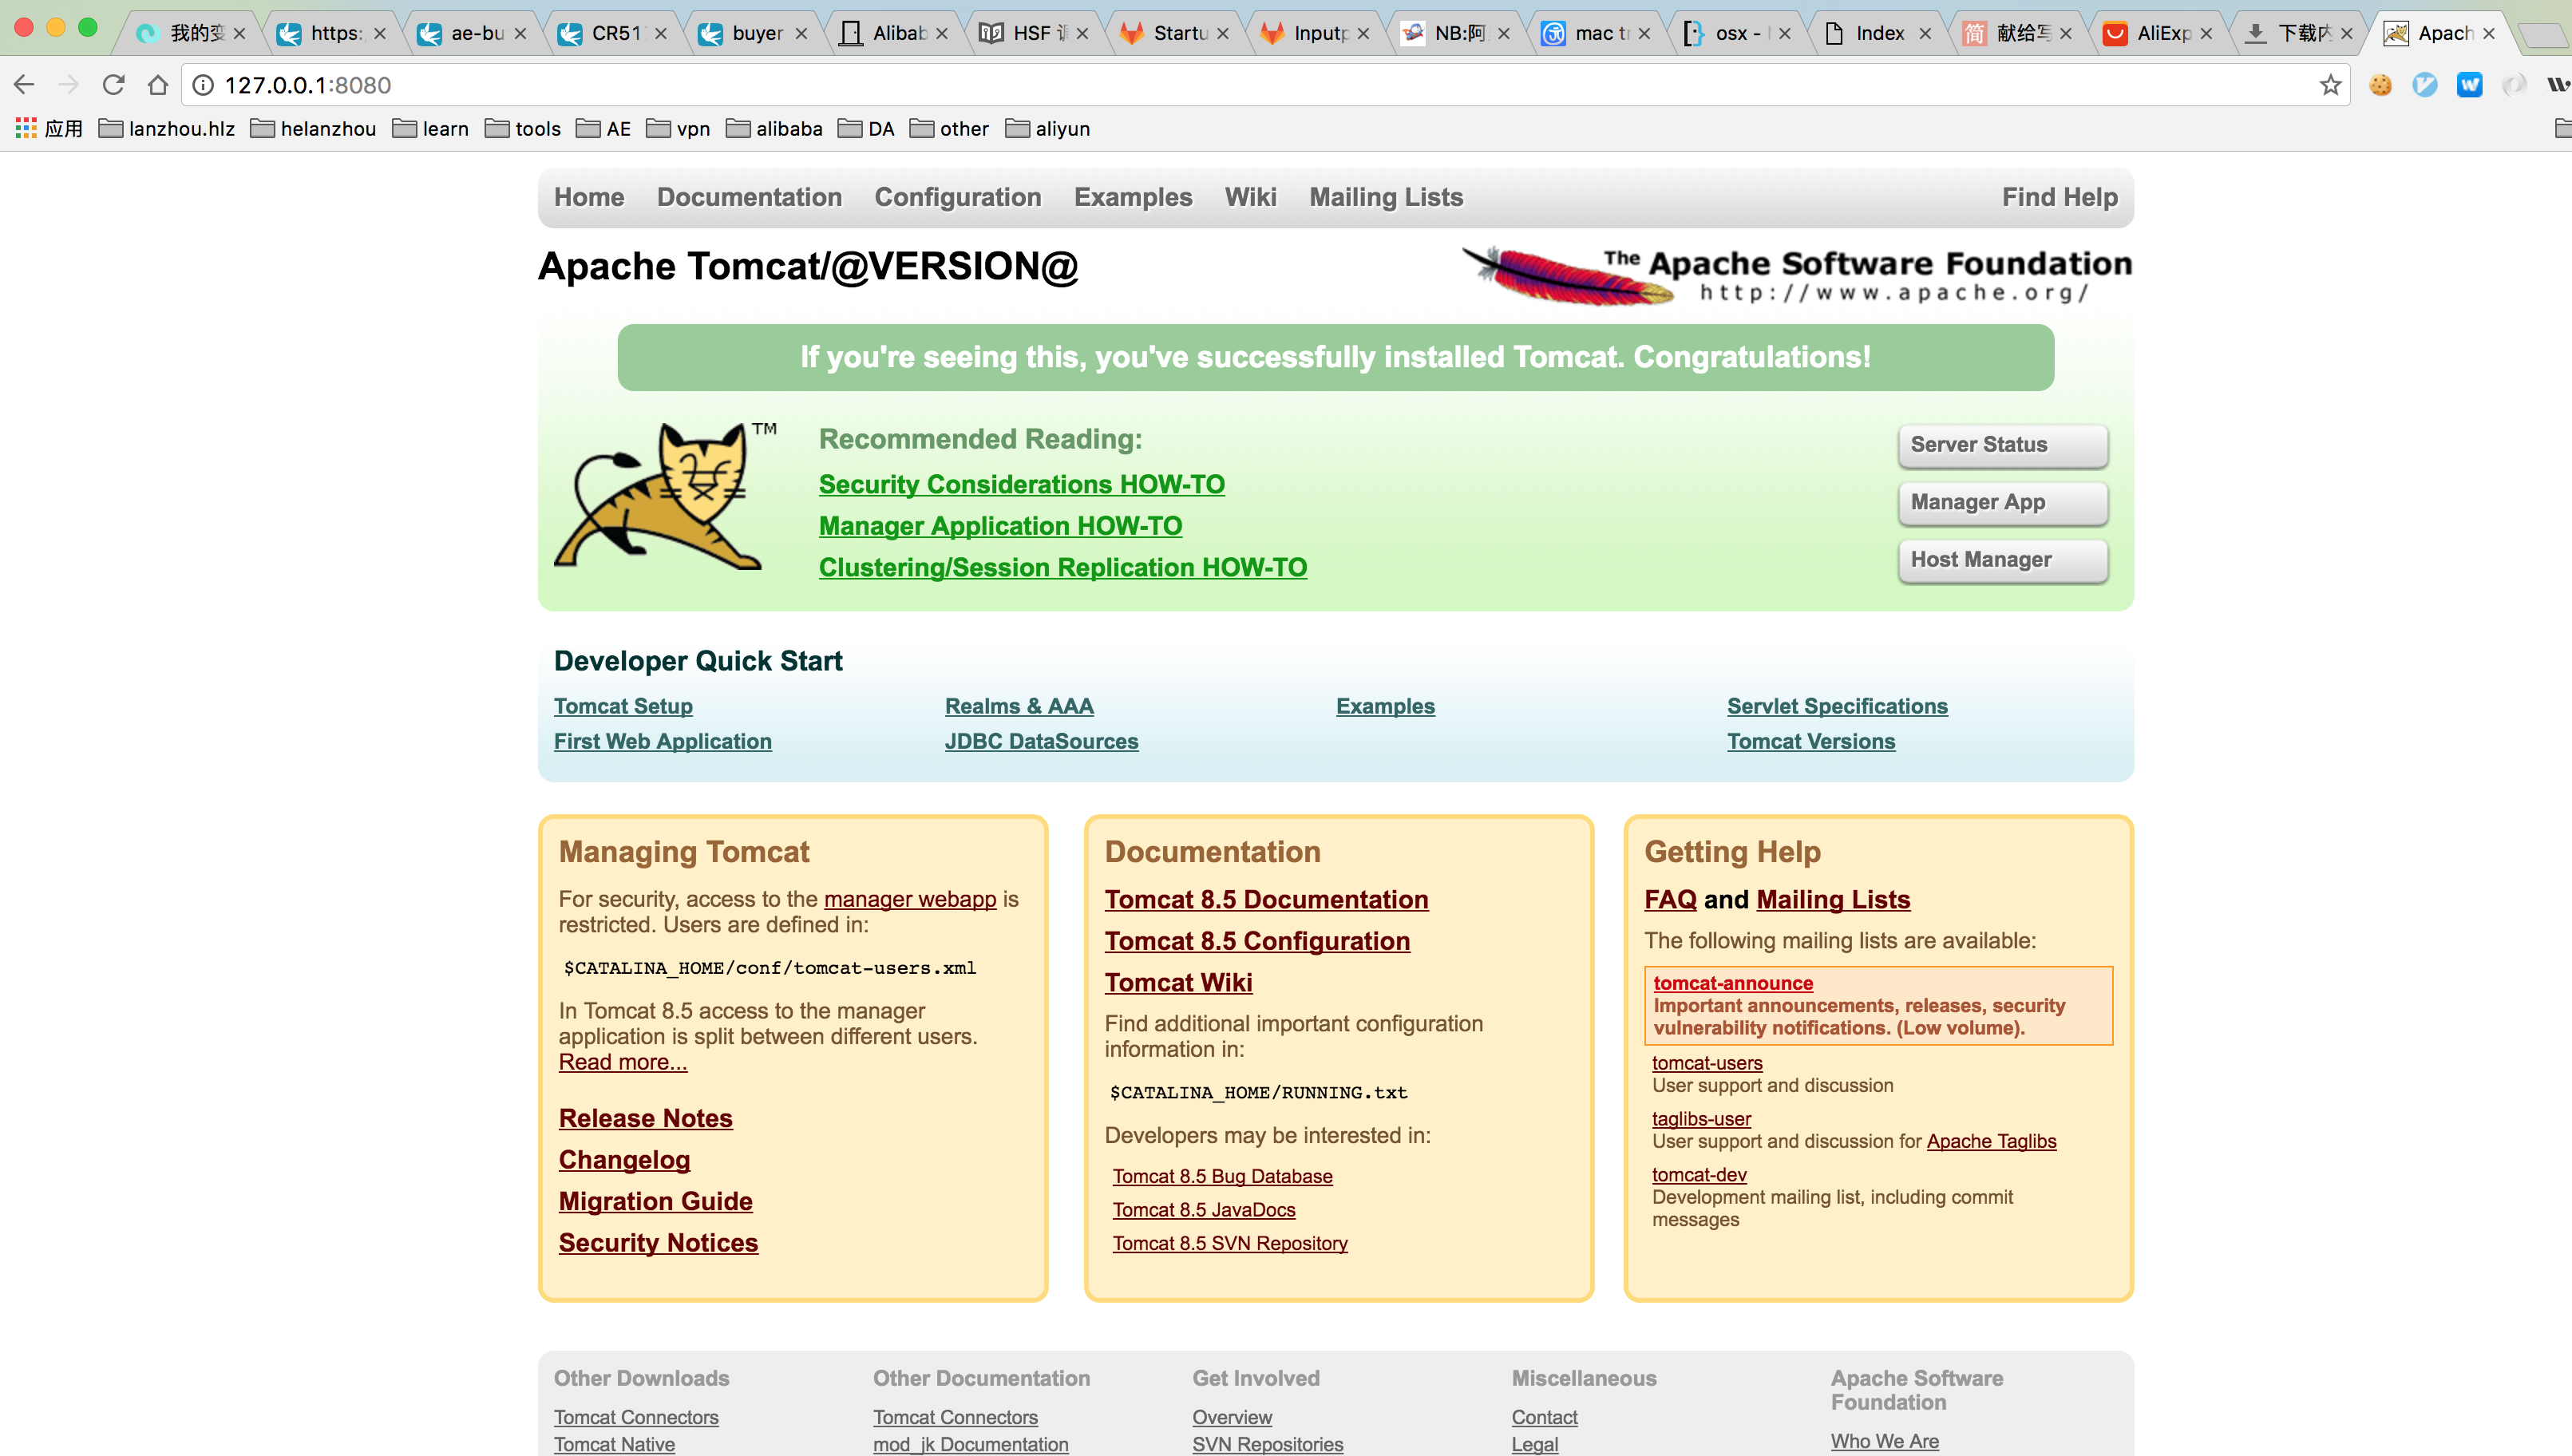
这个时候,说明你的tomcat环境配置已经成功了,接下来,开启你的tomcat源码调试之旅吧!