相关系列文章:
Windows 平台使用 Gitblit 搭建 Git 服务器
如何变更 Git 服务器 IP 地址以及变更后的解决方法
本内容将介绍 在Windows 平台使用 Gitblit 搭建 Git 服务器。
目录:
一、安装 Java 并配置环境变量
二、搭建 Git 服务器
三、创建 Git 用户
四、创建 Git 版本库
一、安装 Java 并配置环境变量
1. 安装 Java
官网下载地址:http://www.oracle.com/technetwork/java/javase/downloads/index.html。
下载后直接进行安装。
2. 配置 Java 环境变量
- 打开环境变量设置:右键“计算机” -> 属性 -> 高级系统设置 -> 高级 -> 环境变量 -> 系统变量。
- 新建变量 “JAVA_HOME”:变量值为电脑上 Java 的安装目录 (比如
C:\Program Files\Java\jdk1.8.0_172)。 - 新建变量 “CLASSPATH”:变量值为
%JAVA_HOME%/lib/dt.jar;%JAVA_HOME%/lib/tools.jar。 - 添加 “Path” 变量:找到 Path 变量,选择编辑,将
%JAVA_HOME%/bin;%JAVA_HOME%/jre/bin添加进去,注意使用英文 “;” 进行分割。
二、搭建 Git 服务器
1. 下载 Gitblit
官网下载地址:http://www.gitblit.com/。
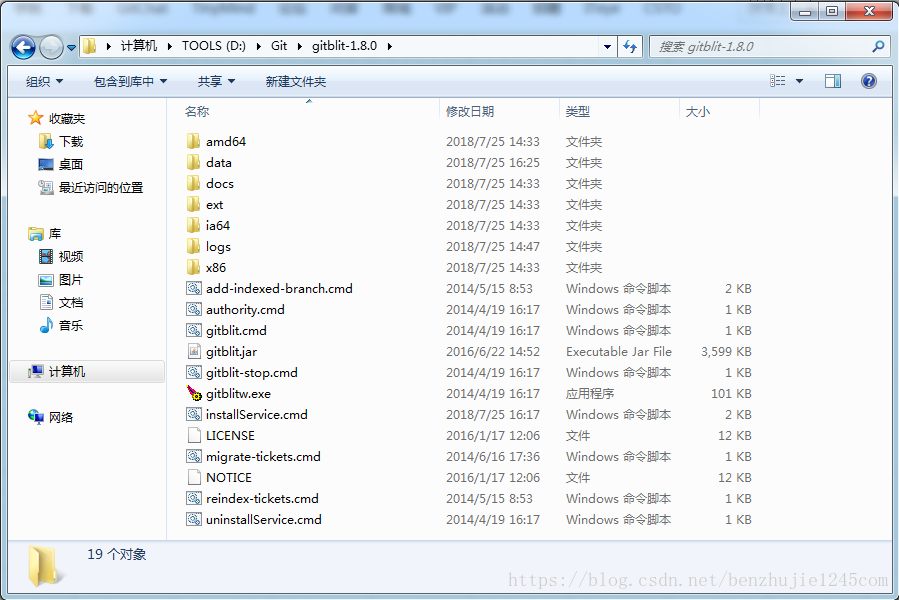
下载并将其解压后,放到一个目录,比如: D:\Git\gitblit-1.8.0。
2. 创建代码库存放目录
创建一个目录,用来存放代码库,比如: D:\Git\GitRepository。
3. 修改 gitblit.properties 配置文件
gitblit.properties 所在路径为 ...\gitblit-1.8.0\data。在 gitblit.properties 中需要修改以下信息:
- git.repositoriesFolder:存放代码库的目录,比如:
D:\Git\GitRepository。 - server.httpPort:设置访问的端口,比如:
80,8080,10101等等,注意不要和别的端口有冲突。 - server.httpsPort:使用默认推荐的
8443即可。 - server.httpBindInterface:搭建 Git 服务器的 IP,即当前电脑使用的 IP 地址。
- server.httpsBindInterface:直接使用
localhost即可。
具体信息:
#
# GITBLIT.PROPERTIES
#
# Define your custom settings in this file and/or include settings defined in
# other properties files.
#

# Include Gitblit's 'defaults.properties' within your configuration.
#
# NOTE: Gitblit will not automatically reload "included" properties.  Gitblit
# only watches the 'gitblit.properties' file for modifications.
#
# Paths may be relative to the ${baseFolder} or they may be absolute.
#
# COMMA-DELIMITED
# SINCE 1.7.0
include = defaults.properties

#
# Define your overrides or custom settings below
#

# Base folder for repositories.
# This folder may contain bare and non-bare repositories but Gitblit will only
# allow you to push to bare repositories.
# Use forward slashes even on Windows!!
# e.g. c:/gitrepos
#
# SINCE 0.5.0
# RESTART REQUIRED
# BASEFOLDER
# 存放代码库的目录
git.repositoriesFolder = D:/Git/GitRepository

# Standard http port to serve.  <= 0 disables this connector.
# On Unix/Linux systems, ports < 1024 require root permissions.
# Recommended value: 80 or 8080
#
# SINCE 0.5.0
# RESTART REQUIRED
# 设置访问的端口
server.httpPort = 10101

# Secure/SSL https port to serve. <= 0 disables this connector.
# On Unix/Linux systems, ports < 1024 require root permissions.
# Recommended value: 443 or 8443
#
# SINCE 0.5.0
# RESTART REQUIRED
# 使用默认推荐的 8443 即可
server.httpsPort = 8443

# Specify the interface for Jetty to bind the standard connector.
# You may specify an ip or an empty value to bind to all interfaces.
# Specifying localhost will result in Gitblit ONLY listening to requests to
# localhost.
#
# SINCE 0.5.0
# RESTART REQUIRED
# 搭建 Git 服务器的 IP,也就是当前电脑使用的 IP 地址
server.httpBindInterface = xxx.xxx.xxx.xxx

# Specify the interface for Jetty to bind the secure connector.
# You may specify an ip or an empty value to bind to all interfaces.
# Specifying localhost will result in Gitblit ONLY listening to requests to
# localhost.
#
# SINCE 0.5.0
# RESTART REQUIRED
# 直接使用 localhost 即可
server.httpsBindInterface = localhost
4. 修改 installService.cmd 文件
installService.cmd 所在路径为 ...\gitblit-1.8.0。在 installService.cmd 中需要修改以下信息:
- 修改 ARCH
32 位系统:SET ARCH=x86
64位系统:SET ARCH=amd64 - 设置 CD 目录
SET CD=D:\Git\gitblit-1.8.0 (电脑上 Gitblit 实际存放的目录) - 修改 StartParams 启动参数
直接给空就可以了。
具体信息:
@REM
@REM By default this tool launches the service properties dialog
@REM but it also has some other very useful functionality.
@REM
@REM http://commons.apache.org/daemon/procrun.html

@REM arch = x86, amd64, or ia32
SET ARCH=amd64
SET CD=D:\Git\gitblit-1.8.0

@REM Be careful not to introduce trailing whitespace after the ^ characters.
@REM Use ; or # to separate values in the --StartParams parameter.
"%CD%\%ARCH%\gitblit.exe"  //IS//gitblit ^
		 --DisplayName="gitblit" ^
		 --Description="a pure Java Git solution" ^
		 --Startup=auto ^
		 --LogPath="%CD%\logs" ^
		 --LogLevel=INFO ^
		 --LogPrefix=gitblit ^
		 --StdOutput=auto ^
		 --StdError=auto ^
		 --StartPath="%CD%" ^
		 --StartClass=org.moxie.MxLauncher ^
		 --StartMethod=main ^
		 --StartParams="" ^
		 --StartMode=jvm ^
		 --StopPath="%CD%" ^
		 --StopClass=org.moxie.MxLauncher ^
		 --StopMethod=main ^
		 --StopParams="--stop;--baseFolder;%CD%\data" ^
		 --StopMode=jvm ^
		 --Classpath="%CD%\gitblit.jar" ^
		 --Jvm=auto ^
		 --JvmMx=1024
5. 以 Windows service 方式启动 Gitblit
- 安装 Windows 服务
运行...\gitblit-1.8.0目录的installService.cmd,有两种方法:
a. 以管理员身份启动 cmd 终端并执行installService;
b. 右键点击installService.cmd,选择“以管理员身份运行”。 - 设置 Windows 服务
按照如下步骤设置:
a. 打开服务设置界面;(打开方法:同时按下 WIN+R 组合键,打开运行界面,输入services.msc指令,按确定。)
b. 将启动类型修改为自动,确保每次 Windows 启动都自动启动;
c. 右键点击 gitblit,把服务启动起来。
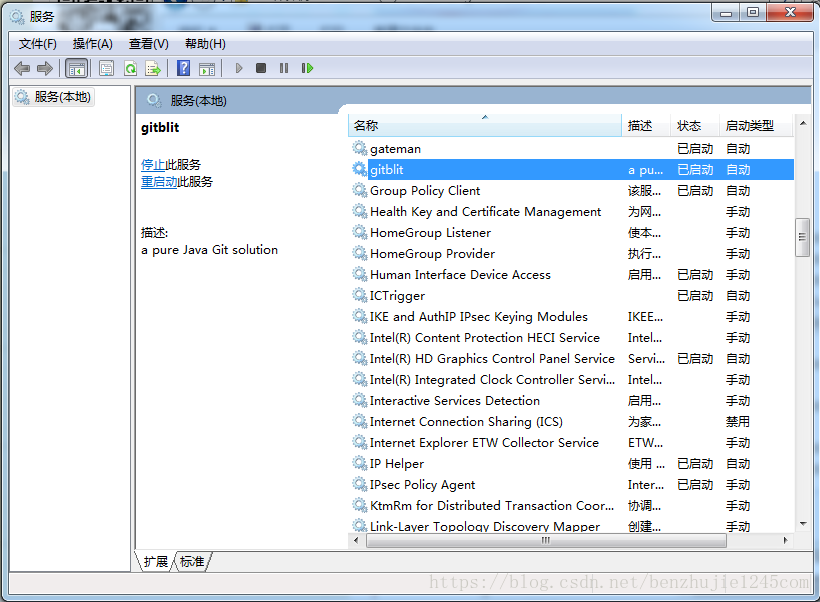
** 如果要删除服务,可以直接运行
...\gitblit-1.8.0下面的uninstallService.cmd。
三、创建 Git 用户
1. 进入 Git 服务器网址
实际上就是 “http://” + “IP地址” + “:” + “设置访问的端口” 的组合,比如:http://xxx.xxx.xxx.xxx:10101/。
2. 用管理员账号登陆
用户名和密码默认都是 admin。登陆后最好修改一下密码。
3. 添加用户
为你团队中的开发人员创建用户账号。
创建步骤: 点击右上角的用户图标 -> 用户 -> 点击右上角的“添加用户” -> 填写用户的相关信息 -> 点击“保存”。具体可以参照以下图片信息:

四、创建 Git 版本库
1. 同上面“创建 Git 用户”步骤中一样,使用管理员账号登陆 Git 服务器网址
2. 创建版本库
- 创建方法
创建步骤: 点击右上角的用户图标 -> 创建版本库 -> 填写版本库的相关信息 -> 点击“创建”。具体可以参照以下图片信息:

- 设置版本库权限
创建完版本库后,需要设置以下版本库权限。
设置步骤: 点击网页上面的“版本库” -> 点击需要修改权限的版本库 -> 点击右上角的“编辑” -> 点击左边的“permissions” -> 进行相关设置 -> 点击“保存”。
以上,就可以成功通过 Gitblit 配置 Git 服务器了。
问题解决:
如果 Gitblit 服务没有自动启动,可以直接双击 gitblit.cmd。如果仍然无法启动 Gitblit 服务,可以先尝试双击执行 gitblit-stop.cmd 后,再双击执行 gitblit.cmd 。它们都在 ...\gitblit-1.8.0 目录。