版权声明:本文为博主原创文章,转载请注明出处 浅然的专栏 https://blog.csdn.net/w_linux/article/details/81056313
一、场景
搭建Javaweb项目的框架有很多,但是例如SpringMVC搭建都比较繁琐(各种XML),所以该篇博客笔者将记录SpringBoot+Mybatis的整合搭建Java web工程
关于SpringBoot的优点以及介绍,该篇博客叙述的比较清楚
SpringBoot是什么?有什么优点?
二、场景分析
1.开发环境
- JDK:1.9
- SpringBoot:2.0
- Mybatis:3.2.x
- MySQL:5.5
- 操作系统:windows
- IDE:IntelliJ IDEA 2018.1.5 x64
2.项目目录

3、数据表
+-------+-------------+------+-----+---------+-------+
| Field | Type        | Null | Key | Default | Extra |
+-------+-------------+------+-----+---------+-------+
| id    | int(11)     | NO   | PRI | NULL    |       |
| name  | varchar(32) | YES  |     | NULL    |       |
+-------+-------------+------+-----+---------+-------+
三、实现方案
1、构建启动类(DemoApplication)
一般IDEA会自动生成,但是必须知道的是:启动类的位置及其重要,因为它的位置决定了它能否扫描到相应的controller、service等,启动类会扫描它所在的当前包及其子包
@SpringBootApplication
public class DemoApplication {
    public static void main(String[] args) {
        SpringApplication.run(DemoApplication.class, args);
    }
}
2、pom.xml中添加相应的依赖
- web依赖
- mybatis依赖
mysql依赖
<!--web-->
<dependency>
    <groupId>org.springframework.boot</groupId>
    <artifactId>spring-boot-starter-web</artifactId>
</dependency>
<!--mybatis-->
<dependency>
    <groupId>org.mybatis.spring.boot</groupId>
    <artifactId>mybatis-spring-boot-starter</artifactId>
    <version>1.3.2</version>
</dependency>
<!--mysql-->
<dependency>
    <groupId>mysql</groupId>
    <artifactId>mysql-connector-java</artifactId>
    <scope>runtime</scope>
</dependency>
3、配置application
#路径
server.servlet.context-path=/demo

#数据库配置信息
spring.datasource.driver-class-name =com.mysql.jdbc.Driver
spring.datasource.url = jdbc:mysql://localhost/springbootdemo?useUnicode=true&characterEncoding=utf8
spring.datasource.username =root
spring.datasource.password =1111

#mybatis配置信息
mybatis.typeAliasesPackage=com.example.demo.domain.User
mybatis.mapperLocations=classpath:/mappers/UserMapper.xml

#项目编码配置信息
spring.freemarker.template-loader-path=classpath:/templates/
spring.freemarker.cache=false
spring.freemarker.charset=UTF-8
spring.freemarker.check-template-location=true
spring.freemarker.content-type=text/html
spring.freemarker.expose-request-attributes=true
spring.freemarker.expose-session-attributes=true
spring.freemarker.request-context-attribute=request
spring.freemarker.suffix=.demo
4、构建实体类User
public class User {
    private Integer id; //用户id
    private String name;//用户姓名

    //省略构造器
    //省略setter和getter
    //省略toString
}
5、构建UserMapper(与UserMapper.xml进行映射,Mapper可以理解为dao层)
@Mapper
public interface UserMapper {
    User GetUserMessage(Integer id);
}
6、构建UserMapper.xml(mapper的映射文件)
<?xml version="1.0" encoding"UTF-8"?>
<!DOCTYPE mapper PUBLIC "-//mybatis.org//DTD Mapper 3.0//EN" "http://mybatis.org/dtd/mybatis-3-mapper.dtd">

<!-- 指定工作空间,要与接口名相同,通过"这里的namespace.下边方法的id"来定位方法的 -->
<!--#{id}是占位符,本质是代表实体类中的id-->
<mapper namespace="com.example.demo.mapper.UserMapper">

    <sql id="id_name">
        id,name
    </sql>
    <select id="GetUserMessage" parameterType="int" resultType="com.example.demo.domain.User">
    select
        <include refid="id_name"></include>
    from user where id = #{id}
    </select>

</mapper>
7、构建service层的接口及其实现类(相关业务逻辑,这里是查询)
IUserService
public interface IUserService {
   public User FindUser(Integer id);
}
UserServiceImpl
@ComponentScan({"com.example.demo.mapper"})
@Service
public class UserServiceImpl implements IUserService {
    //装配UserMapper这个Bean
    @Resource
    private UserMapper userMapper;

    @Override
    public User FindUser(Integer id) {
        return userMapper.GetUserMessage(id);
    }
}
8、构建UserController(请求处理控制器)
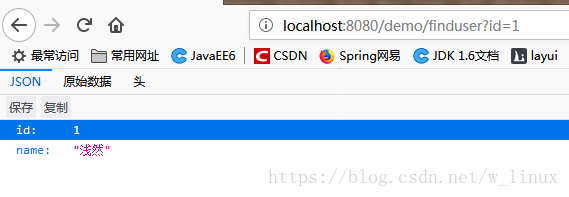
这里采用@RestController注解,直接返回JSON给页面
@RestController
@ComponentScan({"com.example.demo.service"})
@MapperScan({"com.example.demo.mapper"})
public class UserController {
    @Resource
    private IUserService userService;

    @GetMapping("/finduser")
    public User findUser(@RequestParam(value = "id") Integer id){
        return userService.FindUser(id);
    }
}
注意点
如果将控制器中的@RestController改成@Controller,页面将无法显示,并且页面显示错误信息,因为@Controller都知道在SpringMVC中返回的是视图(返回值为页面名称),所以如果想返回JSON就得用@RestController

ok,这样一个SpringBoot+Mybatis项目就搭建成功了