版权声明:本文为博主原创文章,未经博主允许不得转载。 https://blog.csdn.net/qq_34261214/article/details/79932236
参考资料:https://www.jianshu.com/p/22c397354997
前言:为什么学习Dagger2
Dagger是安卓界最棒的依赖注入框架第一代由大名鼎鼎的Square公司共享出来,第二代则是由谷歌接手后推出的。
注意
因为参考资料已经很详细,我就直接贴上练习代码代码,在使用Dagger2过程中,最好对工厂模式有所了解
前提:添加项目支持
    compile 'com.google.dagger:dagger:2.10'
    annotationProcessor 'com.google.dagger:dagger-compiler:2.10'
本文结构
- 无Module
- 有Module
- scope
1. 无Module的使用方法
a. 无参
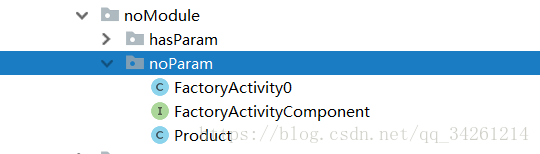
看结构涉及三个类
- FactoryActivity 传统的Activity类,将在这个类上实现主要操作
- FactoryActivityComponent 接口,通过Buider会生成Component所对应的类 格式(Dagger+所定义的Component的名字)
- Product 需要被实例化的类
FactoryActivity.java
public class FactoryActivity0 extends AppCompatActivity {
    //标注要注入的变量
    @Inject
    Product product;
    @Override
    protected void onCreate(Bundle savedInstanceState) {
        super.onCreate(savedInstanceState);
        setContentView(R.layout.activity_factory);
        //调用自动生成的Component类方法
        DaggerFactoryActivityComponent.create().inject(this);
        //Factory的构造函数被Inject标注并且无参,于是dagger2把Product的实例注入给Factory.然后再去实例化factory
        Toast.makeText(this,"product.hashCode():"+product.hashCode(),Toast.LENGTH_SHORT).show();
    }
}
FactoryActivityComponent.java
@Component
public interface FactoryActivityComponent {
    //参数表示要将依赖注入到的目标位置
    void inject(FactoryActivity0 factoryActivity);
    //使用Build编译一下项目,自动生成Component所对应的类 格式(Dagger+所定义的Component的名字)
}
Product.java
public class Product {
    //告诉dagger可以实例化这个类
    @Inject
    public Product(){
    }
}
b. 有参
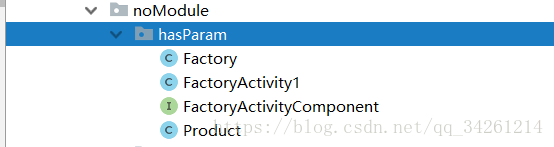
观察结构,会比无参多一个Factory工厂类,所以我们在Activity中就不能单纯地去@Inject Product了,反而要通过工厂类去生产Product,所以要@Inject Factory
FactoryActivity.java
public class FactoryActivity1 extends AppCompatActivity {
    //标注要注入的变量
    @Inject
    Factory factory;
    @Override
    protected void onCreate(Bundle savedInstanceState) {
        super.onCreate(savedInstanceState);
        setContentView(R.layout.activity_factory);
        //调用自动生成的Component类方法
        DaggerFactoryActivityComponent.create().inject(this);
        //Factory的构造函数被Inject标注并且无参,于是dagger2把Product的实例注入给Factory.然后再去实例化factory
        Toast.makeText(this,"factory.hashCode():"+factory.hashCode()+"\n factory.product.hashCode():"+factory.product.hashCode(),Toast.LENGTH_SHORT).show();
    }

}
FactoryActivityComponent.java
@Component
public interface FactoryActivityComponent {
    //参数表示要将依赖注入到的目标位置
    void inject(FactoryActivity1 factoryActivity);
    //使用Build编译一下项目,自动生成Component所对应的类 格式(Dagger+所定义的Component的名字)

}
Product.java
public class Product {
    //告诉dagger可以实例化这个类
    @Inject
    public Product(){
    }
}
Factory.java
public class Factory {
    Product product;
    @Inject
    public Factory(Product product){
        this.product = product;
    }
}
2. 有Module的使用方法
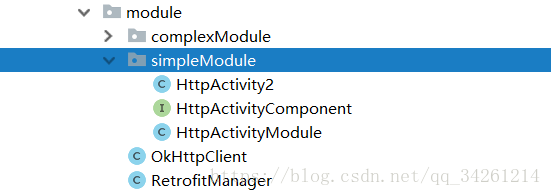
a. 简单的module
在学习过程中,我们需要用到Module ,但我们不需要去添加依赖,自己可以编写一个
如
- OkHttpClient
- RetrofitManager
OkHttpClient
//模拟不可改动代码
public class OkHttpClient {
    private int cacheSize;
    public OkHttpClient(){

    }
    public void setCacheSize(int cacheSize){
        this.cacheSize = cacheSize;
    }

    public int getCacheSize() {
        return cacheSize;
    }
}
RetrofitManager
//模拟不可改动代码
public class RetrofitManager {
    private OkHttpClient client;

    public RetrofitManager(OkHttpClient client) {
        this.client = client;
    }
    public OkHttpClient getClient() {
        return client;
    }
}
结构
- HttpActivity
- HttpActivityComponent
- HttpActivityModule 需要标志Module 用于提供需要Inject的可行,也就是提供Module
HttpActivity
public class HttpActivity2 extends AppCompatActivity{
    @Inject
    OkHttpClient okHttpClient;
    @Override
    protected void onCreate(@Nullable Bundle savedInstanceState) {
        super.onCreate(savedInstanceState);
        setContentView(R.layout.activity_complex);
        DaggerHttpActivityComponent.create().inject(this);
        Toast.makeText(this,"okHttpClient.hashCode():"+okHttpClient.hashCode(),Toast.LENGTH_LONG).show();
    }
}
HttpActivityComponent
//链接Module类
@Component(modules = HttpActivityModule.class)
public interface HttpActivityComponent {
    void inject(HttpActivity2 httpActivity);
}
HttpActivityModule
@Module
public class HttpActivityModule {
    @Provides // 返回我们需要的inject的类型
    OkHttpClient provideOkHttpClient(){
        return new OkHttpClient();
    }
}
b.复杂的Module
代码结构和简单的一样,那为什么说是复杂的呢,因为这里要用上Retrofit,如果忘记了Retrofit的话,请转身去https://blog.csdn.net/DeMonliuhui/article/details/77854530
结构
- HttpActivity 这里需要@Inject的是RetrofitManager 其中要注意构造函数会有所不同
- HttpActivityComponent
- HttpActivityModule 这里需要增加一个RetrofitManager的provides
HttpActivity
public class HttpActivity3 extends AppCompatActivity{
    @Inject
    RetrofitManager retrofitManager;
    @Override
    protected void onCreate(@Nullable Bundle savedInstanceState) {
        super.onCreate(savedInstanceState);
        setContentView(R.layout.activity_complex);
        //Module的构造函数带有参数且参数被使用的,没有create的方法
        DaggerHttpActivityComponent.builder()
        .httpActivityModule(new HttpActivityModule(100))
        .build()
        .inject(this);
        Toast.makeText(this,"retrofitManager:"+retrofitManager.hashCode()
    +"\n retrofitManager.getClient():"+retrofitManager.getClient().hashCode()+
                "\n retrofitManager.getClient().getCacheSize():"+retrofitManager.getClient().getCacheSize()
                ,Toast.LENGTH_LONG).show();
    }
}
HttpActivityComponent
@Component(modules = HttpActivityModule.class)
public interface HttpActivityComponent {
    void inject(HttpActivity3 httpActivity);
}
HttpActivityModule
@Module
public class HttpActivityModule {
    private int cacheSize;
    public HttpActivityModule(int cacheSize){
        this.cacheSize = cacheSize;
    }
    @Provides
    OkHttpClient provideOkHttpClient() {
        OkHttpClient client = new OkHttpClient();
        client.setCacheSize(this.cacheSize);
        return client;
    }

    @Provides
    RetrofitManager provideRetorfitManager(OkHttpClient client){
        return new RetrofitManager(client);
    }
}
3. Scope
Scope 也就是Product使用了单例,注意需要在Component中添加@Singleton,这里使用有Module的使用作示例
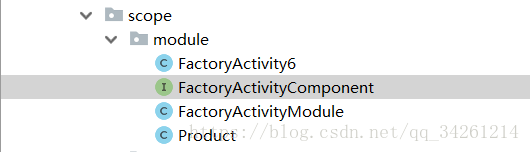
结构
- FactoryActivity
- FactoryActivityComponent 接口,通过Buider会生成Component所对应的类 格式(Dagger+所定义的Component的名字)
- Product 需要被实例化的类,使用@Singleton标注
- FactoryActivityModule 在Provides前添加@Singleton标注
FactoryActivity.java
public class FactoryActivity6 extends AppCompatActivity {
    @Inject
    Product product;
    @Inject
    Product product1;
    @Override
    protected void onCreate(@Nullable Bundle savedInstanceState) {
        super.onCreate(savedInstanceState);
        setContentView(R.layout.activity_factory);

        DaggerFactoryActivityComponent.create().inject(this);

        Toast.makeText(this,"product.hashCode():"+product.hashCode()+"\n product1.hashCode():"+product1.hashCode(),Toast.LENGTH_SHORT).show();

    }
}
FactoryActivityComponent.java
@Singleton
@Component(modules = FactoryActivityModule.class)
public interface FactoryActivityComponent {
    void inject(FactoryActivity6 factoryActivity);
}
Product.java
@Singleton
public class Product {
    @Inject
    public Product(){
    }
}
FactoryActivityModule.java
@Module
public class FactoryActivityModule {
    @Singleton
    @Provides
    Product provideProduct(){
        return new Product();
    }
}
最后结果会发现输出的HashCode一致,实现单例
结论
在创建的实例构造函数需要输入的参数动态变化时非常使用。
记录贴还没有记录依赖如何使用,这里立个flag ,下次一定补上去