我们在之前的文章中有简单介绍过画布Canvas的使用,它可以使用一系列的draw方法来绘制出各种样式的几何的图形、文字和图片来。今天我们继续探讨Canvas的另一种使用,那就是画布裁剪。什么是画布裁剪?它有点像flash 遮罩层的概念,说白了就是把原来一整块画布裁剪部分出来,然后要绘制出来的东西只能在指定的裁剪区域范围内才能显示出来。
Canvas的裁剪必须要使用save和restore方法:
save: 用于保存Canvas当前的状态。save之后,我们便可以随意对Canvas进行平移、放缩、旋转、错切、裁剪等操作
restore: 用于恢复Canvas之前保存的状态。也就是使save后对Canvas执行的操作对后续的绘制不会造成影响
Canvas的裁剪提供了一些的clip方法:
clipRegion 方法已经不再建议使用
clipPath 裁剪路径,就是指在此路径内绘制
clipRect 裁剪矩形,就是指在此矩形内绘制
示例:
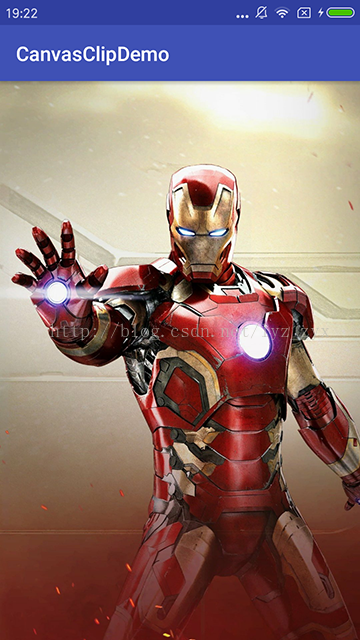
public class MyView extends View {
   public MyView(Context context) {
        this(context, null, 0);
    }

   public MyView(Context context, @Nullable AttributeSet attrs) {
       this(context, attrs, 0);
    }

   public MyView(Context context, @Nullable AttributeSet attrs, intdefStyleAttr) {
       super(context, attrs, defStyleAttr);
    }

   @Override
   protected void onDraw(Canvas canvas) {
       super.onDraw(canvas);

       Paint paint = new Paint(Paint.ANTI_ALIAS_FLAG);
       paint.setColor(Color.RED);

       Bitmap bitmap = BitmapFactory.decodeResource(getResources(),R.mipmap.iron_man);
       canvas.drawBitmap(bitmap, 0, 0, paint);
    }
}
我们首先来看下正常情况下,我们只在canvas中绘制一张图片。输出效果:
修改onDraw代码:
@Override
protected void onDraw(Canvas canvas) {
super.onDraw(canvas);
Paint paint = new Paint(Paint.ANTI_ALIAS_FLAG);
paint.setColor(Color.RED);
int centerX = getWidth() / 2;
int centerY = getHeight() / 2;
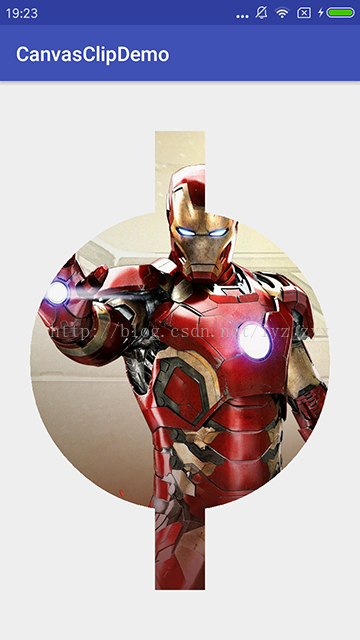
canvas.save();
Path path = new Path();
path.addCircle(centerX, centerY, 300, Path.Direction.CW);
canvas.clipPath(path);
canvas.clipRect(centerX - 50, 100, centerX + 50, getHeight() - 100,Region.Op.UNION);
Bitmap bitmap =BitmapFactory.decodeResource(getResources(),R.mipmap.iron_man);
canvas.drawBitmap(bitmap, 0, 0, paint);
canvas.restore();
}代码中,我们在开头和结尾分别使用了canvas.save();和canvas.restore();。然后来看中间部分,canvas.clipPath()和canvas.clipRect()两次裁剪了画布。注意clipRect最后的参数Region.Op.UNION,它是表示两个区域叠加。运行效果:
再修改onDraw代码:
@Override
protected void onDraw(Canvas canvas) {
super.onDraw(canvas);
Paint paint = new Paint(Paint.ANTI_ALIAS_FLAG);
paint.setColor(Color.RED);
int centerX = getWidth() / 2;
int centerY = getHeight() / 2;
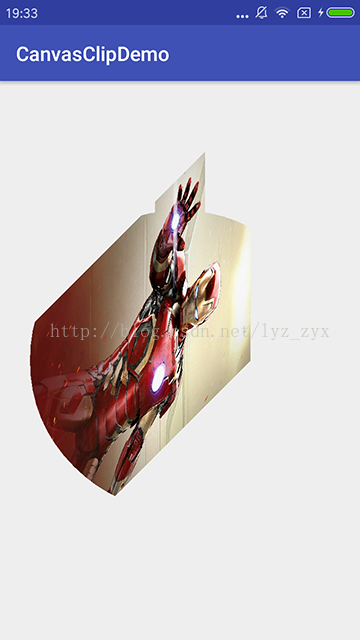
canvas.save();
Path path = new Path();
path.addCircle(centerX, centerY, 300, Path.Direction.CW);
canvas.clipPath(path);
canvas.clipRect(centerX - 50, 100, centerX + 50, getHeight() - 100,Region.Op.UNION);
canvas.rotate(45, centerX, centerY); // 旋转
canvas.translate(100, 100); // 平移
canvas.scale(0.5f, 0.5f); // 缩放
canvas.skew(0, 1); // 错切
Bitmap bitmap = BitmapFactory.decodeResource(getResources(),R.mipmap.iron_man);
canvas.drawBitmap(bitmap, 0, 0, paint);
canvas.restore();
}本次代码中,我们加入了旋转(rotate)、平移(translate)、缩放(scale)以及错切(skew)效果。运行效果:
注意
在Android4.0及之前的手机中,因为硬件加速等原因,在使用clipPath时很有可能会发生UnsupportedOperationException异常,像下面:
java.lang.UnsupportedOperationException
atandroid.view.GLES20Canvas.clipPath(GLES20Canvas.java:287)
atcom.myapp.MyCustomView.onDraw(SourceFile:288)
at android.view.View.draw(View.java:9310)
at android.view.View.getDisplayList(View.java:8773)
atandroid.view.ViewGroup.dispatchGetDisplayList(ViewGroup.java:2298)
所以在使用画布裁剪中最好加入捕捉UnsupportedOperationException异常的处理和系统判断过滤。