做项目用到spring boot 感觉spring boot用起来比较流畅。想总结一下,别的不多说,从入口开始。
spring boot启动类Application.class不能直接放在main/java文件夹下
一、spring boot的入口启动类概览。

import org.springframework.context.annotation.Bean;
import org.springframework.scheduling.annotation.EnableScheduling;
import org.springframework.web.cors.CorsConfiguration;
import org.springframework.web.cors.UrlBasedCorsConfigurationSource;
import org.springframework.web.filter.CorsFilter;

@SpringBootApplication
@EnableAutoConfiguration(exclude = HibernateJpaAutoConfiguration.class)
@EnableScheduling
public class Application {

    public static void main(String[] args) {
        SpringApplication.run(Application.class, args);
    }

     /**
      * 跨域过滤器
      * @return CorsFilter 跨域过滤器对象
      */
     @Bean
     public CorsFilter corsFilter() {
         UrlBasedCorsConfigurationSource source = new UrlBasedCorsConfigurationSource();
         source.registerCorsConfiguration("/**", buildConfig()); // 4
         return new CorsFilter(source);
     }

    private CorsConfiguration buildConfig() {
         CorsConfiguration corsConfiguration = new CorsConfiguration();
         corsConfiguration.addAllowedOrigin("*");
         corsConfiguration.addAllowedHeader("*");
         corsConfiguration.addAllowedMethod("*");
         return corsConfiguration;
     }
}
二、spring boot的入口启动类详细解释
飞过导入代码不看,我们先看第一部分:
- @SpringBootApplication
- @EnableAutoConfiguration(exclude = HibernateJpaAutoConfiguration.class) 配置
- @EnableScheduling 从应用的全局定义一个调度器
@SpringBootApplication 是什么?@EnableAutoConfiguration 又是什么? 记住一句话:学习很简单,动手玩一玩,要是还不懂,再问1、2、3。
好吧,我们就进去玩一玩,点击进去就以看到源码。
@Target(ElementType.TYPE)
@Retention(RetentionPolicy.RUNTIME)
@Documented
@Inherited
@SpringBootConfiguration
@EnableAutoConfiguration
@ComponentScan(excludeFilters = @Filter(type = FilterType.CUSTOM, classes = TypeExcludeFilter.class))
public @interface SpringBootApplication {

    /**
     * Exclude specific auto-configuration classes such that they will never be applied.
     * @return the classes to exclude
     */
    Class<?>[] exclude() default {};

    /**
     * Exclude specific auto-configuration class names such that they will never be
     * applied.
     * @return the class names to exclude
     * @since 1.3.0
     */
    String[] excludeName() default {};

    /**
     * Base packages to scan for annotated components. Use {@link #scanBasePackageClasses}
     * for a type-safe alternative to String-based package names.
     * @return base packages to scan
     * @since 1.3.0
     */
    @AliasFor(annotation = ComponentScan.class, attribute = "basePackages")
    String[] scanBasePackages() default {};

    /**
     * Type-safe alternative to {@link #scanBasePackages} for specifying the packages to
     * scan for annotated components. The package of each class specified will be scanned.
     * <p>
     * Consider creating a special no-op marker class or interface in each package that
     * serves no purpose other than being referenced by this attribute.
     * @return base packages to scan
     * @since 1.3.0
     */
    @AliasFor(annotation = ComponentScan.class, attribute = "basePackageClasses")
    Class<?>[] scanBasePackageClasses() default {};

}
从源代码中可以看到 @SpringBootApplication 被 @SpringBootConfiguration、@EnableAutoConfiguration、@ComponentScan 注解所修饰。
再深入的玩一下 @SpringBootConfiguration 注意其中的一句话:就是下文中的红色部分。
 Can be used as an alternative to the Spring's * standard {@code @Configuration} annotation so that configuration can be found * automatically (for example in tests).
/**
 * Indicates that a class provides Spring Boot application
 * {@link Configuration @Configuration}. Can be used as an alternative to the Spring's
 * standard {@code @Configuration} annotation so that configuration can be found
 * automatically (for example in tests).
 * <p>
 * Application should only ever include <em>one</em>
 * {@code @SpringApplicationConfiguration} and most idiomatic Spring Boot applications
 * will inherit it from {@code @SpringBootApplication}.
 *
 * @author Phillip Webb
 * @since 1.4.0
 */
@Target(ElementType.TYPE)
@Retention(RetentionPolicy.RUNTIME)
@Documented
@Configuration
public @interface SpringBootConfiguration {

}
这就是说,@SpringBootConfiguration是作为 原来Spring 注解体系中@Configuration 注解的替代品出现的, @SpringBootConfiguration是@Configuration 的壳。储君上位成了国王,换上丞相的儿子做丞相,其它官位不变;甚至连儿子都算不上,顶多是给老丞相新定做了一身衣服。
@SpringBootConfiguration、@EnableAutoConfiguration、@ComponentScan
@Configuration、 @EnableAutoConfiguration、@ComponentScan
总结: Springboot 提供了统一的注解@SpringBootApplication 来替代以上三个注解,简化程序的配置。下面解释一下各注解的功能。
- @Configuration
- @EnableAutoConfiguration
- @ComponentScan
关于@Target、@Retention、@Documented等注释 可以参照(http://blog.csdn.net/bluetjs/article/details/52250596)自行脑补。
哎呀还是再开一篇来讲吧。
spring boot 提倡约定优于配置,方便之处就是用约定来代替配置,减少的是手工配置不等于去掉配置。
凡是遇到注解我们都要问一句:那原来的配置是什么样子?现在的约定是什么样子? 好吧,
@Configuration
原来是这个样子:
<beans xmlns="http://www.springframework.org/schema/beans" ... ...>

</beans>
现在:
@Configuration
@EnableAutoConfiguration
顾名思义,@EnableAutoConguration是自动化配置。那就是@Configuration的高级形式,其本质不变的就是,最终形成的配置放在 beans内部,和@Bean的效果相同。不过它的适用范围大部分是内部默认包。也就是它对这些Bean的有特殊要求。
 1 @Target(ElementType.TYPE)
 2 @Retention(RetentionPolicy.RUNTIME)
 3 @Documented
 4 @Inherited
 5 @AutoConfigurationPackage
 6 @Import(EnableAutoConfigurationImportSelector.class)
 7 public @interface EnableAutoConfiguration {
 8
 9     String ENABLED_OVERRIDE_PROPERTY = "spring.boot.enableautoconfiguration";
10
11     /**
12      * Exclude specific auto-configuration classes such that they will never be applied.
13      * @return the classes to exclude
14      */
15     Class<?>[] exclude() default {};
16
17     /**
18      * Exclude specific auto-configuration class names such that they will never be
19      * applied.
20      * @return the class names to exclude
21      * @since 1.3.0
22      */
23     String[] excludeName() default {};
24
25 }
EnableAutoConfigurationImportSelector.Class
public String[] selectImports(AnnotationMetadata metadata) {
        try {
            AnnotationAttributes attributes = AnnotationAttributes.fromMap(metadata
                    .getAnnotationAttributes(EnableAutoConfiguration.class.getName(),
                            true));

            Assert.notNull(attributes, "No auto-configuration attributes found. Is "
                    + metadata.getClassName()
                    + " annotated with @EnableAutoConfiguration?");

            // Find all possible auto configuration classes, filtering duplicates
            List<String> factories = new ArrayList<String>(new LinkedHashSet<String>(
                    SpringFactoriesLoader.loadFactoryNames(EnableAutoConfiguration.class,
                            this.beanClassLoader)));

            // Remove those specifically disabled
            factories.removeAll(Arrays.asList(attributes.getStringArray("exclude")));

            // Sort
            factories = new AutoConfigurationSorter(this.resourceLoader)
                    .getInPriorityOrder(factories);

            return factories.toArray(new String[factories.size()]);
        }
        catch (IOException ex) {
            throw new IllegalStateException(ex);
        }
    }
获取类路径下spring.factories下key为EnableAutoConfiguration全限定名对应值
@AutoConfigurationPackage
@Target(ElementType.TYPE)
@Retention(RetentionPolicy.RUNTIME)
@Documented
@Inherited
@Import(AutoConfigurationPackages.Registrar.class)
public @interface AutoConfigurationPackage {

}
@Import
每当我看到这个注释,意味着我快触摸到问题所在。
@Target(ElementType.TYPE)
@Retention(RetentionPolicy.RUNTIME)
@Documented
public @interface Import {

    /**
     * {@link Configuration}, {@link ImportSelector}, {@link ImportBeanDefinitionRegistrar}
     * or regular component classes to import.
     */
    Class<?>[] value();

}
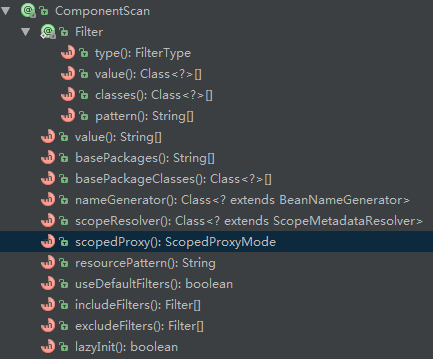
@ComponentScan
我们知道Spring Boot默认会扫描启动类同包以及子包下的注解,实现的途径就是必须在启动类引入注解@ComponetScan。
可以看到,项目中引入了注解@SpringBootApplication 这就意味(本质上)引入注解@ComponetScan,所以就会扫描Application.Class所在包以及子包的注解。
当然,如果你要改变这种扫描包的方式,原理很简单就是:用@ComponentScan注解进行指定要扫描的包以及要扫描的类。
@Retention(RetentionPolicy.RUNTIME)
@Target(ElementType.TYPE)
@Documented
@Repeatable(ComponentScans.class)
public @interface ComponentScan {

}
注解:@ComponentScan的内容:
知识点:
@ComponentScan has a Annotation @Repeatable with has a vale of ComponentScans.class
@Retention(RetentionPolicy.RUNTIME)
@Target(ElementType.TYPE)
@Documented
public @interface ComponentScans {

    ComponentScan[] value();

}
知识点:
@Repeatable :indicate that the annotation type whose declaration it
@Documented
@Retention(RetentionPolicy.RUNTIME)
@Target(ElementType.ANNOTATION_TYPE)
public @interface Repeatable {
    /**
     * Indicates the <em>containing annotation type</em> for the
     * repeatable annotation type.
     * @return the containing annotation type
     */
    Class<? extends Annotation> value();
}
知识点:

@Retention:specify Annotation retention policy such as SOURCE、CLASS、RUNTIME
@Documented
@Retention(RetentionPolicy.RUNTIME)
@Target(ElementType.ANNOTATION_TYPE)
public @interface Retention {
    /**
     * Returns the retention policy.
     * @return the retention policy
     */
    RetentionPolicy value();
}
接下来看代码
     /**
      * 跨域过滤器
      * @return  CorsFilter
      */
     @Bean
     public CorsFilter corsFilter() {
         UrlBasedCorsConfigurationSource source = new UrlBasedCorsConfigurationSource();
         source.registerCorsConfiguration("/**", buildConfig()); // 4
         return new CorsFilter(source);
     }
@Bean
原来
<bean id = "corsFilter" class="org.springframework.web.filter.CorsFilter"> </bean>
@Bean标注在方法上(返回某个实例的方法),等价于spring的xml配置文件中的<bean>,作用为:注册bean对象。
在这个类中涉及到的配置就是:
<beans xmlns="http://www.springframework.org/schema/beans"  ... ...    >

    <bean id = "corsFilter" class="org.springframework.web.filter.CorsFilter"></bean>

</beans>
@EnableScheduling
@Target(ElementType.TYPE)
@Retention(RetentionPolicy.RUNTIME)
@Import(SchedulingConfiguration.class)
@Documented
public @interface EnableScheduling {

}
@Configuration
@Role(BeanDefinition.ROLE_INFRASTRUCTURE)
public class SchedulingConfiguration {

    @Bean(name = TaskManagementConfigUtils.SCHEDULED_ANNOTATION_PROCESSOR_BEAN_NAME)
    @Role(BeanDefinition.ROLE_INFRASTRUCTURE)
    public ScheduledAnnotationBeanPostProcessor scheduledAnnotationProcessor() {
        return new ScheduledAnnotationBeanPostProcessor();
    }

}
忍不住要插点小常识:
大概说一下:
Spring 是一个“引擎”
Spring MVC 是基于 Spring 的一个 MVC 框架
Spring Boot 是基于 Spring4 的条件注册的一套快速开发整合包
Spring 最初利用“工厂模式”( DI )和“代理模式”( AOP )解耦应用组件,并构建了一些列功能组件。大家觉得挺好用,于是按照 MVC 框架模式,(用Spring 解耦的组件)搞了一个MVC用来开发 web 应用也就是( SpringMVC )。然后有发现每次开发都要搞很多依赖,写很多样板代码很麻烦,于是搞了一些懒人整合包( starter ),这套就是 Spring Boot 。
spring 框架有超多的延伸产品例如 boot security jpa etc... 但它的基础就是 spring 的 ioc 和 aop ioc 提供了依赖注入的容器 aop 解决了面向横切面的编程 然后在此两者的基础上实现了其他延伸产品的高级功能 Spring MVC 呢是基于 Servlet 的一个 MVC 框架 主要解决 WEB 开发的问题 因为 Spring 的配置太复杂了 各种 XML JavaConfig hin 麻烦 于是懒人改变世界推出了 Spring boot 约定优于配置 简化了 spring 的配置流程 简单谈下自己的理解 以上来自度娘,感觉和自己的理解相当。直接拿来用,占个坑。以后完善。
springApplication可以读取不同种类的源文件:
- 类- java类由
AnnotatedBeanDefinitionReader加载。 Resource- xml资源文件由XmlBeanDefinitionReader读取, 或者groovy脚本由GroovyBeanDefinitionReader读取Package- java包文件由ClassPathBeanDefinitionScanner扫描读取。CharSequence- 字符序列可以是类名、资源文件、包名,根据不同方式加载。如果一个字符序列不可以解析程序到类,也不可以解析到资源文件,那么就认为它是一个包。- http://www.51drhome.com
- http://www.sohu.com/a/157811214_405968
- http://www.wang1314.com/doc/topic-2664759-1.html
- http://jianfangmi.com/qinggangbieshu/qinggangbieshuanli/201612/00001662.htmlq