1、预准备:
Git:https://git-for-windows.github.io/4
anaconda:https://www.anaconda.com/download/
git和anaconda需要先安装好,anaconda可以根据使用的Python版本来进行选择或者安装最新版本指定Python环境。
2、环境配置
打开Git命窗口,依次执行如下命令:
git clone https://github.com/mli/gluon-tutorials-zh
cd gluon-tutorials-zh
conda env create -f environment.yml
activate gluon
这个过程会自动下载安装所需的依赖包并激活环境(mxnet也会被下载安装)
然后安装notedown,运行Jupyter并加载notedown插件:
pip install https://github.com/mli/notedown/tarball/master
jupyter notebook –NotebookApp.contents_manager_class=’notedown.NotedownContentsManager’
3、jupyter安装配置
然后先生成jupyter配置文件(如果已经生成过可以跳过)
jupyter notebook –generate-config
将下面这一行加入到生成的配置文件的末尾(Linux/macOS一般在~/.jupyter/jupyter_notebook_config.py)
c.NotebookApp.contents_manager_class = ‘notedown.NotedownContentsManager’
之后就只需要运行jupyter notebook即可。
注:配置jupyter notebook默认目录,打开开始生成的jupyter配置文件:/jupyter_notebook_config.py
找到c.NotebookApp.notebook_dir = ’ ’ 把前面的#号去掉,然后在‘ ’填入你想修改后的默认路径即可,然后保存关闭
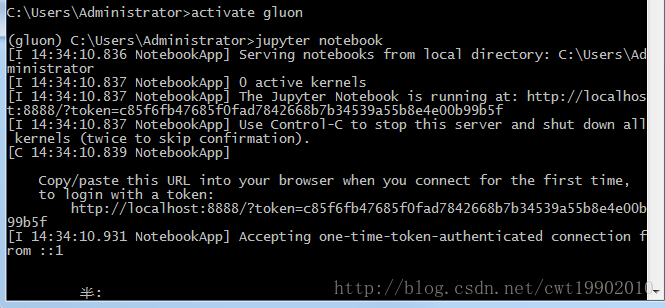
4、再次使用jupyter notebook
如果下次想再次进入jupyter notebook时,只需要打开Git命令窗口,输入:
activate gluon
jupyter notebook
然后浏览器会自动打开http://localhost:8888 ,就可以查看和运行各个教程了。
以上是CPU版本的安装,GPU的需要等待一些时间,对于Gluon的使用,大家可以多看官网
Gluon官方论坛
课程安排及安装介绍