版权声明: https://blog.csdn.net/weixin_41826907/article/details/80764447
我们经常需要将一个文件生成为目录结构树,我们可以通过win 提供的tree指令来搞定。
win系统里的tree指令:
在cmd种输入tree /?
C:\Users\zhang\Desktop\work>tree /?
以图形显示驱动器或路径的文件夹结构。

TREE [drive:][path] [/F] [/A]

   /F   显示每个文件夹中文件的名称。
   /A   使用 ASCII 字符,而不使用扩展字符。
你会发现这个win系统的tree指令太鸡肋,配置项太少了,一个目录里面要忽略点文件啥的都没法去配置。
win10是支持内置的linux子系统
1、选择开发者选项,会自动安装环境
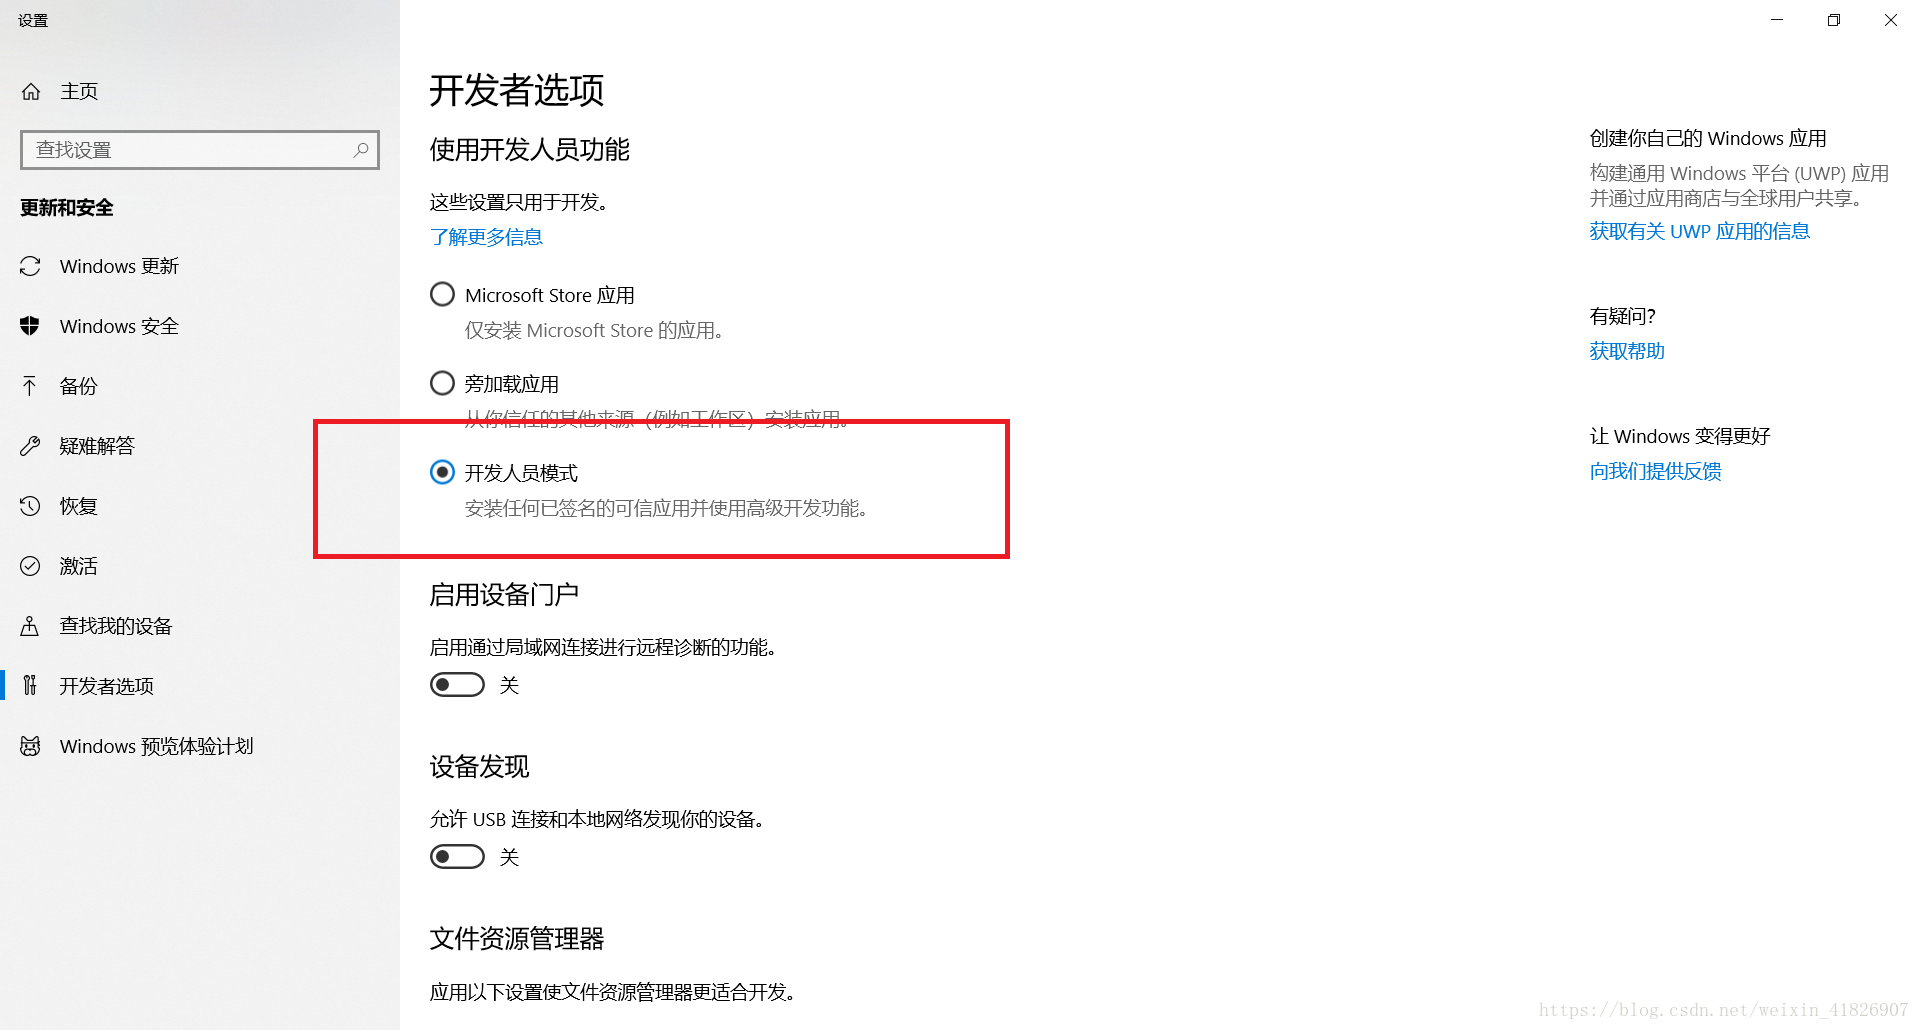
2、勾选适用于Linux的windows子系统

3、在应用商店种下载Ubuntu并启动出现如下界面
4、在初始化安装里设置用户
Installing, this may take a few minutes...
Please create a default UNIX user account. The username does not need to match your Windows username.
For more information visit: https://aka.ms/wslusers
Enter new UNIX username: zgt
Enter new UNIX password:
Retype new UNIX password:
passwd: password updated successfully
Installation successful!
To run a command as administrator (user "root"), use "sudo <command>".
See "man sudo_root" for details.
zgt@zhang:~$ sudo apt-get update //最好先执行下update--避免出现一些不必要的错误
[sudo] password for zgt: //提供权限需要输入密码
Hit:1 http://archive.ubuntu.com/ubuntu xenial InRelease
Get:2 http://security.ubuntu.com/ubuntu xenial-security InRelease [107 kB]
Get:3 http://archive.ubuntu.com/ubuntu xenial-updates InRelease [109 kB]
Get:4 http://archive.ubuntu.com/ubuntu xenial-backports InRelease [107 kB]
Get:5 http://security.ubuntu.com/ubuntu xenial-security/main amd64 Packages [511 kB]
Get:6 http://archive.ubuntu.com/ubuntu xenial/universe amd64 Packages [7,532 kB]
Get:7 http://security.ubuntu.com/ubuntu xenial-security/main Translation-en [219 kB]
Get:8 http://security.ubuntu.com/ubuntu xenial-security/restricted amd64 Packages [7,204 B]
Get:9 http://security.ubuntu.com/ubuntu xenial-security/restricted Translation-en [2,152 B]
Get:10 http://security.ubuntu.com/ubuntu xenial-security/universe amd64 Packages [355 kB]
Get:11 http://security.ubuntu.com/ubuntu xenial-security/universe Translation-en [132 kB]
Get:12 http://security.ubuntu.com/ubuntu xenial-security/multiverse amd64 Packages [3,456 B]
Get:13 http://security.ubuntu.com/ubuntu xenial-security/multiverse Translation-en [1,744 B]
Get:14 http://archive.ubuntu.com/ubuntu xenial/universe Translation-en [4,354 kB]
Get:15 http://archive.ubuntu.com/ubuntu xenial/multiverse amd64 Packages [144 kB]
Get:16 http://archive.ubuntu.com/ubuntu xenial/multiverse Translation-en [106 kB]
Get:17 http://archive.ubuntu.com/ubuntu xenial-updates/main amd64 Packages [795 kB]
Get:18 http://archive.ubuntu.com/ubuntu xenial-updates/main Translation-en [329 kB]
Get:19 http://archive.ubuntu.com/ubuntu xenial-updates/restricted amd64 Packages [7,560 B]
Get:20 http://archive.ubuntu.com/ubuntu xenial-updates/restricted Translation-en [2,272 B]
Get:21 http://archive.ubuntu.com/ubuntu xenial-updates/universe amd64 Packages [636 kB]
Get:22 http://archive.ubuntu.com/ubuntu xenial-updates/universe Translation-en [256 kB]
Get:23 http://archive.ubuntu.com/ubuntu xenial-updates/multiverse amd64 Packages [16.4 kB]
Get:24 http://archive.ubuntu.com/ubuntu xenial-updates/multiverse Translation-en [8,344 B]
Get:25 http://archive.ubuntu.com/ubuntu xenial-backports/main amd64 Packages [4,844 B]
Get:26 http://archive.ubuntu.com/ubuntu xenial-backports/main Translation-en [3,220 B]
Get:27 http://archive.ubuntu.com/ubuntu xenial-backports/universe amd64 Packages [7,400 B]
Get:28 http://archive.ubuntu.com/ubuntu xenial-backports/universe Translation-en [3,996 B]
Fetched 15.8 MB in 1min 17s (204 kB/s)
Reading package lists... Done
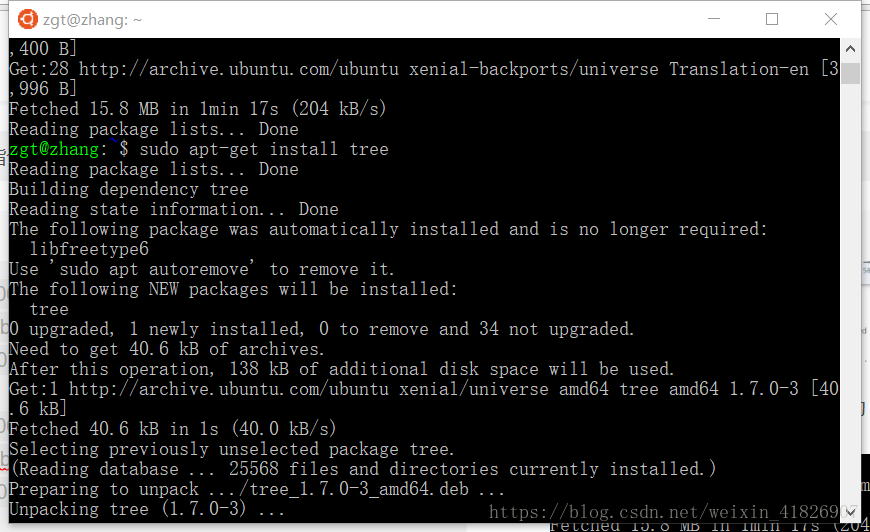
//在子系统里安装tree
zgt@zhang:~$ sudo apt-get install tree
Reading package lists... Done
Building dependency tree
Reading state information... Done
The following package was automatically installed and is no longer required:
libfreetype6
Use 'sudo apt autoremove' to remove it.
The following NEW packages will be installed:
tree
0 upgraded, 1 newly installed, 0 to remove and 34 not upgraded.
Need to get 40.6 kB of archives.
After this operation, 138 kB of additional disk space will be used.
Get:1 http://archive.ubuntu.com/ubuntu xenial/universe amd64 tree amd64 1.7.0-3 [40.6 kB]
Fetched 40.6 kB in 1s (40.0 kB/s)
Selecting previously unselected package tree.
(Reading database ... 25568 files and directories currently installed.)
Preparing to unpack .../tree_1.7.0-3_amd64.deb ...
Unpacking tree (1.7.0-3) ...
Processing triggers for man-db (2.7.5-1) ...
Setting up tree (1.7.0-3) ...
zgt@zhang:~$linux系统里tree指令的参数说明:参考菜鸟教程
-a 显示所有文件和目录。
-A 使用ASNI绘图字符显示树状图而非以ASCII字符组合。
-C 在文件和目录清单加上色彩,便于区分各种类型。
-d 显示目录名称而非内容。
-D 列出文件或目录的更改时间。
-f 在每个文件或目录之前,显示完整的相对路径名称。
-F 在执行文件,目录,Socket,符号连接,管道名称名称,各自加上"*","/","=","@","|"号。
-g 列出文件或目录的所属群组名称,没有对应的名称时,则显示群组识别码。
-i 不以阶梯状列出文件或目录名称。
-I<范本样式> 不显示符合范本样式的文件或目录名称。
-l 如遇到性质为符号连接的目录,直接列出该连接所指向的原始目录。
-n 不在文件和目录清单加上色彩。
-N 直接列出文件和目录名称,包括控制字符。
-p 列出权限标示。
-P<范本样式> 只显示符合范本样式的文件或目录名称。
-q 用"?"号取代控制字符,列出文件和目录名称。
-s 列出文件或目录大小。
-t 用文件和目录的更改时间排序。
-u 列出文件或目录的拥有者名称,没有对应的名称时,则显示用户识别码。
-x 将范围局限在现行的文件系统中,若指定目录下的某些子目录,其存放于另一个文件系统上,则将该子目录予以排除在寻找范围外。
5、使用
:\Users\zhang\Desktop\work>bash  //进入bash
zgt@zhang:/mnt/c/Users/zhang/Desktop/work$ tree -I "*png|*jpg|*test|*build|*config|*dist|*.|*node_modules"  > tree.md
// 这句话的意思是忽略双引号里的文件,将当前目录生成树结构并写入到当前文件夹下的tree.md文件里(没有就自动创建)
zgt@zhang:/mnt/c/Users/zhang/Desktop/work$
在tree.md文件里就可以看到生成的tree结构,我们可以对其做相应的注释
├── src
│   ├── api                                         #后台接口
│   │   ├── index.js
│   │   ├── modules                                 #不同模块的请求接口
│   │   │   └── common.js
│   │   └── request.js
│   ├── assets
│   │   ├── image
│   │   ├── images
│   │   └── scss                                    #全局样式
│   │       ├── _animate.scss
│   │       ├── _base.scss
│   │       ├── _element-reset.scss
│   │       ├── function.scss
│   │       ├── index.scss
│   │       ├── mixins.scss
│   │       ├── _normalize.scss
│   │       ├── _public.scss
│   │       └── variable.scss