一.SSM框架整合
把框架进行整合在一个项目
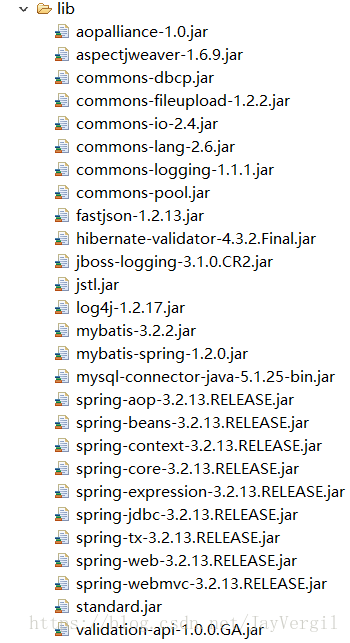
1.导jar包
2.web-xml
3.框架的xml
4.实体类
5.dao的xml及接口方法
6.servlce类 @Service注解
@Resource
接口方法 get set + return
7.controller
@Controller
@RequestMapping("xxx")
里面用到service,@Resource注解+get+set
写个返回值ModeAndView 方法给注解@RequestMapping(""),查过结果返回ModeAndView,存入mv.addObject(集合),跳转mv.setViewName("cg")
applicationContext-mybatis.xml 参考配置:
<?xml version="1.0" encoding="UTF-8"?>
<beans xmlns="http://www.springframework.org/schema/beans"
xmlns:xsi="http://www.w3.org/2001/XMLSchema-instance"
xmlns:aop="http://www.springframework.org/schema/aop"
xmlns:p="http://www.springframework.org/schema/p"
xmlns:tx="http://www.springframework.org/schema/tx"
xmlns:context="http://www.springframework.org/schema/context"
xsi:schemaLocation="
http://www.springframework.org/schema/beans http://www.springframework.org/schema/beans/spring-beans-2.5.xsd
http://www.springframework.org/schema/aop http://www.springframework.org/schema/aop/spring-aop-2.5.xsd
http://www.springframework.org/schema/tx http://www.springframework.org/schema/tx/spring-tx-2.5.xsd
http://www.springframework.org/schema/context
http://www.springframework.org/schema/context/spring-context.xsd">
<context:component-scan base-package="com.service"/>
<context:component-scan base-package="com.dao"/>
<!-- 读取数据库配置文件 -->
<context:property-placeholder location="classpath:database.properties"/>
<!-- JNDI获取数据源(使用dbcp连接池) -->
<bean id="dataSource" class="org.apache.commons.dbcp.datasources" destroy-method="close" scope="singleton">
<property name="driverClassName" value="${driver}" />
<property name="url" value="${url}" />
<property name="username" value="${user}" />
<property name="password" value="${password}" />
<property name="initialSize" value="${initialSize}"/>
<property name="maxActive" value="${maxActive}"/>
<property name="maxIdle" value="${maxIdle}"/>
<property name="minIdle" value="${minIdle}"/>
<property name="maxWait" value="${maxWait}"/>
<property name="removeAbandonedTimeout" value="${removeAbandonedTimeout}"/>
<property name="removeAbandoned" value="${removeAbandoned}"/>
<!-- sql 心跳 -->
<property name= "testWhileIdle" value="true"/>
<property name= "testOnBorrow" value="false"/>
<property name= "testOnReturn" value="false"/>
<property name= "validationQuery" value="select 1"/>
<property name= "timeBetweenEvictionRunsMillis" value="60000"/>
<property name= "numTestsPerEvictionRun" value="${maxActive}"/>
</bean>
<!-- 配置mybitas SqlSessionFactoryBean-->
<bean id="sqlSessionFactory" class="org.mybatis.spring.SqlSessionFactoryBean">
<property name="dataSource" ref="dataSource"/>
<property name="configLocation" value="classpath:mybatis-config.xml"/>
</bean>
<bean class="org.mybatis.spring.mapper.MapperScannerConfigurer">
<property name="basePackage" value="com.dao.**" />
</bean>
</beans>
database.properties:
driver=com.mysql.jdbc.Driver
url=jdbc:mysql://127.0.0.1:3306/supermarket?useUnicode=true&characterEncoding=utf-8
user=root
password=root
minIdle=45
maxIdle=50
initialSize=5
maxActive=100
maxWait=100
removeAbandonedTimeout=180
removeAbandoned=true
mybatis-config.xml:
<?xml version="1.0" encoding="UTF-8"?>
<!DOCTYPE configuration
PUBLIC "-//mybatis.org//DTD Config 3.0//EN"
"http://mybatis.org/dtd/mybatis-3-config.dtd">
<configuration>
<settings>
<!-- changes from the defaults -->
<setting name="lazyLoadingEnabled" value="false" />
</settings>
<typeAliases>
<!--这里给实体类取别名,方便在mapper配置文件中使用-->
<package name="com.entity"/>
</typeAliases>
</configuration>
springmvc-servlet.xml:
<?xml version="1.0" encoding="UTF-8"?>
<beans xmlns="http://www.springframework.org/schema/beans"
xmlns:xsi="http://www.w3.org/2001/XMLSchema-instance" xmlns:mvc="http://www.springframework.org/schema/mvc"
xmlns:p="http://www.springframework.org/schema/p" xmlns:context="http://www.springframework.org/schema/context"
xsi:schemaLocation="
http://www.springframework.org/schema/beans
http://www.springframework.org/schema/beans/spring-beans.xsd
http://www.springframework.org/schema/context
http://www.springframework.org/schema/context/spring-context.xsd
http://www.springframework.org/schema/mvc
http://www.springframework.org/schema/mvc/spring-mvc.xsd">
<context:component-scan base-package="com.controller" />
<mvc:annotation-driven>
<mvc:message-converters>
<bean class="org.springframework.http.converter.StringHttpMessageConverter">
<property name="supportedMediaTypes">
<list>
<value>application/json;charset=UTF-8</value>
</list>
</property>
</bean>
<bean
class="com.alibaba.fastjson.support.spring.FastJsonHttpMessageConverter">
<property name="supportedMediaTypes">
<list>
<value>text/html;charset=UTF-8</value>
<value>application/json</value>
</list>
</property>
<property name="features">
<list>
<!-- Date的日期转换器 -->
<value>WriteDateUseDateFormat</value>
</list>
</property>
</bean>
</mvc:message-converters>
</mvc:annotation-driven>
<mvc:resources location="/statics/" mapping="/statics/**"></mvc:resources>
<!-- 配置多视图解析器:允许同样的内容数据呈现不同的view -->
<bean
class="org.springframework.web.servlet.view.ContentNegotiatingViewResolver">
<property name="favorParameter" value="true" />
<property name="defaultContentType" value="text/html" />
<property name="mediaTypes">
<map>
<entry key="html" value="text/html;charset=UTF-8" />
<entry key="json" value="application/json;charset=UTF-8" />
<entry key="xml" value="application/xml;charset=UTF-8" />
</map>
</property>
<property name="viewResolvers">
<list>
<bean
class="org.springframework.web.servlet.view.InternalResourceViewResolver">
<property name="prefix" value="/WEB-INF/jsp/" />
<property name="suffix" value=".jsp" />
</bean>
</list>
</property>
</bean>
</beans>
二.BootStrp
二 BootStrp
1.自适应布局
传统自适应
<Style>
//大屏幕1024分辨率下
@media all and(min-width:1024px){
样式
}
//小屏幕分辨率下
@media all and(max-width:1023px)and(min-width:768px){
样式
}
//更小屏幕分辨率下
@media all and(max-width:767px){
样式
}
</Style>
BootStrp自适应作用
十二分三拦设置
1.把所有css放进去
2.导了一句话,使用所有的屏幕信息
3.导入BootStrp.css
4. class = "container"
Class="row" BootStrp提供
class="col-md-3"代表小屏幕
class="col-xs-4"大屏幕
实例:
<html>
<head lang="en"> <meta name="viewport" content="width=device-width, user-scalable=no, initial-scale=1.0/>
<link href="css/bootstrap.css" rel="stylesheet"> </head>
<body> <h1>这是一个Bootstrap框架的最基本HTML模板</h1> <script src="js/jquery-1.12.4.js"></script> <script src="js/bootstrap.js"></script>
</body>
</html>
BootStrp自带css样式
BootStrp自带js样式
BootStrp其他插件