版权声明:本文为博主原创文章,未经博主允许不得转载。 https://blog.csdn.net/a1533588867/article/details/53129259
Android多文件断点续传在很多应用场景中都会运用到,更重要的是相对于简单的下载功能,断点续传在下载文件过程中能带来非常好的用户体验。本系列教程将围绕一个简单Demo介绍多文件断点续传的实现方式。
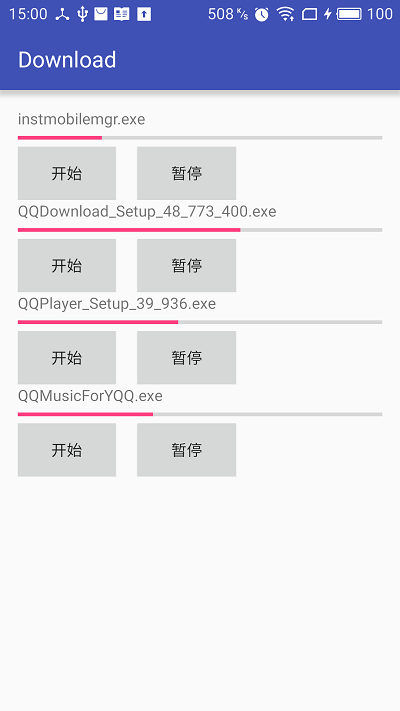
先看效果图,源码在教程结尾提供。
Demo所涉及主要内容如下:
1. Service:用于后台处理下载文件的逻辑。
2. SQLite : 用于保存下载进度。
3. EventBus : 用于分发和接收下载进度。
4. ThreadPool : 用于管理下载线程。
一. 封装实体类
我们需要将下载的文件信息和下载线程的信息分别封装起来。
/**
 * Created by kun on 2016/11/10.
 * 下载文件信息
 */
public class FileBean implements Serializable {

    private int id;
    private String fileName;
    private String url;
    private int length;
    private int finished;

    .... //Constructor,get,set
}
/**
 * Created by kun on 2016/11/10.
 * 下载线程信息
 */
public class ThreadBean implements Serializable{

    private int id;
    private String url;
    private int start;
    private int end;
    private int finished;

    .... //Constructor,get,set
}
FileBean 中封装了下载文件的信息:id、下载路径、文件名称、文件长度和已下载的长度。
ThreadBean 中封装了下载线程的信息:id、下载路径、下载起始位置、下载结束位置和已下载的长度。
二.绘制布局以及添加数据
在效果图中我们看到界面很简单,这里用RecyclerView来实现。
<?xml version="1.0" encoding="utf-8"?>
<LinearLayout xmlns:android="http://schemas.android.com/apk/res/android"
    android:layout_width="match_parent"
    android:layout_height="match_parent"
    android:paddingBottom="@dimen/activity_vertical_margin"
    android:paddingLeft="@dimen/activity_horizontal_margin"
    android:paddingRight="@dimen/activity_horizontal_margin"
    android:paddingTop="@dimen/activity_vertical_margin"
    android:orientation="vertical">

    <android.support.v7.widget.RecyclerView
        android:id="@+id/recyclerview"
        android:layout_width="match_parent"
        android:layout_height="match_parent"/>
</LinearLayout>
在Activity中我们初始化RecyclerView并添加几个下载数据
    private void initView(){
        recyclerview = (RecyclerView) findViewById(R.id.recyclerview);
        LinearLayoutManager layoutManager = new LinearLayoutManager(this);
        layoutManager.setOrientation(LinearLayoutManager.VERTICAL);
        recyclerview.setLayoutManager(layoutManager);
    }

    private void initData() {
        FileBean fileBean1 = new FileBean(0, "instmobilemgr.exe", url1, 0);
        FileBean fileBean2 = new FileBean(1, "QQDownload_Setup_48_773_400.exe", url2, 0);
        FileBean fileBean3 = new FileBean(2, "QQPlayer_Setup_39_936.exe", url3, 0);
        FileBean fileBean4 = new FileBean(3, "QQMusicForYQQ.exe", url4, 0);
        List<FileBean> fileBeanList = new ArrayList<>();
        fileBeanList.add(fileBean1);
        fileBeanList.add(fileBean2);
        fileBeanList.add(fileBean3);
        fileBeanList.add(fileBean4);
        adaper = new RecyclerViewListAdapter(this, fileBeanList);
        recyclerview.setAdapter(adaper);
    }
三.RecyclerViewListAdapter
/**
 * Created by kun on 2016/11/11.
 */
public class RecyclerViewListAdapter extends RecyclerView.Adapter<RecyclerViewListAdapter.ViewHolder> {

    List<FileBean> datas;
    Context context;

    public RecyclerViewListAdapter(Context context, List<FileBean> datas) {
        if (datas == null) datas = new ArrayList<>();
        this.datas = datas;
        this.context = context;
    }

    ... ...

    //自定义的ViewHolder,持有每个Item的的所有界面元素
    public static class ViewHolder extends RecyclerView.ViewHolder {
        TextView textName;
        ProgressBar progressBar;
        Button btnStart;
        Button btnPause;

        public ViewHolder(View convertView) {
            super(convertView);
            textName = (TextView) convertView.findViewById(R.id.textName);
            progressBar = (ProgressBar) convertView.findViewById(R.id.progressBar);
            btnStart = (Button) convertView.findViewById(R.id.btnStart);
            btnPause = (Button) convertView.findViewById(R.id.btnPause);
        }
    }

    //将数据与界面进行绑定的操作
    @Override
    public void onBindViewHolder(final ViewHolder viewHoder, final int position) {
        final FileBean fileBean = datas.get(position);
        viewHoder.textName.setText(fileBean.getFileName());
        if(fileBean.getLength()!=0) {
            viewHoder.progressBar.setProgress((int)(fileBean.getFinished()*1.0f/fileBean.getLength()*100));
        }
        viewHoder.btnStart.setOnClickListener(new View.OnClickListener() {
            @Override
            public void onClick(View v) {
                Intent startIntent = new Intent(context, DownloadService.class);
                startIntent.setAction(DownloadService.ACTION_START);
                startIntent.putExtra("FileBean", fileBean);
                context.startService(startIntent);
            }
        });
        viewHoder.btnPause.setOnClickListener(new View.OnClickListener() {
            @Override
            public void onClick(View v) {
                Intent pauseIntent = new Intent(context, DownloadService.class);
                pauseIntent.setAction(DownloadService.ACTION_PAUSE);
                pauseIntent.putExtra("FileBean", fileBean);
                context.startService(pauseIntent);
            }
        });
    }

    private long curTime = 0;
     public void updateProgress(FileBean fileBean) {
         int i = 0;
        for(FileBean data:datas){
            if(data.getId() == fileBean.getId()){
                data.setLength(fileBean.getLength());
                data.setFinished(fileBean.getFinished());
                if(System.currentTimeMillis()-curTime >500) {
                    curTime = System.currentTimeMillis();
                    notifyDataSetChanged();
                }
                return;
            }
            i++;
        }
    }
}