先记录一下相关代码,后续完善内容
路由 Route
静态路由
在Flutter中有着两种路由跳转的方式,一种是静态路由,在创建时就已经明确知道了要跳转的页面和值。另一种是动态路由,跳转传入的目标地址和要传入的值都可以是动态的。
OK,还是先来介绍下静态路由
从我们开始学习Flutter到现在,相信大家看到最多的肯定是下面的代码
void main(){
  runApp(new MaterialApp());
}
在runApp方法中需要传入一个MaterialApp的Widget,但是我们基本用到的都是home属性,但是其实MaterialApp方法里面有着很多的参数,其中routes参数就是定义路由的参数。
routes: {}
routes需要传入类型的Map,第一个参数是目标路由的名称,第二个参数就是你要跳转的页面。
嗯,还是来个例子看看怎么用
main.dart
import 'package:flutter/material.dart';
import 'package:flutteraa/MyHomePage.dart';
import 'package:flutteraa/PlatformPage.dart';
import 'package:test1/route/Page2.dart';
import 'package:test1/route/Page1.dart';

void main() => runApp(new MyApp());

class MyApp extends StatelessWidget {
  @override
  Widget build(BuildContext context) {
    return new MaterialApp(
      title: 'Welcome to Flutter',
      theme: ThemeData(primaryColor: Colors.blue),
      home: Page1(),
      routes: <String, WidgetBuilder>{'page2': (_) => Page2()},
    );
  }
}
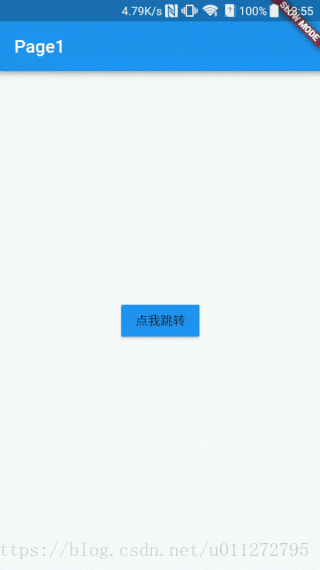
第一个页面:
import 'package:flutter/material.dart';
import 'package:test1/route/Page2.dart';

class MyApp extends StatelessWidget {
  @override
  Widget build(BuildContext context) {
    return new Scaffold(
      appBar: new AppBar(
        title: new Text("Page1"),
      ),
      body: new Center(
        child: new RaisedButton(
          onPressed: () {
            Navigator.of(context).pushNamed("page2");
          },
          child: new Text("点我跳转"),
          color: Colors.blue,
          highlightColor: Colors.lightBlue,
        ),
      ),
    );
  }
}
在第一个页面在Main方法中我们定义了我们需要跳转的页面名称为“Page2”,要跳转的页面是Page2,每当我们点击屏幕正中央的button都会触发调用
Navigator.of(context).pushNamed(“/page2”);
Navigator就是在在Flutter中负责页面导航的,相信了解Android的童鞋都知道这个玩意。
使用pushNamed方法传入一个在routes定义的名字即可。
第二个页面:
import 'package:flutter/material.dart';
class Page2 extends StatelessWidget {
  @override
  Widget build(BuildContext context) {
    return new Scaffold(
      appBar: new AppBar(
        title: new Text("Page2"),
      ),
      body: new Center(
        child: new Text(
          "Page2",
          style: new TextStyle(fontSize: 25.0),
        ),
      ),
    );
  }
}
好吧,那么尝试下往下个页面传递数据,其实也很简单,我们给第二个页面加一个构造函数,并且把从第一个页面传递过来的值赋给Text
import 'package:flutter/material.dart';

class Page2 extends StatelessWidget {
  final title;

  Page2(this.title);

  @override
  Widget build(BuildContext context) {
    return new Scaffold(
      appBar: new AppBar(
        title: new Text("Page2"),
      ),
      body: new Center(
        child: new Text(
          title,
          style: new TextStyle(fontSize: 25.0),
        ),
      ),
    );
  }
}
在第一个页面定义路由时就需要把你需要传递的参数定义出来。
routes: <String, WidgetBuilder>{
'page2': (BuildContext context) => new Page2("I am from Page1"),
},
这种定义路由并使用的方式非常的简单,但是大家肯定会发现一个问题,就是如果我需要传递给第二个页面的数据不是已知的话我就无法使用这种方式,因为我们无法动态改变上面定义的值。
所以,我们就需要了解下Flutter中的动态路由了。
动态路由
在Navigator中还有一个方法是push()方法,需要传入一个Route对象,在Flutter中我们可以使用PageRouteBuilder来构建这个Route对象。
所以,我们可以在Button的点击事件中做下面代码的操作:
Navigator.of(context).push(new PageRouteBuilder(
pageBuilder: (BuildContext context,
    Animation<double> animation,
Animation<double> secondaryAnimation) {
return new Page2("some attrs you like ");

}))
这样的话,我们就可以把用户操作与交互的数据传递给下个页面。
全局代码:
页面1:
import 'dart:async';

import 'package:flutter/material.dart';
import 'package:flutteraa/PlatformPage.dart';

class MyHomePage extends StatefulWidget {
  @override
  createState() => new MyHomePageState();
}

class MyHomePageState extends State<MyHomePage> {


  @override
  Widget build(BuildContext context) {
    return   Scaffold(
      appBar: AppBar(
        title: Text(
          'Tab',
          style: TextStyle(fontSize: 18.0),
        ),
        backgroundColor: Colors.blue,
      ),
      body: Column(
        children: <Widget>[
          RaisedButton(
            onPressed: _btnPress,
            child: Text('跳转'),
          ),
        ],
      ),
    );

  }

  Future _btnPress() {
  //静态路由,需要配置route
    //Navigator.pushNamed(context, 'Platform');
    //动态路由,跳转并传递参数
    Future future = Navigator.push(context, PageRouteBuilder(pageBuilder:
        (BuildContext context, Animation<double> animation,
        Animation<double> secondaryAnimation) {
      return PlatformPage(":获取电量");
    }));
    future.then((value) {
      showDialog(
          context: context,
          builder: (context) => AlertDialog(
            title: Text('前面返回的数据是:$value'),
          ));
    });
  }
}
页面2:
/*
 * Created by 李卓原 on 2018/9/6.
 * email: [email protected]
 *
 */

import 'dart:async';

import 'package:flutter/material.dart';
import 'package:flutter/services.dart';

class PlatformPage extends StatefulWidget {
  final title;

  PlatformPage(this.title);

  @override
  State<StatefulWidget> createState() => PlatformPageState(title);
}

class PlatformPageState extends State<PlatformPage> {
  static const platform = const MethodChannel('flutteraa/battery');
  String _batteryLevel = 'Unknown battery level.';
  final title;

  PlatformPageState(this.title);

  @override
  Widget build(BuildContext context) {
    return Scaffold(
      appBar: AppBar(
        title: Text('平台代码$title'),
      ),
      body: Column(
        children: <Widget>[
          RaisedButton(
            onPressed: _goback,
            child: Text('返回'),
          )
        ],
      ),
    );
  }

  void _goback() {
  //返回上一页面并传递参数
    Navigator.pop(context,'aiyo');
  }
}
main.dart
import 'package:flutter/material.dart';
import 'package:flutteraa/MyHomePage.dart';
import 'package:flutteraa/PlatformPage.dart';

void main() => runApp(new MyApp());

class MyApp extends StatelessWidget {
  @override
  Widget build(BuildContext context) {
    return new MaterialApp(
        title: 'Welcome to Flutter',
        theme: ThemeData(primaryColor: Colors.blue),
        home: MyHomePage(),
        routes: <String,WidgetBuilder>{
          'Platform':(_)=>PlatformPage('a')
        },
    );
  }
}