一、前言
如果你还不了解 GitLab CI 的话,最好先参考一下这篇博客对 GitLab CI 的简介,
链接:https://blog.csdn.net/afei__/article/details/82377382
GitLab 8.0 之后的版本已经默认集成了 CI,所以我们只需要安装 CI 的 Runner 即可。本文以 Linux x86-64 系统为例,其它系统也可以参考官网链接
官方链接:https://docs.gitlab.com/runner/install/linux-manually.html
二、安装 Runner 步骤
1. 下载 gitlab-runner
# Linux x86-64
sudo wget -O /usr/local/bin/gitlab-runner https://gitlab-runner-downloads.s3.amazonaws.com/latest/binaries/gitlab-runner-linux-amd64

# Linux x86
sudo wget -O /usr/local/bin/gitlab-runner https://gitlab-runner-downloads.s3.amazonaws.com/latest/binaries/gitlab-runner-linux-386

# Linux arm
sudo wget -O /usr/local/bin/gitlab-runner https://gitlab-runner-downloads.s3.amazonaws.com/latest/binaries/gitlab-runner-linux-arm备注:使用 sudo uname --m 命令可以查看 Linux 系统的位数。
2. 给予相应权限
sudo chmod +x /usr/local/bin/gitlab-runner3. 新建一个用户
sudo useradd --comment 'GitLab Runner' --create-home gitlab-runner --shell /bin/bash一般来说,我们已经有一些用户了,这一步是可以选择 跳过 的。
但是要注意的是这个用户必须得拥有各命令执行的权限。不然执行过程中会因为一些权限问题导致失败。

4. 安装并运行
sudo gitlab-runner install --user=afei --working-directory=/home/afei/gitlab-runner
sudo gitlab-runner start
注意:
--user 指定为自己的用户,用户在 /home 目录下,既可以选择一个已有用户,也可以选择使用上一步新建的用户
--working-directory 执行工作目录,注意应该选择一个该用户有相关权限的目录
5. 安装后想修改怎么办
修改这个文件即可:/etc/systemd/system/gitlab-runner.service
三、注册 Runner 步骤
官方介绍链接:https://docs.gitlab.com/runner/register/index.html
1. 示例图片
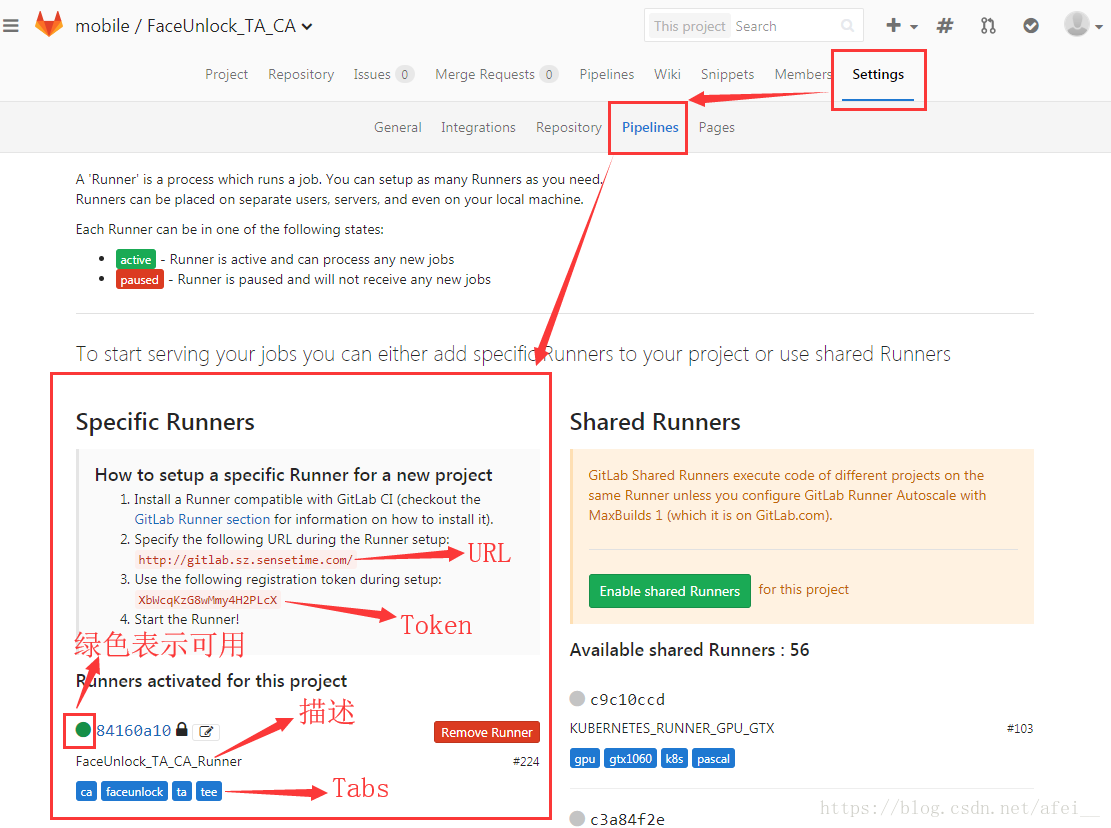
2. 注册
sudo gitlab-runner register3. 输入你的 GitLab 的 url
Please enter the gitlab-ci coordinator URL (e.g. https://gitlab.com )
http://gitlab.sz.sensetime.com/ # 参考上图图解
4. 输入 Token
Please enter the gitlab-ci token for this runner
XbWcqKzG8wMmy4H2PLcX # 参考上图图解
5. 输入这个 Runner 的描述
Please enter the gitlab-ci description for this runner
[hostame] my-runner
6. 输入这个 Runner 的 Tabs,每个 tab 使用英文逗号隔开
Please enter the gitlab-ci tags for this runner (comma separated):
my-tag,another-tag
7. 选择执行方式
Please enter the executor: ssh, docker+machine, docker-ssh+machine, kubernetes, docker, parallels, virtualbox, docker-ssh, shell:
shell
这里根据自己的实际需要选择把,我选的是 shell。
四、编写和运行 CI
这里举个简单的例子,帮助大家熟悉一下 CI 的配置和运作。
CI 的语法为 yaml,这里不做解释,仅作为扩展介绍流程。
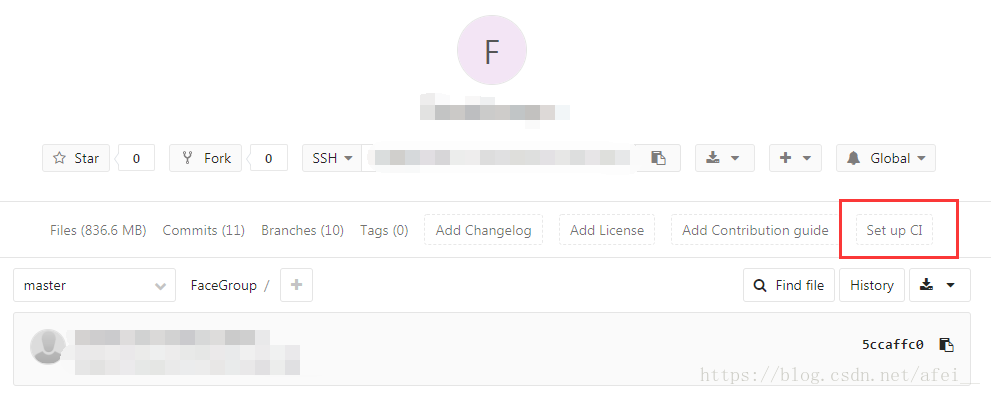
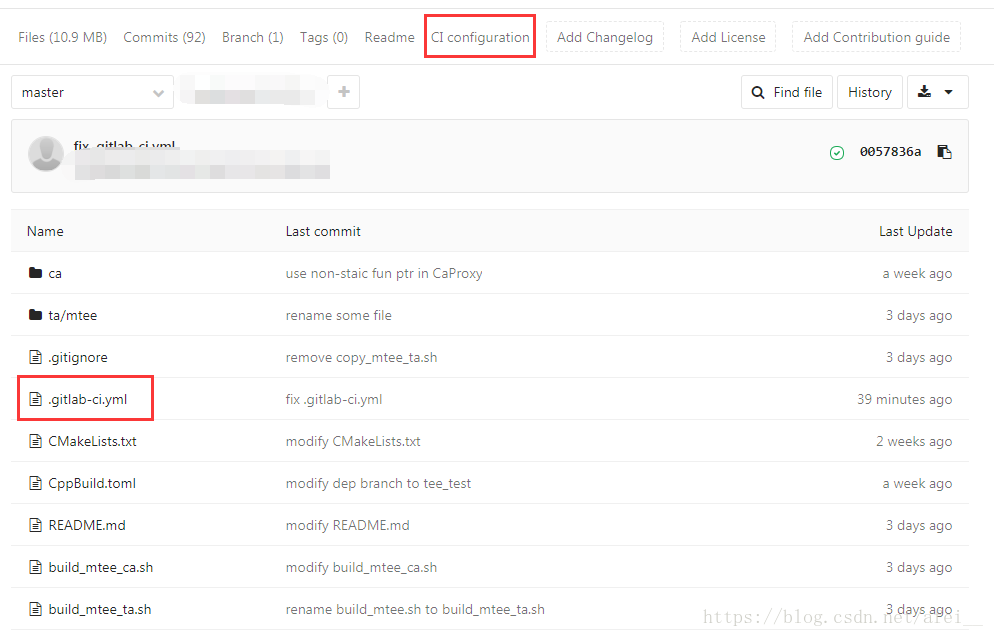
1. 新建 .gitlab-ci.yml 文件
2. 输入执行脚本
点击上面那个 "Set up CI" 就行。例如输入:
build:
  stage: build
  script:
    - ./build_mtee_ca.sh
  tags:
    - ca,faceunlock,ta,tee
然后就是下图所示这样了
3. 执行
如果已经存在 ".gitlab-ci.yml" 文件后,当你 push 代码时,CI 就已经会自动执行了,执行的结果在
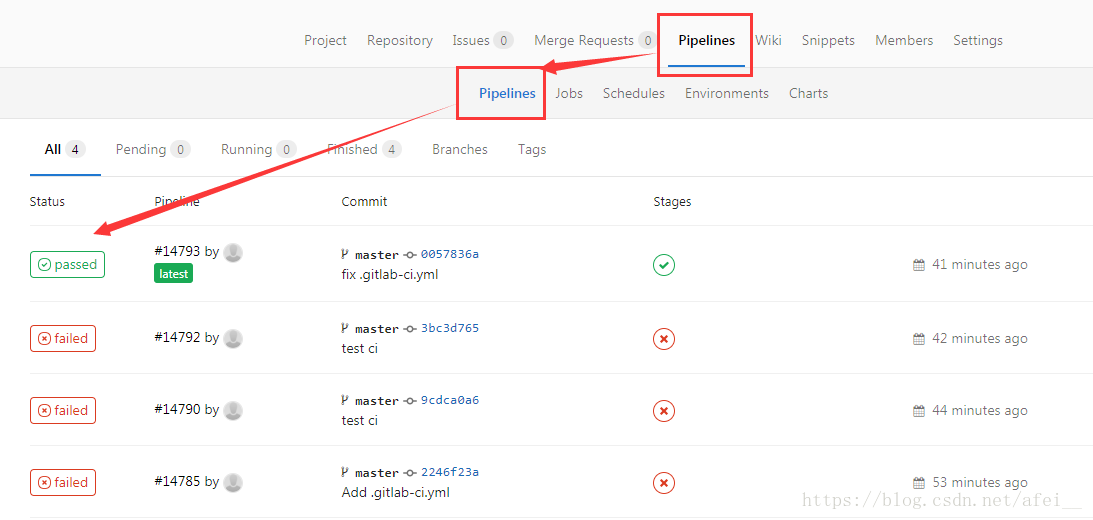
你还可以通过点击 failed 弹到下面这个页面,查看具体失败原因
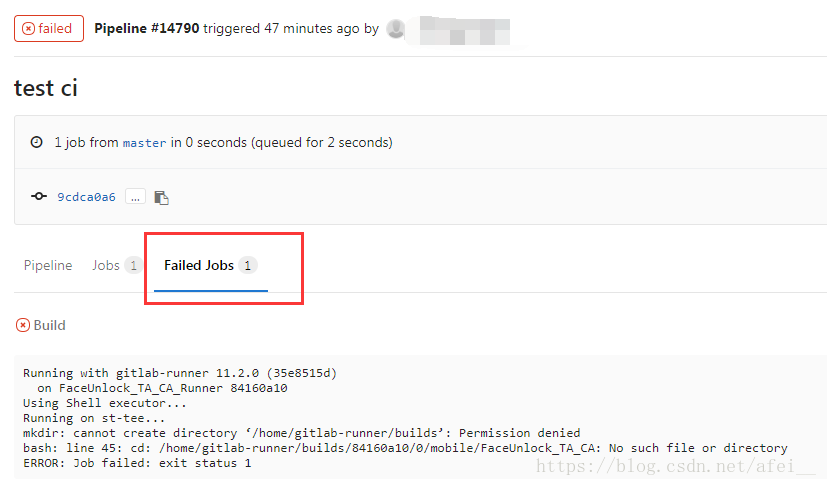
这个错误原因就只是 Runner 指定的用户没有操作指定工作区间文件的相应权限,所以在注册 Runner 的时候一定要注意用户和权限的问题。
4. 指定执行任务
我们也可以指定在一些固定时间自动执行 CI,例如 4:00am,或者每个月的第一天。如下:
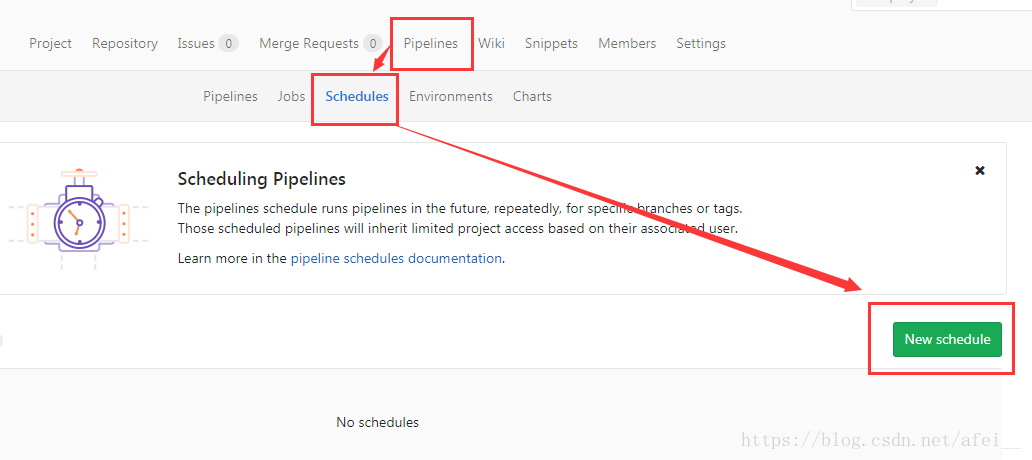
点击 New schedule 后有如此页面:
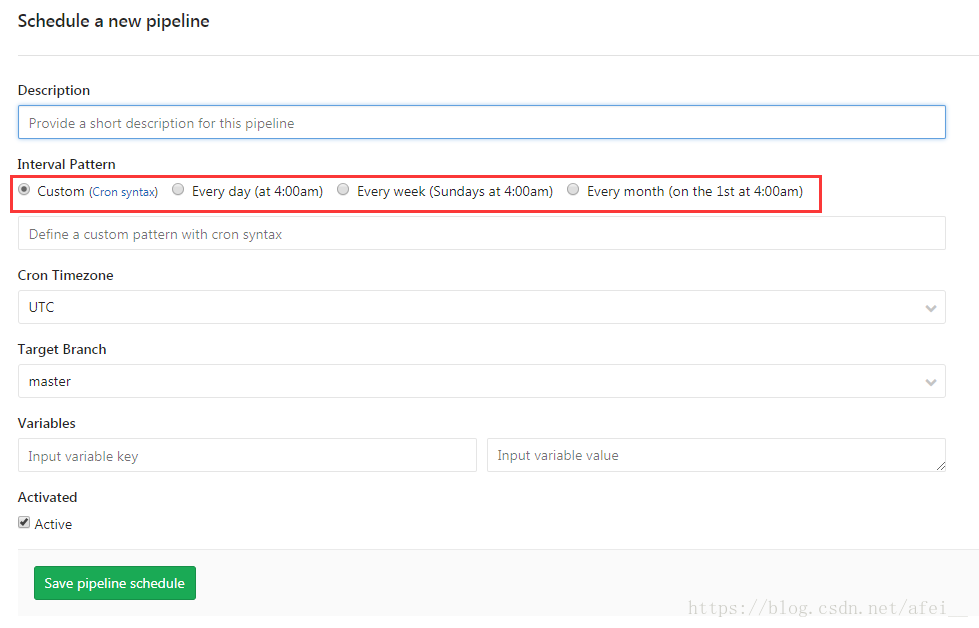
选择你需要的配置即可。