前言
之前在dubbo的入门的文章中,用到过zookeeper,但是是建立在伪分布式环境下的,这次是对zookeeper的系统化学习,打算在真实的分布式环境下搭建zookeeper集群,其实也没什么难的,也就是一些配置文件的设置而已,偏使用居多。
zookeeper的安装
准备环境
在本地vmware中搭建了三台linux的虚拟机。保证每台虚拟机jdk安装正常。至于怎么安装,用yum就可以搞定。这里就不详细讨论了。
这里三台虚拟机ip地址分别是192.168.2.128,192.168.2.129,192.168.2.130
主要介绍zookeeper在linux下的安装
1、去zookeeper官网下载zookeeper的压缩包,传送门:zookeeper下载
2、解压安装包,解压命令——tar -zxvf zookeeper.tar.gz

(用黑色框框遮住了个人姓名......)
集群搭建
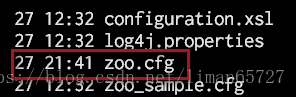
1、将zookeeper的配置文件zoo_sample.cfg 拷贝一份,命名为zoo.cfg
2、修改配置文件zoo.cfg
# The number of milliseconds of each tick
tickTime=2000

# The number of ticks that the initial
# synchronization phase can take
initLimit=10

# The number of ticks that can pass between
# sending a request and getting an acknowledgement
syncLimit=5

# the directory where the snapshot is stored.
# do not use /tmp for storage, /tmp here is just
# example sakes.
#数据持久化路径
dataDir=/data/zookeeper

#日志文件存放路径
dataLogDir=/data/zookeeper/log

# the port at which the clients will connect
clientPort=2181

# the maximum number of client connections.
# increase this if you need to handle more clients
#maxClientCnxns=60
#
# Be sure to read the maintenance section of the
# administrator guide before turning on autopurge.
#
# http://zookeeper.apache.org/doc/current/zookeeperAdmin.html#sc_maintenance
#
# The number of snapshots to retain in dataDir
#autopurge.snapRetainCount=3
# Purge task interval in hours
# Set to "0" to disable auto purge feature
#autopurge.purgeInterval=1

#集群的ip和主机配置(主机名,心跳端口,备用端口)
server.1=192.168.2.128:2888:3888
server.2=192.168.2.129:2888:3888
server.3=192.168.2.130:2888:3888
其实需要修改的地方也不多,针对其中的相关属性,会在后面几篇博客中去总结,这里主要修改了日志存放的路径和数据持久化的路径
最重要的配置是最后几行
#集群的ip和主机配置(主机名,心跳端口,备用端口)
server.1=192.168.2.128:2888:3888
server.2=192.168.2.129:2888:3888
server.3=192.168.2.130:2888:3888
server.服务器ID=服务器IP地址:服务器之间通信端口:服务器之间投票选举端口
3、建立myid文件
在zookeeper目录下建立myid文件(不同的版本,可能要求myid所在的目录不同),这个文件的目的就是标记服务器id,在文件中只需要输入一个数字即可
在192.168.2.128的虚拟机下建立的myid文件,其中就保存1即可,其他另外两个虚拟机同样操作即可,需要保持与上面的集群ip配置一致。
4、关闭防火墙
防火墙还是要关的,否则会出现主机无法访问的问题,关闭防火墙的命令(CentOS 7)—— systemctl stop firewalld.service
5、启动zookeeper
在bin目录中执行sh zkServer.sh start (可以配置环境变量之后,在任意目录下启动都可以)
6、查看zookeeper的状态

执行sh zkServer.sh status,即可看到相关的状态,这里是以192.168.2.128主机为例,可以看到其目前是一个follower节点。
这个时候也可以去查看zookeeper的日志文件,看到相应的状态。