1 CSS
1.1 基础

<style>
p{
color:red;
}
</style>
<p>这是一个P</p>
<p>这是一个P</p>
或者
<p style="color:red">这是style为红色的</p>
1.1.1选择器
选择器主要分3种
元素选择器
id选择器
类选择器
元素选择器
<style>
p{
color:red;
}
</style>
<p>p元素</p>
<p>p元素</p>
id选择器
通过id选择元素
注: 一个元素的id应该是唯一的。另一个元素不应该重复使用
<p id="p1">id=p1的p</p>
<style>
#p1{
color:blue;
}
</style>
类选择器
<p class="pre">前3个</p>
<p class="pre">前3个</p>
<p class="pre">前3个</p>
<style>
.pre{
color:blue;
}
</style>
1.1.2 尺寸
尺寸大小
<p id="percentage"> 按比例设置尺寸50%宽 50%高</p>
<style>
p#percentage{
width:50%;
height:50%;
background-color:pink;
}
</style>
1.1.3 背景
背景颜色
属性名background-color
颜色的值可以采用3种方式
1. 预定义的颜色名字
比如red,gray,white,black,pink,参考颜色速查手册
2. rgb格式
分别代表红绿蓝的比例 rgb(250,0,255) 即表示红色是满的,没有绿色,蓝色是满的,即红色和蓝色混合在一起:紫色
3. 16进制的表示
#00ff00 等同于 rgb(0,255,0)
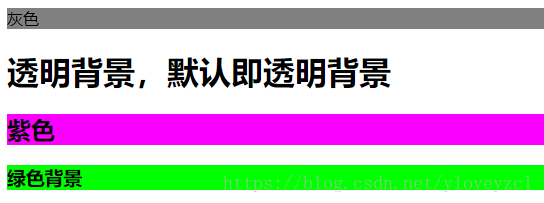
<style>
p.gray {background-color: gray;}
h1 {background-color: transparent}
h2 {background-color: rgb(250,0,255)}
h3 {background-color: #00ff00}
</style>
<p class="gray">灰色</p>
<h1>透明背景,默认即透明背景</h1>
<h2>紫色</h2>
<h3>绿色背景</h3>
图片做背景
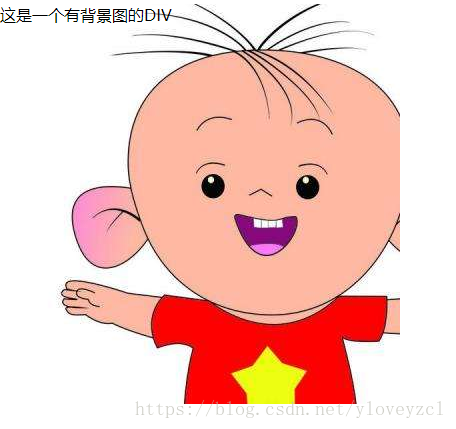
<style>
div#test
{
background-image:url(c.jpg);
width:400px;
height:400px;
}
</style>
<div id="test">
这是一个有背景图的DIV
</div>
背景重复
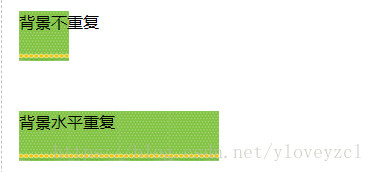
<style>
div#norepeat
{
background-image:url(/study/background_small.jpg);
width:200px;
height:100px;
background-repeat: no-repeat;
}
div#repeat-x
{
background-image:url(/study/background_small.jpg);
width:200px;
height:100px;
background-repeat: repeat-x;
}
</style>
<div id="norepeat">
背景不重复
</div>
<div id="repeat-x">
背景水平重复
</div>
1.1.4 文本
文本颜色
属性名color
颜色的值可以采用3种方式
1. 预定义的颜色名字
比如red,gray,white,black,pink
2. rgb格式
分别代表红绿蓝的比例 rgb(250,0,255) 即表示红色是满的,没有绿色,蓝色是满的,即红色和蓝色混合在一起:紫色
3. 16进制的表示
#00ff00 等同于 rgb(0,255,0)
<style>
div#colorful{
color:pink
}
</style>
<div id="colorful">
粉红色
</div>
对齐
属性:text-align
值:left,right,center
div是块级元素,其默认宽度是100%,所以文本有对齐的空间前提。
但是,span却看不出右对齐效果,为什么呢?
因为span是内联元素其默认宽度就是其文本内容的宽度
简单说就是文本已经粑在其边框上了,对齐是看不出效果来的
使用了后面的样式风格,让div和span的边框显露出来,便于理解本知识点
用到了边框和外边距

<style>
div#left{
text-align:left;
}
/*让div和span的边框显露出来,便于理解本知识点*/
div,span{
border: 1px gray solid;
margin:10px;
}
div#right{
text-align:right;
}
div#center{
text-align:center;
}
span#right{
text-align:right;
}
</style>
<div id="left">
左对齐
</div>
<div id="right">
右对齐
</div>
<div id="center">
居中
</div>
<span id="right">
span看不出右对齐效果
</span>
文本修饰

| <style type="text/css"> h1 {text-decoration: overline} h2 {text-decoration: line-through} h3 {text-decoration: underline} h4 {text-decoration:blink} .a {text-decoration: none} </style> <h1>上划线</h1> <h2>删除效果</h2> <h3>下划线</h3> <h4>闪烁效果,大部分浏览器已经取消该效果</h4> <a href="http://how2j.cn/">默认的超链</a> <a class="a" href="http://how2j.cn/">去掉了下划线的超链</a> |
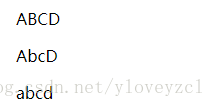
大小写
属性:text-transform
值:
uppercase 全部大写
capitalize 首字母大写
lowercase 全部小写
<style>
p.u {text-transform:uppercase}
p.c {text-transform:capitalize}
p.l {text-transform:lowercase}
</style>
<p class="u">
abcD
</p>
<p class="c">
abcD
</p>
<p class="l">
abcD
</p>
1.1.5 字体
尺寸
属性:font-size
值:数字或者百分比

<style>
p.big{
font-size:30px;
}
p.small{
font-size:50%;
}
p.small2{
font-size:0.5em;
}
</style>
<p >正常大小</p>
<p class="big">30px大小的文字</p>
<p class="small">50%比例的文字</p>
<p class="small2">0.5em 等同于 50%比例的文字</p>
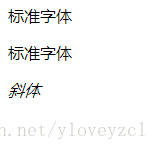
风格
font-style:
normal 标准字体
italic 斜体
<style>
p.n{
font-style:normal;
}
p.i{
font-style:italic;
}
</style>
<p >标准字体</p>
<p class="n">标准字体</p>
<p class="i">斜体</p>
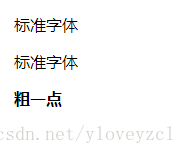
粗细
属性 font-weight
normal 标准粗细
bold 粗一点
<style>
p.n{
font-weight:normal;
}
p.b{
font-weight:bold;
}
</style>
<p >标准字体</p>
<p class="n">标准字体</p>
<p class="b">粗一点</p>
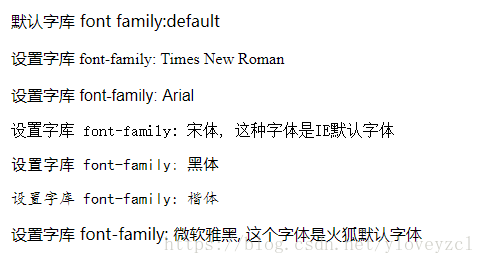
字库
属性font-family
<style>
p.f1{
font-family:"Times New Roman";
}
p.f2{
font-family:Arial;
}
p.f3{
font-family:宋体;
}
p.f4{
font-family:黑体;
}
p.f5{
font-family:楷体;
}
p.f6{
font-family:微软雅黑;
}
</style>
<p >默认字库 font family:default </p>
<p class="f1">设置字库 font-family: Times New Roman</p>
<p class="f2">设置字库 font-family: Arial</p>
<p class="f3">设置字库 font-family: 宋体, 这种字体是IE默认字体</p>
<p class="f4">设置字库 font-family: 黑体</p>
<p class="f5">设置字库 font-family: 楷体</p>
<p class="f6">设置字库 font-family: 微软雅黑, 这个字体是火狐默认字体</p>
声明在一起
把大小,风格,粗细,字库都写在一行里面

<style>
p.all{
font:italic bold 30px "Times New Roman";
}
</style>
<p>默认字体</p>
<p class="all">斜体的 粗体的 大小是30px的 "Times New Roman" </p>
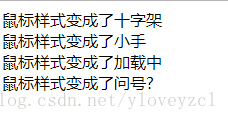
1.1.6 鼠标样式
<style>
span{
cursor:crosshair;
}
#pointer{
cursor: pointer;
}
#wait{
cursor: wait;
}
#help{
cursor: help;
}
</style>
<span>鼠标样式变成了十字架</span><br />
<span id="pointer">鼠标样式变成了小手</span><br />
<span id="wait">鼠标样式变成了加载中</span><br />
<span id="help">鼠标样式变成了问号?</span>
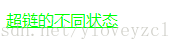
1.1.7 超链接状态
伪类,所谓的伪类即被选中的元素处于某种状态的时候
超链状态有4种
link - 初始状态,从未被访问过
visited - 已访问过
hover - 鼠标悬停于超链的上方
active - 鼠标左键点击下去,但是尚未弹起的时候
<style>
a:link {color: #FF0000}
a:visited {color: #00FF00}
a:hover {color: #FF00FF}
a:active {color: #0000FF}
</style>
<a href="http://www.12306.com">超链的不同状态</a>
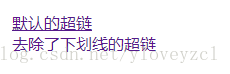
去除超链的下划线
默认状态下,超链是有下划线的,但是现在网站上的超链普遍采用无下划线风格。
使用 text-decoration: none 文本修饰的样式来解决
<style>
a.no_underline {text-decoration: none}
</style>
<a href="http://www.12306.com">默认的超链</a>
<br>
<a class="no_underline" href="http://www.12306.com">去除了下划线的超链</a>
1.1.8 CSS文件
把样式代码写在style.css,并在html中包含它
创建一个文件叫style.css
其内容为
.p1{
color:red;
}
.span1{
color:blue;
}
然后在html中包含该文件
<link rel="stylesheet" type="text/css" href="style.css" />

<link rel="stylesheet" type="text/css" href="style.css" />
<p class="p1">红色</p>
<span class="span1">蓝色</span>
1.1.9 优先级
style标签上的与style属性冲突
style标签上的与style属性冲突
优先使用style属性

<style>
.p1{
color:green;
}
</style>
<p class="p1" style="color:red">p1 颜色是红色,优先使用style属性</p>
!important
如果样式上增加了!important,则优先级最高,甚至高于style属性

<style>
.p1{
color:green !important;
}
</style>
<p class="p1" style="color:red">p1 颜色是绿色,优先使用!important样式</p>
1.2 布局
1.2.1 显示方式
内联-块级
内联是不换行,但是不能指定大小
块级时能指定大小,但是会换行
有时候,需要元素处于同一行,同时还能指定大小,这个时候,就需要用到内联-块级 inline-block

<style>
span{
display:inline-block;
border: 1px solid lightgray;
margin:10px;
width:100px;
}
</style>
像这样 ,每个都能设置宽度 ,同时还能在同一行。
<br>
<span>盖伦</span>
<span>蒙多医生</span>
<span>奈德丽</span>
<span>蒸汽机器人</span>
1.2.2 水平居中
内容居中

<style>
div{
border:1px solid lightgray;
margin:10px;
}
</style>
<div align="center">
通过设置属性align="center" 居中的内容
</div>
<div style="text-align:center">
通过样式style="text-align:center" 居中的内容
</div>
左侧固定,右边自动占满

<style>
.left{
width:200px;
float:left;
background-color:pink
}
.right{
overflow:hidden;
background-color:lightskyblue;
}
</style>
<div class="left">左边固定宽度</div>
<div class="right">右边自动填满</div>
左右固定,中间自适应的布局

<style>
.left{
width:200px;
float:left;
background-color:pink
}
.right{
width:200px;
float:right;
background-color:pink
}
.center {margin:0 200px; background-color:lightblue}
</style>
<div class="left">左边固定宽度</div>
<div class="right">左边固定宽度</div>
<div class="center">中间自适应</div>
一个div始终贴在下方
首先把蓝色div设置为相对定位
然后把内部的绿色div设置为绝对定位, bottom: 0表示贴在下面

<style>
#div1
{
position: relative;
height: 300px;
width: 90%;
background-color: skyblue;
}
#div2
{
position: absolute;
bottom: 0;
height: 30px;
width: 100%;
background-color: lightgreen;
}
</style>
<div id="div1">
<div id="div2"> 无论蓝色div高度如何变化,绿色div都会贴在下面
</div>
</div>
1.3 综合性练习1

1.4 应用
显示部分图片
1.4.1 使用背景方式
第一种方式,使用背景的方式获取一部分图片
对div使用背景图片
background:transparent url(wangwang.gif) no-repeat scroll -83px -0px ;
等同于
background-color:transparent;
background-image:url(wangwang.gif);
background-repeat:no-repeat;
background-attachment:scroll;
background-position: -83px -0px;
设置scroll -83px -0px 把图片向左滚动83个像素,向上滚动0个像素。
再把div大小设置为和小图片大小一样,即可大小只显示部分图片的效果

<style>
div{
width:25;
height:25;
background:transparent url(wangwang.gif) no-repeat scroll -83px -0px ;
}
</style>
<div></div>
使用img方式
借助裁剪的方式只显示部分图片:
clip:rect(top, right, bottom, left)
裁剪之后,只显示被裁剪出来的图片,所以还需要把整个图片向左移动,才看上去像拿到了想要的那部分图片
img{
position:absolute;
left:-83px;
clip:rect(0px 108px 25px 83px);
}
<style>
img{
position:absolute;
left:-83px;
clip:rect(0px 108px 25px 83px);
}
</style>
<img src="wangwang.gif">