【转载】Linux升级NTPD服务器-编译安装ntp-4.2.8p12与配置

【转载】Linux升级NTPD服务器-编译安装ntp-4.2.8p12与配置

1. 系统与软件版本

1.1 系统版本

rhel6.4(Red Hat Enterprise Linux Server release 6.4 (Santiago))

1.2 ntpd软件版本

ntp-4.2.8p12.tar.gz 

1.3 下载地址

官方下载地址:http://support.ntp.org/bin/view/Main/SoftwareDownloads

参考文档:http://www.linuxfromscratch.org/blfs/view/svn/basicnet/ntp.html

2. 安装前提

2.1 安装依赖包

# 特别注意:先用命令rpm -qa | grep "gcc/gcc-c++/openssl-devel/ libstdc++* /libcap*"查看本系统是否已经安装有这些软件包,有的话就不需要再次安装!

[root@ntpserver ~]# yum install gcc gcc-c++ openssl-devel libstdc++* libcap*

一般显示输出的话就代表已经安装此软件包了!

2.2 备份旧版本的配置文件

[root@ntpserver ~]# cp -ar /etc/ntp /etc/ntp.bak
[root@ntpserver ~]# cp /etc/ntp.conf /etc/ntp.conf.bak
[root@ntpserver ~]# cp /etc/init.d/ntpd /etc/init.d/ntpd.bak
[root@ntpserver ~]# cp /etc/sysconfig/ntpd /etc/sysconfig/ntpd.bak
[root@ntpserver ~]# cp /etc/sysconfig/ntpdate /etc/sysconfig/ntpdate.bak

2.3 卸载yum安装的ntpd服务

[root@ntpserver ~]# yum erase ntp ntpdate

3. 编译安装ntp-4.2.8p9

3.1 创建/var/lib/ntp目录

[root@ntpserver ~]# install -v -m710 -o ntp -g ntp -d /var/lib/ntp

3.2 编译安装ntpd

# 这里要特别注意编译安装的命令格式:

[root@ntpserver ntp-4.2.8p9]# ./configure \--prefix=/usr \--bindir=/usr/sbin \--sysconfdir=/etc \--enable-linuxcaps \--with-lineeditlibs=readline \--docdir=/usr/share/doc/ntp-4.2.8p9 \--enable-all-clocks \--enable-parse-clocks \--enable-clockctl
[root@ntpserver ntp-4.2.8p9]# make && make install 

4. 创建配置文件

[root@ntpserver ~]# cp /etc/init.d/ntpd.bak /etc/init.d/ntpd
[root@ntpserver ~]# cp /etc/sysconfig/ntpd.bak /etc/sysconfig/ntpd
[root@ntpserver ~]# cp /etc/sysconfig/ntpdate.bak /etc/sysconfig/ntpdate
[root@ntpserver ~]# mv /etc/ntp.bak /etc/ntp
[root@ntpserver ~]# cp /etc/ntp.conf.bak /etc/ntp.conf

5. 配置ntp.conf

在/etc/ntp.conf配置文件添加以下参数

server 127.127.1.0 # 这里以自己为ntpserver测试

fudge 127.127.1.0 stratum 10

下面是实际生产中的例子:

启动/重启ntpd服务

[root@ntpserver ~]# service ntpd start/restart

检查ntp服务是否开机启动,将其设置为开机启动。

[root@localhost ~]# chkconfig --list ntpd

ntpd 0:off 1:off 2:off 3:off 4:off 5:off 6:off

[root@localhost ~]# runlevel

N 3

[root@localhost ~]# chkconfig ntpd on #在运行级别2、3、4、5上设置为自动运行

[root@localhost ~]# chkconfig --list ntpd

ntpd 0:off 1:off 2:on 3:on 4:on 5:on 6:off


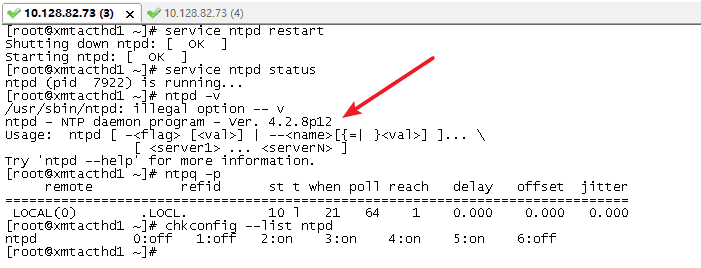
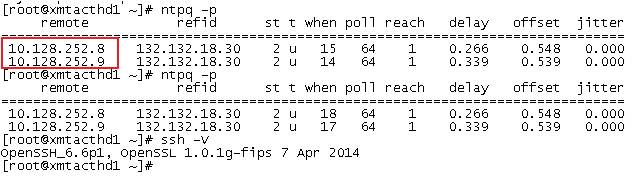
# 最后查看ntpd的版本,重启系统,验证服务:

6. 客户端配置

[root@localhost ~]# date
Sat Aug 8 08:08:13 CST 2015

/etc/ntp.conf添加服务端IP地址

server 10.17.83.106

[root@localhost ~]# ntpq -p
remote refid st t when poll reach delay offset jitter
==============================================================================
10.17.83.106 10.17.82.25 12 u 3 64 1 0.628 4279381 0.001

等待几分钟,ntpd客户端自动去同步服务端的时间
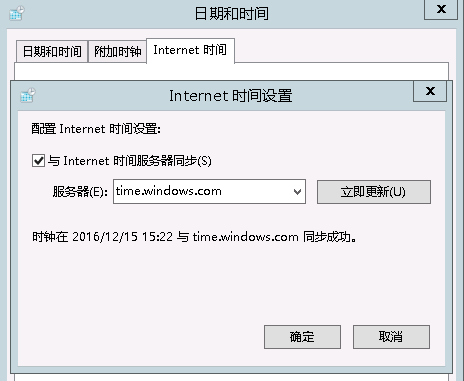
[root@localhost ~]# date
Sat Aug 8 08:11:10 CST 2015
[root@localhost ~]# dat
Thu Dec 15 15:28:41 CST 2016

Windows客户端配置

文章转载来源: http://blog.51cto.com/7424593/1883058

The end!
**************************************************************************************************
                                                        Good lucky to you
**************************************************************************************************

猜你喜欢

转载自www.cnblogs.com/520ZXL/p/9630798.html