前言:
记得上次分享过一篇小程序的文章《时隔两年,我开始学习微信小程序了~~仿小米手机天气预报》,那是我首次学习小程序,转眼间又过去大半年了,这次我就来谈谈--->小程序蓝牙开发。
一、你了解蓝牙吗?
蓝牙是一种无线技术标准,可实现固定设备、移动设备和楼宇个人域网之间的短距离数据交换(使用2.4—2.485GHz的ISM波段的UHF无线电波)。蓝牙技术最初由电信巨头爱立信公司于1994年创制,当时是作为RS232数据线的替代方案。蓝牙可连接多个设备,克服了数据同步的难题。
相信负责移动端开发的朋友们或大或小都有了解过“经典蓝牙”和“低功耗蓝牙”这两个代名词;而我总结了一下他们的优缺点:
1、android手机必须系统版本4.3及以上才支持BLE API。BLE蓝牙较传统蓝牙, 传输速度更快,覆盖范围更广,安全性更高,延迟更短,耗电极低等等优点;
2、传统蓝牙与BLE蓝牙通信方式也有所不同,传统的一般通过socket方式,而BLE蓝牙是通过Gatt协议来实现;
3、传统蓝牙可以用与数据量比较大的传输,如语音,音乐,较高数据量传输等;
低功耗蓝牙这样应用于实时性要求比较高,但是数据速率比较低的产品,如遥控类的,如鼠标,键盘,遥控鼠标(Air Mouse),传感设备的数据发送,如心跳带,血压计,温度传感器等一些医疗器械。
二、小程序蓝牙开发
一直以来我都是负责Android端的蓝牙软件项目开发,突然间某某某领导对我说要用小程序开发,那时我心中有一百个不爽,由于小程序的API已经对蓝牙提供支持了,我也没有什么理由去推卸了,但我只能说对领导说关于小程序蓝牙开发还不够成熟,其中可能会有兼容性问题,对于可行性问题我也不太确定,所以我也是抱着学习的心态去面对的。开始行动起来吧,相信敢于挑战,敢于付出的人,肯定有所收获的。
首先小程序开发 离不开小程序开发文档:先去了解和熟悉蓝牙API;都看一遍,对整个蓝牙开发流程也不过如此简单,都是一些api的套路罢了。
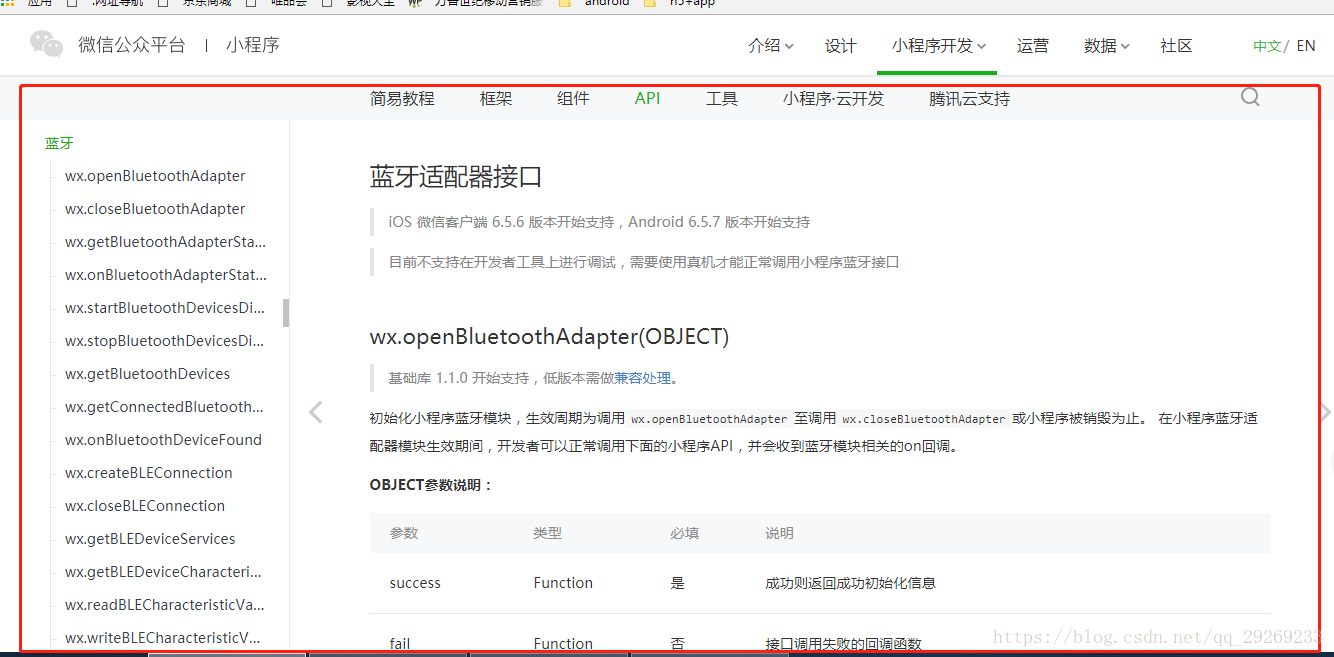
微信客户端对小程序蓝牙的支持版本为:iOS 微信客户端 6.5.6 版本开始支持,Android微信客户端 6.5.7 版本开始支持,此外还需要注意的就是Android系统需要Android4.3以上才可以使用蓝牙BLE,而小程序蓝牙只支持BLE,这点需要注意下。
1.获取当前设备平台以及微信版本,判断是否支持小程序蓝牙:
//获取当前设备平台以及微信版本
    if (app.getPlatform() == 'android' && this.versionCompare('6.5.7', app.getWxVersion())) {
      wx.showModal({
        title: '提示',
        content: '当前微信版本过低,请更新至最新版本',
        showCancel: false,
        success: function (res) {
          if (res.confirm) {
            that.backPage();
          }
        }
      })

    } else if (app.getPlatform() == 'ios' && this.versionCompare('6.5.6', app.getWxVersion())){
      wx.showModal({
        title: '提示',
        content: '当前微信版本过低,请更新至最新版本',
        showCancel: false,
        success: function (res) {
          if (res.confirm) {
            that.backPage();
          }
        }
      })
}2.初始化小程序蓝牙模块,生效周期为调用wx.openBluetoothAdapter至调用wx.closeBluetoothAdapter或小程序被销毁为止。 在小程序蓝牙适配器模块生效期间,开发者可以正常调用下面的小程序API,并会收到蓝牙模块相关的on回调。
//初始化小程序蓝牙模块
  openBluetoothAdapter:function(){
    var that = this;
    wx.openBluetoothAdapter({
      success: function (res){
        var log = that.data.textLog + "打开蓝牙适配器成功!\n";
        that.setData({
          textLog: log,
          isopen:true
        });
        that.getBluetoothAdapterState();
      },
      fail: function (err){
        isopen: true;
        app.toastTap("蓝牙开关未开启");
        var log = that.data.textLog + "蓝牙开关未开启 \n";
        that.setData({
          textLog: log
        });
      }
    })
    //监听蓝牙适配器状态变化事件
    wx.onBluetoothAdapterStateChange(function (res) {
      console.log('onBluetoothAdapterStateChange', res)
      var isDvailable = res.available;//蓝牙适配器是否可用
      if (isDvailable) {
        that.getBluetoothAdapterState();
      } else {
        that.stopBluetoothDevicesDiscovery();//停止搜索
        that.setData({
          devices: []
        });
        app.toastTap1("蓝牙开关未开启");
      }
    })
  }
3.获取本机蓝牙适配器状态
getBluetoothAdapterState: function () {
    var that = this;
    wx.getBluetoothAdapterState({
      success: function (res) {
        var isDiscov = res.discovering;//是否正在搜索设备
        var isDvailable = res.available;//蓝牙适配器是否可用
        if (isDvailable) {
          var log = that.data.textLog + "本机蓝牙适配器状态:可用 \n";
          that.setData({
            textLog: log
          });
          if (!isDiscov){
            that.startBluetoothDevicesDiscovery();
          }else{
            var log = that.data.textLog + "已在搜索设备 \n";
            that.setData({
              textLog: log
            });
          }
        }
      }
    })
  }
4.开始扫描附近的蓝牙外围设备。注意,该操作比较耗费系统资源,请在搜索并连接到设备后调用 stop 方法停止搜索。
wx.startBluetoothDevicesDiscovery({
      services: [],// 以微信硬件平台的蓝牙智能灯为例,主服务的 UUID 是 FEE7。传入这个参数:services: ['FEE7'],只搜索主服务 UUID 为 FEE7 的设备
      allowDuplicatesKey: true,  //是否允许重复上报同一设备, 如果允许重复上报,则onDeviceFound 方法会多次上报同一设备,但是 RSSI(信号) 值会有不同
      success: function (res) {
        var log = that.data.textLog + "扫描附近的蓝牙外围设备成功,准备监听寻找新设备:" + res+"\n";
        that.setData({
          textLog: log
        });
        that.onBluetoothDeviceFound();  //监听寻找到新设备的事件
      }
    });
5.监听寻找到新设备的事件;Android 上获取到的deviceId为设备 MAC 地址,iOS 上则为设备 uuid。因此deviceId不能硬编码到代码中
//监听寻找到新设备的事件
  onBluetoothDeviceFound:function() {
    var that = this;
    wx.onBluetoothDeviceFound(function(res) {
      res.devices.forEach(function (device) {
        if (!device.name && !device.localName) {
          return
        }
        const foundDevices = that.data.devices;
        const idx = inArray(foundDevices, 'deviceId', device.deviceId);
        const data = {};
        if (idx === -1) {
          data[`devices[${foundDevices.length}]`] = device
        } else {
          data[`devices[${idx}]`] = device
        }
        that.setData(data)
      })
    })
  }
至此整个过程就完成了对设备的搜索操作,这时就可以对扫描到的设备id以及name,进行处理;不过这个过程需要注意的是:安卓和IOS差别很大,安卓设备地址就是mac地址,但是IOS无法获取mac地址,所以设备地址是针对本机范围有效的UUID,所以这里需要注意。剩下的就是蓝牙设备的连接、读、写、还有监听获取返回值了。
6.连接低功耗蓝牙设备。
wx.createBLEConnection({
  // 这里的 deviceId 需要已经通过 createBLEConnection 与对应设备建立链接
  deviceId: deviceId,
  success: function (res) {
    console.log(res)
  }
})
当使用此方法成功连接蓝牙设备后,需要使用方法:wx.stopBluetoothDevicesDiscovery() 关闭蓝牙扫描功能,释放资源,减少消耗。
7.获取蓝牙设备所有 service(服务)
//获取蓝牙设备所有 service(服务)
  getBLEDeviceServices:function(devId) {
    var that = this;
    wx.getBLEDeviceServices({
      deviceId:devId,
      success: function(res) {
        for (let i = 0; i < res.services.length; i++) {
          if (res.services[i].isPrimary) {//该服务是否为主服务
            var log = that.data.textLog + "该服务是否为主服务:" + res.services[i].isPrimary + "\n";
            that.setData({
              textLog: log
            });

          }
        }
      }
    })
  }
8.获取到服务ID后,就可以获取蓝牙设备某个服务中的所有 characteristic(特征值)
//获取蓝牙设备某个服务中的所有 characteristic(特征值)
  getBLEDeviceCharacteristics: function (deviceId, serviceId){
    var that = this;
    wx.getBLEDeviceCharacteristics({
      deviceId: deviceId,
      serviceId: serviceId,
      success: function (res) {
        for (let i = 0; i < res.characteristics.length; i++) {
          let item = res.characteristics[i]
          if (item.properties.read) {//该特征值是否支持 read 操作
            var log = that.data.textLog + "该特征值支持 read 操作:" + item.uuid + "\n";
            that.setData({
              textLog: log,
              readCharacteristicId: item.uuid
            });
          }
          if (item.properties.write) {//该特征值是否支持 write 操作
            var log = that.data.textLog + "该特征值支持 write 操作:" + item.uuid + "\n";
            that.setData({
              textLog: log,
              writeCharacteristicId: item.uuid,
              canWrite:true
            });
          }
          if (item.properties.notify) {//该特征值是否支持 notify或indicate 操作
            var log = that.data.textLog + "该特征值支持 notify 操作:" + item.uuid + "\n";
            that.setData({
              textLog: log,
              notifyCharacteristicId: item.uuid,
            });
            that.notifyBLECharacteristicValueChange();
          }

        }

      }
    })
  }
至此,我们已经获取了 读的特征值UUID,有些设备不支持读操作的话,就没有这个UUID;我们还获取了写操作的UUID,如果没有此UUID的话,我们的设备就不支持写入指令操作;我们还获取了notify UUID,是用来执行广播监听事件的,就是写入指令后,蓝牙设备有返回数值,都可以监听接收。
9.开启监听蓝牙设备的返回值,读写操作成功后的返回值也是在下面onBLECharacteristicValueChange这个方法获取,这里相当于Android蓝牙BLE的开启广播监听。
notifyBLECharacteristicValueChange:function(){
    var that = this;
    wx.notifyBLECharacteristicValueChange({
      state: true, // 启用 notify 功能
      deviceId: that.data.deviceId,
      serviceId: that.data.serviceId,
      characteristicId: that.data.notifyCharacteristicId,
      success: function (res) {
        var log = that.data.textLog + "notify启动成功\n";
        that.setData({
          textLog: log,
        });
        that.onBLECharacteristicValueChange();   //监听特征值变化

      },
      fail: function (res) {
        wx.showToast({
          title: 'notify启动失败',
          mask: true
        });
        setTimeout(function () {
          wx.hideToast();
        }, 2000)
      }
    })

  },
  //监听低功耗蓝牙设备的特征值变化。必须先启用notify接口才能接收到设备推送的notification。
  onBLECharacteristicValueChange:function(){
    var that = this;
    var log = that.data.textLog + "准备监听低功耗蓝牙设备的特征值变化\n";
    that.setData({
      textLog: log,
    });
    wx.onBLECharacteristicValueChange(function (res) {
      var log = that.data.textLog + "监听低功耗蓝牙设备的特征值变化\n";
      that.setData({
        textLog: log,
      });
      // var resValue = that.ab2hext(res.value); //16进制字符串

    });
  }
10.最后一步,读或写操作;这里需要注意的是:小程序中对蓝牙数据的传递是使用ArrayBuffer的二进制类型来的,所以在我们的使用过程中需要进行转码再进行读或者写操作。
//读
wx.readBLECharacteristicValue({
  // 这里的 deviceId 需要已经通过 createBLEConnection 与对应设备建立链接  [**new**]
  deviceId: deviceId,
  // 这里的 serviceId 需要在上面的 getBLEDeviceServices 接口中获取
  serviceId: serviceId,
  // 这里的 characteristicId 需要在上面的 getBLEDeviceCharacteristics 接口中获取
  characteristicId: characteristicId,
  success: function (res) {
    console.log('readBLECharacteristicValue:', res.errCode)
  }
})


、、、、、


//写
wx.writeBLECharacteristicValue({
  // 这里的 deviceId 需要在上面的 getBluetoothDevices 或 onBluetoothDeviceFound 接口中获取
  deviceId: deviceId,
  // 这里的 serviceId 需要在上面的 getBLEDeviceServices 接口中获取
  serviceId: serviceId,
  // 这里的 characteristicId 需要在上面的 getBLEDeviceCharacteristics 接口中获取
  characteristicId: characteristicId,
  // 这里的value是ArrayBuffer类型
  value: buffer,
  success: function (res) {
    console.log('writeBLECharacteristicValue success', res.errMsg)
  }
})
查看小程序蓝牙api也会发现如下tip:
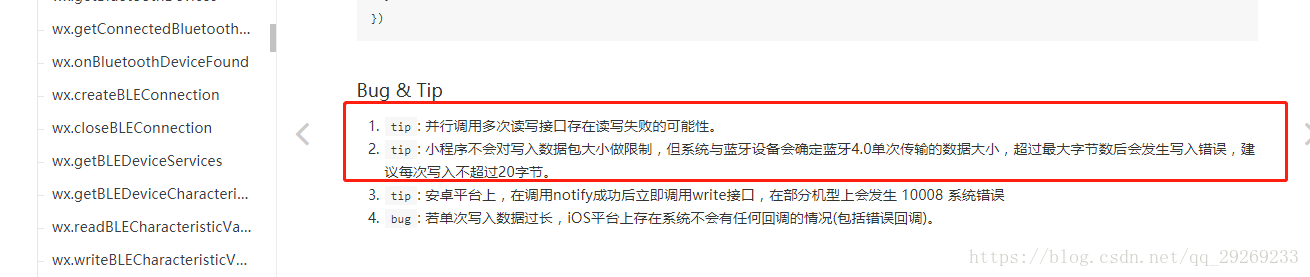
就是要控制单次传送的指令,确保不要超过20个字节,如果超过了,就要进行分包发送了,也就是每次分20个字节,分成多次发送,如果是Android开发的话,可以调整MTU的大小,但是小程序没有封装这个方法,所以只能分包也是可以的。
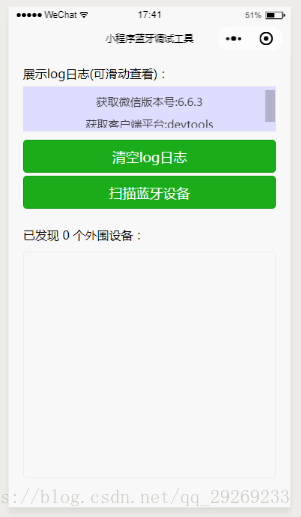
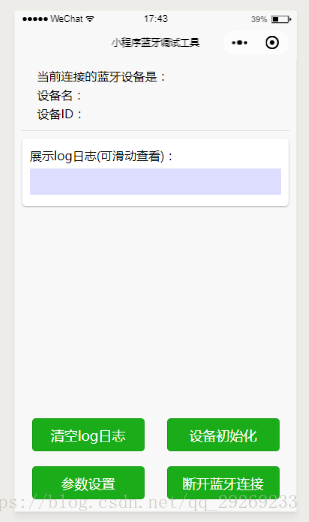
在学习小程序蓝牙的过程中,我也写了个demo:小程序蓝牙demo,希望能帮助到大家,并且也能趁此机会和大家交流,望多多指教。
demo的页面效果图如下: