1、domain类
 1 package com.xiaostudy.domain;
 2
 3 public class User {
 4
 5     private int id;
 6     private String username;
 7     private String password;
 8
 9     public int getId() {
10         return id;
11     }
12
13     public void setId(int id) {
14         this.id = id;
15     }
16
17     public String getUsername() {
18         return username;
19     }
20
21     public void setUsername(String username) {
22         this.username = username;
23     }
24
25     public String getPassword() {
26         return password;
27     }
28
29     public void setPassword(String password) {
30         this.password = password;
31     }
32
33     @Override
34     public String toString() {
35         return "User [id=" + id + ", username=" + username + ", password=" + password + "]";
36     }
37
38 }
2、填写表单数据的jsp
 1 <%@ page language="java" contentType="text/html; charset=UTF-8"
 2     pageEncoding="UTF-8"%>
 3 <!DOCTYPE html PUBLIC "-//W3C//DTD HTML 4.01 Transitional//EN" "http://www.w3.org/TR/html4/loose.dtd">
 4 <html>
 5 <head>
 6     <meta http-equiv="Content-Type" content="text/html; charset=UTF-8">
 7     <title>springMVC</title>
 8 </head>
 9 <body>
10 <form action="${pageContext.request.contextPath }/command.do" method="post">
11     ID:<input type="text" name="id" id="id"/>
12     姓名:<input type="text" name="username" id="username"/>
13     密码:<input type="password" name="password" id="password"/>
14     <input type="submit" value="提交"/>
15 </form>
16 </body>
17 </html>
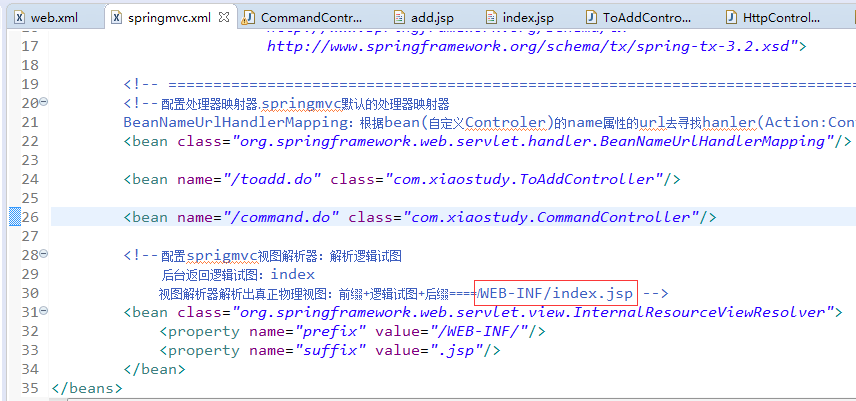
3、springmvc.xml
 1 <?xml version="1.0" encoding="UTF-8"?>
 2 <beans xmlns="http://www.springframework.org/schema/beans"
 3     xmlns:mvc="http://www.springframework.org/schema/mvc"
 4     xmlns:aop="http://www.springframework.org/schema/aop"
 5     xmlns:tx="http://www.springframework.org/schema/tx"
 6     xmlns:context="http://www.springframework.org/schema/context"
 7     xmlns:xsi="http://www.w3.org/2001/XMLSchema-instance"
 8     xsi:schemaLocation="http://www.springframework.org/schema/beans
 9                         http://www.springframework.org/schema/beans/spring-beans-3.2.xsd
10                         http://www.springframework.org/schema/mvc
11                         http://www.springframework.org/schema/mvc/spring-mvc-3.2.xsd
12                         http://www.springframework.org/schema/context
13                         http://www.springframework.org/schema/context/spring-context-3.2.xsd
14                         http://www.springframework.org/schema/aop
15                         http://www.springframework.org/schema/aop/spring-aop-3.2.xsd
16                         http://www.springframework.org/schema/tx
17                         http://www.springframework.org/schema/tx/spring-tx-3.2.xsd">
18
19         <!-- ======================================================================================================= -->
20         <!-- 配置处理器映射器,springmvc默认的处理器映射器
21         BeanNameUrlHandlerMapping:根据bean(自定义Controler)的name属性的url去寻找hanler(Action:Controller) -->
22         <bean class="org.springframework.web.servlet.handler.BeanNameUrlHandlerMapping"/>
23
24         <bean name="/toadd.do" class="com.xiaostudy.ToAddController"/>
25
26         <bean name="/command.do" class="com.xiaostudy.CommandController"/>
27
28         <!-- 配置sprigmvc视图解析器:解析逻辑试图
29              后台返回逻辑试图:index
30             视图解析器解析出真正物理视图:前缀+逻辑试图+后缀====/WEB-INF/index.jsp -->
31         <bean class="org.springframework.web.servlet.view.InternalResourceViewResolver">
32             <property name="prefix" value="/WEB-INF/"/>
33             <property name="suffix" value=".jsp"/>
34         </bean>
35 </beans>
4、负责跳转到add.jsp的类
 1 package com.xiaostudy;
 2
 3 import javax.servlet.http.HttpServletRequest;
 4 import javax.servlet.http.HttpServletResponse;
 5
 6 import org.springframework.web.servlet.ModelAndView;
 7 import org.springframework.web.servlet.mvc.Controller;
 8
 9 public class ToAddController implements Controller{
10
11     public ModelAndView handleRequest(HttpServletRequest request,
12             HttpServletResponse response) throws Exception {
13         ModelAndView mv = new ModelAndView();
14         //调转到add添加页面视图
15         mv.setViewName("add");
16         return mv;
17     }
18
19 }
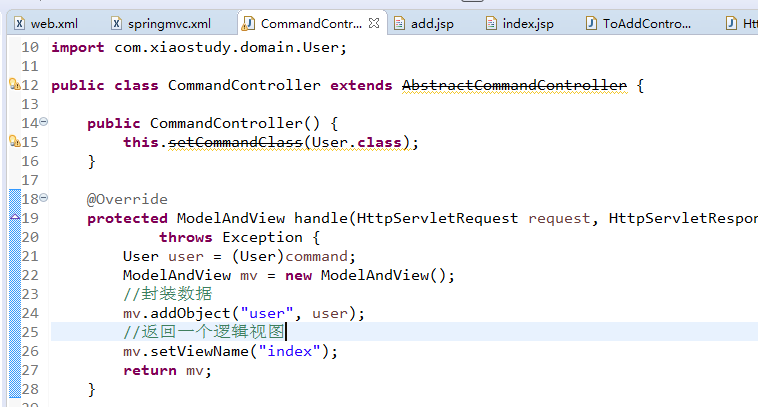
5、处理表单数据类
 1 package com.xiaostudy;
 2
 3 import javax.servlet.http.HttpServletRequest;
 4 import javax.servlet.http.HttpServletResponse;
 5
 6 import org.springframework.validation.BindException;
 7 import org.springframework.web.servlet.ModelAndView;
 8 import org.springframework.web.servlet.mvc.AbstractCommandController;
 9
10 import com.xiaostudy.domain.User;
11
12 public class CommandController extends AbstractCommandController {
13
14     public CommandController() {
15         this.setCommandClass(User.class);
16     }
17
18     @Override
19     protected ModelAndView handle(HttpServletRequest request, HttpServletResponse response, Object command, BindException arg3)
20             throws Exception {
21         User user = (User)command;
22         ModelAndView mv = new ModelAndView();
23         mv.addObject("user", user);
24         mv.setViewName("index");
25         return mv;
26     }
27
28 }
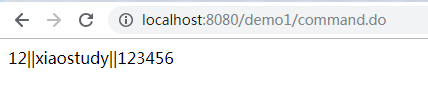
6、返回到jsp中
 1 <%@ page language="java" contentType="text/html; charset=UTF-8" pageEncoding="UTF-8"%>
 2 <!DOCTYPE html PUBLIC "-//W3C//DTD HTML 4.01 Transitional//EN"
 3             "http://www.w3.org/TR/html4/loose.dtd">
 4 <html>
 5 <head>
 6     <meta http-equiv="Content-Type" content="text/html; charset=UTF-8">
 7     <title>springMVC_demo</title>
 8 </head>
 9 <body>
10     ${user.id }||${user.username }||${user.password }
11 </body>
12 </html>
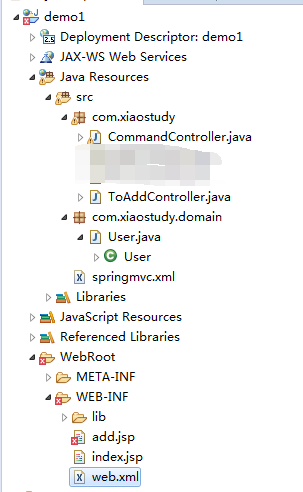
项目文件路径
分析执行过程
1、浏览器通过地址访问,经过web.xml拦截,交给springmvc.xml

2、springmvc.xml通过匹配,找到相应的类

3、类返回一个逻辑视图

4、springmvc.xml解析逻辑视图,得到物理视图路径


5、填写表单数据并提交数据


6、web.xml拦截,交给springmvc.xml去处理,springmvc.xml通过匹配,找到相应的类

7、类处理表单数据,并返回一个逻辑视图
8、springmvc.xml解析逻辑视图,得到物理视图路径

9、把数据返回给用户