整合思路
Dao 层:
1、SqlMapConfig.xml
- 空文件即可(可以配置一下别名),但是需要文件头。
2、applicationContext.xml
- 数据库连接池
- SqlSessionFactory 对象,需要 spring 和 mybatis 整合包下的。
- 配置 mapper 文件扫描器。
Service 层:
- applicationContext-trans.xml 配置事务 。
Controller 层:
1、Springmvc.xml
- 配置包扫描器,扫描 @service 和 @Controller 的注解的类
- 配置注解驱动
- 配置视图解析器
Web.xml 文件
- 配置 spring
- 配置前端控制器。
SpringMVC+Mybatis+Spring 案例
需求:页面显示所有商品信息并且提供修改功能。
1.搭建数据库环境

CREATE DATABASE mybatis;
DROP TABLE IF EXISTS `items`;
CREATE TABLE `items` (
  `id` INT(11) NOT NULL AUTO_INCREMENT,
  `name` VARCHAR(32) NOT NULL COMMENT '商品名称',
  `price` FLOAT(10,1) NOT NULL COMMENT '商品定价',
  `detail` TEXT COMMENT '商品描述',
  `pic` VARCHAR(64) DEFAULT NULL COMMENT '商品图片',
  `createtime` DATETIME NOT NULL COMMENT '生产日期',
  PRIMARY KEY (`id`)
) ENGINE=INNODB AUTO_INCREMENT=4 DEFAULT CHARSET=utf8;

-- ----------------------------

INSERT INTO `items` VALUES ('1', '小米8', '3000.0', '超大屏幕!', NULL, '2018-02-03 13:22:53');
INSERT INTO `items` VALUES ('2', '小米8 SE', '2000.0', '5.78屏幕,性价比高', NULL, '2018-02-09 13:22:57');
INSERT INTO `items` VALUES ('3', '荣耀10', '2600', 'AI拍摄', NULL, '2019-02-06 13:23:02');2.创建 Web 工程,导入 Spring(包括 SpringMVC),Mybatis,mybatis-spring 整合包,Mysql 驱动,连接池等 jar 包3.通过 Mybatis 逆向工程生成 POJO 对象和 Mapper 接口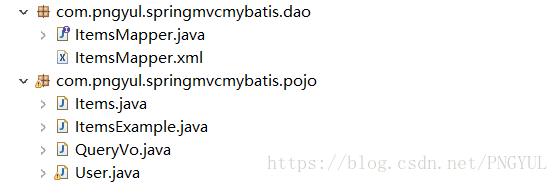
4.配置 Spring 配置文件,applicationContext.xml

<?xml version="1.0" encoding="UTF-8"?>
<beans xmlns:xsi="http://www.w3.org/2001/XMLSchema-instance"
    xmlns="http://www.springframework.org/schema/beans"
    xmlns:context="http://www.springframework.org/schema/context"
    xmlns:tx="http://www.springframework.org/schema/tx"
    xmlns:aop="http://www.springframework.org/schema/aop"
    xsi:schemaLocation="http://www.springframework.org/schema/beans
    http://www.springframework.org/schema/beans/spring-beans-4.2.xsd
    http://www.springframework.org/schema/context http://www.springframework.org/schema/context/spring-
    context-4.2.xsd http://www.springframework.org/schema/tx
    http://www.springframework.org/schema/tx/spring-tx-4.2.xsd http://www.springframework.org/schema/aop
    http://www.springframework.org/schema/aop/spring-aop-4.2.xsd ">
    <!-- 指定 spring 读取 db.properies 配置 -->
    <context:property-placeholder location="classpath:config/db.properties" />
    <!-- 配置连接池 -->
    <bean name="dataSource" class="com.mchange.v2.c3p0.ComboPooledDataSource">
        <property name="jdbcUrl" value="${jdbc.jdbcUrl}"></property>
        <property name="driverClass" value="${jdbc.driverClass}"></property>
        <property name="user" value="${jdbc.user}"></property>
        <property name="password" value="${jdbc.password}"></property>
    </bean>
    <!-- 配置 mybatis 工厂 -->
    <bean id="sqlSessionFactory" class="org.mybatis.spring.SqlSessionFactoryBean">
        <!-- 配置 Mybatis 核心配置文件 -->
        <property name="configLocation" value="classpath:config/SqlMapConfig.xml"></property>
        <!-- 配置数据源 -->
        <property name="dataSource" ref="dataSource"></property>
    </bean>

    <!-- 配置 mapper 扫描 -->
    <bean class="org.mybatis.spring.mapper.MapperScannerConfigurer">
        <property name="basePackage" value="com.pngyul.springmvcmybatis.dao" />
    </bean>
</beans>
5.配置 spring-mvc 配置文件

<?xml version="1.0" encoding="UTF-8"?>
<beans xmlns:xsi="http://www.w3.org/2001/XMLSchema-instance" xmlns="http://www.springframework.org/schema/beans"
xmlns:context="http://www.springframework.org/schema/context"
xmlns:tx="http://www.springframework.org/schema/tx"
xmlns:aop="http://www.springframework.org/schema/aop"
xmlns:mvc="http://www.springframework.org/schema/mvc"
xsi:schemaLocation="http://www.springframework.org/schema/beans
http://www.springframework.org/schema/beans/spring-beans-4.2.xsd
http://www.springframework.org/schema/context http://www.springframework.org/schema/context/spring-
context-4.2.xsd http://www.springframework.org/schema/tx
http://www.springframework.org/schema/tx/spring-tx-4.2.xsd http://www.springframework.org/schema/aop
http://www.springframework.org/schema/aop/spring-aop-4.2.xsd
http://www.springframework.org/schema/mvc http://www.springframework.org/schema/mvc/spring-mvc-4.0.xsd ">
<!-- 手动配置处理器 映射器
<bean class="org.springframework.web.servlet.mvc.method.annotation.RequestMappingHandlerMapping"> </bean>
手动配置处理器适配器
<bean class="org.springframework.web.servlet.mvc.method.annotation.RequestMappingHandlerAdapter"></bean> -->

<!-- 注解驱动 -->
<mvc:annotation-driven></mvc:annotation-driven>
<bean class="org.springframework.web.servlet.view.InternalResourceViewResolver">
  <!--  配置逻辑视图的前缀 -->
  <property name="prefix" value="/WEB-INF/jsp/"></property>
  <!--  配置逻辑视图的后-->
  <property name="suffix" value=".jsp"></property>
</bean>
<!-- 注解扫描 -->
<context:component-scan base-package="com.pngyul.springmvcmybatis" />
</beans>
6.配置 Mybatis 核心配置文件

<?xml version="1.0" encoding="UTF-8" ?>
<!DOCTYPE configuration
PUBLIC "-//mybatis.org//DTD Config 3.0//EN"
"http://mybatis.org/dtd/mybatis-3-config.dtd">
<configuration>
    <!-- 配置别名 -->
    <typeAliases>
        <package name="com.pngyul.springmvcmybatis.pojo" />
    </typeAliases>

</configuration>
7.配置 Web.xml
<?xml version="1.0" encoding="UTF-8"?>
<web-app xmlns:xsi="http://www.w3.org/2001/XMLSchema-instance"
xmlns="http://java.sun.com/xml/ns/javaee"
xsi:schemaLocation="http://java.sun.com/xml/ns/javaee http://java.sun.com/xml/ns/javaee/web-app_2_5.xsd"
id="WebApp_ID" version="2.5">
<display-name>springmvc_mybatis</display-name>
<welcome-file-list>
<welcome-file>index.html</welcome-file>
<welcome-file>index.htm</welcome-file>
<welcome-file>index.jsp</welcome-file>
<welcome-file>default.html</welcome-file>
<welcome-file>default.htm</welcome-file>
<welcome-file>default.jsp</welcome-file>
</welcome-file-list>
<!-- 配置 spring 配置文件 -->
<context-param>
<param-name>contextConfigLocation</param-name>
<param-value>classpath:config/applicationContext.xml</param-value>
</context-param>
<!-- 使用监听器加载 Spring 配置文件 -->
<listener>
<listener-class>org.springframework.web.context.ContextLoaderListener</listener-class>
</listener>
<!-- 配置 springmvc 前端控制器 -->
<servlet>
<servlet-name>springmvc</servlet-name>
<servlet-class>org.springframework.web.servlet.DispatcherServlet</servlet-class>
<init-param>
<param-name>contextConfigLocation</param-name>
<param-value>classpath:config/springmvc.xml</param-value>
</init-param>
</servlet>
<servlet-mapping>
<servlet-name>springmvc</servlet-name>
<url-pattern>*.action</url-pattern>
</servlet-mapping>
</web-app>7.创建 Service 层
public interface ItemsService {
//查询所有商品
List<Items> queryItemList();
}@Service
public class ItemsServiceImpl implements ItemsService{
@Autowired
private ItemsMapper itemsMapper;
//查询所有商品
@Override
public List<Items> queryItemList() {
//ItemsExample example = new ItemsExample();
List<Items> list = itemsMapper.selectByExampleWithBLOBs(null);
return list;
}
}8.创建 Controller
@Controller
public class ItemController {
@Autowired
private ItemsService itemsService;
//查询数据库所有商品
@RequestMapping("/itemListFromDd.action")
public ModelAndView queryItemListFromDd(){
List<Items> itemList = itemsService.queryItemList();
ModelAndView mAV = new ModelAndView();
mAV.addObject("itemList", itemList);
mAV.setViewName("itemList");
return mAV;
}
}9.编写 JSP 页面
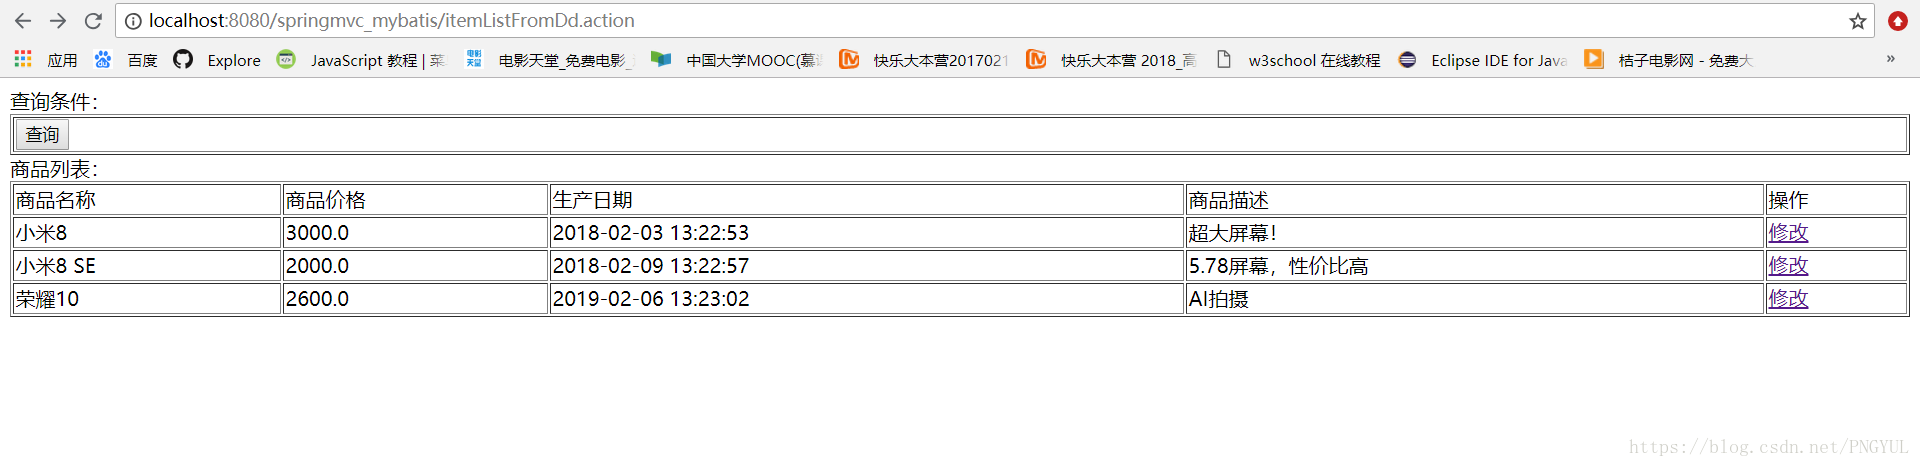
商品列表:
<table width="100%" border=1>
<tr>
<td>商品名称</td>
<td>商品价格</td>
<td>生产日期</td>
<td>商品描述</td>
<td>操作</td>
</tr>
<c:forEach items="${itemList }" var="item">
<tr>
<td>${item.name }</td>
<td>${item.price }</td>
<td><fmt:formatDate value="${item.createtime}" pattern="yyyy-MM-dd HH:mm:ss"/></td>
<td>${item.detail }</td>
<td><a href="${pageContext.request.contextPath }/itemEdit.action?id=${item.id}">修改</a></td>
</tr>
</c:forEach>
</table>10、测试,结果如下:
修改商品信息
1.我们点击修改按钮,跳转到修改页面,然后将商品内容回显,先创建 service 层

public interface ItemsService {
    //查询所有商品
    List<Items> queryItemList();
    //根据商品id查看商品信息
    Items  queryItemById(Integer id);
    //修改商品信息
    void updateItemById(Items items);
}
@Service
public class ItemsServiceImpl implements ItemsService{
@Autowired
private ItemsMapper itemsMapper;
//查询所有商品
@Override
public List<Items> queryItemList() {
//ItemsExample example = new ItemsExample();
List<Items> list = itemsMapper.selectByExampleWithBLOBs(null);
return list;
}
//根据商品id查看商品信息
@Override
public Items queryItemById(Integer id) {
return itemsMapper.selectByPrimaryKey(id);
}
//修改商品信息
@Override
public void updateItemById(Items items) {
items.setCreatetime(new Date());
itemsMapper.updateByPrimaryKeyWithBLOBs(items);
}
}2.编写 Controller
//根据商品 id 查看商品信息
@RequestMapping("/itemEdit.action")
public String queryItemById0(Integer id,Model modle){
Items item = itemsService.queryItemById(id);
modle.addAttribute("item",item);
return "editItem";
}
//修改商品信息
@RequestMapping("/updateItem.action")
public String updateItem(Items items){
System.out.println(items);
itemsService.updateItemById(items);
return "success";
}我们发现上面的数据提交到数据库后,出现乱码情况。
解决乱码问题
SpringMVC 框架提供了 org.springframework.web.filter.CharacterEncodingFilter 用于解决 POST 方式造成的中文乱码问题。
在 web.xml 中配置.

<!-- 解决 post 乱码问题 -->
    <filter>
        <filter-name>encoding</filter-name>
        <filter-class>org.springframework.web.filter.CharacterEncodingFilter</filter-class>
        <init-param>

            <param-name>encoding</param-name>
            <param-value>UTF-8</param-value>
        </init-param>
    </filter>
    <filter-mapping>
        <filter-name>encoding</filter-name>
        <url-pattern>/*</url-pattern>
    </filter-mapping>