批量管理服务器的工具,无需部署代理,通过ssh进行管理,是python写的
ansible 常用模块 :
(1)shell命令模块执行命令
(2)copy模块批量下发文件或文件夹
(3)script模块批量运行脚本
Python3与ansible的安装
使用源码安装Python3.5
#安装支持包
yum -y install lrzsz vim net-tools gcc gcc-c++ ncurses ncurses-devel unzip zlib-devel zlib openssl-devel openssl
#源码编译Python3.5
tar xf Python-3.5.2.tgz -C /usr/src/
cd /usr/src/Python-3.5.2/
./configure --prefix=/usr/local/python/;make ;make install
ln -s /usr/local/python/bin/python3 /usr/bin/python3

python3 -V
Python 3.5.2
使用pip3安装ansible
/usr/local/python/bin/pip3 install ansible
ln -s /usr/local/python/bin/ansible /usr/local/bin/
ansible --version
ansible 2.6.3
  config file = None
  configured module search path = ['/root/.ansible/plugins/modules', '/usr/share/ansible/plugins/modules']
  ansible python module location = /usr/local/python/lib/python3.5/site-packages/ansible
  executable location = /usr/local/bin/ansible
  python version = 3.5.2 (default, Sep  2 2018, 22:56:37) [GCC 4.8.5 20150623 (Red Hat 4.8.5-28)]
使用公私钥实现SSH无密码登陆
ansible是无代理的,主要是借用ssh来批量管理服务器.ssh默认登陆是需要密码的,所以管理起来比较麻烦.SSH无密码登陆实现以后,使用ansible批量管理服务器就变得简单了。
| ansible |
192.168.50.16 |
| 主机1 | 192.168.50.168 |
| 主机2 | 192.168.50.176 |
#生成密钥对
ssh-keygen -t rsa -f ~/.ssh/id_rsa -P ""
#分发密钥
yum -y install sshpass      #安装sshpass
sshpass -p 123456 ssh-copy-id -i ~/.ssh/id_rsa.pub "-o StrictHostKeyChecking=no" 192.168.50.168
 免密码       密码      上传公钥                              免交互                    去往的主机
#进行免密码登陆测试
ssh 192.168.50.176
hostname -I
192.168.50.176
ansible的简单配置和模块
ansible的配置文件
通过PIP安装的ansible是没有配置文件的。我们需要创建一个
mkdir -p /etc/ansible
vim /etc/ansible/hosts       #ansible主机管理配置文件
[zhujizu]                #被管理的主机组名称
webA ansible_ssh_host=192.168.50.168 ansible_ssh_port=22 ansible_ssh_user=root                 #第一台主机
webB ansible_ssh_host=192.168.50.176 ansible_ssh_port=22 ansible_ssh_user=root  ansible_ssh_pass=123456   #第二台主机
 主机名        定义主机IP                ssh的默认端口号            以什么身份管理     如果没有上传公钥需要指定连接密码
ansible语法:ansible -i /etc/ansible/hosts 主机或主机组 -m 指定模块 -a 命令
不用-i指定配置文件默认为在/etc/ansible/hosts
主机组,主机,all代表所有
进行命令测试:
ansible zhujizu -m ping    #ping整个组
zhuji2 | SUCCESS => {    #连接成功
    "changed": false,
    "ping": "pong"
}
zhuji1 | SUCCESS => {
    "changed": false,
    "ping": "pong"
}
ansible zhuji1 -m ping     #只ping 主机1
zhuji1 | SUCCESS => {
    "changed": false,
    "ping": "pong"
}


ansible all -m ping        #ping 配置文件的所有
zhuji2 | SUCCESS => {
    "changed": false,
    "ping": "pong"
}
zhuji1 | SUCCESS => {
    "changed": false,
    "ping": "pong"
}
ansible的三个命令模块
ansible模块command(不支持管道,不建议使用) #需要python支持,一般都有python
ansible模块shell(支持管道,支持重定向,常用) #需要python支持,一般都有python
ansible模块raw,最原始的方式运行命令(不依赖python,仅通过ssh实现)
ansible all -m shell -a "echo hehe >>/root/wk"    #在所有主机执行输出hehe并重定向到wk文件

zhuji1 | SUCCESS | rc=0 >>


zhuji2 | SUCCESS | rc=0 >>


cat /root/wk           #查看wk文件
hehe
ansible的copy模块批量下发文件或文件夹
copy模块概述
copy模块的参数,ansible 主机组 -m 模块 -a 命令
- src:指定源文件或目录
- dest:指定目标服务器的文件或目录
- backup:是否要备份
- owner:拷贝到目标服务器后,文件或目录的所属用户
- group:拷贝到目标服务器后,文件或目录的所属群组
- mode:文件或目录的权限
所有被管理端节点必须安装libselinux-python包
yum -y install libselinux-python
copy模块拷贝文件
ansible all -m copy -a "src=/root/server/txt dest=/root/server/"
#                       源文件               目标目录(如果目标没有目录可自动创建)如果目标路径里有与我拷贝的文件同名文件的话,会直接覆盖目标路径下的文件
copy模块拷贝目录下所有文件
ansible all -m copy -a "src=/root/server/ dest=/root/server/"
              源目录下所有         目标目录
copy模块自动备份
backup=yes ===>意思是,如果目标路径下,有与我同名但不同内容的文件时,在覆盖前,对目标文件先进行备份。
ansible all -m copy -a "src=/root/server/ dest=/root/server/ backup=yes"
copy模块指定用户和属主
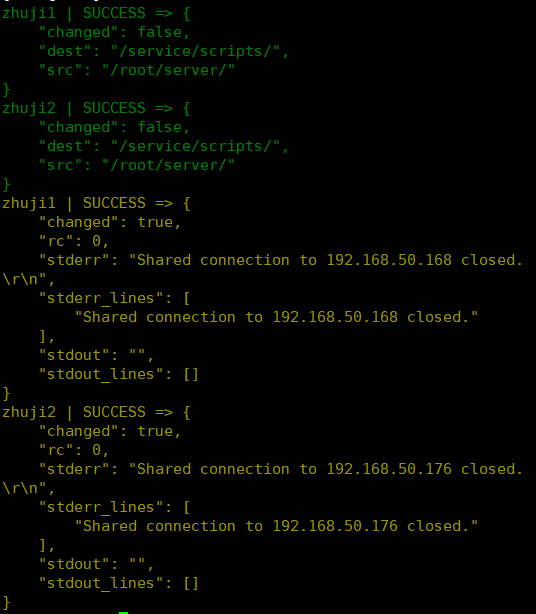
ansible all -m copy -a "src=/service/scripts/ dest=/service/scripts/ owner=nobody group=nobody mode=0600"
                                          属主          属组          权限
ansible的script模块批量运行脚本
ansible的script模块能够实现远程服务器批量运行本地的shell脚本。
#远程批量分发并自动部署nginx
#所有被管理端都能使用yum
pwd
/root/server

ls |xargs -n1
nginx-1.14.0.tar.gz   #nginx源码包
nginx-anzhuang.sh    #自动安装nginx脚本

vim /root/server/nginx-anzhuang.sh      #安装nginx脚本
#!/bin/sh
#nginx install shell scripts
test -d /media/cdrom || mkdir -p /media/cdrom
mount /dev/sr0 /media/cdrom &>/dev/null
yum -y install gcc gcc-c++ make pcre pcre-devel zlib zlib-devel openssl  openssl-devel &>/dev/null
test -d /service/scripts || exit 3
cd /service/scripts/
tar xf nginx-1.14.0.tar.gz -C /usr/src/
cd /usr/src/nginx-1.14.0/
./configure --prefix=/usr/local/nginx --with-http_ssl_module --with-http_stub_status_module &>/dev/null
make &>/dev/null
make install &>/dev/null
exit 0

vim /root/fenfa.sh        #批量分发脚本
#!/bin/sh
#批量分发脚本
Group=$1
ansible $Group -m copy -a "src=/root/server/ dest=/service/scripts/"
ansible $Group -m script -a "/usr/bin/sh /service/scripts/nginx-anzhuang.sh"
~

sh /root/fenfa.sh all     #激活脚本