简介
学习SVM(一) SVM模型训练与分类的OpenCV实现
学习SVM(二) 如何理解支持向量机的最大分类间隔
学习SVM(三)理解SVM中的对偶问题
学习SVM(四) 理解SVM中的支持向量(Support Vector)
学习SVM(五)理解线性SVM的松弛因子
Andrew Ng 在斯坦福大学的机器学习公开课上这样评价支持向量机:
support vector machines is the supervised learning algorithm that many people consider the most effective off-the-shelf supervised learning algorithm.That point of view is debatable,but there are many people that hold that point of view.
可见,在监督学习算法中支持向量机有着非常广泛的应用,而且在解决图像分类问题时有着优异的效果。
OpenCV集成了这种学习算法,它被包含在ml模块下的CvSVM类中,下面我们用OpenCV实现SVM的数据准备、模型训练和加载模型实现分类,为了理解起来更加直观,我们用三个工程来实现。
数据准备
在OpenCV的安装路径下,搜索digits,可以得到一张图片,图片大小为1000*2000,有0-9的10个数字,每5行为一个数字,总共50行,共有5000个手写数字,每个数字块大小为20*20。 下面将把这些数字中的0和1作为二分类的准备数据。其中0有500张,1有500张。
用下面的代码将图片准备好,在写入路径提前建立好文件夹:
#include <opencv2/opencv.hpp>
#include <iostream>

using namespace std;
using namespace cv;

int main()
{
    char ad[128]={0};
    int  filename = 0,filenum=0;
    Mat img = imread("digits.png");
    Mat gray;
    cvtColor(img, gray, CV_BGR2GRAY);
    int b = 20;
    int m = gray.rows / b;   //原图为1000*2000
    int n = gray.cols / b;   //裁剪为5000个20*20的小图块

    for (int i = 0; i < m; i++)
    {
        int offsetRow = i*b;  //行上的偏移量
        if(i%5==0&&i!=0)
        {
            filename++;
            filenum=0;
        }
        for (int j = 0; j < n; j++)
        {
            int offsetCol = j*b; //列上的偏移量
            sprintf_s(ad, "D:\\data\\%d\\%d.jpg",filename,filenum++);
            //截取20*20的小块
            Mat tmp;
            gray(Range(offsetRow, offsetRow + b), Range(offsetCol, offsetCol + b)).copyTo(tmp);
            imwrite(ad,tmp);
        }
    }
    return 0;
}
- 1
- 2
- 3
- 4
- 5
- 6
- 7
- 8
- 9
- 10
- 11
- 12
- 13
- 14
- 15
- 16
- 17
- 18
- 19
- 20
- 21
- 22
- 23
- 24
- 25
- 26
- 27
- 28
- 29
- 30
- 31
- 32
- 33
- 34
- 35
- 36
- 37
最后可以得到这样的结果:
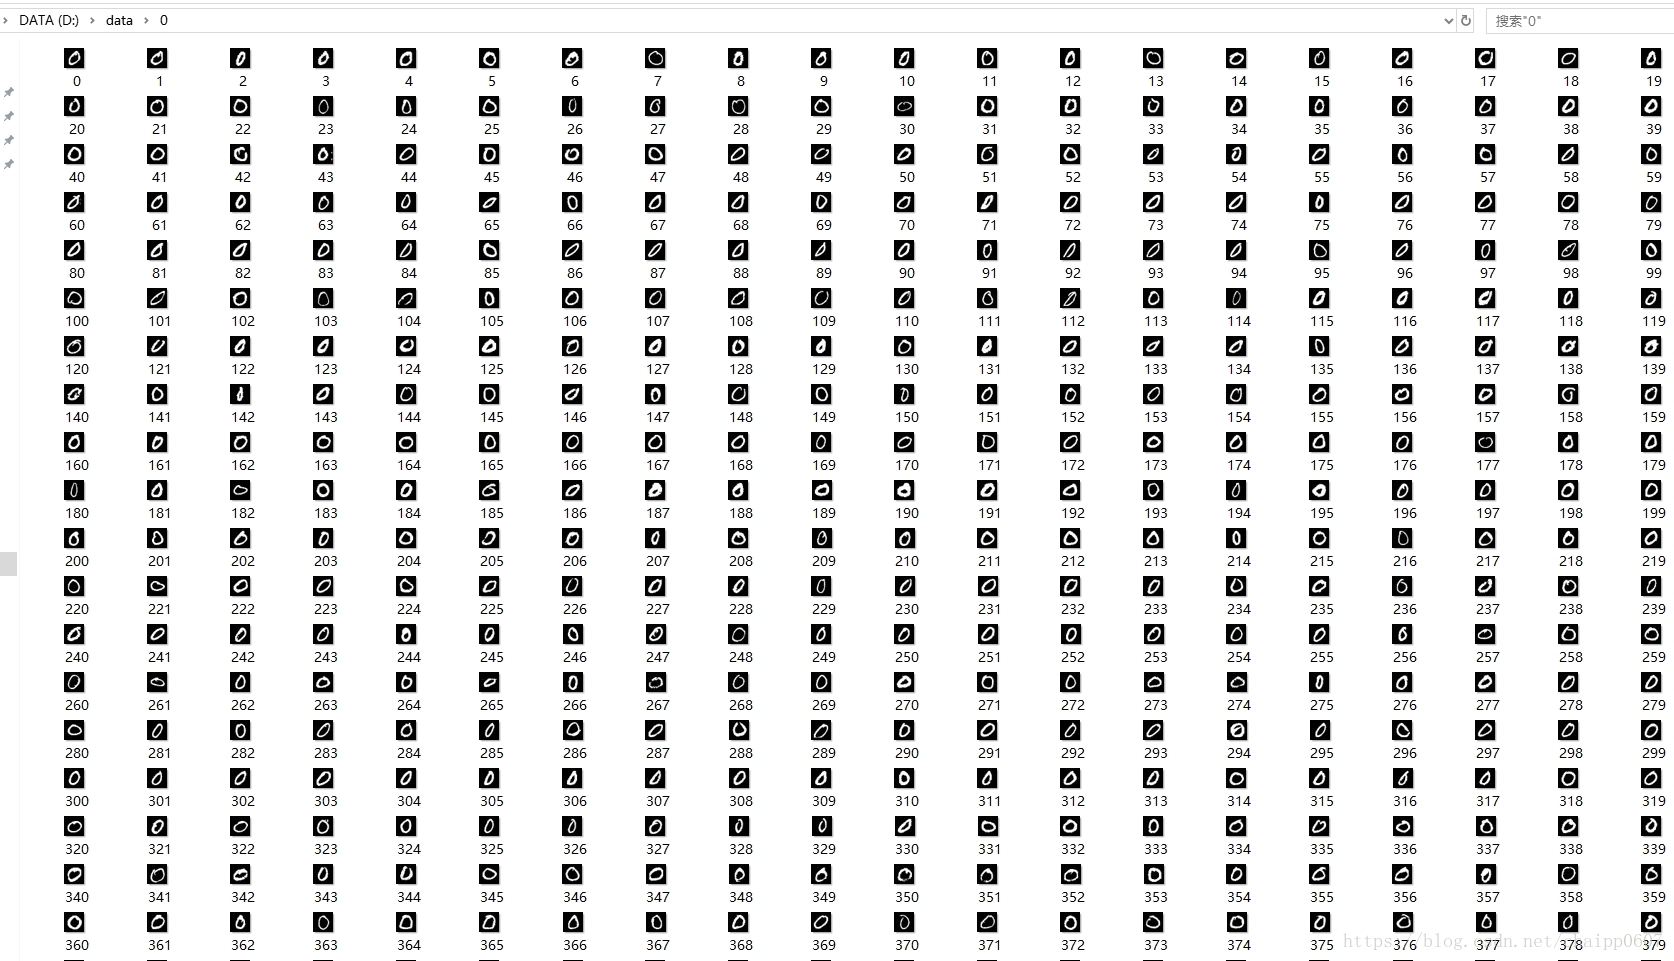
组织的二分类数据形式为:
--D:
  --data
    --train_image
      --0(400张)
      --1(400张)
    --test_image
      --0(100张)
      --1(100张)
- 1
- 2
- 3
- 4
- 5
- 6
- 7
- 8
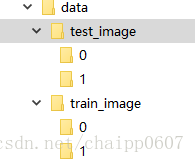
训练数据800张,0,1各400张;测试数据200张,0,1各100张
模型训练
数据准备完成之后,就可以用下面的代码训练了:
#include <stdio.h>
#include <time.h>
#include <opencv2/opencv.hpp>
#include <opencv/cv.h>
#include <iostream>
#include <opencv2/core/core.hpp>
#include <opencv2/highgui/highgui.hpp>
#include <opencv2/ml/ml.hpp>
#include <io.h>

using namespace std;
using namespace cv;

void getFiles( string path, vector<string>& files);
void get_1(Mat& trainingImages, vector<int>& trainingLabels);
void get_0(Mat& trainingImages, vector<int>& trainingLabels);

int main()
{
    //获取训练数据
    Mat classes;
    Mat trainingData;
    Mat trainingImages;
    vector<int> trainingLabels;
    get_1(trainingImages, trainingLabels);
    get_0(trainingImages, trainingLabels);
    Mat(trainingImages).copyTo(trainingData);
    trainingData.convertTo(trainingData, CV_32FC1);
    Mat(trainingLabels).copyTo(classes);
    //配置SVM训练器参数
    CvSVMParams SVM_params;
    SVM_params.svm_type = CvSVM::C_SVC;
    SVM_params.kernel_type = CvSVM::LINEAR;
    SVM_params.degree = 0;
    SVM_params.gamma = 1;
    SVM_params.coef0 = 0;
    SVM_params.C = 1;
    SVM_params.nu = 0;
    SVM_params.p = 0;
    SVM_params.term_crit = cvTermCriteria(CV_TERMCRIT_ITER, 1000, 0.01);
    //训练
    CvSVM svm;
    svm.train(trainingData, classes, Mat(), Mat(), SVM_params);
    //保存模型
    svm.save("svm.xml");
    cout<<"训练好了!!!"<<endl;
    getchar();
    return 0;
}
void getFiles( string path, vector<string>& files )
{
    long   hFile   =   0;
    struct _finddata_t fileinfo;
    string p;
    if((hFile = _findfirst(p.assign(path).append("\\*").c_str(),&fileinfo)) !=  -1)
    {
        do
        {
            if((fileinfo.attrib &  _A_SUBDIR))
            {
                if(strcmp(fileinfo.name,".") != 0  &&  strcmp(fileinfo.name,"..") != 0)
                    getFiles( p.assign(path).append("\\").append(fileinfo.name), files );
            }
            else
            {
                files.push_back(p.assign(path).append("\\").append(fileinfo.name) );
            }
        }while(_findnext(hFile, &fileinfo)  == 0);

        _findclose(hFile);
    }
}
void get_1(Mat& trainingImages, vector<int>& trainingLabels)
{
    char * filePath = "D:\\data\\train_image\\1";
    vector<string> files;
    getFiles(filePath, files );
    int number = files.size();
    for (int i = 0;i < number;i++)
    {
        Mat  SrcImage=imread(files[i].c_str());
        SrcImage= SrcImage.reshape(1, 1);
        trainingImages.push_back(SrcImage);
        trainingLabels.push_back(1);
    }
}
void get_0(Mat& trainingImages, vector<int>& trainingLabels)
{
    char * filePath = "D:\\data\\train_image\\0";
    vector<string> files;
    getFiles(filePath, files );
    int number = files.size();
    for (int i = 0;i < number;i++)
    {
        Mat  SrcImage=imread(files[i].c_str());
        SrcImage= SrcImage.reshape(1, 1);
        trainingImages.push_back(SrcImage);
        trainingLabels.push_back(0);
    }
}
- 1
- 2
- 3
- 4
- 5
- 6
- 7
- 8
- 9
- 10
- 11
- 12
- 13
- 14
- 15
- 16
- 17
- 18
- 19
- 20
- 21
- 22
- 23
- 24
- 25
- 26
- 27
- 28
- 29
- 30
- 31
- 32
- 33
- 34
- 35
- 36
- 37
- 38
- 39
- 40
- 41
- 42
- 43
- 44
- 45
- 46
- 47
- 48
- 49
- 50
- 51
- 52
- 53
- 54
- 55
- 56
- 57
- 58
- 59
- 60
- 61
- 62
- 63
- 64
- 65
- 66
- 67
- 68
- 69
- 70
- 71
- 72
- 73
- 74
- 75
- 76
- 77
- 78
- 79
- 80
- 81
- 82
- 83
- 84
- 85
- 86
- 87
- 88
- 89
- 90
- 91
- 92
- 93
- 94
- 95
- 96
- 97
- 98
- 99
- 100
整个训练过程可以分为一下几个部分:
数据准备:
该例程中一个定义了三个子程序用来实现数据准备工作:
getFiles()用来遍历文件夹下所有文件,可以参考:
http://blog.csdn.net/chaipp0607/article/details/53914954
getBubble()用来获取有气泡的图片和与其对应的Labels,该例程将Labels定为1。
getNoBubble()用来获取没有气泡的图片与其对应的Labels,该例程将Labels定为0。
getBubble()与getNoBubble()将获取一张图片后会将图片(特征)写入到容器中,紧接着会将标签写入另一个容器中,这样就保证了特征和标签是一一对应的关系push_back(0)或者push_back(1)其实就是我们贴标签的过程。
trainingImages.push_back(SrcImage);
trainingLabels.push_back(0);
- 1
- 2
在主函数中,将getBubble()与getNoBubble()写好的包含特征的矩阵拷贝给trainingData,将包含标签的vector容器进行类型转换后拷贝到trainingLabels里,至此,数据准备工作完成,trainingData与trainingLabels就是我们要训练的数据。
    Mat classes;
    Mat trainingData;
    Mat trainingImages;
    vector<int> trainingLabels;
    getBubble(trainingImages, trainingLabels);
    getNoBubble(trainingImages, trainingLabels);
    Mat(trainingImages).copyTo(trainingData);
    trainingData.convertTo(trainingData, CV_32FC1);
    Mat(trainingLabels).copyTo(classes);
- 1
- 2
- 3
- 4
- 5
- 6
- 7
- 8
- 9
特征选取
其实特征提取和数据的准备是同步完成的,我们最后要训练的也是正负样本的特征。本例程中同样在getBubble()与getNoBubble()函数中完成特征提取工作,只是我们简单粗暴将整个图的所有像素作为了特征,因为我们关注更多的是整个的训练过程,所以选择了最简单的方式完成特征提取工作,除此中外,特征提取的方式有很多,比如LBP,HOG等等。
SrcImage= SrcImage.reshape(1, 1);
- 1
我们利用reshape()函数完成特征提取,原型如下:
Mat reshape(int cn, int rows=0) const;
- 1
可以看到该函数的参数非常简单,cn为新的通道数,如果cn = 0,表示通道数不会改变。参数rows为新的行数,如果rows = 0,表示行数不会改变。我们将参数定义为reshape(1, 1)的结果就是原图像对应的矩阵将被拉伸成一个一行的向量,作为特征向量。
参数配置
参数配置是SVM的核心部分,在Opencv中它被定义成一个结构体类型,如下:
struct CV_EXPORTS_W_MAP CvSVMParams
{
    CvSVMParams();
    CvSVMParams(
    int svm_type,
    int kernel_type,
    double degree,
    double coef0,
    double Cvalue,
    double p,
    CvMat* class_weights,
    CvTermCriteria term_crit );
    CV_PROP_RW int         svm_type;
    CV_PROP_RW int         kernel_type;
    CV_PROP_RW double      degree; // for poly
    CV_PROP_RW double      gamma;  // for poly/rbf/sigmoid
    CV_PROP_RW double      coef0;  // for poly/sigmoid
    CV_PROP_RW double      C;  // for CV_SVM_C_SVC,       CV_SVM_EPS_SVR and CV_SVM_NU_SVR
    CV_PROP_RW double      nu; // for CV_SVM_NU_SVC, CV_SVM_ONE_CLASS, and CV_SVM_NU_SVR
    CV_PROP_RW double      p; // for CV_SVM_EPS_SVR
    CvMat*      class_weights; // for CV_SVM_C_SVC
    CV_PROP_RW CvTermCriteria term_crit; // termination criteria
};
- 1
- 2
- 3
- 4
- 5
- 6
- 7
- 8
- 9
- 10
- 11
- 12
- 13
- 14
- 15
- 16
- 17
- 18
- 19
- 20
- 21
- 22
- 23
所以在例程中我们定义了一个结构体变量用来配置这些参数,而这个变量也就是CVSVM类中train函数的第五个参数,下面对参数进行说明。
SVM_params.svm_type :SVM的类型:
C_SVC表示SVM分类器,C_SVR表示SVM回归
SVM_params.kernel_type:核函数类型
线性核LINEAR:
d(x,y)=(x,y)
多项式核POLY:
d(x,y)=(gamma*(x’y)+coef0)degree
径向基核RBF:
d(x,y)=exp(-gamma*|x-y|^2)
sigmoid核SIGMOID:
d(x,y)= tanh(gamma*(x’y)+ coef0)
SVM_params.degree:核函数中的参数degree,针对多项式核函数;
SVM_params.gama:核函数中的参数gamma,针对多项式/RBF/SIGMOID核函数;
SVM_params.coef0:核函数中的参数,针对多项式/SIGMOID核函数;
SVM_params.c:SVM最优问题参数,设置C-SVC,EPS_SVR和NU_SVR的参数;
SVM_params.nu:SVM最优问题参数,设置NU_SVC, ONE_CLASS 和NU_SVR的参数;
SVM_params.p:SVM最优问题参数,设置EPS_SVR 中损失函数p的值.
训练模型
CvSVM svm;
svm.train(trainingData, classes, Mat(), Mat(), SVM_params);
- 1
- 2
通过上面的过程,我们准备好了待训练的数据和训练需要的参数,其实可以理解为这个准备工作就是在为svm.train()函数准备实参的过程。来看一下svm.train()函数,Opencv将SVM封装成CvSVM库,这个库是基于台湾大学林智仁(Lin Chih-Jen)教授等人开发的LIBSVM封装的,由于篇幅限制,不再全部粘贴库的定义,所以一下代码只是CvSVM库中的一部分数据和函数:
class CV_EXPORTS_W CvSVM : public CvStatModel
{
public:
virtual bool train(
  const CvMat* trainData,
  const CvMat* responses,
  const CvMat* varIdx=0,
  const CvMat* sampleIdx=0,
  CvSVMParams params=CvSVMParams() );
virtual float predict(
  const CvMat* sample,
  bool returnDFVal=false ) const;
- 1
- 2
- 3
- 4
- 5
- 6
- 7
- 8
- 9
- 10
- 11
- 12
我们就是应用类中定义的train函数完成模型训练工作。
保存模型
svm.save("svm.xml");
- 1
保存模型只有一行代码,利用save()函数,我们看下它的定义:
CV_WRAP virtual void save( const char* filename, const char* name=0 ) const;
- 1
该函数被定义在CvStatModel类中,CvStatModel是ML库中的统计模型基类,其他 ML 类都是从这个类中继承。
总结:到这里我们就完成了模型训练工作,可以看到真正用于训练的代码其实很少,OpenCV最支持向量机的封装极大地降低了我们的编程工作。
加载模型实现分类
#include <stdio.h>
#include <time.h>
#include <opencv2/opencv.hpp>
#include <opencv/cv.h>
#include <iostream>
#include <opencv2/core/core.hpp>
#include <opencv2/highgui/highgui.hpp>
#include <opencv2/ml/ml.hpp>
#include <io.h>

using namespace std;
using namespace cv;

void getFiles( string path, vector<string>& files );

int main()
{
    int result = 0;
    char * filePath = "D:\\data\\test_image\\0";
    vector<string> files;
    getFiles(filePath, files );
    int number = files.size();
    cout<<number<<endl;
    CvSVM svm;
    svm.clear();
    string modelpath = "svm.xml";
    FileStorage svm_fs(modelpath,FileStorage::READ);
    if(svm_fs.isOpened())
    {
        svm.load(modelpath.c_str());
    }
    for (int i = 0;i < number;i++)
    {
        Mat inMat = imread(files[i].c_str());
        Mat p = inMat.reshape(1, 1);
        p.convertTo(p, CV_32FC1);
        int response = (int)svm.predict(p);
        if (response == 0)
        {
            result++;
        }
    }
    cout<<result<<endl;
    getchar();
    return  0;
}
void getFiles( string path, vector<string>& files )
{
    long   hFile   =   0;
    struct _finddata_t fileinfo;
    string p;
    if((hFile = _findfirst(p.assign(path).append("\\*").c_str(),&fileinfo)) !=  -1)
    {
        do
        {
            if((fileinfo.attrib &  _A_SUBDIR))
            {
                if(strcmp(fileinfo.name,".") != 0  &&  strcmp(fileinfo.name,"..") != 0)
                    getFiles( p.assign(path).append("\\").append(fileinfo.name), files );
            }
            else
            {       files.push_back(p.assign(path).append("\\").append(fileinfo.name) );
            }
        }while(_findnext(hFile, &fileinfo)  == 0);
        _findclose(hFile);
    }
}
- 1
- 2
- 3
- 4
- 5
- 6
- 7
- 8
- 9
- 10
- 11
- 12
- 13
- 14
- 15
- 16
- 17
- 18
- 19
- 20
- 21
- 22
- 23
- 24
- 25
- 26
- 27
- 28
- 29
- 30
- 31
- 32
- 33
- 34
- 35
- 36
- 37
- 38
- 39
- 40
- 41
- 42
- 43
- 44
- 45
- 46
- 47
- 48
- 49
- 50
- 51
- 52
- 53
- 54
- 55
- 56
- 57
- 58
- 59
- 60
- 61
- 62
- 63
- 64
- 65
- 66
- 67
在上面我们把该介绍的都说的差不多了,这个例程中只是用到了load()函数用于模型加载,加载的就是上面例子中生成的模型,load()被定义在CvStatModel这个基类中:
svm.load(modelpath.c_str());
- 1
load的路径是string modelpath = "svm.xml",这意味着svm.mxl文件应该在测试工程的根目录下面,但是因为训练和预测是两个独立的工程,所以必须要拷贝一下这个文件。最后用到predict()函数用来预测分类结果,predict()被定义在CVSVM类中。
注意:
1.为什么要建立三个独立的工程呢?
主要是考虑写在一起话,代码量会比较大,逻辑没有分开清晰,当跑通上面的代码之后,就可以随意的改了。
2.为什么加上数据准备?
之前有评论说道数据的问题,提供数据后实验能更顺利一些,因为本身代码没有什么含金量,这样可以更顺利的运行起来工程,并修改它。
3.一些容易引起异常的情况:
(1):注意生成的.xml记得拷贝到预测工程下;
(2):注意准备好数据路径和代码是不是一致;
(3):注意训练的特征要和测试的特征一致;
        <link rel="stylesheet" href="https://csdnimg.cn/release/phoenix/template/css/markdown_views-ea0013b516.css">
            </div>
简介
学习SVM(一) SVM模型训练与分类的OpenCV实现
学习SVM(二) 如何理解支持向量机的最大分类间隔
学习SVM(三)理解SVM中的对偶问题
学习SVM(四) 理解SVM中的支持向量(Support Vector)
学习SVM(五)理解线性SVM的松弛因子
Andrew Ng 在斯坦福大学的机器学习公开课上这样评价支持向量机:
support vector machines is the supervised learning algorithm that many people consider the most effective off-the-shelf supervised learning algorithm.That point of view is debatable,but there are many people that hold that point of view.
可见,在监督学习算法中支持向量机有着非常广泛的应用,而且在解决图像分类问题时有着优异的效果。
OpenCV集成了这种学习算法,它被包含在ml模块下的CvSVM类中,下面我们用OpenCV实现SVM的数据准备、模型训练和加载模型实现分类,为了理解起来更加直观,我们用三个工程来实现。
数据准备
在OpenCV的安装路径下,搜索digits,可以得到一张图片,图片大小为1000*2000,有0-9的10个数字,每5行为一个数字,总共50行,共有5000个手写数字,每个数字块大小为20*20。 下面将把这些数字中的0和1作为二分类的准备数据。其中0有500张,1有500张。
用下面的代码将图片准备好,在写入路径提前建立好文件夹:
#include <opencv2/opencv.hpp>
#include <iostream>

using namespace std;
using namespace cv;

int main()
{
    char ad[128]={0};
    int  filename = 0,filenum=0;
    Mat img = imread("digits.png");
    Mat gray;
    cvtColor(img, gray, CV_BGR2GRAY);
    int b = 20;
    int m = gray.rows / b;   //原图为1000*2000
    int n = gray.cols / b;   //裁剪为5000个20*20的小图块

    for (int i = 0; i < m; i++)
    {
        int offsetRow = i*b;  //行上的偏移量
        if(i%5==0&&i!=0)
        {
            filename++;
            filenum=0;
        }
        for (int j = 0; j < n; j++)
        {
            int offsetCol = j*b; //列上的偏移量
            sprintf_s(ad, "D:\\data\\%d\\%d.jpg",filename,filenum++);
            //截取20*20的小块
            Mat tmp;
            gray(Range(offsetRow, offsetRow + b), Range(offsetCol, offsetCol + b)).copyTo(tmp);
            imwrite(ad,tmp);
        }
    }
    return 0;
}
- 1
- 2
- 3
- 4
- 5
- 6
- 7
- 8
- 9
- 10
- 11
- 12
- 13
- 14
- 15
- 16
- 17
- 18
- 19
- 20
- 21
- 22
- 23
- 24
- 25
- 26
- 27
- 28
- 29
- 30
- 31
- 32
- 33
- 34
- 35
- 36
- 37
最后可以得到这样的结果:
组织的二分类数据形式为:
--D:
  --data
    --train_image
      --0(400张)
      --1(400张)
    --test_image
      --0(100张)
      --1(100张)
- 1
- 2
- 3
- 4
- 5
- 6
- 7
- 8
训练数据800张,0,1各400张;测试数据200张,0,1各100张
模型训练
数据准备完成之后,就可以用下面的代码训练了:
#include <stdio.h>
#include <time.h>
#include <opencv2/opencv.hpp>
#include <opencv/cv.h>
#include <iostream>
#include <opencv2/core/core.hpp>
#include <opencv2/highgui/highgui.hpp>
#include <opencv2/ml/ml.hpp>
#include <io.h>

using namespace std;
using namespace cv;

void getFiles( string path, vector<string>& files);
void get_1(Mat& trainingImages, vector<int>& trainingLabels);
void get_0(Mat& trainingImages, vector<int>& trainingLabels);

int main()
{
    //获取训练数据
    Mat classes;
    Mat trainingData;
    Mat trainingImages;
    vector<int> trainingLabels;
    get_1(trainingImages, trainingLabels);
    get_0(trainingImages, trainingLabels);
    Mat(trainingImages).copyTo(trainingData);
    trainingData.convertTo(trainingData, CV_32FC1);
    Mat(trainingLabels).copyTo(classes);
    //配置SVM训练器参数
    CvSVMParams SVM_params;
    SVM_params.svm_type = CvSVM::C_SVC;
    SVM_params.kernel_type = CvSVM::LINEAR;
    SVM_params.degree = 0;
    SVM_params.gamma = 1;
    SVM_params.coef0 = 0;
    SVM_params.C = 1;
    SVM_params.nu = 0;
    SVM_params.p = 0;
    SVM_params.term_crit = cvTermCriteria(CV_TERMCRIT_ITER, 1000, 0.01);
    //训练
    CvSVM svm;
    svm.train(trainingData, classes, Mat(), Mat(), SVM_params);
    //保存模型
    svm.save("svm.xml");
    cout<<"训练好了!!!"<<endl;
    getchar();
    return 0;
}
void getFiles( string path, vector<string>& files )
{
    long   hFile   =   0;
    struct _finddata_t fileinfo;
    string p;
    if((hFile = _findfirst(p.assign(path).append("\\*").c_str(),&fileinfo)) !=  -1)
    {
        do
        {
            if((fileinfo.attrib &  _A_SUBDIR))
            {
                if(strcmp(fileinfo.name,".") != 0  &&  strcmp(fileinfo.name,"..") != 0)
                    getFiles( p.assign(path).append("\\").append(fileinfo.name), files );
            }
            else
            {
                files.push_back(p.assign(path).append("\\").append(fileinfo.name) );
            }
        }while(_findnext(hFile, &fileinfo)  == 0);

        _findclose(hFile);
    }
}
void get_1(Mat& trainingImages, vector<int>& trainingLabels)
{
    char * filePath = "D:\\data\\train_image\\1";
    vector<string> files;
    getFiles(filePath, files );
    int number = files.size();
    for (int i = 0;i < number;i++)
    {
        Mat  SrcImage=imread(files[i].c_str());
        SrcImage= SrcImage.reshape(1, 1);
        trainingImages.push_back(SrcImage);
        trainingLabels.push_back(1);
    }
}
void get_0(Mat& trainingImages, vector<int>& trainingLabels)
{
    char * filePath = "D:\\data\\train_image\\0";
    vector<string> files;
    getFiles(filePath, files );
    int number = files.size();
    for (int i = 0;i < number;i++)
    {
        Mat  SrcImage=imread(files[i].c_str());
        SrcImage= SrcImage.reshape(1, 1);
        trainingImages.push_back(SrcImage);
        trainingLabels.push_back(0);
    }
}
- 1
- 2
- 3
- 4
- 5
- 6
- 7
- 8
- 9
- 10
- 11
- 12
- 13
- 14
- 15
- 16
- 17
- 18
- 19
- 20
- 21
- 22
- 23
- 24
- 25
- 26
- 27
- 28
- 29
- 30
- 31
- 32
- 33
- 34
- 35
- 36
- 37
- 38
- 39
- 40
- 41
- 42
- 43
- 44
- 45
- 46
- 47
- 48
- 49
- 50
- 51
- 52
- 53
- 54
- 55
- 56
- 57
- 58
- 59
- 60
- 61
- 62
- 63
- 64
- 65
- 66
- 67
- 68
- 69
- 70
- 71
- 72
- 73
- 74
- 75
- 76
- 77
- 78
- 79
- 80
- 81
- 82
- 83
- 84
- 85
- 86
- 87
- 88
- 89
- 90
- 91
- 92
- 93
- 94
- 95
- 96
- 97
- 98
- 99
- 100
整个训练过程可以分为一下几个部分:
数据准备:
该例程中一个定义了三个子程序用来实现数据准备工作:
getFiles()用来遍历文件夹下所有文件,可以参考:
http://blog.csdn.net/chaipp0607/article/details/53914954
getBubble()用来获取有气泡的图片和与其对应的Labels,该例程将Labels定为1。
getNoBubble()用来获取没有气泡的图片与其对应的Labels,该例程将Labels定为0。
getBubble()与getNoBubble()将获取一张图片后会将图片(特征)写入到容器中,紧接着会将标签写入另一个容器中,这样就保证了特征和标签是一一对应的关系push_back(0)或者push_back(1)其实就是我们贴标签的过程。
trainingImages.push_back(SrcImage);
trainingLabels.push_back(0);
- 1
- 2
在主函数中,将getBubble()与getNoBubble()写好的包含特征的矩阵拷贝给trainingData,将包含标签的vector容器进行类型转换后拷贝到trainingLabels里,至此,数据准备工作完成,trainingData与trainingLabels就是我们要训练的数据。
    Mat classes;
    Mat trainingData;
    Mat trainingImages;
    vector<int> trainingLabels;
    getBubble(trainingImages, trainingLabels);
    getNoBubble(trainingImages, trainingLabels);
    Mat(trainingImages).copyTo(trainingData);
    trainingData.convertTo(trainingData, CV_32FC1);
    Mat(trainingLabels).copyTo(classes);
- 1
- 2
- 3
- 4
- 5
- 6
- 7
- 8
- 9
特征选取
其实特征提取和数据的准备是同步完成的,我们最后要训练的也是正负样本的特征。本例程中同样在getBubble()与getNoBubble()函数中完成特征提取工作,只是我们简单粗暴将整个图的所有像素作为了特征,因为我们关注更多的是整个的训练过程,所以选择了最简单的方式完成特征提取工作,除此中外,特征提取的方式有很多,比如LBP,HOG等等。
SrcImage= SrcImage.reshape(1, 1);
- 1
我们利用reshape()函数完成特征提取,原型如下:
Mat reshape(int cn, int rows=0) const;
- 1
可以看到该函数的参数非常简单,cn为新的通道数,如果cn = 0,表示通道数不会改变。参数rows为新的行数,如果rows = 0,表示行数不会改变。我们将参数定义为reshape(1, 1)的结果就是原图像对应的矩阵将被拉伸成一个一行的向量,作为特征向量。
参数配置
参数配置是SVM的核心部分,在Opencv中它被定义成一个结构体类型,如下:
struct CV_EXPORTS_W_MAP CvSVMParams
{
    CvSVMParams();
    CvSVMParams(
    int svm_type,
    int kernel_type,
    double degree,
    double coef0,
    double Cvalue,
    double p,
    CvMat* class_weights,
    CvTermCriteria term_crit );
    CV_PROP_RW int         svm_type;
    CV_PROP_RW int         kernel_type;
    CV_PROP_RW double      degree; // for poly
    CV_PROP_RW double      gamma;  // for poly/rbf/sigmoid
    CV_PROP_RW double      coef0;  // for poly/sigmoid
    CV_PROP_RW double      C;  // for CV_SVM_C_SVC,       CV_SVM_EPS_SVR and CV_SVM_NU_SVR
    CV_PROP_RW double      nu; // for CV_SVM_NU_SVC, CV_SVM_ONE_CLASS, and CV_SVM_NU_SVR
    CV_PROP_RW double      p; // for CV_SVM_EPS_SVR
    CvMat*      class_weights; // for CV_SVM_C_SVC
    CV_PROP_RW CvTermCriteria term_crit; // termination criteria
};
- 1
- 2
- 3
- 4
- 5
- 6
- 7
- 8
- 9
- 10
- 11
- 12
- 13
- 14
- 15
- 16
- 17
- 18
- 19
- 20
- 21
- 22
- 23
所以在例程中我们定义了一个结构体变量用来配置这些参数,而这个变量也就是CVSVM类中train函数的第五个参数,下面对参数进行说明。
SVM_params.svm_type :SVM的类型:
C_SVC表示SVM分类器,C_SVR表示SVM回归
SVM_params.kernel_type:核函数类型
线性核LINEAR:
d(x,y)=(x,y)
多项式核POLY:
d(x,y)=(gamma*(x’y)+coef0)degree
径向基核RBF:
d(x,y)=exp(-gamma*|x-y|^2)
sigmoid核SIGMOID:
d(x,y)= tanh(gamma*(x’y)+ coef0)
SVM_params.degree:核函数中的参数degree,针对多项式核函数;
SVM_params.gama:核函数中的参数gamma,针对多项式/RBF/SIGMOID核函数;
SVM_params.coef0:核函数中的参数,针对多项式/SIGMOID核函数;
SVM_params.c:SVM最优问题参数,设置C-SVC,EPS_SVR和NU_SVR的参数;
SVM_params.nu:SVM最优问题参数,设置NU_SVC, ONE_CLASS 和NU_SVR的参数;
SVM_params.p:SVM最优问题参数,设置EPS_SVR 中损失函数p的值.
训练模型
CvSVM svm;
svm.train(trainingData, classes, Mat(), Mat(), SVM_params);
- 1
- 2
通过上面的过程,我们准备好了待训练的数据和训练需要的参数,其实可以理解为这个准备工作就是在为svm.train()函数准备实参的过程。来看一下svm.train()函数,Opencv将SVM封装成CvSVM库,这个库是基于台湾大学林智仁(Lin Chih-Jen)教授等人开发的LIBSVM封装的,由于篇幅限制,不再全部粘贴库的定义,所以一下代码只是CvSVM库中的一部分数据和函数:
class CV_EXPORTS_W CvSVM : public CvStatModel
{
public:
virtual bool train(
  const CvMat* trainData,
  const CvMat* responses,
  const CvMat* varIdx=0,
  const CvMat* sampleIdx=0,
  CvSVMParams params=CvSVMParams() );
virtual float predict(
  const CvMat* sample,
  bool returnDFVal=false ) const;
- 1
- 2
- 3
- 4
- 5
- 6
- 7
- 8
- 9
- 10
- 11
- 12
我们就是应用类中定义的train函数完成模型训练工作。
保存模型
svm.save("svm.xml");
- 1
保存模型只有一行代码,利用save()函数,我们看下它的定义:
CV_WRAP virtual void save( const char* filename, const char* name=0 ) const;
- 1
该函数被定义在CvStatModel类中,CvStatModel是ML库中的统计模型基类,其他 ML 类都是从这个类中继承。
总结:到这里我们就完成了模型训练工作,可以看到真正用于训练的代码其实很少,OpenCV最支持向量机的封装极大地降低了我们的编程工作。
加载模型实现分类
#include <stdio.h>
#include <time.h>
#include <opencv2/opencv.hpp>
#include <opencv/cv.h>
#include <iostream>
#include <opencv2/core/core.hpp>
#include <opencv2/highgui/highgui.hpp>
#include <opencv2/ml/ml.hpp>
#include <io.h>

using namespace std;
using namespace cv;

void getFiles( string path, vector<string>& files );

int main()
{
    int result = 0;
    char * filePath = "D:\\data\\test_image\\0";
    vector<string> files;
    getFiles(filePath, files );
    int number = files.size();
    cout<<number<<endl;
    CvSVM svm;
    svm.clear();
    string modelpath = "svm.xml";
    FileStorage svm_fs(modelpath,FileStorage::READ);
    if(svm_fs.isOpened())
    {
        svm.load(modelpath.c_str());
    }
    for (int i = 0;i < number;i++)
    {
        Mat inMat = imread(files[i].c_str());
        Mat p = inMat.reshape(1, 1);
        p.convertTo(p, CV_32FC1);
        int response = (int)svm.predict(p);
        if (response == 0)
        {
            result++;
        }
    }
    cout<<result<<endl;
    getchar();
    return  0;
}
void getFiles( string path, vector<string>& files )
{
    long   hFile   =   0;
    struct _finddata_t fileinfo;
    string p;
    if((hFile = _findfirst(p.assign(path).append("\\*").c_str(),&fileinfo)) !=  -1)
    {
        do
        {
            if((fileinfo.attrib &  _A_SUBDIR))
            {
                if(strcmp(fileinfo.name,".") != 0  &&  strcmp(fileinfo.name,"..") != 0)
                    getFiles( p.assign(path).append("\\").append(fileinfo.name), files );
            }
            else
            {       files.push_back(p.assign(path).append("\\").append(fileinfo.name) );
            }
        }while(_findnext(hFile, &fileinfo)  == 0);
        _findclose(hFile);
    }
}
- 1
- 2
- 3
- 4
- 5
- 6
- 7
- 8
- 9
- 10
- 11
- 12
- 13
- 14
- 15
- 16
- 17
- 18
- 19
- 20
- 21
- 22
- 23
- 24
- 25
- 26
- 27
- 28
- 29
- 30
- 31
- 32
- 33
- 34
- 35
- 36
- 37
- 38
- 39
- 40
- 41
- 42
- 43
- 44
- 45
- 46
- 47
- 48
- 49
- 50
- 51
- 52
- 53
- 54
- 55
- 56
- 57
- 58
- 59
- 60
- 61
- 62
- 63
- 64
- 65
- 66
- 67
在上面我们把该介绍的都说的差不多了,这个例程中只是用到了load()函数用于模型加载,加载的就是上面例子中生成的模型,load()被定义在CvStatModel这个基类中:
svm.load(modelpath.c_str());
- 1
load的路径是string modelpath = "svm.xml",这意味着svm.mxl文件应该在测试工程的根目录下面,但是因为训练和预测是两个独立的工程,所以必须要拷贝一下这个文件。最后用到predict()函数用来预测分类结果,predict()被定义在CVSVM类中。
注意:
1.为什么要建立三个独立的工程呢?
主要是考虑写在一起话,代码量会比较大,逻辑没有分开清晰,当跑通上面的代码之后,就可以随意的改了。
2.为什么加上数据准备?
之前有评论说道数据的问题,提供数据后实验能更顺利一些,因为本身代码没有什么含金量,这样可以更顺利的运行起来工程,并修改它。
3.一些容易引起异常的情况:
(1):注意生成的.xml记得拷贝到预测工程下;
(2):注意准备好数据路径和代码是不是一致;
(3):注意训练的特征要和测试的特征一致;
        <link rel="stylesheet" href="https://csdnimg.cn/release/phoenix/template/css/markdown_views-ea0013b516.css">
            </div>