1.使用已知网络安装资源安装软件
注意:(不用挂载镜像,直接在xxxx.repo里面指定已知安装源的位置)
vim /etc/yum.repos.d/xxx.repo 文件名称必须以repo结尾,打开此目录,编辑xxx.repo文件,xxx名字任意,但是最好起规范一点
[rhel7.2] 仓库名称
name=rhel7.2 source 对软件源的描述
baseurl=http:172.25.254.250/rhel7.2/x86_64/dvd 网络安装源
gpgcheck=0 不检测gpgkey
enable=1 此安装源语句块生效
yum clean all 清空系统原有的yum信息
yum repolist 当出现下图结果时,表示yum源配置成功,就可以安装下载东西了


2.配置本地yum源
(1)获得一个与本机系统一致的系统镜像,放在/iso目录下
(2)临时挂载镜像(用命令挂载是临时的)
mkdir rhel7.2 (新建一个目录 将镜像挂载在此目录下,此目录就是一个新的安装源,在xxx.repo里面指向此新建目录即可)
mount /iso/镜像 rhel7.2/
设定永久挂载
vim /etc/rc.d/rc.local 在开机的时侯自动执行此文件,
mount /iso/镜像 /rhel7.2 在文件里面挂载镜像
chmod 755 /etc/rc.d/rc.local 修改权限
(3)设定系统安装指向(安装源指向)
vim /etc/yum.repos.d/xxx.repo 编辑此文件,来指向安装源,安装源就是你镜像挂载的位置,位置一定要写对,你写的地址必须在网页里面可以打开[rhel7.2] 仓库名字
name=rhel7.2 对软件源的描述
baseurl=file:///rhel7.2 yum源指定位置(一定要写对!!)
gpgcheck=0 不检测gpgkey(值为0就相当于电脑管家不起作用,没有软件去保护电脑)yum clean all
扫描二维码关注公众号,回复: 2992587 查看本文章
yum repolist
yum inatall httpd -y 试着安装httpd 看是否成功
3.共享yum源的部署
(1)在一台已经建立好本地yum源的主机中安装httpd(共享某一个目录--/var/www/html)
Apache 阿帕器服务 nginx 俄罗斯
(2)配置yum源 (将此镜像挂载在一个共享目录下面,同样用命令执行就是临时挂载,系统重新启动就会消失 所以在/etc/rc.d/rc.local文件里面加入挂载命令,即可永久有效)
systemctl start httpd
systemctl stop firewalld
systemctl enable httpd
systemctl disable firewalld
mkdir /var/www/html/rhel7.2
mount /iso/镜像 /var/www/html/rhel7.2/ 临时的
vim /etc/rc.d/rc.local
mount /iso/镜像 /var/www/html/rhel7.2/ 永久的
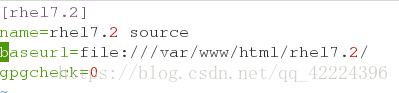
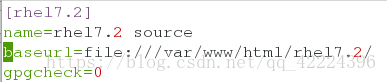
(3)vim /etc/yum.repos.d/xxx.repo
[rhel7.2]
name=rhel7.2
baseurl=file:///var/www/html/rhel7.2
gpgcheck=0
yum clean all
yum inatall httpd -y


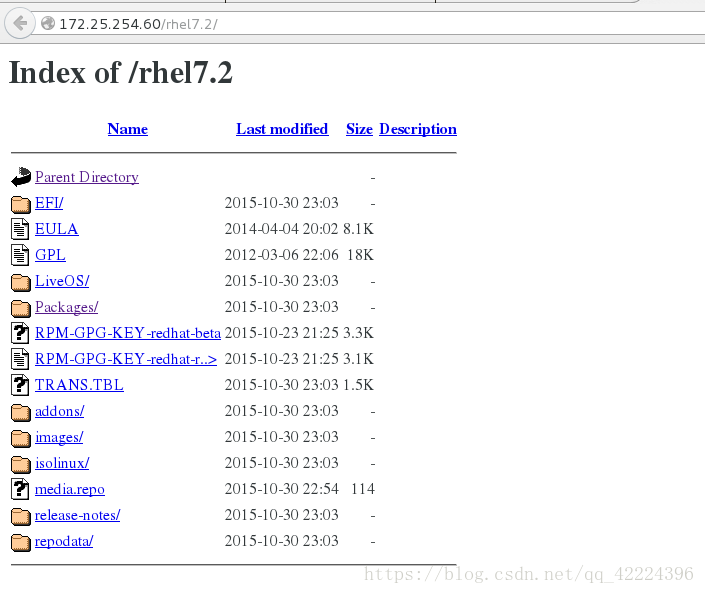
测试:在浏览器中输入地址
http://172.25.254.60/rhel7.2 此地址就是网络yum源地址