python sphinx 自动生成文档
借鉴:http://blog.csdn.net/preyta/article/details/73647937
在此基础上进行修改扩展
前言:
sphinx是python支持的一种文档自动生成工具,仅需少量操作,就可以把docstring注释生成文档,文档可以是html格式,latex格式,pdf格式等。
安装:
使用pip安装。如果连pip都没有,请先安装anoconda。
$ pip install sphinx创建项目
创造一个sphinx文件夹,输入以下指令:
$ sphinx-quickstart影响比较大的有下面几条:
 # 将source文件夹与build文件夹分离,建议选y
> Separate source and build directories (y/n) [n]: y

 # 自动插入模块中的docstring注释,不用想,无脑y
> autodoc: automatically insert docstrings from modules (y/n) [n]: y

 # 是否让文件中包含你的源代码,可酌情选择
> viewcode: include links to the source code of documented Python objects (y/n) [n]: y
输入完后,默认的目录就生成了,目录结构如下:
$ ls -l
total 5
drwxr-xr-x 1 Administrator 197121   0 二月  2 16:47 build/
-rw-r--r-- 1 Administrator 197121 806 二月  2 16:47 make.bat
-rw-r--r-- 1 Administrator 197121 608 二月  2 16:47 Makefile
drwxr-xr-x 1 Administrator 197121   0 二月  2 16:47 source/
解释一下文件夹内容:
- source 存放生成的模板和py脚本
- build 存放生成的文档目前为空
- makefile 加工source的模板成文档,并将文档放入build文件夹里
进入source文件夹,文件夹内容如下:
$ ll
total 9
drwxr-xr-x 1 Administrator 197121    0 二月  2 16:47 _static/
drwxr-xr-x 1 Administrator 197121    0 二月  2 16:47 _templates/
-rw-r--r-- 1 Administrator 197121 5334 二月  2 16:47 conf.py
-rw-r--r-- 1 Administrator 197121  448 二月  2 16:47 index.rst
其中:
- conf.py 可以修改之前quickstart定下的配置
- index.rst 在makefile后生成文档的主目录
添加python文件
现在,我们有了一个新的空目录,我们可以在这个基础上扩展:
新建一个main.py文件到该目录,文件内容如下:
# main.py
def run(name):
    """
    this is a run function
        :param name: name of people who runs
    """
    print name, 'is running'
将之前生成的文件夹放入和main.py的同一个文件夹内,结构如下:
$ ls -l
total 1
-rw-r--r-- 1 Administrator 197121 146 二月  2 17:02 main.py
drwxr-xr-x 1 Administrator 197121   0 二月  2 17:04 sphinx/
由于main.py的路径未知,因此需要先添加main.py文件夹的路径。
进入sphinx文件夹,修改conf.py,在开头添加以下语句:

import os
import sys
sys.path.insert(0, os.path.abspath('../'))
然后修改index.rst的内容:
.. test documentation master file, created by
   sphinx-quickstart on Fri Feb 02 16:47:00 2018.
   You can adapt this file completely to your liking, but it should at least
   contain the root `toctree` directive.

Welcome to test's documentation!
================================

.. toctree::
   :maxdepth: 2
   :caption: Contents:

Introduction
============
This is the introduction of demo。

API
===
.. automodule:: main
   :members:


Indices and tables
==================

* :ref:`genindex`
* :ref:`modindex`
* :ref:`search`
实际上,rst是一种标记语言,类似markdown,有兴趣的可以自己去了解。但是如果不深究的话,知道两点就可以:
toctree生成了一个节点,此节点必须。
.. toctree::
 :maxdepth: 2
 :caption: Contents:
automodule即自动生成模块,后面跟着py文件的文件名。(此处main即指我们刚刚编写的main.py文件)
.. automodule:: main
 :members:
通过这两个语法,我们就能自动生成简单的文档。
创建文档
进入sphinx文件夹,运行以下指令:
$ sphinx-build -b html source build
$ make html  # (linux)
or
$ ./make.bat html # (windows)
运行完毕后,就可以在build文件夹看到生成的html,效果如下:
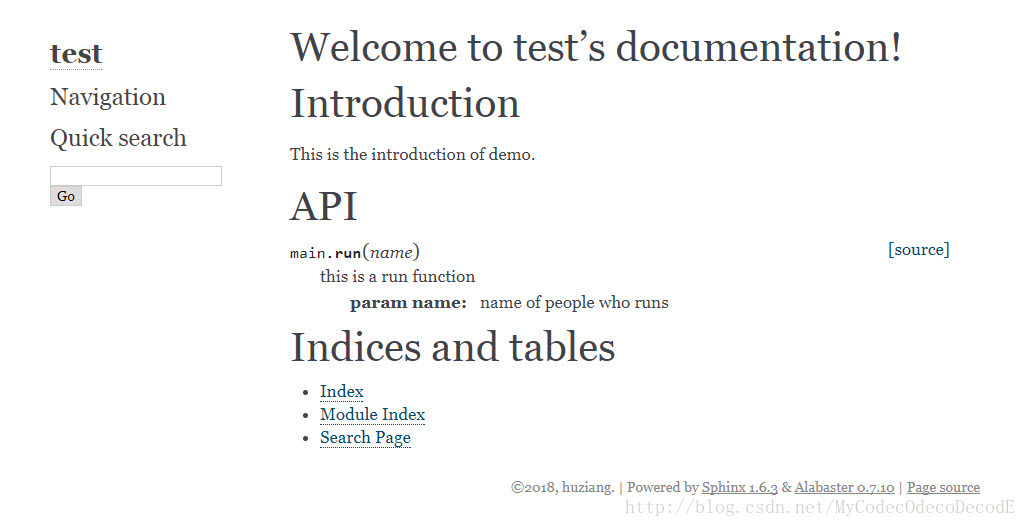
可以看到,我们的自动生成文档已经成功!
进阶
在项目较大时,我们的py文件会不止一个,我们可以将py文件和html文档一一对应,这样就可以分散式管理文档。
新建第二个test.py文件,内容如下:
# test.py
def test(name):
    """
    this is a test function
        :param name: name of people who runs
    """
    print name, 'is testing'
我们进入到sphinx/source中,添加test.rst,main.rst两个文件。
main.rst:
MAIN
====
.. automodule:: main
   :members:

* :ref:`genindex`
* :ref:`modindex`
* :ref:`search`
test.rst:
TEST
====
.. automodule:: test
   :members:

* :ref:`genindex`
* :ref:`modindex`
* :ref:`search`
并且修改index.rst如下:
.. test documentation master file, created by
   sphinx-quickstart on Fri Feb 02 16:47:00 2018.
   You can adapt this file completely to your liking, but it should at least
   contain the root `toctree` directive.

Welcome to test's documentation!
================================

Introduction
============
This is the introduction of demo.

.. toctree::
   :maxdepth: 2
   :caption: Contents:

   main
   test


Indices and tables
==================

* :ref:`genindex`
* :ref:`modindex`
* :ref:`search`
重新执行上面两句指令,打开index.html,效果如下:
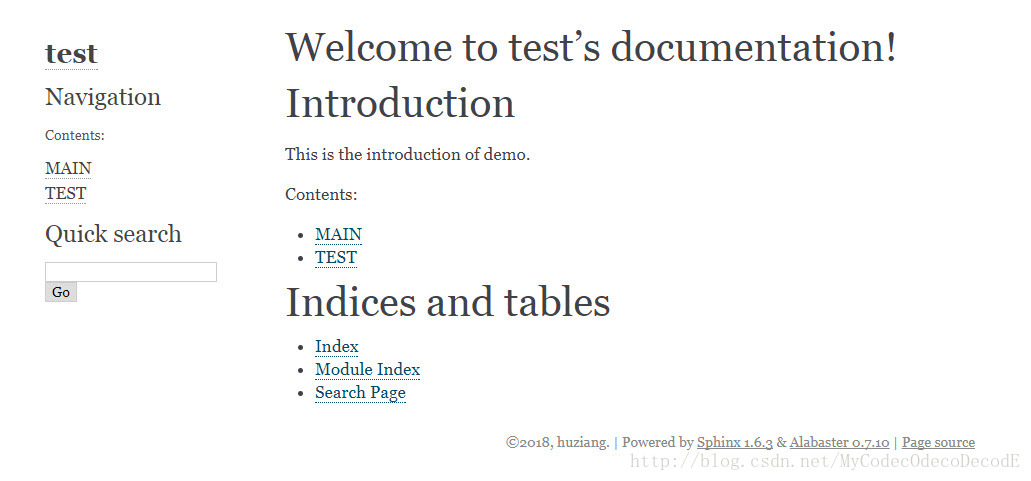
打开TEST链接,效果如下:
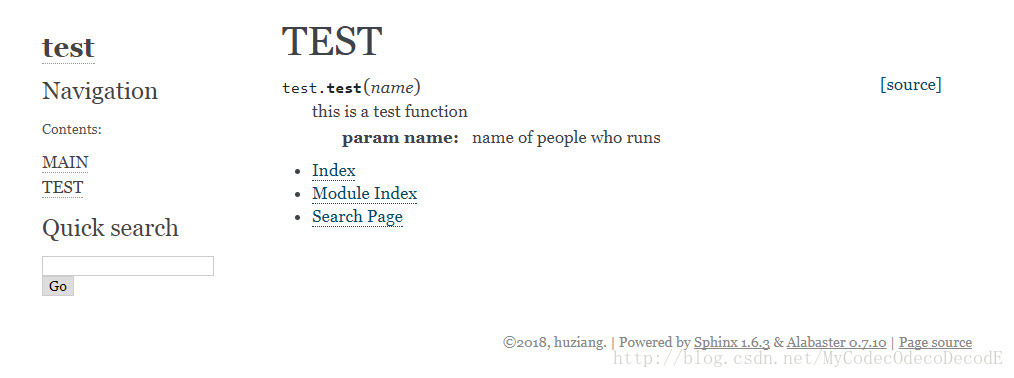
如果还有新的new.py文件加入的话,新建一个XXX.rst文件,添加automodule指令,并在index.rst文件内添加XXX即可。