自制版制作步骤:
1.首先下载一个文件名为testng.xslt-1.1.zip
testng.xslt-1.1我在印象笔记里面备份了一份
打开testng.xslt中lib文件夹,找到saxon-8.7jar包
复制jar包到我们的工程存放的lib文件夹下,lib文件夹需要新建- 1
- 2
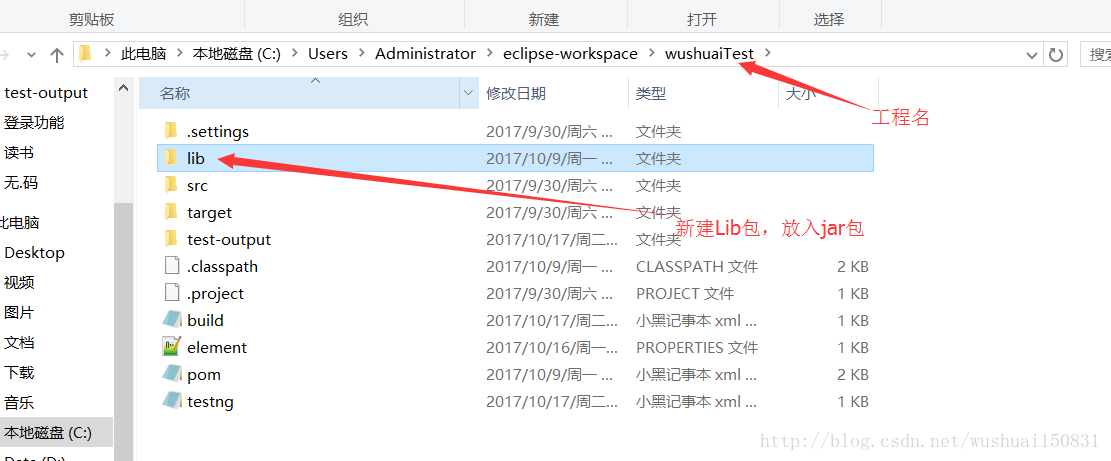
2.把jar包导入到工程中
右键工程-properties-java build path-libraries-Add External jars-选择saxonjar包路径即可 - 1
- 2
3.xslt中的testng.results导入到工程中的test-out文件夹中
步骤:
找到testxslt-src-main-resoures-testresults,复制testresults到工程目录中的test-output文件夹中- 1
- 2

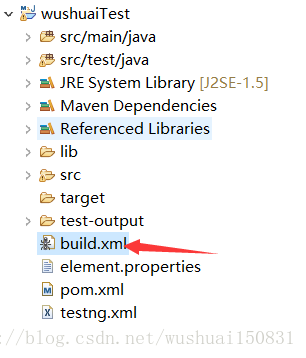
创建build.xml文件
步骤:
右键项目-new-file名称为build.xml- 1
- 2
build.xml内容-官方:
<?xml version="1.0" encoding="UTF-8"?>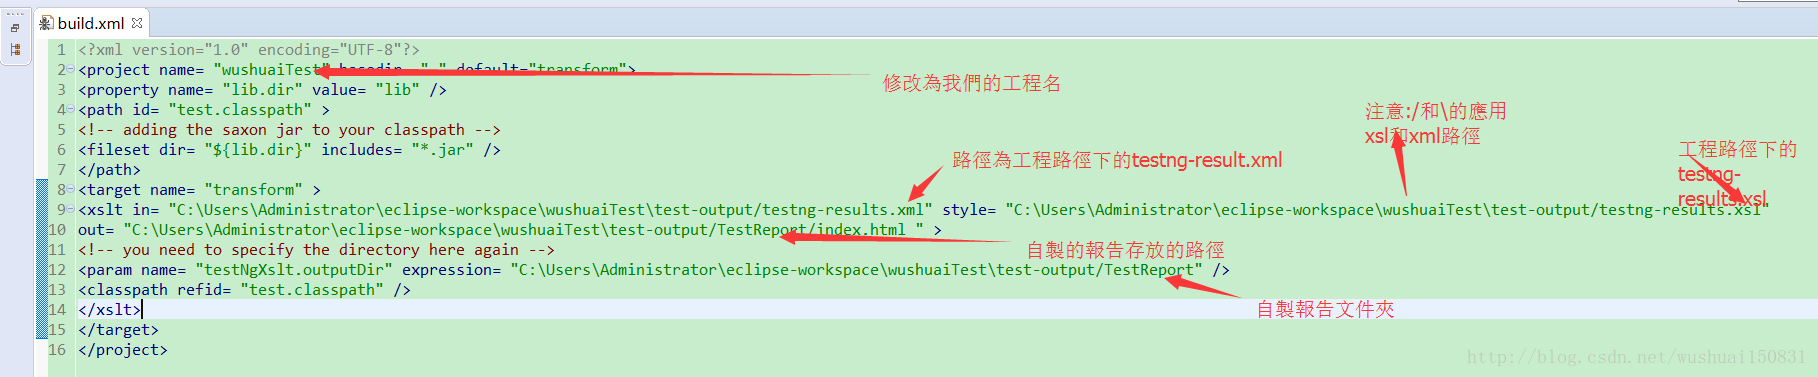
<project name= "wushuaiTest" basedir= "." default="transform"> <property name= "lib.dir" value= "lib" /> <path id= "test.classpath" > <!-- adding the saxon jar to your classpath --> <fileset dir= "${lib.dir}" includes= "*.jar" /> </path> <target name= "transform" > <xslt in= "C:\Users\Administrator\eclipse-workspace\wushuaiTest\test-output/testng-results.xml" style= "C:\Users\Administrator\eclipse-workspace\wushuaiTest\test-output/testng-results.xsl" out= "C:\Users\Administrator\eclipse-workspace\wushuaiTest\test-output/TestReport/index.html " > <!-- you need to specify the directory here again --> <param name= "testNgXslt.outputDir" expression= "C:\Users\Administrator\eclipse-workspace\wushuaiTest\test-output/TestReport" /> <classpath refid= "test.classpath" /> </xslt> </target> </project>- 1
- 2
- 3
- 4
- 5
- 6
- 7
- 8
- 9
- 10
- 11
- 12
- 13
- 14
- 15
- 16
初始化build.xml
步驟:
右鍵build.xml-Run As-1.Ant Build 出现下图的BUILD SUCCESSFUL才算成功, 出现BUILD FAILED算失败- 1
- 2
- 3
- 4

之后我们运行自动化之后就可以查看报告样式了
步骤:
    执行完自动化脚本后-打开工程的testout-put文件夹-TestReport-index
打开index.xml即可,打开方式用火狐浏览器或者谷歌浏览器都可以,用ie浏览器就看不到如图所示的报告了- 1
- 2
- 3
