安装步骤:
- ELK Stack 简介
- 环境准备
- 安装 Elasticsearch
- Elasticsearch 命令
本篇文章主要记录 Elasticsearch 和 Kibana 环境的配置
1. ELK Stack 简介
ELK 是三个开源软件的缩写,分别为:Elasticsearch、Logstash 以及 Kibana,它们都是开源软件。不过现在还新增了一个 Beats,它是一个轻量级的日志收集处理工具(Agent),Beats 占用资源少,适合于在各个服务器上搜集日志后传输给 Logstash,官方也推荐此工具,目前由于原本的 ELK Stack 成员中加入了 Beats 工具所以已改名为 Elastic Stack。
根据 Google Trend 的信息显示,Elastic Stack 已经成为目前最流行的集中式日志解决方案。
Elastic Stack 包含:
- Elasticsearch 是个开源分布式搜索引擎,提供搜集、分析、存储数据三大功能。它的特点有:分布式,零配置,自动发现,索引自动分片,索引副本机制,restful 风格接口,多数据源,自动搜索负载等。详细可参考 Elasticsearch 权威指南
- Logstash 主要是用来日志的搜集、分析、过滤日志的工具,支持大量的数据获取方式。一般工作方式为 c/s 架构,client 端安装在需要收集日志的主机上,server 端负责将收到的各节点日志进行过滤、修改等操作在一并发往 Elasticsearch 上去。
- Kibana 也是一个开源和免费的工具,Kibana 可以为 Logstash 和 ElasticSearch 提供的日志分析友好的 Web 界面,可以帮助汇总、分析和搜索重要数据日志。
- Beats 在这里是一个轻量级日志采集器,其实 Beats 家族有 6 个成员,早期的 ELK 架构中使用 Logstash 收集、解析日志,但是 Logstash 对内存、cpu、io 等资源消耗比较高。相比 Logstash,Beats 所占系统的 CPU 和内存几乎可以忽略不计。
ELK Stack (5.0版本之后)–> Elastic Stack == (ELK Stack + Beats)。
目前 Beats 包含六种工具:
- Packetbeat: 网络数据(收集网络流量数据)
- Metricbeat: 指标(收集系统、进程和文件系统级别的 CPU 和内存使用情况等数据)
- Filebeat: 日志文件(收集文件数据)
- Winlogbeat: windows 事件日志(收集 Windows 事件日志数据)
- Auditbeat:审计数据(收集审计日志)
- Heartbeat:运行时间监控(收集系统运行时的数据)
ELK简单架图:

2. 环境准备
服务器环境:Centos 7.0(目前单机,后续再部署集群)
Elasticsearch 和 Logstash 需要 Java 环境,Elasticsearch 推荐的版本为 Java 8,安装教程:确定稳定的 Spring Cloud 相关环境版本
修改下服务器主机信息:
[root@es01 ~]# cat /etc/hostname
es01
[root@es01 ~]# cat /etc/hosts
127.0.0.1   localhost localhost.localdomain localhost4 localhost4.localdomain4
::1         localhost localhost.localdomain localhost6 localhost6.localdomain6

192.168.3.11 es01
192.168.3.12 kibana
注意:目前安装的 Elasticsearch 和 Kibana 都是最新版本(6.x),如果需要与Spring Cloud做集成会有些问题,需要与Spring Cloud集成可采用5.x 版本(具体 5.6.9 版本)
3. 安装 Elasticsearch
运行以下命令将 Elasticsearch 公共 GPG 密钥导入 rpm:
[root@es01 ~]# rpm --import https://artifacts.elastic.co/GPG-KEY-elasticsearch在/etc/yum.repos.d/目录中,创建一个名为elasticsearch.repo的文件,添加下面配置:
[elasticsearch-6.x]
name=Elasticsearch repository for 6.x packages
baseurl=https://artifacts.elastic.co/packages/6.x/yum
gpgcheck=1
gpgkey=https://artifacts.elastic.co/GPG-KEY-elasticsearch
enabled=1
autorefresh=1
type=rpm-md
Elasticsearch 源创建完成之后,通过 makecache 查看源是否可用,然后通过 yum 安装 Elasticsearch:
[root@es01 ~]# yum makecache && yum install elasticsearch -y修改配置文件:
[root@es01 ~]# grep -Ev "^#|^$" /etc/elasticsearch/elasticsearch.yml
node.name: es01
path.data: /var/lib/elasticsearch
path.logs: /var/log/elasticsearch
network.host: 0.0.0.0
http.port: 9200
http.cors.enabled: true          # 用于http集群插件的使用
http.cors.allow-origin: "*"      # 用于http集群插件的使用
设置开机启动,启服务,停服务
[root@es01 ~]# systemctl enable elasticsearch.service
[root@es01 ~]# systemctl start elasticsearch.service
[root@es01 ~]# systemctl stop elasticsearch.service
查看Elasticsearch服务日志
[root@es01 ~]# journalctl --unit elasticsearch
Aug 15 18:55:14 es01 systemd[1]: [/usr/lib/systemd/system/elasticsearch.service:8] Unknown lvalue 'RuntimeDirectory' in section 'Service'
Aug 15 18:55:14 es01 systemd[1]: [/usr/lib/systemd/system/elasticsearch.service:8] Unknown lvalue 'RuntimeDirectory' in section 'Service'
Aug 15 18:55:14 es01 systemd[1]: Starting Elasticsearch...
Aug 15 18:55:14 es01 systemd[1]: Started Elasticsearch.
Aug 15 18:55:14 es01 elasticsearch[2908]: which: no java in (/usr/local/sbin:/usr/local/bin:/usr/sbin:/usr/bin)
Aug 15 18:55:14 es01 elasticsearch[2908]: could not find java; set JAVA_HOME or ensure java is in PATH
Aug 15 18:55:14 es01 systemd[1]: elasticsearch.service: main process exited, code=exited, status=1/FAILURE
Aug 15 18:55:14 es01 systemd[1]: Unit elasticsearch.service entered failed state. 出现了错误,具体信息是未找到JAVA_HOME环境变量,但我们明明已经配置过了。
[root@es01 ~]# cat /etc/sysconfig/elasticsearch
JAVA_HOME=/usr/local/jdk1.8.0_144

# 重启服务
[root@es01 ~]# systemctl restart elasticsearch.service

# 查看elasticsearch启动状态
[root@es01 ~]# systemctl status elasticsearch.service
● elasticsearch.service - Elasticsearch
   Loaded: loaded (/usr/lib/systemd/system/elasticsearch.service; disabled; vendor preset: disabled)
   Active: active (running) since Wed 2018-08-15 19:07:44 CST; 49min ago
     Docs: http://www.elastic.co
 Main PID: 9871 (java)
   Memory: 1.2G
   CGroup: /system.slice/elasticsearch.service
           ├─ 9871 /usr/local/jdk1.8.0_144/bin/java -Xms1g -Xmx1g -XX:+UseConcMarkSweepGC -XX:CMSInitiatingOccupancyFraction=75 -XX:+UseCMSInitiatingOccupancy...
           └─10070 /usr/share/elasticsearch/modules/x-pack/x-pack-ml/platform/linux-x86_64/bin/controller

Aug 15 19:07:44 es01 systemd[1]: Started Elasticsearch.
Aug 15 19:07:44 es01 systemd[1]: Starting Elasticsearch...
Elasticsearch 已经成功启动
4. Elasticsearch基本命令使用
查看 Elasticsearch 信息:
[root@es01 ~]# curl -XGET 'http://localhost:9200/?pretty'
{
  "name" : "es01",
  "cluster_name" : "elasticsearch",
  "cluster_uuid" : "_qAzhw-pRqSfEb55LX_kdw",
  "version" : {
    "number" : "6.3.1",
    "build_flavor" : "default",
    "build_type" : "rpm",
    "build_hash" : "eb782d0",
    "build_date" : "2018-06-29T21:59:26.107521Z",
    "build_snapshot" : false,
    "lucene_version" : "7.3.1",
    "minimum_wire_compatibility_version" : "5.6.0",
    "minimum_index_compatibility_version" : "5.0.0"
  },
  "tagline" : "You Know, for Search"
}
Elasticsearch默认索引是5个分片,2个副本,所以单点创建索引是yellow状态,例如创建jackyops索引
[root@es01 ~]# curl -XPUT 'http://localhost:9200/jackyops'
{"acknowledged":true,"shards_acknowledged":true,"index":"jackyops"}

修改现有所有索引的副本数为0
[root@es01 ~]# curl -H "Content-Type: application/json"  -XPUT http://localhost:9200/_settings -d '
>  {
> "index":{
> "number_of_replicas":0
> }
> }'
{"acknowledged":true}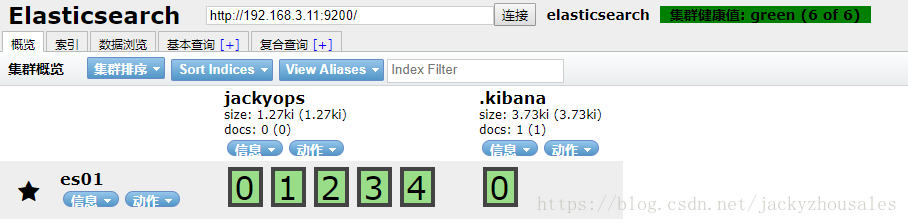
也可以修改指定模板索引的分片与副本数
[root@es01 ~]# curl -H "Content-Type: application/json"  -XPUT http://localhost:9200/_template/dog -d '{
  "template": "dog-*",
  "settings": {
    "number_of_shards": 3,
    "number_of_replicas": "0"
  }
}'


# 创建3只狗的索引
curl -XPUT 'http://localhost:9200/dog-01'
curl -XPUT 'http://localhost:9200/dog-02'
curl -XPUT 'http://localhost:9200/dog-03'
其它常用命令
# 查看Index索引表:
[root@es01 ~]# curl -XGET http://localhost:9200/_cat/indices
green open dog-01   erR2YhLETZS5Q6G3qj_9Qw 3 0 0 0  690b  690b
green open dog-02   72CDFk4yRCuUIV3sMZiHVA 3 0 0 0  690b  690b
green open jackyops gROq0IryTXeaLarzg0NxLQ 5 0 0 0 1.2kb 1.2kb
green open .kibana  0xtBUQExQf6RZe2kgh-XVg 1 0 1 0 3.7kb 3.7kb
green open dog-03   vS8CVqDATPWr6LG253Xzjg 3 0 0 0  690b  690b

# 添加Document数据
[root@es01 ~]# curl -H "Content-Type: application/json" -XPUT 'http://localhost:9200/jackyops/users/1' -d '{
>     "user" : "Jacky.zhou",
>     "post_date" : "2018-08-15T14:12:12",
>     "message" : "trying out Elastic Search"
> }'
{"_index":"jackyops","_type":"users","_id":"1","_version":1,"result":"created","_shards":{"total":1,"successful":1,"failed":0},"_seq_no":0,"_primary_term":1}

[root@es01 ~]# curl  -H "Content-Type: application/json"  -XGET 'http://localhost:9200/jackyops/users/1'
{"_index":"jackyops","_type":"users","_id":"1","_version":1,"found":true,"_source":{
    "user" : "Jacky.zhou",
    "post_date" : "2018-08-15T14:12:12",
    "message" : "trying out Elastic Search"
}}