GitHub操作流程 :
第一次提交 :
方案一 : 本地创建项目根目录, 然后与远程GitHub关联, 之后的操作一样;
-- 初始化Git仓库 :git init ;
-- 提交改变到缓存 :git commit -m 'description' ;
-- 本地git仓库关联GitHub仓库 : git remote add origin [email protected]:han1202012/TabHost_Test.git ;
-- 提交到GitHub中 : git push -u origin master ;
方案二 : 方案二就是不用关联GitHub仓库, 直接从GitHub冲克隆源码到本地, 项目根目录也不用创建;
-- 从GitHub上克隆项目到本地 :git clone [email protected]:han1202012/NDKHelloworld.git , 注意克隆的时候直接在仓库根目录即可, 不用再创建项目根目录 ;
-- 添加文件 :git add ./* , 将目录中所有文件添加;
-- 提交缓存 :git commit -m '提交';
-- 提交到远程GitHub仓库 : git push -u origin master ;
之后修改提交 :
-- 与GitHub远程仓库同步 :git pull ;
-- 查看文件变更 : git status ;
-- 提交代码到本地缓存 : git commit -m 'description';
-- 提交代码到远程GitHub仓库 :git push ;
.gitignore用法 : 开放模式 注明忽略的文件 直接列出文件名, 保守模式 注明保留的文件 !文件名 ;
Git标签操作 : 轻量级标签, 带注释标签;
--查看标签 :git tag ;
--添加标签 : 轻量级标签git tag tagName , 带注释标签git tag -a tagName -m 'description' ;
--删除标签 :git tag -d tagName ;
--提交标签到GitHub中 : git push origin --tags ;
Git分支操作: 创建分支后, 分支操作不会影响master分支, 但是master分支改变会影其它分支;
--列出分支 :git branch ;
--切换分支 :git checkout master ;
--提交分支 : git push origin branchName ;
--删除分支 : git branch -d branchName , 强制删除分支 git branch -D branchName ;
--合并分支 : git merge branchName ;
.
一. Git介绍
分布式 : Git版本控制系统是一个分布式的系统, 是用来保存工程源代码历史状态的命令行工具;
保存点 : Git的保存点可以追踪源码中的文件, 并能得到某一个时间点上的整个工程项目额状态; 可以在该保存点将多人提交的源码合并, 也可以会退到某一个保存点上;
Git离线操作性 :Git可以离线进行代码提交, 因此它称得上是完全的分布式处理, Git所有的操作不需要在线进行; 这意味着Git的速度要比SVN等工具快得多, 因为SVN等工具需要在线时才能操作, 如果网络环境不好, 提交代码会变得非常缓慢;
Git基于快照 : SVN等老式版本控制工具是将提交点保存成补丁文件, Git提交是将提交点指向提交时的项目快照, 提交的东西包含一些元数据(作者, 日期, GPG等);
Git的分支和合并 : 分支模型是Git最显著的特点, 因为这改变了开发者的开发模式, SVN等版本控制工具将每个分支都要放在不同的目录中, Git可以在同一个目录中切换不同的分支;
分支即时性 : 创建和切换分支几乎是同时进行的, 用户可以上传一部分分支, 另外一部分分支可以隐藏在本地, 不必将所有的分支都上传到GitHub中去;
分支灵活性 : 用户可以随时 创建 合并 删除分支, 多人实现不同的功能, 可以创建多个分支进行开发, 之后进行分支合并, 这种方式使开发变得快速, 简单, 安全;
----------------------------------------------------------------------------------------------------------------------------------------------------------------------------------
Git Bash提交源码到GitHub
(1) GitHub中创建一个工程
工程的https地址: https://github.com/han1202012/TabHost_Test.git .
工程的SSH地址 : [email protected]:han1202012/TabHost_Test.git .
GitHub提示生成的命令 :
-- Create a new repository on the command line :
[plain] view plaincopy

- touch README.md
- git init
- git add README.md
- git commit -m "first commit"
- git remote add origin [email protected]:han1202012/TabHost_Test.git
- git push -u origin master
-- Push an existing repository from the command line :
[plain] view plaincopy
- git remote add origin [email protected]:han1202012/TabHost_Test.git
- git push -u origin master
(2) 初始化git目录
使用命令 :
[plain] view plaincopy
- git init
如果不执行这条命令, 就会出现错误 : fatal: Not a git repository (or any of the parent directories): .git .
(3) 添加文件
使用命令 :
[plain] view plaincopy
- git add ./*
可能会报出一些警告, 不用理会 :
[plain] view plaincopy
- warning: LF will be replaced by CRLF in AndroidManifest.xml.
- The file will have its original line endings in your working directory.
- warning: LF will be replaced by CRLF in bin/AndroidManifest.xml.
- The file will have its original line endings in your working directory.
- warning: LF will be replaced by CRLF in gen/shuliang/han/tabhost_test/BuildConfig.java.
将仓库中的所有文件添加到缓存中;
(4) 提交缓存
使用命令 :
[plain] view plaincopy
- git remote add origin [email protected]:han1202012/TabHost_Test.git
将添加或者改变的内容提交到缓存中;
(5) 将Git本地缓存提交到GitHub中
使用命令 :
[plain] view plaincopy
- git push -u origin master
执行该命令, 源码就被提交到了GitHub 中;
.
作者 :万境绝尘
转载请注明出处 : http://blog.csdn.net/shulianghan/article/details/18812279
.
三. Git的一些用法
1. .gitignore文件
屏蔽文件 : .gitignore文件是告诉Git哪些目录或者文件需要忽略, 这些文件将不被提交;
常用场景 : 写完代码后会执行变异调试等操作, 使用 .gitignore 文件将这些编译后的文件屏蔽, 这些文件不需要Git工具进行管理;
Android中的.gitignore : 在Android中 bin 和 gen 两个目录可以忽略;
.gitignore位置 : 项目根目录下;
过滤模式 : Git中的 .gitignore 中有两种模式,开放模式 和保守模式,保守模式的优先级要高于开放模式;
开放模式 : 设置哪些文件 活 目录 被过滤, 凡是在文件中列出的文件或者目录都要被过滤掉;
-- 过滤目录 : /bin/ 就是将bin目录过滤, 该文件下的所有目录和文件都不被提交;
-- 过滤某个类型文件 : *.zip *.class 就是过滤zip 和 class 后缀的文件, 这些文件不被提交;
-- 过滤指定文件 : /gen/R.Java, 过滤该文件, 该文件不被提交;
保守模式 : 设置哪些文件不被过滤, 凡是列在其中的文件都要完整的提交上去;
-- 跟踪目录 : !/src , 该目录下的所有文件都要被提交;
-- 跟踪某类文件 : !*.java , 凡是java文件都要保留;
-- 跟踪指定文件 : !/AndroidManifest.xml , 该文件需要保留, 提交上去;
配置原则 : 一般情况下采用开放模式鱼保守模式共同使用;
eg : 一个目录下有很多目录和文件, 当我们只需要保留其中的一个文件的时候, 先用开放模式不保留这些文件, 然后用保守模式将这个文件留下来, 保守模式的优先级要高于开放模式;
2. 标签使用(Tag)
标签作用: 在开发的一些关键时期,使用标签来记录这些关键时刻, 例如发布版本, 有重大修改, 升级的时候, 会使用标签记录这些时刻, 来永久标记项目中的关键历史时刻;
查看标签: 列出的标签安装ASCII字母顺序确定, 排序没有很明确的意义;
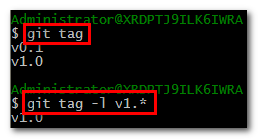
-- 列出所有的标签 :
[plain] view plaincopy
- git tag
-- 使用限定列出限定后的标签 :
[plain] view plaincopy
- git tag -l v1.*
标签分类 : Git中的标签分为 轻量级标签(lightweight) 和 带注释的标签(annotated), 一般情况下推荐使用带注释的标签, 如果标签是临时的可以采用轻量级标签;
-- 轻量级标签 : 轻量级标签中的信息含量很少, 这种标签只代表某时刻代码的提交, 相当于指向这个提交的指针;
-- 带注释标签 : 这种标签是一种校验和, 包含标签名, 邮箱, 日期, 标签信息, GPG签名 和 验证, 它相当于一个对象, 封装了这些信息;
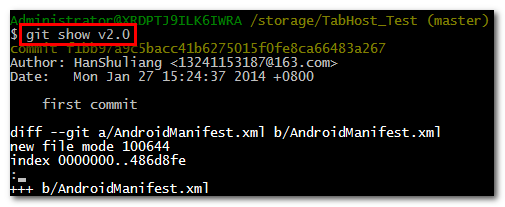
创建标签 :
-- 创建轻量级标签 : 这样的标签没有附带其它的信息;
[plain] view plaincopy
- git tag v2.0
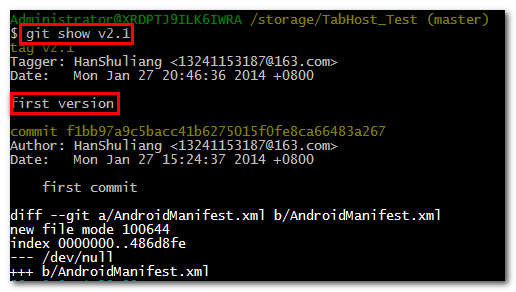
-- 创建带注释标签 : -m 后跟的是注释信息, 当使用git show v2.1的时候, 会显示这个注释信息;
[plain] view plaincopy
- git tag -a v2.1 -m 'first version'
-- 创建GPG私钥的注释标签 :
[plain] view plaincopy
- git tag -s v2.1 -m 'GPG version'
在本机上实验不成功 出现下面的错误 :
[plain] view plaincopy
- Administrator@XRDPTJ9ILK6IWRA /storage/TabHost_Test (master)
- $ git tag -s v2.2 -m 'GPG version'
- gpg: error loading `iconv.dll': 找不到指定的模块。
- gpg: please see http://www.gnupg.org/download/iconv.html for more information
- gpg: keyblock resource `c:/Documents and Settings/Administrator/.gnupg\secring.g
- pg': file open error
- gpg: keyblock resource `c:/Documents and Settings/Administrator/.gnupg\pubring.g
- pg': file open error
- gpg: skipped "HanShuliang <[email protected]>": secret key not available
- gpg: signing failed: secret key not available
- error: gpg failed to sign the data
- error: unable to sign the tag
以后再找原因;
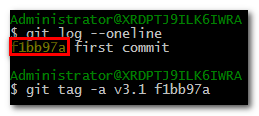
-- 为之前的提交添加标签 : 先使用 git log --oneline 命令列出之前的提交, 会有一个七位的十六进制数进行标记, 使用git tag -a v3.1 f1bb97a 命令即可为这个提交添加标签;
[plain] view plaincopy
- $ git log --oneline
- f1bb97a first commit
- git tag -a v3.1 f1bb97a
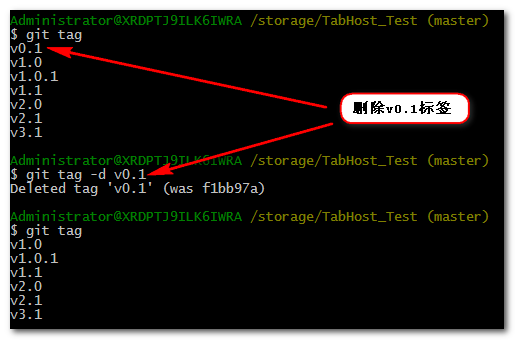
删除标签 : 使用命令 git tag -d 标签名 命令删除标签;
[plain] view plaincopy
- git tag -d v0.1
验证标签 : 提交了GPG带注释标签才可以验证, 因为上面没有提交成功, 这里留下一个命令;
[plain] view plaincopy
- git tag -v v1.0
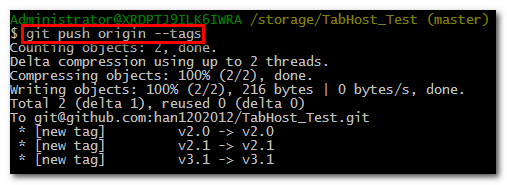
共享标签 : 即将标签提交到GitHub中;
[plain] view plaincopy
- git push origin --tags
3. 分支和合并
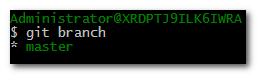
(1) 查看现存分支
查看现存分支 : git branch命令;
[plain] view plaincopy
- git branch
从结果可以看出, 现在只有一个分支master;
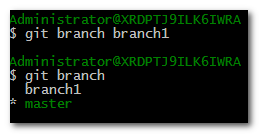
(2) 创建分支
创建分支 : git branch 分之名称, 就可以创建一个分支, 创建完分支以后可以查看分支, 当前使用的分支会显示成为绿色, 前面带有 "*", 如果不是当前使用的分支, 显示的是白色, 并且没有 "*" 前缀;
- git branch branch1
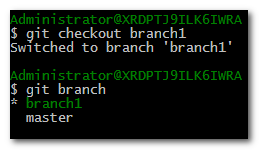
(3) 切换分支
切换分支 : git checkout 分支名称, 切换分支以后, 在分支进行操作,文件的改变不会体现在master主分支中, 主分支改变, 会体现在其它分支中;
- git checkout branch1
关于主分支和其它分支 :
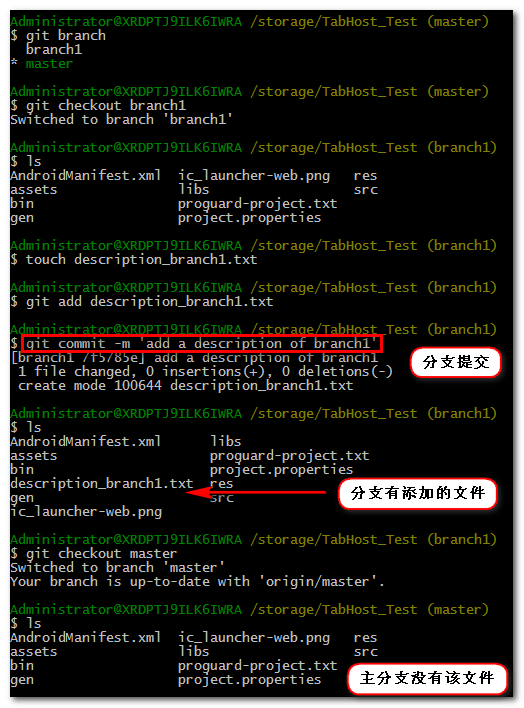
-- 分支编辑 : 现有两个分支 master 主分支, 和刚创建的branch1 分支, 切换到 branch1 分支, 在branch1 中创建一个文件 description_branch1.txt;
-- 其它分支文件不会影响主分支 : 然后在切换回 master 主分支, 发现没有description_branch1.txt文件, 创建一个文件 description_master.txt;
-- 主分支会影响其它分支 : 在切换回 branch1 分支中, 发现存在 description_master.txt文件;
.
对比过程 :
查看该工程项目分支情况 :
- git branch
-- 分支结果 :
- branch1
- master
切换到 branch1 分支 :
- git checkout branch1
-- 切换结果 :
- Switched to branch 'branch1'
查看 branch1 分支下的文件 :
- ls
-- 查看文件结果 :
- AndroidManifest.xml ic_launcher-web.png res
- assets libs src
- bin proguard-project.txt
- gen project.properties
创建一个文件 :
- touch description_branch1.txt
添加这个文件到本地缓存 :
- git add description_branch1.txt
提交本地缓存 : 注意, 这里必须提交, 如果不提交缓存, 这个文件在主分支也会出现;
- git commit -m 'add a description of branch1'
-- 提交结果结果 :
- [branch1 7f5785e] add a description of branch1
- 1 file changed, 0 insertions(+), 0 deletions(-)
- create mode 100644 description_branch1.txt
查看该分支下的文件 :
- ls
-- 查看文件结果 :
- AndroidManifest.xml libs
- assets proguard-project.txt
- bin project.properties
- <strong>description_branch1.txt</strong> res
- gen src
- ic_launcher-web.png
切换回主分支 :
- git checkout master
-- 切换分支结果 :
- Switched to branch 'master'
- Your branch is up-to-date with 'origin/master'.
查看主分支文件 :
- ls
-- 查看文件结果 : 没有在 branch1 中添加的文件;
- AndroidManifest.xml ic_launcher-web.png res
- assets libs src
- bin proguard-project.txt
- gen project.properties
.
(4) 提交分支
提交分支命令 : 将本地的分支提交到 GitHub中;
- git push origin experiment
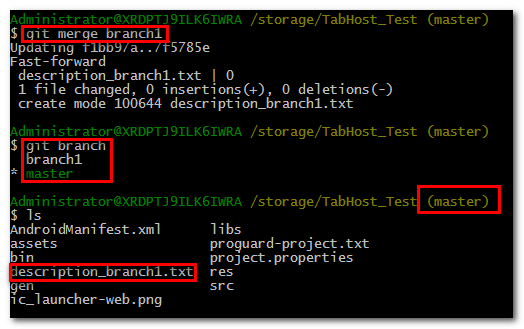
(5) 分支合并移除
合并分支命令 : 合并分支之后, 分支中有的文件在 主分支中也会显示, 相当于将branch1 分支中的文件拷贝了一份到master分支中;
- git merge branch1
合并结果 :
- Updating f1bb97a..7f5785e
- Fast-forward
- description_branch1.txt | 0
- 1 file changed, 0 insertions(+), 0 deletions(-)
- create mode 100644 description_branch1.txt
.
(6) 删除分支
删除分支命令 :
- git branch -d branch1
强制删除分支命令 : 如果branch1 分支还没有被合并的话, Git是不允许删除这个分支的, 此时要想删除该分支, 就只能使用下面的命令强制删除该分支 :
- git branch -D branch1
4. Git工作流程
(1) 两种工作流程
协作开发工作流程 : 这种情况是最复杂的情况, 多人团队共同开发一个项目;
-- 与远程仓库同步 : git pull ;
-- 修改文件 : 添加 删除 修改文件;
-- 查看变更 : git status ;
-- 载入变更 :添加文件, 先使用git add fileName, 在使用 git commit -m 'note' 载入变更; 如果是删除 修改文件, 直接使用 git commit -m 'note' 提交;
-- 重复 : 重复执行 修改文件 查看变更 载入变更 提交载入动作;
-- 上传 : 使用 git push 命令将项目源码提交带GitHub中去;
单独开发工作流程 : 如果是个人独立开发, 仅追踪本地文件变更, 就不需要提交到服务器上, 因为Git是分布式的;
-- 修改文件 :
-- 提交变更 :
-- 重复 :
(2) 简单示例
1> 独立开发示例
该示例不会上传, 仅在本地进行操作;
从GitHub中检出项目源码 : 注意, 检出的源码是根目录源码, 我们在总仓库的根目录检出即可,不同再为项目创建目录;
- git clone [email protected]:han1202012/AndroidPictureViewer.git
-- 检出克隆结果 :
- Cloning into 'AndroidPictureViewer'...
- remote: Counting objects: 86, done.
- remote: Compressing objects: 100% (62/62), done.
- remote: Total 86 (delta 3), reused 86 (delta 3)
- Receiving objects: 100% (86/86), 1.67 MiB | 109.00 KiB/s, done.
- Resolving deltas: 100% (3/3), done.
- Checking connectivity... done.
删除bin和gen目录 : 这两个目录是Android工程编译产生的临时文件, 没有必要上传到GitHub中去;
- rm -rf bin gen
-- 查看删除结果状态 :
- git status
-- 结果 :
- On branch master
- Your branch is up-to-date with 'origin/master'.
- Changes not staged for commit:
- (use "git add/rm <file>..." to update what will be committed)
- (use "git checkout -- <file>..." to discard changes in working directory)
- deleted: bin/AndroidManifest.xml
- deleted: bin/ImageView_Test.apk
- deleted: bin/classes.dex
- deleted: bin/res/crunch/drawable-xxhdpi/ic_launcher.png
- deleted: bin/resources.ap_
- deleted: gen/shuliang/han/imageview_test/BuildConfig.java
- deleted: gen/shuliang/han/imageview_test/R.java
提交缓存 :
git commit -a
-- 提交结果 :
- [master e4377ba] delete bin and gen directory.
- 28 files changed, 2 insertions(+), 110 deletions(-)
- create mode 100644 .gitignore
- delete mode 100644 bin/AndroidManifest.xml
- delete mode 100644 bin/ImageView_Test.apk
- delete mode 100644 bin/classes.dex
- delete mode 100644 bin/resources.ap_
- delete mode 100644 gen/shuliang/han/imageview_test/BuildConfig.java
- delete mode 100644 gen/shuliang/han/imageview_test/R.java
2> 协作开发示例
与远程仓库同步 :
- git pull
-- 如果其他人没有提交项目到GitHub上, 就会出现下面结果 :
- Already up-to-date.
修改文件后查看变更 :
- git status
-- 如果没有变更会出现下面情况 :
- On branch master
- Your branch is ahead of 'origin/master' by 1 commit.
- (use "git push" to publish your local commits)
- nothing to commit, working directory clean
载入变更 : 如果有变更, 那么使用命令载入变更. 使用 git commit -a 或者 git add 命令;
-- 添加文件 : 先使用 git add 文件名 来添加文件到缓存, 之后使用 git commit -m '' 命令提交代码到本地缓存;
-- 删除改变文件 : 直接使用 git commit -m '', 提交删除 或则 改变 到本地缓存;
提交项目源码到服务器 :
- git push
-- 提交源码结果 :
- warning: push.default is unset; its implicit value is changing in
- Git 2.0 from 'matching' to 'simple'. To squelch this message
- and maintain the current behavior after the default changes, use:
- git config --global push.default matching
- To squelch this message and adopt the new behavior now, use:
- git config --global push.default simple
- See 'git help config' and search for 'push.default' for further information.
- (the 'simple' mode was introduced in Git 1.7.11. Use the similar mode
- 'current' instead of 'simple' if you sometimes use older versions of Git)
- Counting objects: 4, done.
- Delta compression using up to 2 threads.
- Compressing objects: 100% (2/2), done.
- Writing objects: 100% (3/3), 292 bytes | 0 bytes/s, done.
- Total 3 (delta 1), reused 0 (delta 0)
- To [email protected]:han1202012/AndroidPictureViewer.git
- 1ddf8c7..e4377ba master -> master
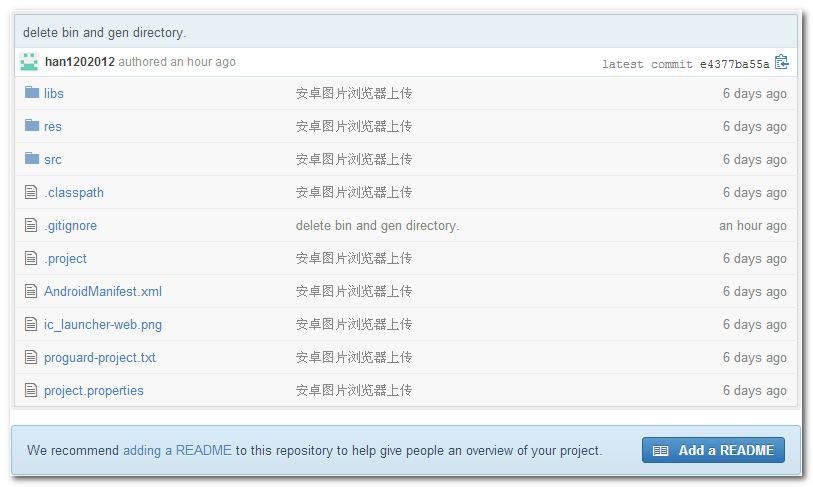
查看GitHub中的源码情况 : gen 和 bin 目录果然被删除了;