什么是ApplicationContext?
它是Spring的核心,Context我们通常解释为上下文环境,但是理解成容器会更好些。
ApplicationContext则是应用的容器。
Spring把Bean(object)放在容器中,需要用就通过get方法取出来。
ApplicationEvent
是个抽象类,里面只有一个构造函数和一个长整型的timestamp。
ApplicationListener
是一个接口,里面只有一个onApplicationEvent方法。
所以自己的类在实现该接口的时候,要实装该方法。
如果在上下文中部署一个实现了ApplicationListener接口的bean,
那么每当在一个ApplicationEvent发布到 ApplicationContext时,
这个bean得到通知。其实这就是标准的Oberver设计模式。
一个Demo:

package com;

import org.springframework.context.ApplicationEvent;

/**
 * Created by MyWorld on 2016/7/31.
 */
public class DemoEvent extends ApplicationEvent{
    public DemoEvent(Object source) {
        super(source);
    }
}
package com;

import org.springframework.context.ApplicationListener;
import org.springframework.stereotype.Component;

/**
 * Created by MyWorld on 2016/7/31.
 */
@Component
public class DemoObserver1 implements ApplicationListener<DemoEvent> {
    @Override
    public void onApplicationEvent(DemoEvent demoEvent) {
        System.out.println(this.getClass().getCanonicalName() + " receive: " + demoEvent.getSource());
    }
}
package com;

import org.springframework.context.ApplicationListener;
import org.springframework.stereotype.Component;

/**
 * Created by MyWorld on 2016/7/31.
 */
@Component
public class DemoObserver2 implements ApplicationListener<DemoEvent> {
    @Override
    public void onApplicationEvent(DemoEvent demoEvent) {
        System.out.println(this.getClass().getCanonicalName() + " receive: " + demoEvent.getSource());
    }
}
package com;

import org.springframework.context.ApplicationEventPublisher;
import org.springframework.context.ApplicationEventPublisherAware;
import org.springframework.stereotype.Component;

/**
 * Created by MyWorld on 2016/7/31.
 */
@Component
public class DemoSubject implements ApplicationEventPublisherAware {

    private ApplicationEventPublisher eventPublisher;

    @Override
    public void setApplicationEventPublisher(ApplicationEventPublisher applicationEventPublisher) {
        this.eventPublisher = applicationEventPublisher;
    }

    public void publish() {
        eventPublisher.publishEvent(new DemoEvent("Hello world!"));
    }
}
测试类:
package com;

import com.DemoConfig;
import com.DemoSubject;
import org.junit.Test;
import org.junit.runner.RunWith;
import org.springframework.beans.factory.annotation.Autowired;
import org.springframework.test.context.ContextConfiguration;
import org.springframework.test.context.junit4.SpringJUnit4ClassRunner;

/**
 * Created by MyWorld on 2016/7/31.
 */
@RunWith(SpringJUnit4ClassRunner.class)
@ContextConfiguration(classes = {DemoConfig.class})
public class DemoSubjectTest {

    @Autowired
    private DemoSubject demoSubject;

    @Test

    public void testPublish() throws Exception {
        demoSubject.publish();
    }
}
执行结果:
"C:\Program Files\Java\jdk1.8.0_65\bin\java" -ea -Didea.launcher.port=7535 "-Didea.launcher.bin.path=D:\Program Files\JetBrains\IntelliJ IDEA 14.1.6\bin" -Dfile.encoding=GBK -classpath "D:\Program Files\JetBrains\IntelliJ IDEA 14.1.6\lib\idea_rt.jar;D:\Program Files\JetBrains\IntelliJ IDEA 14.1.6\plugins\junit\lib\junit-rt.jar;C:\Program Files\Java\jdk1.8.0_65\jre\lib\charsets.jar;C:\Program Files\Java\jdk1.8.0_65\jre\lib\deploy.jar;C:\Program Files\Java\jdk1.8.0_65\jre\lib\javaws.jar;C:\Program Files\Java\jdk1.8.0_65\jre\lib\jce.jar;C:\Program Files\Java\jdk1.8.0_65\jre\lib\jfr.jar;C:\Program Files\Java\jdk1.8.0_65\jre\lib\jfxswt.jar;C:\Program Files\Java\jdk1.8.0_65\jre\lib\jsse.jar;C:\Program Files\Java\jdk1.8.0_65\jre\lib\management-agent.jar;C:\Program Files\Java\jdk1.8.0_65\jre\lib\plugin.jar;C:\Program Files\Java\jdk1.8.0_65\jre\lib\resources.jar;C:\Program Files\Java\jdk1.8.0_65\jre\lib\rt.jar;C:\Program Files\Java\jdk1.8.0_65\jre\lib\ext\access-bridge.jar;C:\Program Files\Java\jdk1.8.0_65\jre\lib\ext\cldrdata.jar;C:\Program Files\Java\jdk1.8.0_65\jre\lib\ext\dnsns.jar;C:\Program Files\Java\jdk1.8.0_65\jre\lib\ext\jaccess.jar;C:\Program Files\Java\jdk1.8.0_65\jre\lib\ext\jfxrt.jar;C:\Program Files\Java\jdk1.8.0_65\jre\lib\ext\localedata.jar;C:\Program Files\Java\jdk1.8.0_65\jre\lib\ext\nashorn.jar;C:\Program Files\Java\jdk1.8.0_65\jre\lib\ext\sunec.jar;C:\Program Files\Java\jdk1.8.0_65\jre\lib\ext\sunjce_provider.jar;C:\Program Files\Java\jdk1.8.0_65\jre\lib\ext\sunmscapi.jar;C:\Program Files\Java\jdk1.8.0_65\jre\lib\ext\sunpkcs11.jar;C:\Program Files\Java\jdk1.8.0_65\jre\lib\ext\zipfs.jar;D:\source\git\EventDemo\target\test-classes;D:\source\git\EventDemo\target\classes;G:\java\repository\org\springframework\spring-context\4.1.6.RELEASE\spring-context-4.1.6.RELEASE.jar;G:\java\repository\org\springframework\spring-aop\4.1.6.RELEASE\spring-aop-4.1.6.RELEASE.jar;G:\java\repository\aopalliance\aopalliance\1.0\aopalliance-1.0.jar;G:\java\repository\org\springframework\spring-beans\4.1.6.RELEASE\spring-beans-4.1.6.RELEASE.jar;G:\java\repository\org\springframework\spring-core\4.1.6.RELEASE\spring-core-4.1.6.RELEASE.jar;G:\java\repository\commons-logging\commons-logging\1.2\commons-logging-1.2.jar;G:\java\repository\org\springframework\spring-expression\4.1.6.RELEASE\spring-expression-4.1.6.RELEASE.jar;G:\java\repository\org\springframework\spring-test\4.1.6.RELEASE\spring-test-4.1.6.RELEASE.jar;G:\java\repository\junit\junit\4.12\junit-4.12.jar;G:\java\repository\org\hamcrest\hamcrest-core\1.3\hamcrest-core-1.3.jar" com.intellij.rt.execution.application.AppMain com.intellij.rt.execution.junit.JUnitStarter -ideVersion5 com.DemoSubjectTest
七月 31, 2016 1:50:40 下午 org.springframework.test.context.support.DefaultTestContextBootstrapper getDefaultTestExecutionListenerClassNames
信息: Loaded default TestExecutionListener class names from location [META-INF/spring.factories]: [org.springframework.test.context.web.ServletTestExecutionListener, org.springframework.test.context.support.DependencyInjectionTestExecutionListener, org.springframework.test.context.support.DirtiesContextTestExecutionListener, org.springframework.test.context.transaction.TransactionalTestExecutionListener, org.springframework.test.context.jdbc.SqlScriptsTestExecutionListener]
七月 31, 2016 1:50:40 下午 org.springframework.test.context.support.DefaultTestContextBootstrapper instantiateListeners
信息: Could not instantiate TestExecutionListener [org.springframework.test.context.jdbc.SqlScriptsTestExecutionListener]. Specify custom listener classes or make the default listener classes (and their required dependencies) available. Offending class: [org/springframework/transaction/interceptor/TransactionAttribute]
七月 31, 2016 1:50:40 下午 org.springframework.test.context.support.DefaultTestContextBootstrapper instantiateListeners
信息: Could not instantiate TestExecutionListener [org.springframework.test.context.transaction.TransactionalTestExecutionListener]. Specify custom listener classes or make the default listener classes (and their required dependencies) available. Offending class: [org/springframework/transaction/interceptor/TransactionAttributeSource]
七月 31, 2016 1:50:40 下午 org.springframework.test.context.support.DefaultTestContextBootstrapper instantiateListeners
信息: Could not instantiate TestExecutionListener [org.springframework.test.context.web.ServletTestExecutionListener]. Specify custom listener classes or make the default listener classes (and their required dependencies) available. Offending class: [javax/servlet/ServletContext]
七月 31, 2016 1:50:40 下午 org.springframework.test.context.support.DefaultTestContextBootstrapper getTestExecutionListeners
信息: Using TestExecutionListeners: [org.springframework.test.context.support.DependencyInjectionTestExecutionListener@17246de, org.springframework.test.context.support.DirtiesContextTestExecutionListener@f67ac7]
七月 31, 2016 1:50:40 下午 org.springframework.context.support.GenericApplicationContext prepareRefresh
信息: Refreshing org.springframework.context.support.GenericApplicationContext@1b6a447: startup date [Sun Jul 31 13:50:40 CST 2016]; root of context hierarchy
com.DemoObserver1 receive: Hello world!
com.DemoObserver2 receive: Hello world!

Process finished with exit code 0
代码:https://github.com/helloworldtang/EventDemo.git
首先,什么是观察者模式:多个观察者去监听主题,当主题发生变化的时候,主题会通知所有的观察者。
盗用网上的一个图:

从上图的结构可以看出,主题维护了一个观察者类型的链表,每当主题变化的时候,就会循环调用各个观察者的对应方法(这就是通知)。
在观察者模式中,又分为 推模型 和 拉模型。
- 推模型:主题向观察者推送详细信息。
- 拉模型:主题把自身作为一个参数发送给观察者,观察者需要什么信息,那么就 主题.getXX() 。
Java中的观察者模式
再来看看 Java中的观察者模式,最后再提一下 个人在 SpringBoot 中对于观察者模式的实际使用。
Java 提供了 Observer接口(观察者接口) 和 Observable 接口(被观察者接口 / 主题接口)。源码如下:
Observable 接口(被观察者接口 / 主题接口):
public class Observable {
    private boolean changed = false; private Vector<Observer> obs; public Observable() { obs = new Vector<>(); } public synchronized void addObserver(Observer o) { if (o == null) throw new NullPointerException(); if (!obs.contains(o)) { obs.addElement(o); } } public synchronized void deleteObserver(Observer o) { obs.removeElement(o); } public void notifyObservers() { notifyObservers(null); } public void notifyObservers(Object arg) { Object[] arrLocal; synchronized (this) { if (!changed) return; arrLocal = obs.toArray(); · clearChanged(); } for (int i = arrLocal.length-1; i>=0; i--) ((Observer)arrLocal[i]).update(this, arg); } public synchronized void deleteObservers() { obs.removeAllElements(); } protected synchronized void setChanged() { changed = true; } protected synchronized void clearChanged() { changed = false; } public synchronized boolean hasChanged() { return changed; } public synchronized int countObservers() { return obs.size(); } }
如上代码:通过 Vector 维护一个 观察者类型的数组。通过调用 notifyObeservers(Object arg) 方法 来通过观察者。在实现中,也是通过for 循环 通知。
Ps:注意:从代码上看,需要先设changed。
Observer接口(观察者接口):
public interface Observer {
    void update(Observable o, Object arg);
}
这两个参数的含义为:
* @param   o     the observable object.
* @param   arg   an argument passed to the <code>notifyObservers</code>
所以,此时即实现了 推模型,也实现了 拉模型。如果我们使用,那么分别实现这两个接口即可。
SpringBoot事件机制对于观察者模式的运用
那么在个人的实际运用中,做的是一个记账的服务,让别人来调用。当然,可以让别人直接在他们的业务处理后面,例如购买了XX东西,马上就直接调用我的记账服务,但是这样其实是一个紧耦合,由于是两个不同的业务,所以紧耦合感觉不太好。那么 观察者模式就有利于解耦。
对于Spring Boot 的事件机制,同样离不开 这2个东西-主题,观察者。 但是 ,spring boot 把 之前所说的通知,包装成了一个 Event。下面分析这三者。
SpringBoot的主题
Spring boot 的主题 可以 由 ApplicationContext 来充当。ApplicaitonContext 继承于 ApplicationEventPublisher。ApplicaiotnEventPublisher 源码如下:
public interface ApplicationEventPublisher {

    /** * Notify all listeners registered with this application of an application * event. Events may be framework events (such as RequestHandledEvent) * or application-specific events. * @param event the event to publish * @see org.springframework.web.context.support.RequestHandledEvent */ void publishEvent(ApplicationEvent event); }
其实该接口就是我们 发布事件的接口。
SpringBoot 的观察者
Spring Boot 的观察者由 ApplicationListener 来进行充当。源码如下:
public interface ApplicationListener<E extends ApplicationEvent> extends EventListener { /** * Handle an application event. * @param event the event to respond to */ void onApplicationEvent(E event); } 可以看到, onApplicaiton(E event) 方法即 上文所说的 update 方法。
SpringBoot的Event
自定义事件 继承ApplicationEvent抽象类
是Subject和Object传递消息的介质。因为这个类型的特殊性、唯一性,可以作为标识的依据。
就像Button按钮的点击事件、Move事件
上文所说的 主题 和 观察者 都有体现,传输的消息 Spring Boot 使用了一个 ApplicationEvent 进行了封装,
源码如下:
public abstract class ApplicationEvent extends EventObject { /** use serialVersionUID from Spring 1.2 for interoperability */ private static final long serialVersionUID = 7099057708183571937L; /** System time when the event happened */ private final long timestamp; public ApplicationEvent(Object source) { super(source); this.timestamp = System.currentTimeMillis(); } public final long getTimestamp() { return this.timestamp; } } EventObject 源码:
public class EventObject implements java.io.Serializable { private static final long serialVersionUID = 5516075349620653480L; /** * The object on which the Event initially occurred. */ protected transient Object source; public EventObject(Object source) { if (source == null) throw new IllegalArgumentException("null source"); this.source = source; } public Object getSource() { return source; } public String toString() { return getClass().getName() + "[source=" + source + "]"; } }

由上面的代码 可知,其实 ApplicationEvent 就是 把需要传输的消息 封装起来。这个消息并没有想 Java 的实现那样推拉模型都实现了,而是 只实现了 拉模型 。
最后,我们程序中只需要 注入ApplicaitonContext (Subject)发送消息publishEvent;
实现 ApplicationListener 接口的Observer进行相应的处理即可。
要注册事件监听器,我们只需要把它配置成一个Bean即可,ApplicationContext容器会自动将其注册。
总结
观察者模式实质是 有两个 东西:
- 一个是 主题
- 一个是观察者
主题中维护了 观察者列表的引用。当主题有变更的时候,循环调用观察者,通知其做相应的处理。另外,不论是 Java,还是 Spring ,都是利用这个原理,只是有不同的类充当 主题 和 观察者。
另外,观察者模式有一个好处:解耦。
http://blog.csdn.net/allen215902/article/details/50747438
通过Application. publishEvent方法,我们可以将事件 通知系统内所有的ApplicationListener。
ApplicationContext容器提供了容器内部事件发布功能,是继承自JavaSE标准自定义事件类而实现的。
JavaSE标准自定义事件结构不在此详细描述,一张图很直观的描述清楚:

EventObject,为JavaSE提供的事件类型基类,任何自定义的事件都继承自该类,例如上图中右侧灰色的各个事件。Spring中提供了该接口的子类ApplicationEvent。
EventListener为JavaSE提供的事件监听者接口(Observer),任何自定义的事件监听者都实现了该接口,如上图左侧的各个事件监听者。
Spring中提供了该接口的子类ApplicationListener接口。
JavaSE中未提供事件发布者这一角色类,由各个应用程序自行实现事件发布者这一角色。Spring中提供了ApplicationEventPublisher接口作为事件发布者,并且ApplicationContext(Subject)实现了这个接口,担当起了事件发布者这一角色。
但ApplicationContext在具体实现上有所差异,Spring提供了ApplicationEventMulticaster接口,负责管理ApplicationListener和发布ApplicationEvent。ApplicationContext会把相应的事件相关工作委派给ApplicationEventMulticaster接口实现类来做。
类图如下所示:
事件发布时序图如下:

Spring中提供一些Aware相关的接口,BeanFactoryAware、 ApplicationContextAware、ResourceLoaderAware、ServletContextAware等等,其中最常用到的是ApplicationContextAware。
实现ApplicationContextAware的Bean,在Bean被初始后,将会被注入ApplicationContext的实例。
ApplicationContextAware提供了publishEvent()方法,实现Observer(观察者)设计模式的事件传播机,提供了针对Bean的事件传播功能。
通过Application.publishEvent方法,我们可以将事件通知系统内所有的ApplicationListener。
Spring事件处理一般过程:
◆定义Event类(Subject和Observer传递消息的介质),继承org.springframework.context.ApplicationEvent。
◆编写发布事件类Publisher(Subject),实现org.springframework.context.ApplicationContextAware接口。
◆覆盖方法setApplicationContext(ApplicationContext applicationContext)和发布方法publish(Object obj)。
◆定义时间监听类EventListener(Observer),实现ApplicationListener接口,实现方法onApplicationEvent(ApplicationEvent event)。
import org.springframework.context.ApplicationEventPublisher;
import org.springframework.context.ApplicationEventPublisherAware;

/**
 *
 * @author zq
 *
 */
public class HelloWorld implements ApplicationEventPublisherAware{
 private String word;
 private ApplicationEventPublisher tradeEventPublisher;

 public void setWord(String w){
  this.word = w;
 }

 public void say(){
  System.out.println("say : "+ this.word);
  //construct a TradeEvent instance and publish it
  TradeEvent tradeEvent = new TradeEvent(new String("tradeEvent"));
  this.tradeEventPublisher.publishEvent(tradeEvent);
 }

 @Override
 public void setApplicationEventPublisher(
   ApplicationEventPublisher applicationEventPublisher) {
  // TODO Auto-generated method stub
  this.tradeEventPublisher = applicationEventPublisher;
 }
}
2.接受事件
import org.springframework.context.ApplicationEvent;
import org.springframework.context.ApplicationListener;
import org.springframework.context.event.ContextStartedEvent;

public class TradeContextListener implements ApplicationListener{

 @Override
 public void onApplicationEvent(ApplicationEvent e) {

  System.out.println(e.getClass().toString());
  // TODO Auto-generated method stub
  if (e instanceof ContextStartedEvent){
   System.out.println("it was contextStartedEvent");
  }

  if (e instanceof TradeEvent){
   System.out.println(e.getSource());
  }

 }

}
3配置文件
<?xml version="1.0" encoding="utf-8"?>
<!DOCTYPE beans PUBLIC "-//SPRING//DTD BEAN//EN" "http://www.springframework.org/dtd/spring-beans.dtd">
<beans>
 <bean name="helloWorld" class="study.HelloWorld">
  <property name="word" value="hello world"/>
 </bean>

 <bean id="tradeContextListener" class="study.TradeContextListener"/>
</beans>
import org.springframework.context.ApplicationContext;
import org.springframework.context.support.ClassPathXmlApplicationContext;

import study.HelloWorld;
public class TestHelloWorld {

 /**
  * @param args
  */
 public static void main(String[] args) {
  // TODO Auto-generated method stub

  ApplicationContext applicationContext = new ClassPathXmlApplicationContext("study-context.xml");
  HelloWorld bean = (HelloWorld)applicationContext.getBean("helloWorld");
  bean.say();
 }

}
1) ContextRefreshedEvent:当ApplicationContext初始化或者刷新时触发该事件。
2) ContextClosedEvent:当ApplicationContext被关闭时触发该事件。容器被关闭时,其管理的所有单例Bean都被销毁。
3) RequestHandleEvent:在Web应用中,当一个http请求(request)结束触发该事件。
ContestStartedEvent:Spring2.5新增的事件,当容器调用ConfigurableApplicationContext的Start()方法开始/重新开始容器时触发该事件。
5) ContestStopedEvent:Spring2.5新增的事件,当容器调用ConfigurableApplicationContext的Stop()方法停止容器时触发该事件。
下面通过一个例子展示如何处理Spring内定的事件(例程3.8)。创建一个Java工程,添加Spring开发能力后,新建ioc.test包。在包中新建ApplicationEventListener类,实现ApplicationListener接口,在onApplicationEvent()方法中添加事件处理代码,如下:
2
3 //Import省略
4 publicclass ApplicationEventListenerimplements ApplicationListener {
5
6 publicvoid onApplicationEvent(ApplicationEvent event) {
7
8 //如果是容器刷新事件
9 if(eventinstanceof ContextClosedEvent ){
10 System.out.println(event.getClass().getSimpleName()+" 事件已发生!");
11 }elseif(eventinstanceof ContextRefreshedEvent ){//如果是容器关闭事件
12 System.out.println(event.getClass().getSimpleName()+" 事件已发生!");
13 }elseif(eventinstanceof ContextStartedEvent ){
14 System.out.println(event.getClass().getSimpleName()+" 事件已发生!");
15 }elseif(eventinstanceof ContextStoppedEvent){
16 System.out.println(event.getClass().getSimpleName()+" 事件已发生!");
17 }else{
18 System.out.println("有其它事件发生:"+event.getClass().getName());
19 }
20
21 }
22
23 }
24
在Spring配置文件中定义一个Bean,类为ApplicationEventListener,代码如下:
2 <beans…………
3
4 <bean id="ApplicationEventListener" class="ioc.test.ApplicationEventListener"/>
5
6 </beans>
7
添加含有主方法的TesMain类,在主方法中,调用容器的相应方法,触发Spring内定事件,代码如下:
2
3 //import省略
4 publicclass TesMain {
5
6 publicstaticvoid main(String[] args) {
7 AbstractApplicationContext ac=newClassPathXmlApplicationContext("applicationContext.xml");
8
9
10 // ac.refresh();//触发ContextRefreshedEvent事件
11 ac.start();//触发ContextStartedEvent事件
12 ac.stop(); //触发ContextStoppedEvent事件
13 ac.close();//关闭容器,触发ContextClosedEvent事件
14
15 }
16 }
17
运行主类,控制台输出如下:
从例子中可以知道,要注册事件监听器,我们只需要把它配置成一个Bean即可,ApplicationContext容器会自动将其注册。
http://blog.csdn.net/it_man/article/details/8440737
什么是ApplicationContext?
它是Spring的核心,Context我们通常解释为上下文环境,但是理解成容器会更好些。
ApplicationContext则是应用的容器。
Spring把Bean(object)放在容器中,需要用就通过get方法取出来。
ApplicationEvent
是个抽象类,里面只有一个构造函数和一个长整型的timestamp。
ApplicationListener
是一个接口,里面只有一个onApplicationEvent方法。
所以自己的类在实现该接口的时候,要实装该方法。
如果在上下文中部署一个实现了ApplicationListener接口的bean,
那么每当在一个ApplicationEvent发布到 ApplicationContext时,
这个bean得到通知。其实这就是标准的Oberver设计模式。
一个Demo:
package com;

import org.springframework.context.ApplicationEvent;

/**
 * Created by MyWorld on 2016/7/31.
 */
public class DemoEvent extends ApplicationEvent{
    public DemoEvent(Object source) {
        super(source);
    }
}
package com;

import org.springframework.context.ApplicationListener;
import org.springframework.stereotype.Component;

/**
 * Created by MyWorld on 2016/7/31.
 */
@Component
public class DemoObserver1 implements ApplicationListener<DemoEvent> {
    @Override
    public void onApplicationEvent(DemoEvent demoEvent) {
        System.out.println(this.getClass().getCanonicalName() + " receive: " + demoEvent.getSource());
    }
}
package com;

import org.springframework.context.ApplicationListener;
import org.springframework.stereotype.Component;

/**
 * Created by MyWorld on 2016/7/31.
 */
@Component
public class DemoObserver2 implements ApplicationListener<DemoEvent> {
    @Override
    public void onApplicationEvent(DemoEvent demoEvent) {
        System.out.println(this.getClass().getCanonicalName() + " receive: " + demoEvent.getSource());
    }
}
package com;

import org.springframework.context.ApplicationEventPublisher;
import org.springframework.context.ApplicationEventPublisherAware;
import org.springframework.stereotype.Component;

/**
 * Created by MyWorld on 2016/7/31.
 */
@Component
public class DemoSubject implements ApplicationEventPublisherAware {

    private ApplicationEventPublisher eventPublisher;

    @Override
    public void setApplicationEventPublisher(ApplicationEventPublisher applicationEventPublisher) {
        this.eventPublisher = applicationEventPublisher;
    }

    public void publish() {
        eventPublisher.publishEvent(new DemoEvent("Hello world!"));
    }
}
测试类:
package com;

import com.DemoConfig;
import com.DemoSubject;
import org.junit.Test;
import org.junit.runner.RunWith;
import org.springframework.beans.factory.annotation.Autowired;
import org.springframework.test.context.ContextConfiguration;
import org.springframework.test.context.junit4.SpringJUnit4ClassRunner;

/**
 * Created by MyWorld on 2016/7/31.
 */
@RunWith(SpringJUnit4ClassRunner.class)
@ContextConfiguration(classes = {DemoConfig.class})
public class DemoSubjectTest {

    @Autowired
    private DemoSubject demoSubject;

    @Test

    public void testPublish() throws Exception {
        demoSubject.publish();
    }
}
执行结果:
"C:\Program Files\Java\jdk1.8.0_65\bin\java" -ea -Didea.launcher.port=7535 "-Didea.launcher.bin.path=D:\Program Files\JetBrains\IntelliJ IDEA 14.1.6\bin" -Dfile.encoding=GBK -classpath "D:\Program Files\JetBrains\IntelliJ IDEA 14.1.6\lib\idea_rt.jar;D:\Program Files\JetBrains\IntelliJ IDEA 14.1.6\plugins\junit\lib\junit-rt.jar;C:\Program Files\Java\jdk1.8.0_65\jre\lib\charsets.jar;C:\Program Files\Java\jdk1.8.0_65\jre\lib\deploy.jar;C:\Program Files\Java\jdk1.8.0_65\jre\lib\javaws.jar;C:\Program Files\Java\jdk1.8.0_65\jre\lib\jce.jar;C:\Program Files\Java\jdk1.8.0_65\jre\lib\jfr.jar;C:\Program Files\Java\jdk1.8.0_65\jre\lib\jfxswt.jar;C:\Program Files\Java\jdk1.8.0_65\jre\lib\jsse.jar;C:\Program Files\Java\jdk1.8.0_65\jre\lib\management-agent.jar;C:\Program Files\Java\jdk1.8.0_65\jre\lib\plugin.jar;C:\Program Files\Java\jdk1.8.0_65\jre\lib\resources.jar;C:\Program Files\Java\jdk1.8.0_65\jre\lib\rt.jar;C:\Program Files\Java\jdk1.8.0_65\jre\lib\ext\access-bridge.jar;C:\Program Files\Java\jdk1.8.0_65\jre\lib\ext\cldrdata.jar;C:\Program Files\Java\jdk1.8.0_65\jre\lib\ext\dnsns.jar;C:\Program Files\Java\jdk1.8.0_65\jre\lib\ext\jaccess.jar;C:\Program Files\Java\jdk1.8.0_65\jre\lib\ext\jfxrt.jar;C:\Program Files\Java\jdk1.8.0_65\jre\lib\ext\localedata.jar;C:\Program Files\Java\jdk1.8.0_65\jre\lib\ext\nashorn.jar;C:\Program Files\Java\jdk1.8.0_65\jre\lib\ext\sunec.jar;C:\Program Files\Java\jdk1.8.0_65\jre\lib\ext\sunjce_provider.jar;C:\Program Files\Java\jdk1.8.0_65\jre\lib\ext\sunmscapi.jar;C:\Program Files\Java\jdk1.8.0_65\jre\lib\ext\sunpkcs11.jar;C:\Program Files\Java\jdk1.8.0_65\jre\lib\ext\zipfs.jar;D:\source\git\EventDemo\target\test-classes;D:\source\git\EventDemo\target\classes;G:\java\repository\org\springframework\spring-context\4.1.6.RELEASE\spring-context-4.1.6.RELEASE.jar;G:\java\repository\org\springframework\spring-aop\4.1.6.RELEASE\spring-aop-4.1.6.RELEASE.jar;G:\java\repository\aopalliance\aopalliance\1.0\aopalliance-1.0.jar;G:\java\repository\org\springframework\spring-beans\4.1.6.RELEASE\spring-beans-4.1.6.RELEASE.jar;G:\java\repository\org\springframework\spring-core\4.1.6.RELEASE\spring-core-4.1.6.RELEASE.jar;G:\java\repository\commons-logging\commons-logging\1.2\commons-logging-1.2.jar;G:\java\repository\org\springframework\spring-expression\4.1.6.RELEASE\spring-expression-4.1.6.RELEASE.jar;G:\java\repository\org\springframework\spring-test\4.1.6.RELEASE\spring-test-4.1.6.RELEASE.jar;G:\java\repository\junit\junit\4.12\junit-4.12.jar;G:\java\repository\org\hamcrest\hamcrest-core\1.3\hamcrest-core-1.3.jar" com.intellij.rt.execution.application.AppMain com.intellij.rt.execution.junit.JUnitStarter -ideVersion5 com.DemoSubjectTest
七月 31, 2016 1:50:40 下午 org.springframework.test.context.support.DefaultTestContextBootstrapper getDefaultTestExecutionListenerClassNames
信息: Loaded default TestExecutionListener class names from location [META-INF/spring.factories]: [org.springframework.test.context.web.ServletTestExecutionListener, org.springframework.test.context.support.DependencyInjectionTestExecutionListener, org.springframework.test.context.support.DirtiesContextTestExecutionListener, org.springframework.test.context.transaction.TransactionalTestExecutionListener, org.springframework.test.context.jdbc.SqlScriptsTestExecutionListener]
七月 31, 2016 1:50:40 下午 org.springframework.test.context.support.DefaultTestContextBootstrapper instantiateListeners
信息: Could not instantiate TestExecutionListener [org.springframework.test.context.jdbc.SqlScriptsTestExecutionListener]. Specify custom listener classes or make the default listener classes (and their required dependencies) available. Offending class: [org/springframework/transaction/interceptor/TransactionAttribute]
七月 31, 2016 1:50:40 下午 org.springframework.test.context.support.DefaultTestContextBootstrapper instantiateListeners
信息: Could not instantiate TestExecutionListener [org.springframework.test.context.transaction.TransactionalTestExecutionListener]. Specify custom listener classes or make the default listener classes (and their required dependencies) available. Offending class: [org/springframework/transaction/interceptor/TransactionAttributeSource]
七月 31, 2016 1:50:40 下午 org.springframework.test.context.support.DefaultTestContextBootstrapper instantiateListeners
信息: Could not instantiate TestExecutionListener [org.springframework.test.context.web.ServletTestExecutionListener]. Specify custom listener classes or make the default listener classes (and their required dependencies) available. Offending class: [javax/servlet/ServletContext]
七月 31, 2016 1:50:40 下午 org.springframework.test.context.support.DefaultTestContextBootstrapper getTestExecutionListeners
信息: Using TestExecutionListeners: [org.springframework.test.context.support.DependencyInjectionTestExecutionListener@17246de, org.springframework.test.context.support.DirtiesContextTestExecutionListener@f67ac7]
七月 31, 2016 1:50:40 下午 org.springframework.context.support.GenericApplicationContext prepareRefresh
信息: Refreshing org.springframework.context.support.GenericApplicationContext@1b6a447: startup date [Sun Jul 31 13:50:40 CST 2016]; root of context hierarchy
com.DemoObserver1 receive: Hello world!
com.DemoObserver2 receive: Hello world!

Process finished with exit code 0
代码:https://github.com/helloworldtang/EventDemo.git
首先,什么是观察者模式:多个观察者去监听主题,当主题发生变化的时候,主题会通知所有的观察者。
盗用网上的一个图:
从上图的结构可以看出,主题维护了一个观察者类型的链表,每当主题变化的时候,就会循环调用各个观察者的对应方法(这就是通知)。
在观察者模式中,又分为 推模型 和 拉模型。
- 推模型:主题向观察者推送详细信息。
- 拉模型:主题把自身作为一个参数发送给观察者,观察者需要什么信息,那么就 主题.getXX() 。
Java中的观察者模式
再来看看 Java中的观察者模式,最后再提一下 个人在 SpringBoot 中对于观察者模式的实际使用。
Java 提供了 Observer接口(观察者接口) 和 Observable 接口(被观察者接口 / 主题接口)。源码如下:
Observable 接口(被观察者接口 / 主题接口):
public class Observable {
    private boolean changed = false; private Vector<Observer> obs; public Observable() { obs = new Vector<>(); } public synchronized void addObserver(Observer o) { if (o == null) throw new NullPointerException(); if (!obs.contains(o)) { obs.addElement(o); } } public synchronized void deleteObserver(Observer o) { obs.removeElement(o); } public void notifyObservers() { notifyObservers(null); } public void notifyObservers(Object arg) { Object[] arrLocal; synchronized (this) { if (!changed) return; arrLocal = obs.toArray(); · clearChanged(); } for (int i = arrLocal.length-1; i>=0; i--) ((Observer)arrLocal[i]).update(this, arg); } public synchronized void deleteObservers() { obs.removeAllElements(); } protected synchronized void setChanged() { changed = true; } protected synchronized void clearChanged() { changed = false; } public synchronized boolean hasChanged() { return changed; } public synchronized int countObservers() { return obs.size(); } }
如上代码:通过 Vector 维护一个 观察者类型的数组。通过调用 notifyObeservers(Object arg) 方法 来通过观察者。在实现中,也是通过for 循环 通知。
Ps:注意:从代码上看,需要先设changed。
Observer接口(观察者接口):
public interface Observer {
    void update(Observable o, Object arg);
}
这两个参数的含义为:
* @param   o     the observable object.
* @param   arg   an argument passed to the <code>notifyObservers</code>
所以,此时即实现了 推模型,也实现了 拉模型。如果我们使用,那么分别实现这两个接口即可。
SpringBoot事件机制对于观察者模式的运用
那么在个人的实际运用中,做的是一个记账的服务,让别人来调用。当然,可以让别人直接在他们的业务处理后面,例如购买了XX东西,马上就直接调用我的记账服务,但是这样其实是一个紧耦合,由于是两个不同的业务,所以紧耦合感觉不太好。那么 观察者模式就有利于解耦。
对于Spring Boot 的事件机制,同样离不开 这2个东西-主题,观察者。 但是 ,spring boot 把 之前所说的通知,包装成了一个 Event。下面分析这三者。
SpringBoot的主题
Spring boot 的主题 可以 由 ApplicationContext 来充当。ApplicaitonContext 继承于 ApplicationEventPublisher。ApplicaiotnEventPublisher 源码如下:
public interface ApplicationEventPublisher {

    /** * Notify all listeners registered with this application of an application * event. Events may be framework events (such as RequestHandledEvent) * or application-specific events. * @param event the event to publish * @see org.springframework.web.context.support.RequestHandledEvent */ void publishEvent(ApplicationEvent event); }
其实该接口就是我们 发布事件的接口。
SpringBoot 的观察者
Spring Boot 的观察者由 ApplicationListener 来进行充当。源码如下:
public interface ApplicationListener<E extends ApplicationEvent> extends EventListener { /** * Handle an application event. * @param event the event to respond to */ void onApplicationEvent(E event); } 可以看到, onApplicaiton(E event) 方法即 上文所说的 update 方法。
SpringBoot的Event
自定义事件 继承ApplicationEvent抽象类
是Subject和Object传递消息的介质。因为这个类型的特殊性、唯一性,可以作为标识的依据。
就像Button按钮的点击事件、Move事件
上文所说的 主题 和 观察者 都有体现,传输的消息 Spring Boot 使用了一个 ApplicationEvent 进行了封装,
源码如下:
public abstract class ApplicationEvent extends EventObject { /** use serialVersionUID from Spring 1.2 for interoperability */ private static final long serialVersionUID = 7099057708183571937L; /** System time when the event happened */ private final long timestamp; public ApplicationEvent(Object source) { super(source); this.timestamp = System.currentTimeMillis(); } public final long getTimestamp() { return this.timestamp; } } EventObject 源码:
public class EventObject implements java.io.Serializable { private static final long serialVersionUID = 5516075349620653480L; /** * The object on which the Event initially occurred. */ protected transient Object source; public EventObject(Object source) { if (source == null) throw new IllegalArgumentException("null source"); this.source = source; } public Object getSource() { return source; } public String toString() { return getClass().getName() + "[source=" + source + "]"; } }

由上面的代码 可知,其实 ApplicationEvent 就是 把需要传输的消息 封装起来。这个消息并没有想 Java 的实现那样推拉模型都实现了,而是 只实现了 拉模型 。
最后,我们程序中只需要 注入ApplicaitonContext (Subject)发送消息publishEvent;
实现 ApplicationListener 接口的Observer进行相应的处理即可。
要注册事件监听器,我们只需要把它配置成一个Bean即可,ApplicationContext容器会自动将其注册。
总结
观察者模式实质是 有两个 东西:
- 一个是 主题
- 一个是观察者
主题中维护了 观察者列表的引用。当主题有变更的时候,循环调用观察者,通知其做相应的处理。另外,不论是 Java,还是 Spring ,都是利用这个原理,只是有不同的类充当 主题 和 观察者。
另外,观察者模式有一个好处:解耦。
http://blog.csdn.net/allen215902/article/details/50747438
通过Application. publishEvent方法,我们可以将事件 通知系统内所有的ApplicationListener。
ApplicationContext容器提供了容器内部事件发布功能,是继承自JavaSE标准自定义事件类而实现的。
JavaSE标准自定义事件结构不在此详细描述,一张图很直观的描述清楚:
EventObject,为JavaSE提供的事件类型基类,任何自定义的事件都继承自该类,例如上图中右侧灰色的各个事件。Spring中提供了该接口的子类ApplicationEvent。
EventListener为JavaSE提供的事件监听者接口(Observer),任何自定义的事件监听者都实现了该接口,如上图左侧的各个事件监听者。
Spring中提供了该接口的子类ApplicationListener接口。
JavaSE中未提供事件发布者这一角色类,由各个应用程序自行实现事件发布者这一角色。Spring中提供了ApplicationEventPublisher接口作为事件发布者,并且ApplicationContext(Subject)实现了这个接口,担当起了事件发布者这一角色。
但ApplicationContext在具体实现上有所差异,Spring提供了ApplicationEventMulticaster接口,负责管理ApplicationListener和发布ApplicationEvent。ApplicationContext会把相应的事件相关工作委派给ApplicationEventMulticaster接口实现类来做。
类图如下所示:
事件发布时序图如下:
Spring中提供一些Aware相关的接口,BeanFactoryAware、 ApplicationContextAware、ResourceLoaderAware、ServletContextAware等等,其中最常用到的是ApplicationContextAware。
实现ApplicationContextAware的Bean,在Bean被初始后,将会被注入ApplicationContext的实例。
ApplicationContextAware提供了publishEvent()方法,实现Observer(观察者)设计模式的事件传播机,提供了针对Bean的事件传播功能。
通过Application.publishEvent方法,我们可以将事件通知系统内所有的ApplicationListener。
Spring事件处理一般过程:
◆定义Event类(Subject和Observer传递消息的介质),继承org.springframework.context.ApplicationEvent。
◆编写发布事件类Publisher(Subject),实现org.springframework.context.ApplicationContextAware接口。
◆覆盖方法setApplicationContext(ApplicationContext applicationContext)和发布方法publish(Object obj)。
◆定义时间监听类EventListener(Observer),实现ApplicationListener接口,实现方法onApplicationEvent(ApplicationEvent event)。
import org.springframework.context.ApplicationEventPublisher;
import org.springframework.context.ApplicationEventPublisherAware;

/**
 *
 * @author zq
 *
 */
public class HelloWorld implements ApplicationEventPublisherAware{
 private String word;
 private ApplicationEventPublisher tradeEventPublisher;

 public void setWord(String w){
  this.word = w;
 }

 public void say(){
  System.out.println("say : "+ this.word);
  //construct a TradeEvent instance and publish it
  TradeEvent tradeEvent = new TradeEvent(new String("tradeEvent"));
  this.tradeEventPublisher.publishEvent(tradeEvent);
 }

 @Override
 public void setApplicationEventPublisher(
   ApplicationEventPublisher applicationEventPublisher) {
  // TODO Auto-generated method stub
  this.tradeEventPublisher = applicationEventPublisher;
 }
}
2.接受事件
import org.springframework.context.ApplicationEvent;
import org.springframework.context.ApplicationListener;
import org.springframework.context.event.ContextStartedEvent;

public class TradeContextListener implements ApplicationListener{

 @Override
 public void onApplicationEvent(ApplicationEvent e) {

  System.out.println(e.getClass().toString());
  // TODO Auto-generated method stub
  if (e instanceof ContextStartedEvent){
   System.out.println("it was contextStartedEvent");
  }

  if (e instanceof TradeEvent){
   System.out.println(e.getSource());
  }

 }

}
3配置文件
<?xml version="1.0" encoding="utf-8"?>
<!DOCTYPE beans PUBLIC "-//SPRING//DTD BEAN//EN" "http://www.springframework.org/dtd/spring-beans.dtd">
<beans>
 <bean name="helloWorld" class="study.HelloWorld">
  <property name="word" value="hello world"/>
 </bean>

 <bean id="tradeContextListener" class="study.TradeContextListener"/>
</beans>
import org.springframework.context.ApplicationContext;
import org.springframework.context.support.ClassPathXmlApplicationContext;

import study.HelloWorld;
public class TestHelloWorld {

 /**
  * @param args
  */
 public static void main(String[] args) {
  // TODO Auto-generated method stub

  ApplicationContext applicationContext = new ClassPathXmlApplicationContext("study-context.xml");
  HelloWorld bean = (HelloWorld)applicationContext.getBean("helloWorld");
  bean.say();
 }

}
1) ContextRefreshedEvent:当ApplicationContext初始化或者刷新时触发该事件。
2) ContextClosedEvent:当ApplicationContext被关闭时触发该事件。容器被关闭时,其管理的所有单例Bean都被销毁。
3) RequestHandleEvent:在Web应用中,当一个http请求(request)结束触发该事件。
ContestStartedEvent:Spring2.5新增的事件,当容器调用ConfigurableApplicationContext的Start()方法开始/重新开始容器时触发该事件。
5) ContestStopedEvent:Spring2.5新增的事件,当容器调用ConfigurableApplicationContext的Stop()方法停止容器时触发该事件。
下面通过一个例子展示如何处理Spring内定的事件(例程3.8)。创建一个Java工程,添加Spring开发能力后,新建ioc.test包。在包中新建ApplicationEventListener类,实现ApplicationListener接口,在onApplicationEvent()方法中添加事件处理代码,如下:
2
3 //Import省略
4 publicclass ApplicationEventListenerimplements ApplicationListener {
5
6 publicvoid onApplicationEvent(ApplicationEvent event) {
7
8 //如果是容器刷新事件
9 if(eventinstanceof ContextClosedEvent ){
10 System.out.println(event.getClass().getSimpleName()+" 事件已发生!");
11 }elseif(eventinstanceof ContextRefreshedEvent ){//如果是容器关闭事件
12 System.out.println(event.getClass().getSimpleName()+" 事件已发生!");
13 }elseif(eventinstanceof ContextStartedEvent ){
14 System.out.println(event.getClass().getSimpleName()+" 事件已发生!");
15 }elseif(eventinstanceof ContextStoppedEvent){
16 System.out.println(event.getClass().getSimpleName()+" 事件已发生!");
17 }else{
18 System.out.println("有其它事件发生:"+event.getClass().getName());
19 }
20
21 }
22
23 }
24
在Spring配置文件中定义一个Bean,类为ApplicationEventListener,代码如下:
2 <beans…………
3
4 <bean id="ApplicationEventListener" class="ioc.test.ApplicationEventListener"/>
5
6 </beans>
7
添加含有主方法的TesMain类,在主方法中,调用容器的相应方法,触发Spring内定事件,代码如下:
2
3 //import省略
4 publicclass TesMain {
5
6 publicstaticvoid main(String[] args) {
7 AbstractApplicationContext ac=newClassPathXmlApplicationContext("applicationContext.xml");
8
9
10 // ac.refresh();//触发ContextRefreshedEvent事件
11 ac.start();//触发ContextStartedEvent事件
12 ac.stop(); //触发ContextStoppedEvent事件
13 ac.close();//关闭容器,触发ContextClosedEvent事件
14
15 }
16 }
17
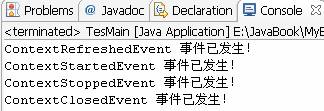
运行主类,控制台输出如下:
从例子中可以知道,要注册事件监听器,我们只需要把它配置成一个Bean即可,ApplicationContext容器会自动将其注册。
http://blog.csdn.net/it_man/article/details/8440737