1.源码下载及编译
编解码器版本采用opus-1.3-beta,opus官网:https://www.opus-codec.org/
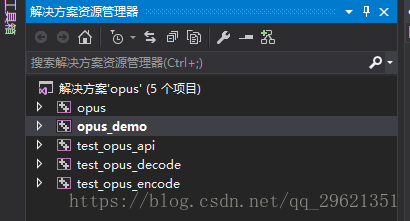
下载完成后解压源码,在VS2015上打开源码 opus-1.3-beta\win32\VS2015\opus.sln,共有5个项目,其中opus项目是opus编解码器的主要实现以及对外部提供接口,实际写程序的时候一定是基于该项目中接口的,opus_demo是基于opus项目写的一个命令行程序,可以通过命令行调用opus项目的编解码功能,操作实际的音频数据。另外三个是基于opus项目的测试程序。分别测试编码功能、解码功能以及API接口
右键点击opus_demo,设为启动项,并生成解决方案。生成之后就可以关闭VS了(因为主要在命令行下进行编解码操作)。
进入 opus-1.3-beta\win32\VS2015\Win32\Debug,里面有一个opus_demo.exe,在当前文件夹下SHIFT+右键选择在此处打开命令窗口,在命令台下使用源码目录README文档中的指令就可以操作。
Usage: opus_demo [-e] <application> <sampling rate (Hz)> <channels (1/2)>
         <bits per second> [options] <input> <output>
       opus_demo -d <sampling rate (Hz)> <channels (1/2)> [options]
         <input> <output>

mode: voip | audio | restricted-lowdelay
options:
  -e                : only runs the encoder (output the bit-stream)
  -d                : only runs the decoder (reads the bit-stream as input)
  -cbr              : enable constant bitrate; default: variable bitrate
  -cvbr             : enable constrained variable bitrate; default:
                      unconstrained
  -bandwidth <NB|MB|WB|SWB|FB>
                    : audio bandwidth (from narrowband to fullband);
                      default: sampling rate
  -framesize <2.5|5|10|20|40|60>
                    : frame size in ms; default: 20
  -max_payload <bytes>
                    : maximum payload size in bytes, default: 1024
  -complexity <comp>
                    : complexity, 0 (lowest) ... 10 (highest); default: 10
  -inbandfec        : enable SILK inband FEC
  -forcemono        : force mono encoding, even for stereo input
  -dtx              : enable SILK DTX
  -loss <perc>      : simulate packet loss, in percent (0-100); default: 0

input and output are little-endian signed 16-bit PCM files or opus
bitstreams with simple opus_demo proprietary framing.
举例:
opus_demo -e voip 48000 1 16000 -framesize 10 C:\Users\tengxc\Desktop\zhou.pcm c:\Users\tengxc\Desktop\zhou.opus2.opus编码器接口
opus编解码器接口的定义主要在opus工程源码中的opus.h文件中。以C语言的方式提供。
编码器接口中有一个重要的结构体变量 struct OpusEncoder,它表示编码器状态,结构体中包含很多变量用来统计opus编码器的状态,使用时用先 typedef struct OpusEncoder OpusEncoder;
创建编码器:
opus接口中创建编码器的方式有两种,因此与之对应的释放编码器的方式也有两种,创建编码器时可以选用
OpusEncoder* enc;
OpusEncoder *opus_encoder_create(opus_int32 Fs, int channels, int application, int *error);
举例:enc = opus_encoder_create(16000, 1, OPUS_APPLICATION_VOIP, &err_num);
参数:采样率、通道数、应用类型、错误码
或者
OpusEncoder *enc;
size = opus_encoder_get_size(channels);
enc = malloc(size);
err_num = opus_encoder_init(enc, Fs, channels, application);
参数:同上
两种创建编码器的方式差异在于表示编码器状态的结构体内存申请方式不一样,第一种内存的申请方式为opus_encoder_create函数申请内存后返回一个首地址指针,第二种是自己申请一块内存后用opus_encoder_init函数填充。
编码音频数据:
编码音频数据也分为两种方式,一种是float型,一种是int型。
opus_int32 opus_encode(OpusEncoder *st, const opus_int16 *pcm, int frame_size, unsigned char *data, opus_int32 max_data_bytes);
举例:opus_int32 len = opus_encode(enc, pcm, 960, out, 4000);
参数:解码器状态指针、音频原始数据、以样本个数为单位的帧长度、编码完成的数据、最大的编码后数据长度

或者
opus_int32 opus_encode_float(OpusEncoder *st, const float *pcm, int frame_size, unsigned char *data, opus_int32 max_data_bytes);
举例:opus_int32 len = opus_encode(enc, pcm, 960, out, 4000);
参数:同上
在这两种编码方式中,浮点型编码是更加损耗CPU,但是因此获得的编码精度更高,所以音质更加精准,而16位in整型编码是更多机器支持的,编码精度稍低,对CPU的损耗也小一点。
释放编码器:
当采用opus_encoder_create创建编码器时,需要用opus_encoder_destroy释放。
opus_encoder_destroy(OpusEncoder *st);
举例:opus_encoder_destroy(enc);
参数:编码器状态结构指针
当采用opus_encoder_init创建编码器时,需要用free释放。
举例:free(enc); //由于前面是使用malloc申请的内存
参数:编码器状态结构指针
修改编码参数:
opus支持编码器运行时的参数修改。
int opus_encoder_ctl(OpusEncoder *st, int request, ...);
举例:opus_encoder_ctl(enc, OPUS_SET_BITRATE(bitrate));
参数:编码器状态结构指针、设置的参数