一、Nginx基础信息
Nginx(enginex)是一个高性能的HTTP和反向代理服务器,也是一个IMAP/POP3/SMTP服务器。
nginx官方网站:http://nginx.org/
nginx plus收费软件,企业级(功能强大)
二、搭建nginx服务器
1.下载安装包并打开

[root@nginx ~]# tar zxf nginx-1.14.0.tar.gz 2.修改配置文件
[root@nginx ~]# cd  nginx-1.14.0/src/core/
[root@nginx core]# vim nginx.h
不显示版本号

3.关掉debug功能
[root@nginx nginx-1.14.0]# cd  auto/cc/
[root@nginx cc]# vim gcc

4.安装nginx
[root@nginx nginx-1.14.0]# yum install gcc pcre-devel openssl-devel -y
[root@nginx nginx-1.14.0]# ./configure --prefix=/usr/local/nginx --with-http_ssl_module --with-http_stub_status_module --with-threads --with-file-aio[root@nginx nginx-1.14.0]# make
t@nginx nginx-1.14.0]# make install5.创建软链接
创建完成之后就可以直接调用
[root@nginx nginx-1.14.0]# cd /usr/local/nginx/sbin
[root@nginx sbin]# ln -s /usr/local/nginx/sbin/nginx /sbin/
6.nginx的相关命令
| 命令 | 含义 |
|---|---|
| nginx | 开启nginx服务 |
| nginx -t | 检查配置文件的语法 |
| nginx -s stop | 关闭nginx服务 |
| nginx -s reload | 重新加载nginx服务 |
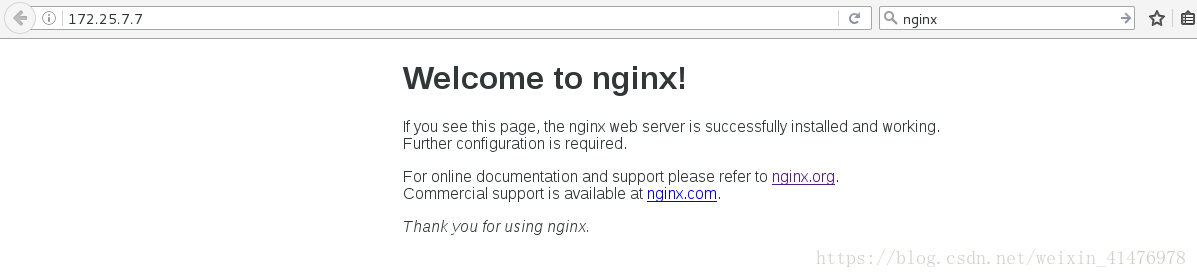
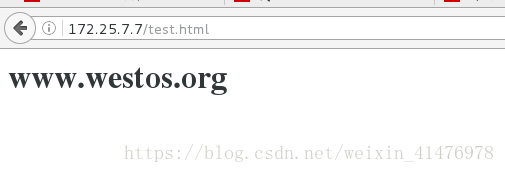
测试:在浏览器访问ngxin
编辑test.html页面
[root@nginx html]# pwd
/usr/local/nginx/html
[root@nginx html]# vim  test.html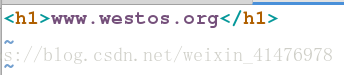
测试:
三、nginx实现负载均衡
1.基本配置
1.修改worker_processes的值
[root@nginx conf]# pwd
/usr/local/nginx/conf
[root@nginx conf]# vim nginx.conf
Nginx worker_processes进程数设置,一般来说,拥有几个逻辑CPU,就设置为几个worker_processes 为宜
本机只有一个cpu我设置为1,也可调用auto函数,自动匹配

2.worker_cpu_affinity的说明
默认是没有开启的,0001 0010 0100 1000 分别代表第1、2、3、4个逻辑CPU,所以我们可以设置0010 0100 1000来将3个进程分别绑定到第2、3、4个逻辑CPU上:
worker_processes 3;
worker_cpu_affinity 0010 0100 1000;
本次实验不加入此项
3.修改最大连接数
[root@nginx conf]# vim nginx.conf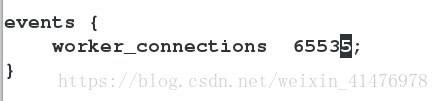
在操作系统中进行修改:
[root@nginx conf]# vim /etc/security/limits.conf
4.添加nginx用户并指定家目录
[root@nginx conf]# useradd -M -d /usr/local/nginx/ nginx
5.修改用户和用户组
[root@nginx conf]# vim nginx.conf

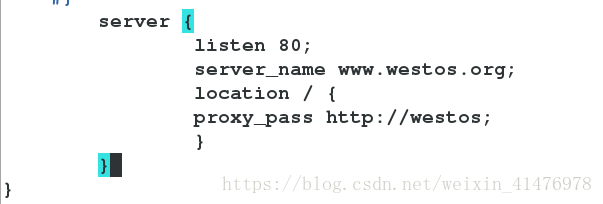
6.设置轮叫upstream
[root@nginx conf]# vim nginx.conf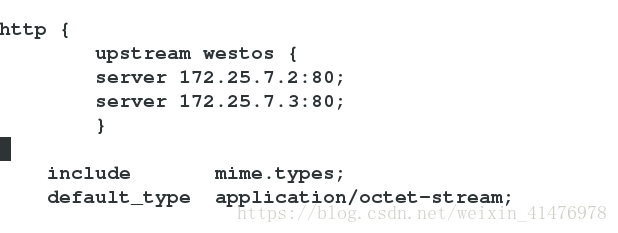
在末尾加入:
当访问 www.westos.org的80端口时把页面定位到upstream westos
检查语法并重新加载:
[root@nginx conf]# nginx -t
nginx: the configuration file /usr/local/nginx/conf/nginx.conf syntax is ok
nginx: configuration file /usr/local/nginx/conf/nginx.conf test is successful
[root@nginx conf]# nginx -s reload
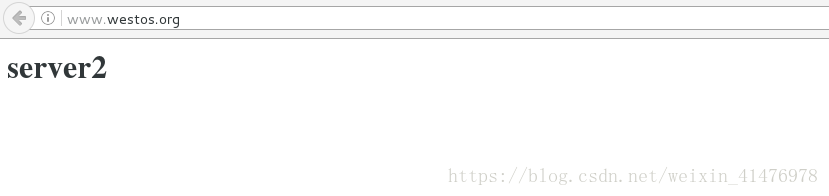
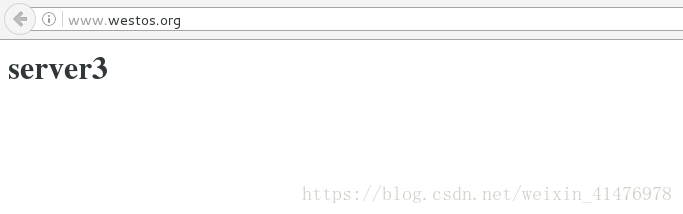
在客户端添加本地解析:

server2和server3的httpd服务开启:
[root@server2 ~]# /etc/init.d/httpd start
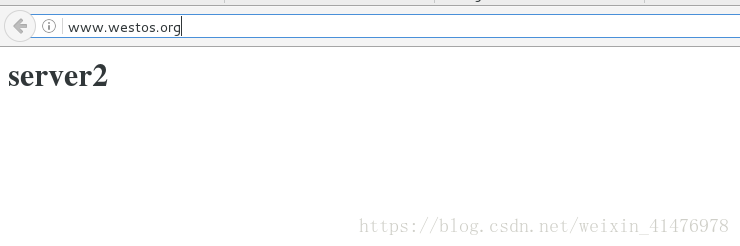
[root@server3 ~]# /etc/init.d/httpd start测试:在客户端打开浏览器访问www.westos.org
2.ip_hash的设置
Nginx中的ip_hash技术能够将某个ip 的请求定向到同一台后端web机器中,这样一来这个ip 下的客户端和某个后端 web机器就能建立起稳固的链接
ip_hash机制能够让某一客户机在相当长的一段时间内只访问固定的后端的某台真实的web服务器,这样会话就会得以保持,在网站页面进行login的时候就不会在后面的web服务器之间跳来跳去了,也不会出现登录一次的网站又提醒重新登录的情况.
1.配置nginx服务
[root@nginx conf]# vim nginx.conf

[root@nginx conf]# nginx -s reload
[root@nginx conf]# nginx -t
nginx: the configuration file /usr/local/nginx/conf/nginx.conf syntax is ok
nginx: configuration file /usr/local/nginx/conf/nginx.conf test is successful
2.客户端检测
[root@foundation7 ~]# for i in {1..10};do curl www.westos.org;done

3.健康检查
1.配置nginx文件
[root@nginx conf]# vim nginx.conf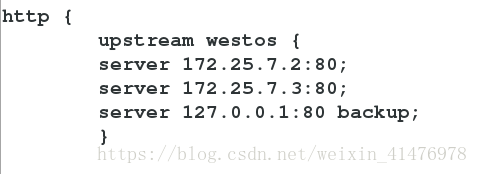
[root@nginx conf]# nginx -t
nginx: the configuration file /usr/local/nginx/conf/nginx.conf syntax is ok
nginx: configuration file /usr/local/nginx/conf/nginx.conf test is successful
[root@nginx conf]# nginx -s reload
2.测试:
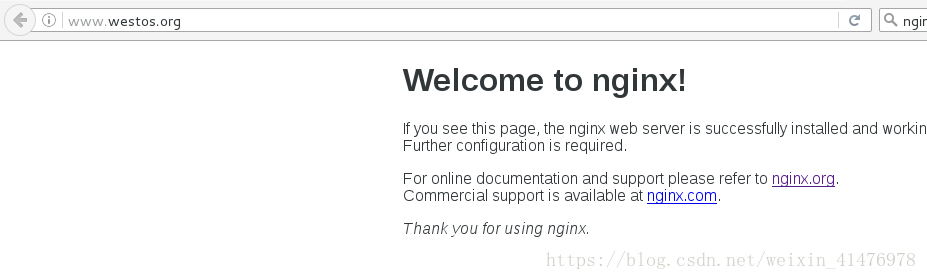
当server2和server3的httpd服务关闭
四、nginx的sticky模块
1.下载1.10版本的nginx和sticky模块

关闭原来的nginx服务:
[root@nginx ~]# nginx -s stop解包:
[root@nginx ~]# tar zxf nginx-sticky-module-ng.tar.gz
[root@nginx ~]# tar zxf nginx-1.10.1.tar.gz
2.安装nginx1.10版本
指定位置为/opt/nginx,加入sticky模块
[root@nginx nginx-1.10.1]# ./configure --prefix=/opt/nginx --with-http_ssl_module --with-http_stub_status_module --with-threads --with-file-aio --add-module=/root/nginx-sticky-module-ng
[root@nginx nginx-1.10.1]# make && make install3.编写nginx配置文件
把之前写好的文件先复制过来
[root@nginx conf]# pwd
/opt/nginx/conf
[root@nginx conf]# cp /usr/local/nginx/conf/nginx.conf .
cp: overwrite `./nginx.conf'? y
然后再进一步编写
[root@nginx conf]# vim nginx.conf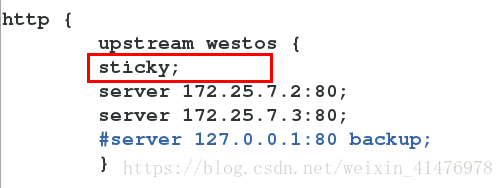
4.开启服务
因为之前版本的nginx 链到了/sbin,所以采用绝对路径的方法来调用1.10版的nginx

[root@nginx ~]# /opt/nginx/sbin/nginx
[root@nginx ~]# /opt/nginx/sbin/nginx -s reload
[root@nginx ~]# /opt/nginx/sbin/nginx -t
nginx: the configuration file /opt/nginx/conf/nginx.conf syntax is ok
nginx: configuration file /opt/nginx/conf/nginx.conf test is successful
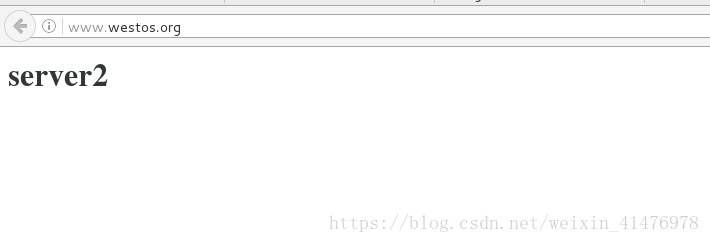
测试:
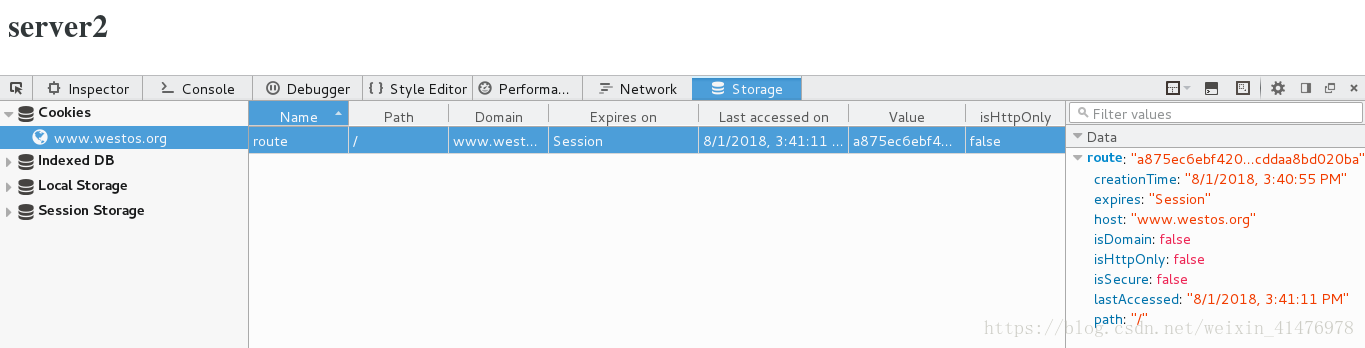
在浏览器访问的时候会一直访问同一个服务器
按F12可以看到缓存信息:
在shell中访问则会轮叫
