实验环境:
172.25.23.2:master
172.25.88.3:slave
172.25.88.1:mysql-proxy
首先实现数据库的主从复制,具体设置请查询我之前的博客,这里我用server1作为master,server2作为slave ,
server1:
[root@server1 ~]# tar zxf mysql-proxy-0.8.5-linux-el6-x86-64bit.tar.gz -C /usr/local/
[root@server1 ~]# cd /usr/local/
[root@server1 local]# ls
bin  games    lib    libexec                                sbin   src
etc  include  lib64  mysql-proxy-0.8.5-linux-el6-x86-64bit  share
[root@server1 local]# ls
bin  games    lib    libexec                                sbin   src
etc  include  lib64  mysql-proxy-0.8.5-linux-el6-x86-64bit  share
[root@server1 local]# cd
[root@server1 ~]# vim .bash_profile
[root@server1 ~]# source .bash_profile
[root@server1 ~]# cd /usr/local/
[root@server1 local]# ls
bin  games    lib    libexec                                sbin   src
etc  include  lib64  mysql-proxy-0.8.5-linux-el6-x86-64bit  share
[root@server1 local]# mv mysql-proxy-0.8.5-linux-el6-x86-64bit/ /usr/local/mysql-proxy
[root@server1 local]#cd /usr/local/mysql-proxy/share/doc/mysql-proxy
[root@server1 mysql-proxy]# vim rw-splitting.lua
[root@server1 mysql-proxy]# pwd
/usr/local/mysql-proxy/share/doc/mysql-proxy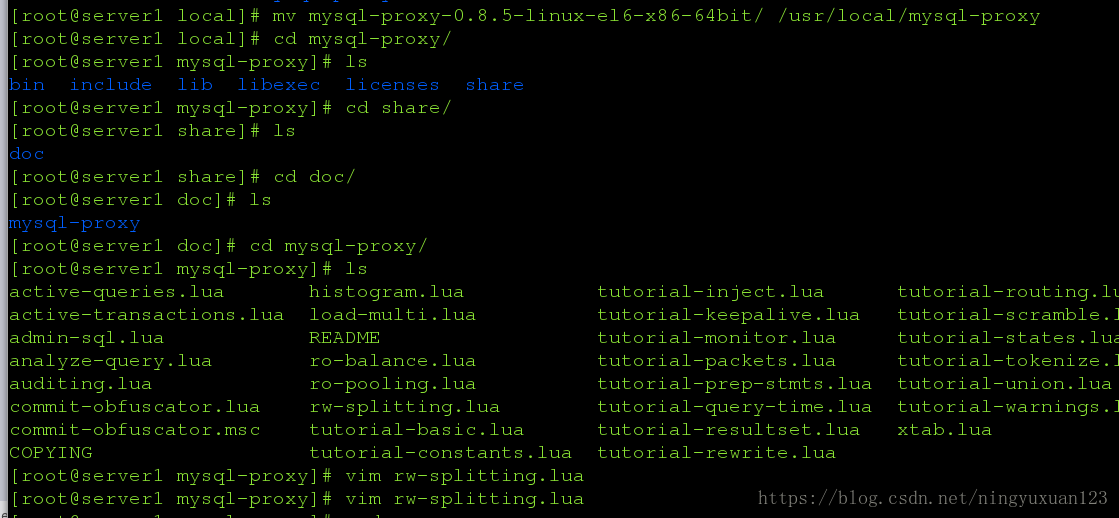
[root@server1 ~]# cd /usr/local/mysql-proxy/
[root@server1 mysql-proxy]# mkdir logs
[root@server1 mysql-proxy]# mkdir conf
[root@server1 mysql-proxy]# cd conf/
[root@server1 conf]# vim mysql-proxy.conf
[root@server1 conf]# chmod 660 mysql-proxy.conf
[root@server1 mysql-proxy]# ls
bin  conf  include  lib  libexec  licenses  logs  share
[root@server1 mysql-proxy]# cd bin/
[root@server1 bin]# ls
[root@server1 mysql-proxy]# cd bin/
[root@server1 bin]# ./mysql-proxy  --defaults-file=/usr/local/mysql-proxy/conf/mysql-proxy.conf
[root@server1 bin]# netstat -antlup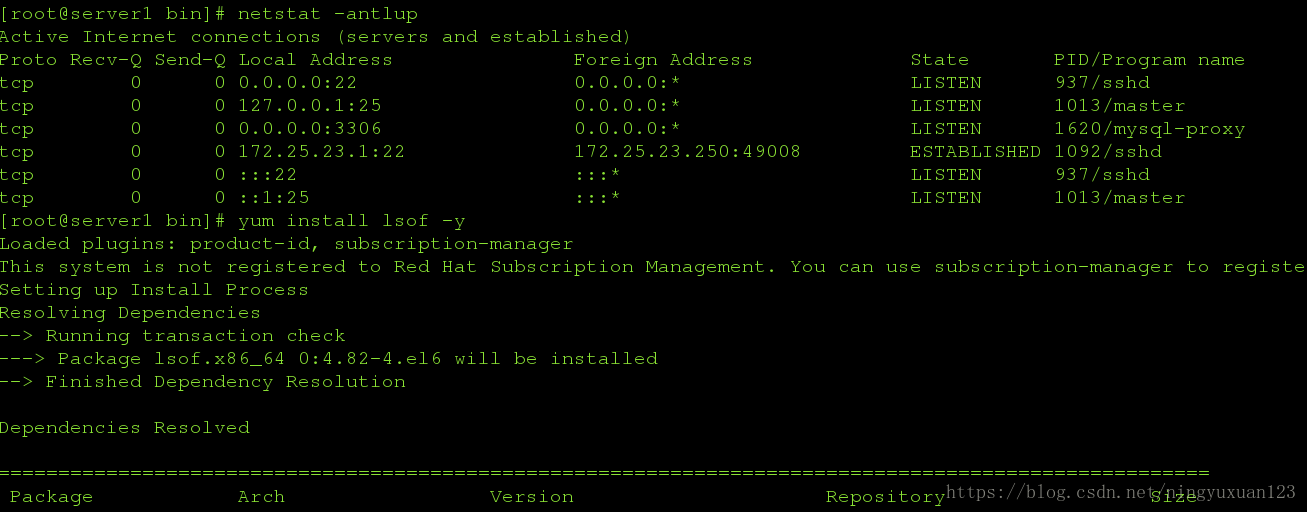
server2:
[root@server2 ~]# mysql -p
Enter password:
Welcome to the MySQL monitor. Commands end with ; or \g.
Your MySQL connection id is 11
Server version: 5.7.17-log MySQL Community Server (GPL)
Copyright (c) 2000, 2016, Oracle and/or its affiliates. All rights reserved.
Oracle is a registered trademark of Oracle Corporation and/or its
affiliates. Other names may be trademarks of their respective
owners.
Type 'help;' or '\h' for help. Type '\c' to clear the current input statement.
mysql> reset master;
Query OK, 0 rows affected (0.36 sec)
mysql>
mysql> create database westos;
Query OK, 1 row affected (0.13 sec)
mysql> grant all on *.* to lily@'%' identified by 'WN123*westos';
Query OK, 0 rows affected, 1 warning (0.13 sec)
mysql> use westos;
Database changed
mysql> show tables;
Empty set (0.00 sec)
mysql> create table userlist(
-> username varchar(10) not null,
-> password varchar(15) not null);
Query OK, 0 rows affected (0.52 sec)
mysql> insert into userlist values('user1','123');
Query OK, 1 row affected (0.12 sec)
mysql> grant all on *.* to root@'%' identified by 'WN123*westos';
Query OK, 0 rows affected, 1 warning (0.05 sec)
mysql> exit
Bye
[root@server2 ~]# yum install lsof -y
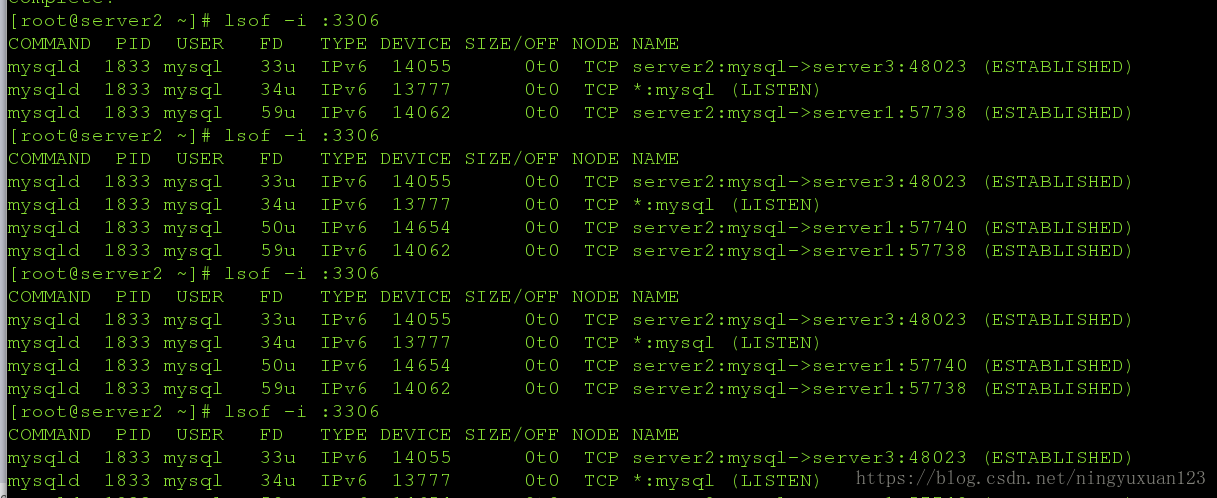
[root@server2 ~]# lsof -i :3306
COMMAND PID USER FD TYPE DEVICE SIZE/OFF NODE NAME
mysqld 1833 mysql 33u IPv6 14055 0t0 TCP server2:mysql->server3:48023 (ESTABLISHED)
mysqld 1833 mysql 34u IPv6 13777 0t0 TCP *:mysql (LISTEN)
mysqld 1833 mysql 50u IPv6 14654 0t0 TCP server2:mysql->server1:57740 (ESTABLISHED)
mysqld 1833 mysql 59u IPv6 14062 0t0 TCP server2:mysql->server1:57738 (ESTABLISHED)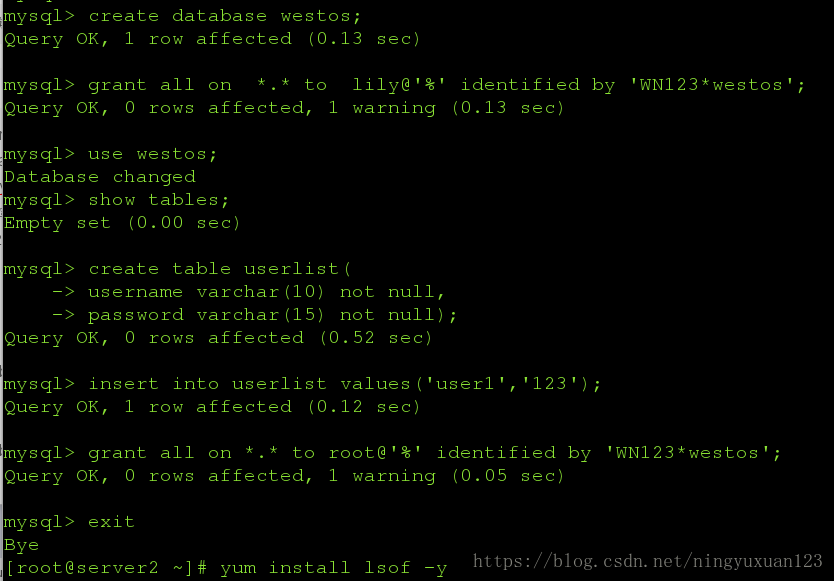
server3:
[root@server3 ~]# yum install lsof -y
[root@server3 ~]# lfso -i :3306
-bash: lfso: command not found
[root@server3 ~]# lsof -i :3306
COMMAND  PID  USER   FD   TYPE DEVICE SIZE/OFF NODE NAME
mysqld  1807 mysql   34u  IPv6  13431      0t0  TCP *:mysql (LISTEN)
mysqld  1807 mysql   57u  IPv4  13535      0t0  TCP server3:48023->server2:mysql (ESTABLISHED)
[root@server3 ~]# lsof -i :3306
COMMAND  PID  USER   FD   TYPE DEVICE SIZE/OFF NODE NAME
mysqld  1807 mysql   34u  IPv6  13431      0t0  TCP *:mysql (LISTEN)
mysqld  1807 mysql   50u  IPv6  14108      0t0  TCP server3:mysql->172.25.23.250:45634 (ESTABLISHED)
mysqld  1807 mysql   57u  IPv4  13535      0t0  TCP server3:48023->server2:mysql (ESTABLISHED)
[root@server3 ~]# lsof -i :3306
COMMAND  PID  USER   FD   TYPE DEVICE SIZE/OFF NODE NAME
mysqld  1807 mysql   34u  IPv6  13431      0t0  TCP *:mysql (LISTEN)
mysqld  1807 mysql   50u  IPv6  14138      0t0  TCP server3:mysql->server1:52161 (ESTABLISHED)
mysqld  1807 mysql   57u  IPv4  13535      0t0  TCP server3:48023->server2:mysql (ESTABLISHED)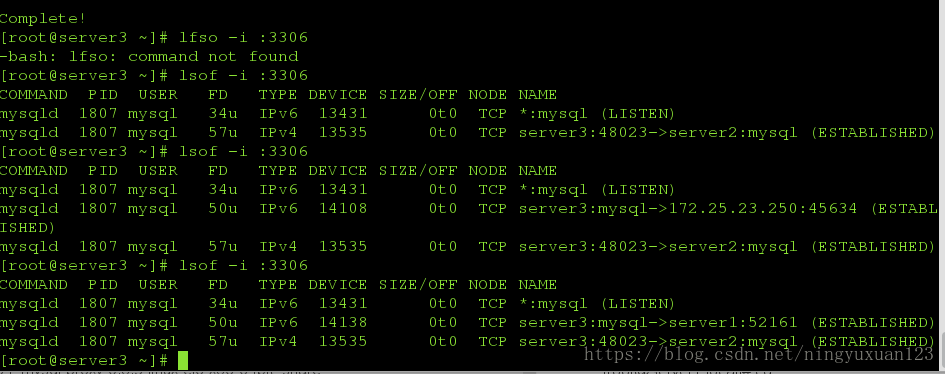
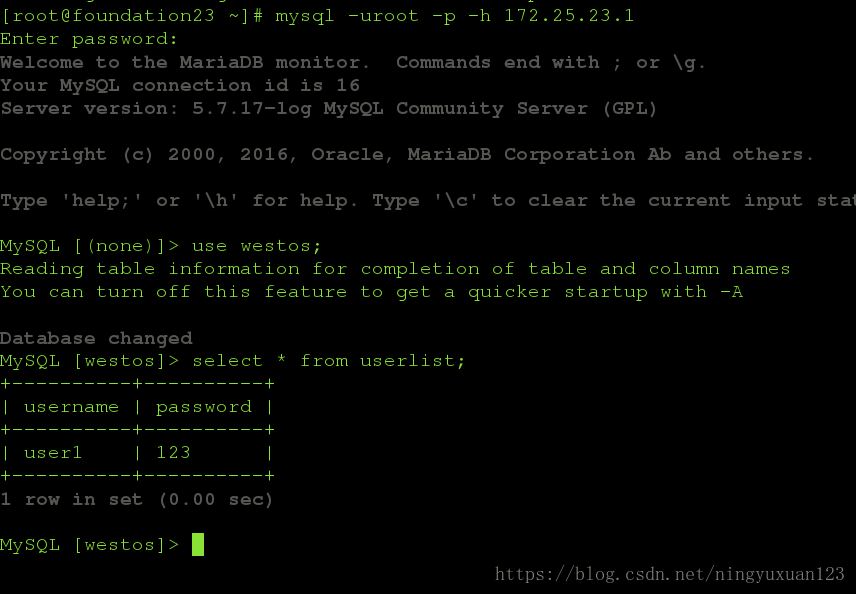
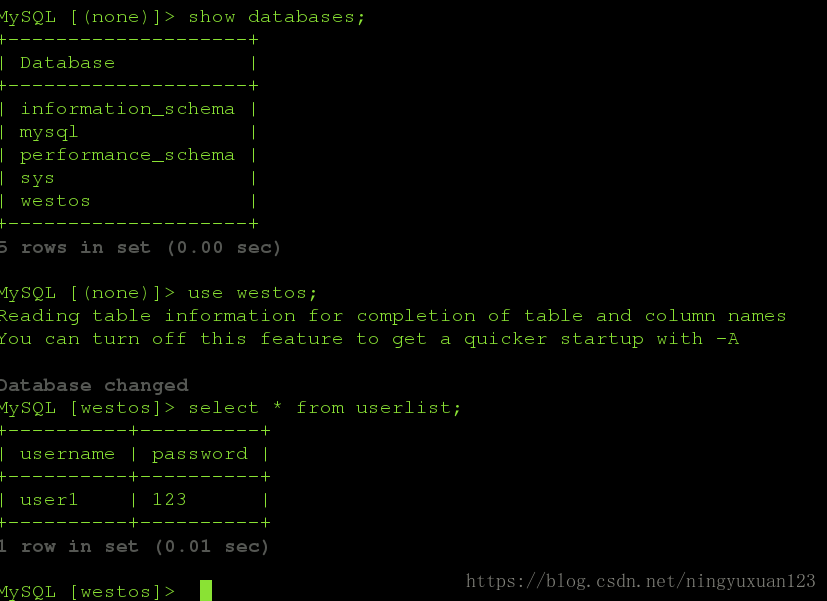
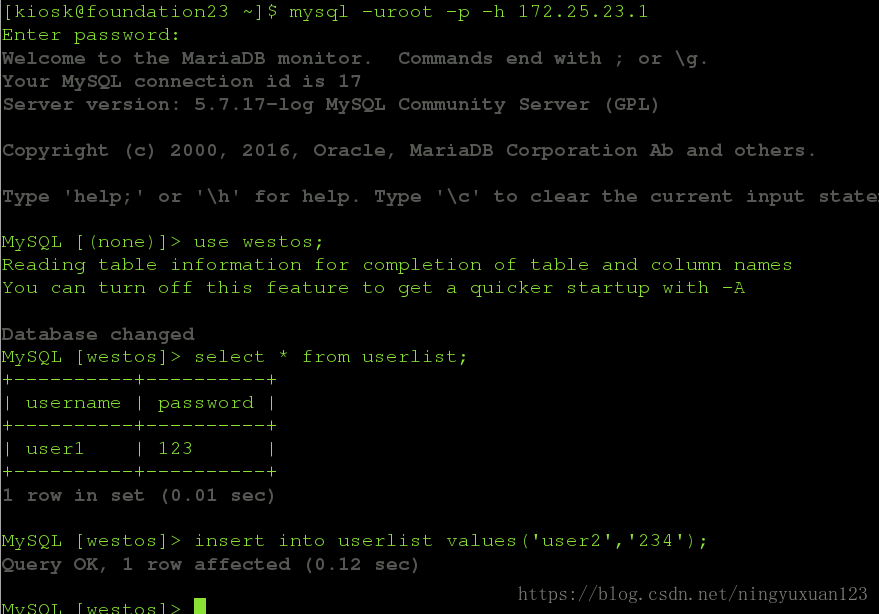
测试:
在主机上登陆数据库,读写分离设置为2次。所以第三次连接到slave,当第三次写的时候转入master,如果是slave,不能转master,我们去master查看。显示数据,表明在master写入