一、项目准备
直接使用上个章节的源码,Spring Boot教程(八):Spring Boot集成pagehelper分页插件
二、添加mapper4依赖
<!-- mapper4 -->
<dependency>
    <groupId>tk.mybatis</groupId>
    <artifactId>mapper-spring-boot-starter</artifactId>
    <version>2.0.2</version>
</dependency>三、修改启动类上@MapperScan所在包,注意包路径!!!
不再采用mybatis的org.mybatis.spring.annotation.MapperScan,而是使用Mapper4的:tk.mybatis.spring.annotation.MapperScan,注意包路径!!!
package com.songguoliang.springboot;

import org.springframework.boot.SpringApplication;
import org.springframework.boot.autoconfigure.SpringBootApplication;
import tk.mybatis.spring.annotation.MapperScan;

/**
 * @Description
 * @Author sgl
 * @Date 2018-05-02 14:51
 */
@SpringBootApplication
@MapperScan("com.songguoliang.springboot.mapper")
public class Application {
    public static void main(String[] args) {
        SpringApplication.run(Application.class, args);
    }
}
四、创建自己的Mapper基类
建议创建自己的Mapper基类,在自己的Mapper基类里,我们可以根据我们的项目需要定义适合我们的公共方法。如果不想使用自己创建的,可以直接继承tk.mybatis.mapper.common.Mapper。
package com.songguoliang.springboot.base;

import tk.mybatis.mapper.common.Mapper;
import tk.mybatis.mapper.common.MySqlMapper;

/**
 * @Description 自己的Mapper基类,主要不能放到mapper下
 * @Author sgl
 * @Date 2018-05-07 16:57
 */
public interface BaseMapper<T> extends Mapper<T>,MySqlMapper<T>{
}
注意:这个接口不能和表对应的Mapper在同一个表下,即不能在@MapperScan扫描的包里
五、配置文件修改
在application.properties配置文件中,添加以下配置:
mapper.mappers=com.songguoliang.springboot.base.BaseMapper
mapper.not-empty=false
mapper.identity=MYSQL六、修改UserMapper
使UserMapper继承我们创建的父Mapper:com.songguoliang.springboot.base.BaseMapper
package com.songguoliang.springboot.mapper;

import com.github.pagehelper.Page;
import com.songguoliang.springboot.base.BaseMapper;
import com.songguoliang.springboot.entity.User;

/**
 * @Description
 * @Author sgl
 * @Date 2018-05-02 15:02
 */
public interface UserMapper extends BaseMapper<User> {

    Page<User> getUsers();
}
七、修改UserService
在UserService里添加一个根据主键获取对象的方法:
public User selectById(long id){
    return userMapper.selectByPrimaryKey(id);
}这里我们直接调用Mapper4自带的selectByPrimaryKey()方法,所以不需要在mapper文件中写sql,也不需要在UserMapper中定义方法,这些任务都由Mapper4来做。
可以抽象出来一个BaseService来作为UserService的父类,定义一些我们常用的方法。
八、修改UserController
添加一个服务,用来根据id获取用户
@GetMapping("/user/{id}")
public User selectUserById(@PathVariable("id") Long id){
    return userService.selectById(id);
}
九、修改实体类
- 实体上面添加
@Table注解以指定表名,如果表名和实体名一样,不需要设置,由于我们的表名是tbl_user,所以需要指定。 - 主键上添加
@Id注解,联合主键需要主键的每个属性上都加@Id。如果不加该注解,在使用xxxByPrimaryKey方法时,会把所有字段当成主键,即会出现where user_id=? and user_name=? and user_age=?这种条件。
package com.songguoliang.springboot.entity;

import javax.persistence.Id;
import javax.persistence.Table;

/**
 * @Description
 * @Author sgl
 * @Date 2018-05-02 14:59
 */
@Table(name = "tbl_user")
public class User {
    @Id
    private Long userId;
    private String userName;
    private Integer userAge;

    //省略getter、setter方法
}
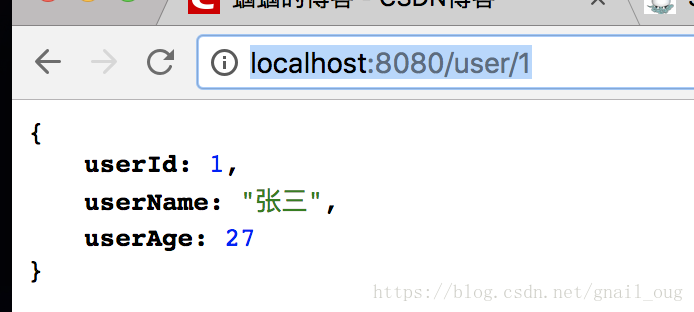
十、启动服务,测试
浏览器输入http://localhost:8080/user/1,得到如下内容:
本文主要是为了说明如何集成Mapper4,对Mapper4的使用,请参考Mapper4作者的GitHub