打通前后端全栈开发node+vue进阶【课程学习系统项目实战详细讲解】(2):后台路由,导航,首页,退出登录
第二章 建议学习时间8小时 总项目预计10章
学习方式:详细阅读,并手动实现相关代码(如果没有node和vue基础,请学习前面的vue和node基础博客【共10章】
演示地址:后台:demoback.lalalaweb.com 前台:demo.lalalaweb.com
演示过程中可能会发现bug,希望即时留言反馈,谢谢
源码下载:https://github.com/sutianbinde/classweb //不是全部的代码,每次更新博客才更新代码
学习目标:此教程将教会大家 如何一步一步实现一个完整的课程学习系统(包括课程管理后台/Node服务器/学习门户三个模块)。
上次node基础课程博客大家反响很好,时隔3个月,才更新项目部分,预计2~3天更新一章,我尽量20天更新完毕,学完这个项目Nodejs和vue就基本熟悉了,如发现教程有误的地方,请及时留言反馈
视频教程地址:www.lalalaweb.com,后期会上传教学视频,大家可前往视频学习(暂时还没有视频)
首页导航 路由配置
上一篇博客中,我们已经实现了登录功能,那么接着我就需要写登录完成后跳转的页面
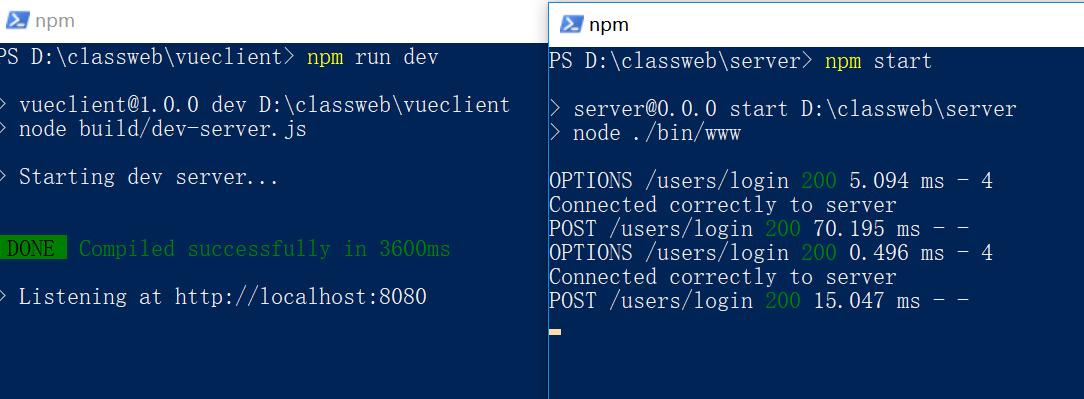
我们先把项目运行起来 Node端 npm start ,vue端npm run dev
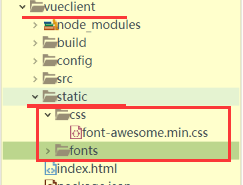
首先我们需要使用一个字体图标库 fontawesome,如果没有用过的自行百度啊,这里就不扯其他知识了
下载地址:http://fontawesome.dashgame.com/ 或者 到github下载的本项目中对应路径去找也可以
下载好以后把css和font放到static中,然后我们在index.html中引入
<link rel="stylesheet" type="text/css" href="../static/css/font-awesome.min.css"/>
注:1。我没有找到可以通过import引入的fontawesome包,所以就直接引入文件了,(网上有 vue-awesome,但貌似不好用,就没有用)
这里为什么是 ../static 这样去找static,而不是 ./ ,因为当进入二级路由以后,在路由内部index和static就不在被认为是同一级,就找不到了,所以就通过 ../往上再找了一级。

我们要设置一些统一的全局样式,我们就直接写在 index.html中,这里本来不是一次就写完这些样式,但为了避免以后再回来添加样式,这里就一起写了,首先清楚了全局的margin等,然后定义了 .btn按钮样式 .myinput输入框样式,以后再使用

<style>
        *{
                margin: 0;
                padding: 0;
            }
            body{
                font-size: 14px;
                font-family: arial "microsoft yahei";
                background: #f0f2f5;
            }
            ul,li{
                list-style: none;
            }
            /*按钮*/
            .btn{
                border:1px solid #4187db;
                color: #4187db;
                background: #fff;
                padding: 6px 14px 7px;
                border-radius: 3px;
                transition: all 0.5s ease;
                outline: none;
                margin-top: 14px;
                cursor: pointer;
            }
            .btn i{
                margin-right: 4px;
            }
            .btn:hover{
                background: #4187db;
                color: #fff;
            }

            /*输入框*/
            .myinput{
                width: 65%;
                border: 1px solid #cad3de;
                height: 35px;
                line-height: 35px;
                margin: 5px 0 10px;
                border-radius: 3px;
                padding: 0 10px;
                outline: none;
                box-sizing: border-box;
            }
            .myinput:focus{
                border: 1px solid #4289dc;
            }
    </style>
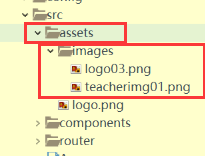
在assets文件夹中创建 images文件夹,放入我们backIndex.vue中需要的图片 (图片请到github下载的项目中对应路径去找)
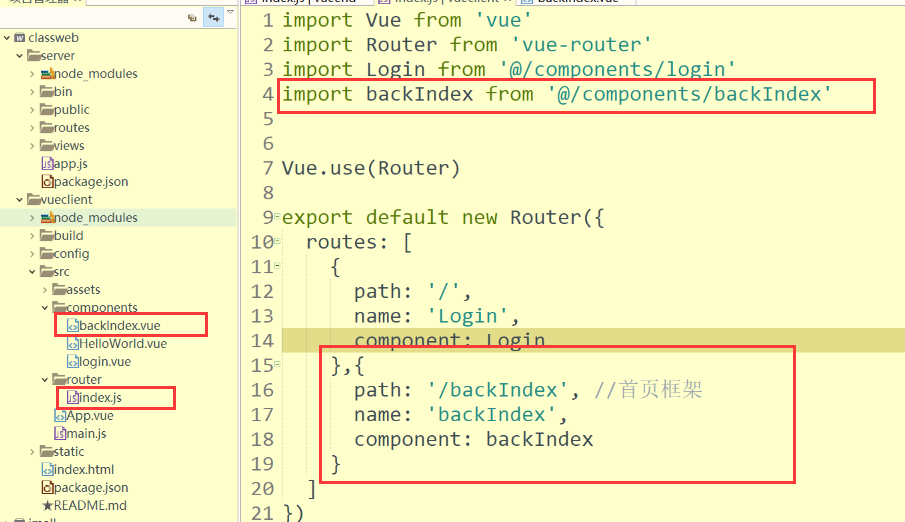
然后我们去修改 路由文件 index.js的路由,在其中添加后台首页框架的路由,如下图
并且在components中创建 backIndex.vue组件
在backIndex.vue组件中写入后面代码
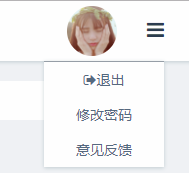
基本功能如下图,左侧导航,顶部搜索栏和个人头像 退出等操作
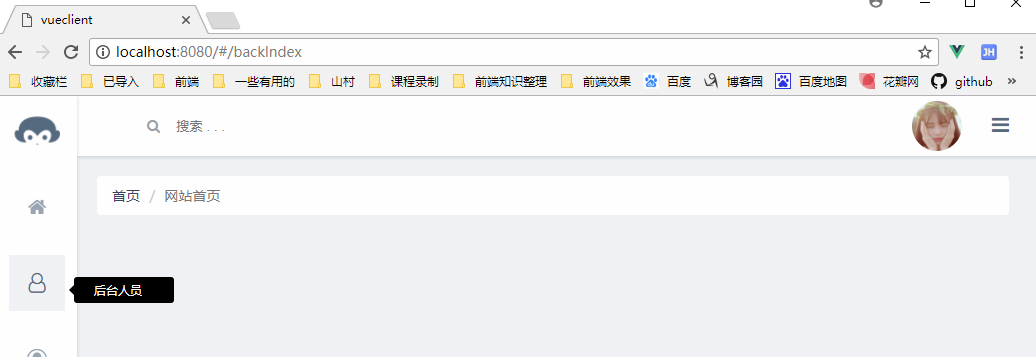
代码解释:中间大部分是Html+css代码,代码中注释已经可以帮助大家理解
这里着重说一下路由部分:router-link表示点击的时候url需要跳转的地址,这些地址对应的路由文件还没有写,这里先写上,下下步就配置这个,页面不多,我们就完成 首页 用户/学员管理 课程列表/课程编辑 几个页面,这样就可以算是一个基础版的后台管理系统了。
当点击对应的link的时候,vue内部会自动添加router-link-active 类,我们css中对这个类做了样式设置。
<template>
  <div class="backlogin">
    <div class="header">
            <div class="search_box" :class="{search_box_fouce:search_box_fouce}">
                <i class="fa fa-search" aria-hidden="true"></i>
                <input @focus="focusFn" @blur="blurFn" type="text" name="" id="" value="" placeholder="搜索 . . . " />
            </div>
            <div class="handler">
                <div class="more" @click="toggleSlide">
                    <i class="fa fa-bars" aria-hidden="true"></i>
                    <ul :class="{showul:showExit}">
                        <li><a href="javascript:;" @click="logout"><i class="fa fa-sign-out" aria-hidden="true"></i>退出</a></li>
                        <li><a href="javascript:;" @click="">修改密码</a></li>
                        <li><a href="javascript:;">意见反馈</a></li>
                    </ul>
                </div>
                <img src="../assets/images/teacherimg01.png" alt="" />
            </div>
        </div>

        <!--侧面导航-->
        <div class="sidenav_box">
            <img class="logo" src="../assets/images/logo03.png" alt="" />
            <ul class="sidenav">
                <li class="now">
                    <router-link to="/backIndex/indexContent">
                        <i class="fa fa-home" aria-hidden="true"></i>
                        <span>网站首页</span>
                    </router-link>
                </li>
                <li>
                    <router-link to="/backIndex/adminList">
                        <i class="fa fa-user-o" aria-hidden="true"></i>
                        <span>后台人员</span>
                    </router-link>
                </li>
                <li>
                    <router-link to="/backIndex/studentList">
                        <i class="fa fa-user-circle-o" aria-hidden="true"></i>
                        <span>学员管理</span>
                    </router-link>
                </li>
                <li>
                    <router-link to="/backIndex/courseList">
                        <i class="fa fa-book" aria-hidden="true"></i>
                        <span>课程管理</span>
                    </router-link>
                </li>
            </ul>
        </div>

        <div class="content">

            <ul class="breadcrumb">
                <li><a href="#/backIndex/">首页</a></li>
                <li>{{pageTitle}}</li>
            </ul>
            <router-view></router-view>

        </div>

  </div>
</template>

<script>
    var pageTitleObj = {
        indexContent:"网站首页",
        adminList:"后台人员",
        studentList:"学员管理",
        courseList:"课程管理",
        courseEdit:"课程编辑"
    };

    export default {
      name: 'backlogin',
      data () {
        return {
                    search_box_fouce:false,
                    showExit:false,
                    pageTitle: pageTitleObj[ this.$route.path.substr( this.$route.path.lastIndexOf("/")+1 ) ] || "网站首页"
        }
      },
      methods:{
            focusFn(){  //搜索框获取焦点,添加class
                this.search_box_fouce = true;
            },
            blurFn(){   //搜索框失去焦点,去掉class
                this.search_box_fouce = false;
            },
            toggleSlide(){ //这个是用来显示和隐藏头像旁的退出下拉框
                this.showExit = !this.showExit
            },
            logout(){ //退出系统

            }
        },
        watch:{ //监控路径变化  当路径发送变化的时候,改变面包屑导航的显示
            $route: {
                handler: function (val, oldVal) {
                    var path = val.path;
                    this.pageTitle = pageTitleObj[ path.substr( path.lastIndexOf("/")+1 ) ] || "网站首页";
                }
            }
        }
    }
</script>

<!-- Add "scoped" attribute to limit CSS to this component only -->
<style scoped>
    ul, li{
        list-style: none;
    }
    .header{
        height: 60px;
        box-shadow: 0 1px 5px rgba(13,62,73,0.2) ;
        background: #fff;
        margin-left: 80px;
        min-width: 740px;
    }

    .sidenav_box{
        width: 80px;
        box-shadow: 0 1px 5px rgba(13,62,73,0.2) ;
        position: fixed;
        left: 0;
        top: 0;
        bottom: 0;
        background: #fff;
        z-index: 99;
    }
    .sidenav_box .logo{
        width: 46px;
        margin: 20px 0 0 17px;
    }
    .sidenav{
        margin-top: 30px;
    }
    .sidenav li{
        margin-bottom: 20px;
    }
    .sidenav a{
        display: block;
        width: 56px;
        height: 56px;
        margin: 0 auto;
        position: relative;
        cursor: pointer;
        opacity: 0.6;
        transition:all 0.5s ease;
        text-decoration: none;
    }
    .sidenav a i{
        font-size: 20px;
        line-height: 56px;
        text-align: center;
        display: block;
        color: #566a80;
    }
    .sidenav a:hover{
        background: #f0f2f5;
        opacity: 1;
    }
    .sidenav a span{
        position: absolute;
        left: 55px;
        top: 22px;
        background: #000;
        color: #fff;
        width: 0px;
        padding: 5px 0;
        border-radius: 3px;
        font-size: 12px;
        opacity: 0;
    }
    .sidenav a:hover span{
        opacity: 1;
        left: 65px;
        width: 60px;
        padding: 5px 20px;
        transition:none 0.5s ease-out;
        transition-property: opacity,left;
    }
    .sidenav a span:after{
        content: "";
        position: absolute;
        top: 8px;
        left: -10px;
        border:5px solid transparent;
        border-right-color: #000;
    }
    .sidenav .router-link-active:after{
        content: "";
        position: absolute;
        left: -16px;
        top: 8px;
        height: 40px;
        width: 8px;
        border-radius: 3px;
        background: #566a80;
    }
    .sidenav .router-link-active{
        opacity: 1;
        background: #f0f2f5;
    }

    /*顶部栏*/
    .search_box{
        color: #979fa8;
        padding-top: 20px;
        float: left;
    }
    .search_box i{
        margin: 0 12px 0 70px;
        transition: all 0.5s ease;
    }
    .search_box input{
        border:none;
        outline: none;
    }
    .search_box_fouce i{
        margin-left: 55px;
        color: #2C3D50;
    }

    .handler > *{
        float: right;
        margin-right: 20px;
        cursor: pointer;
    }
    .handler .more{
        font-size: 20px;
        color: #566A80;
        margin: 15px 30px 0 0;
        position: relative;
    }
    .handler .more:hover{
        color: #2C3D50;
    }
    .handler .more ul{
        font-size: 14px;
        position: absolute;
        right: 0;
        top: 55px;
        width: 120px;
        box-shadow: 0 1px 5px rgba(13,62,73,0.2);
        transition: all 0.3s ease-out;
        height: 0;
        opacity: 0;
        overflow: hidden;
        text-align: center;
    }
    .handler .more .showul{
        height: auto;
        top: 45px;
        opacity: 1;
        border-top: 1px solid #979FA8;
    }
    .handler .more a{
        display: block;
        padding: 8px 10px;
        background: #fff;
        color: #566A80;
        text-decoration: none;
    }
    .handler .more a:hover{
        background: #f8f9fb;
    }
    .handler > img{
        width: 50px;
        border-radius: 50%;
        margin-top: 5px;
        margin-right: 30px;
    }

    .content{
        margin: 20px 30px 0px 100px;
        min-height: 300px;
        min-width: 700px;
    }

    .breadcrumb{
        border-radius: 4px;
        padding: 10px 15px;
        background: #fff;
    }
    .breadcrumb > li{
        display: inline-block;
        color: #777777;
    }
    .breadcrumb > li+li:before{
        padding: 0 5px;
        color: #ccc;
        content: "/\00a0";
    }
    .breadcrumb > li > a{
        color: #32475f;
        text-decoration: none;
    }
    .main{
        border-radius: 4px;
        background: #fff;
        margin-top: 10px;
    }


</style>
然后在地址栏输入 http://localhost:8080/#/backIndex 就可以看到首页框架的效果了。 (这时候内部页面还没有,所以点击左侧导航会找不到页面,先不要点)
常见错误: 如果前面的图片路径没放对,就会出现这个错误

然后我们继续将所有的路由配置其他页面的路由
一共有 课程列表 / 编辑课程 / 首页统计 / 后台用户 / 学员用户 这些二级页面,我们都加入到 路由文件 index.js中
import Vue from 'vue'
import Router from 'vue-router'
import Login from '@/components/login'
import backIndex from '@/components/backIndex'
import courseList from '@/components/courseList'
import indexContent from '@/components/indexContent'
import adminList from '@/components/adminList'
import studentList from '@/components/studentList'
import courseEdit from '@/components/courseEdit'


Vue.use(Router)

export default new Router({
  routes: [
    {
      path: '/',
      name: 'Login',
      component: Login
    },{
        path: '/backIndex', //首页框架
        name: 'backIndex',
        component: backIndex,
        children:[
            {
              path: 'courseList', //课程列表
                component: courseList
            },{
              path: 'courseEdit/:sysId', //编辑课程
                component: courseEdit
            },{
              path: 'indexContent', //首页统计
                component: indexContent
            },{
              path: 'adminList', //后台用户
                component: adminList
            },{
              path: 'studentList', //学员用户
                component: studentList
            },{
               path: '*',           //其他路径都跳转到首页
                redirect: 'indexContent'
            }
        ]
        }
  ]
})
添加这些路由后的需要建立对应的 vue 组件文件,在componets中建立上面路由对应的空vue文件
这些新建的vue文件中需要先放入一个空的template标签,以免报错
<template>
</template>

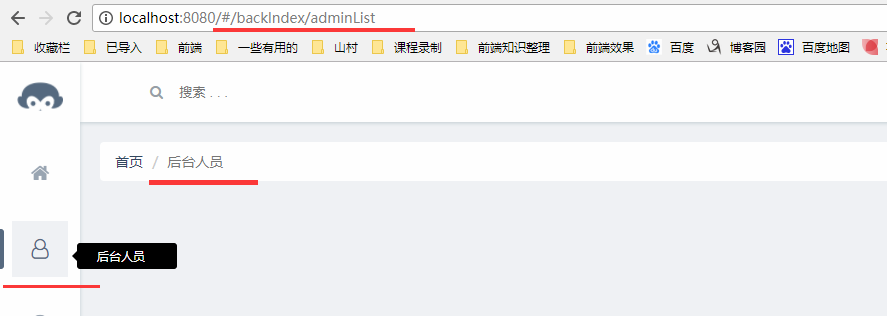
再刷新页面的时候,左侧导航就可以点击了(这些router-link对应的路径和路由对应的path一致),可以看到面包屑导航对应的名字就修改了(这个修改的逻辑在backIndex.vue的97行左右的 watch方法中)。
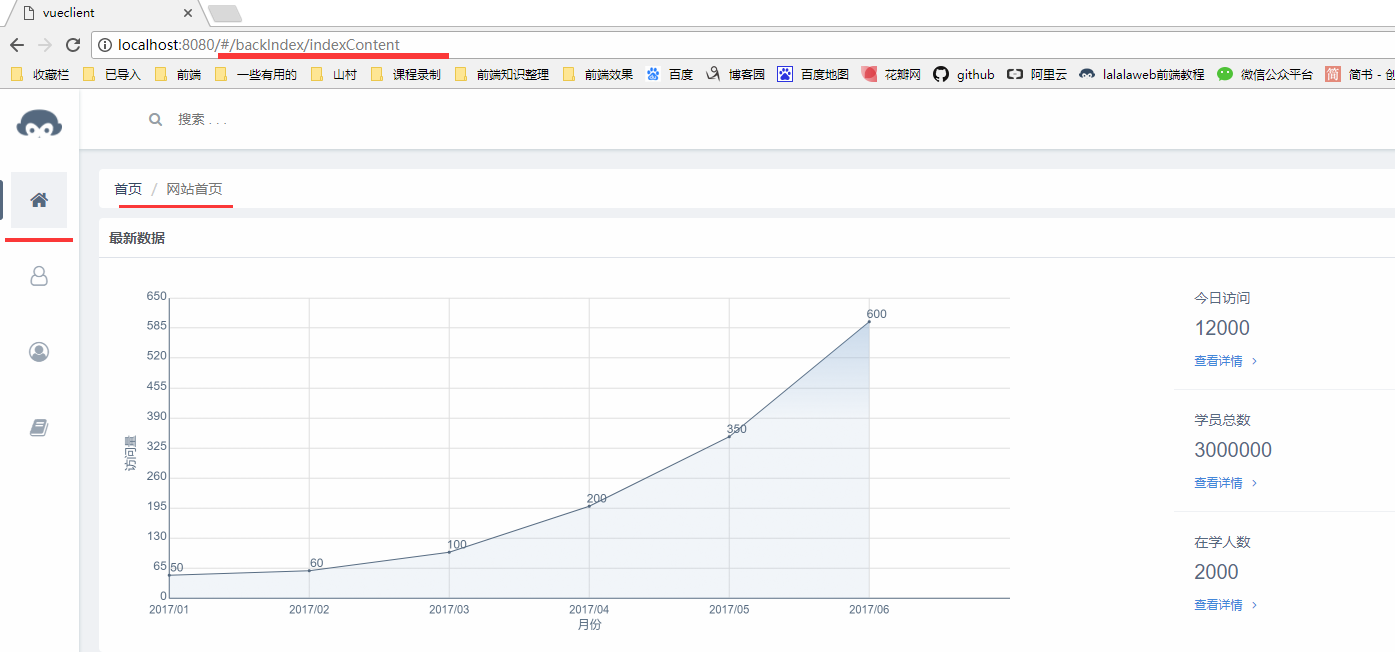
首页统计页面
然后我们为 indexContent.vue 添加中间显示的统计图表,代码在后面
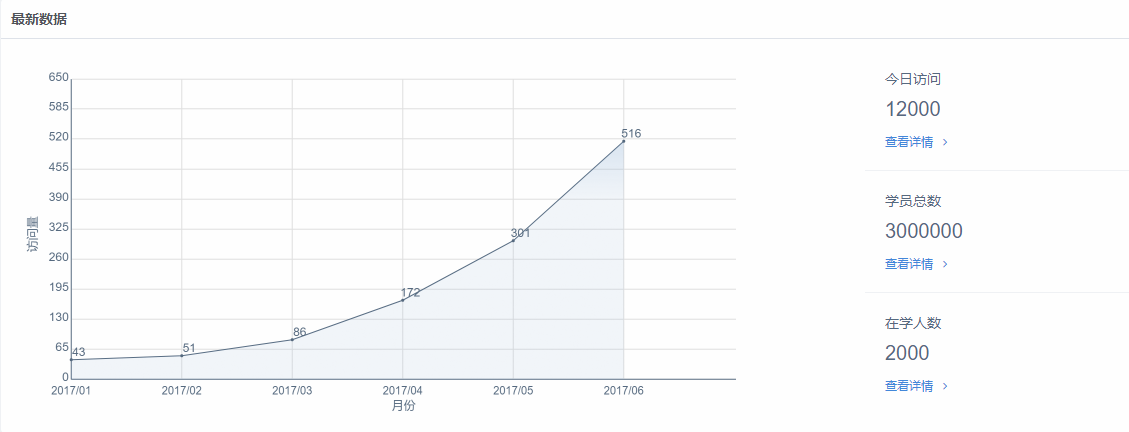
代码如下:由于前台页面的统计还没开始写,当下我们就只放一个静态页面在此,
canvas绘制提标使用的是原生js写的,具体的原理步骤请查看我以前的博客 http://www.cnblogs.com/chengduxiaoc/p/7678967.html
<template>
  <div class="indexContent main">
    <h4>最新数据</h4>
    <ul class="number">
            <li>
                <div class="title">今日访问</div>
                <p>12000</p>
                <a href="javascript:;">查看详情<i class="fa fa-angle-right" aria-hidden="true"></i></a>
            </li>
            <li>
                <div class="title">学员总数</div>
                <p>3000000</p>
                <a href="javascript:;">查看详情<i class="fa fa-angle-right" aria-hidden="true"></i></a>
            </li>
            <li>
                <div class="title">在学人数</div>
                <p>2000</p>
                <a href="javascript:;">查看详情<i class="fa fa-angle-right" aria-hidden="true"></i></a>
            </li>
        </ul>
    <canvas id="barChart" height="400" width="600" style="margin:10px 0"> 你的浏览器不支持HTML5 canvas </canvas>

  </div>
</template>

<!-- Add "scoped" attribute to limit CSS to this component only -->
<style scoped>
    .main{
        border-radius: 4px;
        background: #fff;
        margin-top: 10px;
        overflow: hidden;
    }
    .main > h4{
        color: #51555a;
    padding:10px;
    border-bottom: 1px solid #DFE3EA;
    }
    .number{
        width: 30%;
        float: right;
        margin-right: 10%;
        margin-top: 10px;
        color: #566A80;
    }
    .number li{
        padding: 20px;
        border-top:1px solid #F0F2F5;
    }
    .number li:first-child{
        border: none 0;
    }
    .number p{
        font-size: 20px;
        font-family: arial;
        margin: 10px 0;
    }
    .number a{
        text-decoration: none;
        color: #4187db;
        font-size: 12px;
    }
    .number li:hover{
        color: #173859;
    }
    .number a:hover{

    }
    .number i{
        transition: all 0.3s ease-out;
        padding-left: 10px;
    }
    .number a:hover i{
        padding-left: 20px;
    }
    .number:hover li{
        border-color:#DFE3EA
    }
    canvas{
        max-width: 55%;
        min-width: 45%;
    }
</style>

<script>

    export default {
      name: 'indexContent',
      data () {
        return {

        }
      },
      methods:{
        },
        mounted:function(){
            var chartData = [["2017/01", 50], ["2017/02", 60], ["2017/03", 100], ["2017/04",200], ["2017/05",350], ["2017/06",600]];
            goBarChart(chartData);

        }
    }

    function goBarChart(dataArr){


    // 声明所需变量
    var canvas,ctx;
    // 图表属性
    var cWidth, cHeight, cMargin, cSpace;
    var originX, originY;
    // 折线图属性
    var tobalDots, dotSpace, maxValue;
    var totalYNomber;
    // 运动相关变量
    var ctr, numctr, speed;

    // 获得canvas上下文
    canvas = document.getElementById("barChart");
    if(canvas && canvas.getContext){
        ctx = canvas.getContext("2d");
    }
    initChart(); // 图表初始化
    drawLineLabelMarkers(); // 绘制图表轴、标签和标记
    drawBarAnimate(); // 绘制折线图的动画

    //点击刷新图表
    canvas.onclick = function(){
        initChart(); // 图表初始化
        drawLineLabelMarkers(); // 绘制图表轴、标签和标记
        drawBarAnimate(); // 绘制折线图的动画
    };

    // 图表初始化
    function initChart(){
        // 图表信息
        cMargin = 60;
        cSpace = 80;
        canvas.width = Math.floor( (window.innerWidth-100)/2 ) * 2 ;
        canvas.height = 740;
        canvas.style.height = canvas.height/2 + "px";
        canvas.style.width = canvas.width/2 + "px";
        cHeight = canvas.height - cMargin - cSpace;
        cWidth = canvas.width - cMargin - cSpace;
        originX = cMargin + cSpace;
        originY = cMargin + cHeight;

        // 折线图信息
        tobalDots = dataArr.length;
        dotSpace = parseInt( cWidth/tobalDots );
        maxValue = 0;
        for(var i=0; i<dataArr.length; i++){
            var dotVal = parseInt( dataArr[i][1] );
            if( dotVal > maxValue ){
                maxValue = dotVal;
            }
        }
        maxValue += 50;
        totalYNomber = 10;
        // 运动相关
        ctr = 1;
        numctr = 100;
        speed = 6;

        ctx.translate(0.5,0.5);  // 当只绘制1像素的线的时候,坐标点需要偏移,这样才能画出1像素实线
    }

    // 绘制图表轴、标签和标记
    function drawLineLabelMarkers(){
        ctx.font = "24px Arial";
        ctx.lineWidth = 2;
        ctx.fillStyle = "#566a80";
        ctx.strokeStyle = "#566a80";
        // y轴
        drawLine(originX, originY, originX, cMargin);
        // x轴
        drawLine(originX, originY, originX+cWidth, originY);

        // 绘制标记
        drawMarkers();
    }

    // 画线的方法
    function drawLine(x, y, X, Y){
        ctx.beginPath();
        ctx.moveTo(x, y);
        ctx.lineTo(X, Y);
        ctx.stroke();
        ctx.closePath();
    }

    // 绘制标记
    function drawMarkers(){
        ctx.strokeStyle = "#E0E0E0";
        // 绘制 y 轴 及中间横线
        var oneVal = parseInt(maxValue/totalYNomber);
        ctx.textAlign = "right";
        for(var i=0; i<=totalYNomber; i++){
            var markerVal =  i*oneVal;
            var xMarker = originX-5;
            var yMarker = parseInt( cHeight*(1-markerVal/maxValue) ) + cMargin;
            //console.log(xMarker, yMarker+3,markerVal/maxValue,originY);
            ctx.fillText(markerVal, xMarker, yMarker+3, cSpace); // 文字
            if(i>0){
                drawLine(originX+2, yMarker, originX+cWidth, yMarker);
            }
        }
        // 绘制 x 轴 及中间竖线
        ctx.textAlign = "center";
        for(var i=0; i<tobalDots; i++){
            var markerVal = dataArr[i][0];
            var xMarker = originX+i*dotSpace;
            var yMarker = originY+30;
            ctx.fillText(markerVal, xMarker, yMarker, cSpace); // 文字
            if(i>0){
                drawLine(xMarker, originY-2, xMarker, cMargin    );
            }
        }
        // 绘制标题 y
        ctx.save();
        ctx.rotate(-Math.PI/2);
        ctx.fillText("访问量", -canvas.height/2, cSpace-10);
        ctx.restore();
        // 绘制标题 x
        ctx.fillText("月份", originX+cWidth/2, originY+cSpace/2+20);
    };

    //绘制折线图
    function drawBarAnimate(){
        ctx.strokeStyle = "#566a80";  //"#49FE79";

        //连线
        ctx.beginPath();
        for(var i=0; i<tobalDots; i++){
            var dotVal = dataArr[i][1];
            var barH = parseInt( cHeight*dotVal/maxValue* ctr/numctr );//
            var y = originY - barH;
            var x = originX + dotSpace*i;
            if(i==0){
                ctx.moveTo( x, y );
            }else{
                ctx.lineTo( x, y );
            }
        }
        ctx.stroke();

        //背景
        ctx.lineTo( originX+dotSpace*(tobalDots-1), originY);
        ctx.lineTo( originX, originY);
        //背景渐变色
        //柱状图渐变色
        var gradient = ctx.createLinearGradient(0, 0, 0, 300);
        gradient.addColorStop(0, 'rgba(133,171,212,0.6)');
        gradient.addColorStop(1, 'rgba(133,171,212,0.1)');
        ctx.fillStyle = gradient;
        ctx.fill();
        ctx.closePath();
        ctx.fillStyle = "#566a80";

        //绘制点
        for(var i=0; i<tobalDots; i++){
            var dotVal = dataArr[i][1];
            var barH = parseInt( cHeight*dotVal/maxValue * ctr/numctr );
            var y = originY - barH;
            var x = originX + dotSpace*i;
            drawArc( x, y );  //绘制点
            ctx.fillText(parseInt(dotVal*ctr/numctr), x+15, y-8); // 文字
        }

        if(ctr<numctr){
            ctr++;
            setTimeout(function(){
                ctx.clearRect(0,0,canvas.width, canvas.height);
                drawLineLabelMarkers();
                drawBarAnimate();
            }, speed);
        }
    }

    //绘制圆点
    function drawArc( x, y, X, Y ){
        ctx.beginPath();
        ctx.arc( x, y, 3, 0, Math.PI*2 );
        ctx.fill();
        ctx.closePath();
    }


    }

</script>
然后我们可以看到,首页的效果就出来啦
登录功能完善:
当登录请求完成以后,如果出错,就弹出错误(我们本项目没有封装模态框,就直接用alert吧),如果正确,就跳转到首页
修改后的 login.vue中的 ajax请求代码如下:
this.$reqs.post("/users/login",{
                        username:this.username,
                        password:this.password
                }).then(function(result){
                    //成功
                    if(result.data.err){
                        alert(result.data.err);
                    }else{
                        _this.$router.push({path:'/backIndex/indexContent'});
                    }
                    _this.disablebtn = false;
                    _this.loginText = "登录";

                }).catch(function (error) {
                    //失败
                    _this.disablebtn = false;
                    _this.loginText = "登录"
                });
注:我们通过 router.push去修改url,作用和原生js的 window.location.href基本一致。
退出系统
功能点:点击退出,实现退出功能
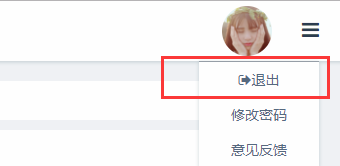
在backIndex.vue中我们有一个退出登录的空方法,我们在里面写退出登录的请求的代码,退出成功后跳转到根目录(以就算登录页面)

            logout(){ //退出系统
                var _this = this;
                this.$reqs.post("/users/logout",{

                }).then(function(result){
                    //成功
                    _this.$router.push({path:'/'});
                }).catch(function (error) {
                    //失败
                console.log(error)
              });
            }
然后在后台写接口,在user.js中 登录的方法后面写(修改完成后需要重启node服务)
注:这里直接清除登录中设置的 session 就可以了,(我们后面会对所有的请求设置拦截,如果session中的用户信息没有,再提示用户未登录,跳转到登录页面就可以了)
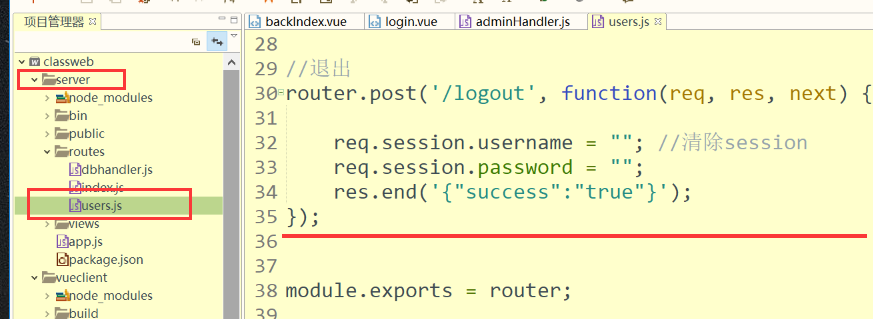
//退出
router.post('/logout', function(req, res, next) {

    req.session.username = ""; //清除session
    req.session.password = "";
    res.end('{"success":"true"}');
});
到此,我们就实现了登录,显示首页,退出的基本功能
好啦,今天就讲到这里。下一篇将讲解 用户添加/修改/删除,表格分页