更多干货
环境以及版本
Apollo: 0.11.0
Java JDK:1.8
Maven : 3.3.9
Mysql : 5.7.9 (要求5.6.5以上)
准备工作
在携程apollo github 官网上,下载最新的源码包0.11.0(目前:2018.7.31),导入到本地的开发工具中(Eclipse、IDEA)。确保相关依赖下载完毕,maven无相关报错即可。导入apollo中的相关数据库表。这里就不做赘述了!
测试服务器(两台) 分别是:192.168.220.83、192.168.220.85 共用192.168.220.83 上的数据库!
注: 接下来,我的端口号设定分别为:
apollo-configservice:30080
apollo-adminservice:30090
apollo-portal:30070
修改文件
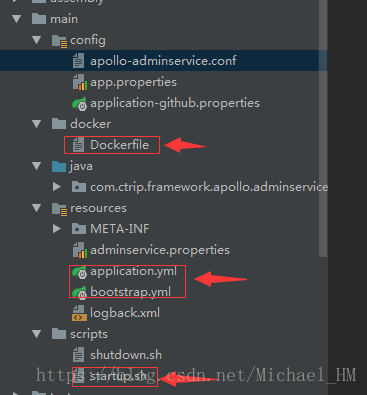
以192.168.220.85机子为例进行修改。(192.168.220.83修改类似,区别就是Ip地址)
1.修改apollo-adminservice
(1)修改application.yml 的端口号:
server:

port: 30090

        (2)修改bootstrap.yml 的Ip地址,防止出现之后docker网络地址找不到。


eureka:

instance:

#hostname: ${hostname:localhost}

preferIpAddress: true

ip-address: 192.168.220.85

client:

serviceUrl:

defaultZone: http://192.168.220.85:30080/eureka/

healthcheck:

enabled: true

eurekaServiceUrlPollIntervalSeconds: 60


endpoints:

health:

sensitive: false


management:

security:

enabled: false

health:

status:

order: DOWN, OUT_OF_SERVICE, UNKNOWN, UP
(3)修改 startup.sh 中的端口
SERVER_PORT=30090(4)修改Dockerfile中的端口(这一步可以省略,本章只介绍如何部署到Linux服务器中)
EXPOSE 300902.修改apollo-configservice
步骤同apollo-adminservice修改步骤,只是将30090端口改为30080端口,是30080端口的不需要修改!
3.修改apollo-portal
同样需要修改端口号为30070。
注:在0.11.0版本之后出现了config 目录。记得将config 目录中的apollo-env.properties中添加:
dev.meta=http://192.168.220.85:300804.修改apollo-core
为了防止特殊情况,需要修改apollo-core 中resources 文件夹中的apollo-env.properties,添加:
local.meta=http://localhost:8080

dev.meta=http://192.168.220.85:30080

fat.meta=${fat_meta}

uat.meta=${uat_meta}

lpt.meta=${lpt_meta}

pro.meta=${pro_meta}
接下来进行打包操作。如果使用eclipse 或者idea 打包的话,可能会出现找不到jdk或者Jre的情况,百度即可。但是也会出现单元测试一直失败报错的情况。可以选择跳过单元测试,或者直接将apollo-client 中的test 下面的测试包全部删掉即可!
5.修改build.bat
我选择的是直接用build.bat进行打包(windows环境下)
build.bat 在整个源码包的scripts目录下!
内容对应个人具体环境进行修改!
本人修改内容如下:
@echo off


rem apollo config db info

set apollo_config_db_url="jdbc:mysql://192.168.220.83:xxxx/ApolloConfigDB?characterEncoding=utf8"

set apollo_config_db_username="root"

set apollo_config_db_password="xxxx"


rem apollo portal db info

set apollo_portal_db_url="jdbc:mysql://192.168.220.83:xxxx/ApolloPortalDB?characterEncoding=utf8"

set apollo_portal_db_username="root"

set apollo_portal_db_password="xxxx"


rem meta server url, different environments should have different meta server addresses

set dev_meta="http://192.168.220.85:30080"

set fat_meta="http://someIp:8080"

set uat_meta="http://anotherIp:8080"

set pro_meta="http://192.168.220.83:30081"


set META_SERVERS_OPTS=-Ddev_meta=%dev_meta% -Dfat_meta=%fat_meta% -Duat_meta=%uat_meta% -Dpro_meta=%pro_meta%


rem =============== Please do not modify the following content ===============

rem go to script directory

cd "%~dp0"


cd ..


rem package config-service and admin-service

echo "==== starting to build config-service and admin-service ===="


call mvn clean package -DskipTests -pl apollo-configservice,apollo-adminservice -am -Dapollo_profile=github -Dspring_datasource_url=%apollo_config_db_url% -Dspring_datasource_username=%apollo_config_db_username% -Dspring_datasource_password=%apollo_config_db_password%


echo "==== building config-service and admin-service finished ===="


echo "==== starting to build portal ===="


call mvn clean package -DskipTests -pl apollo-portal -am -Dapollo_profile=github,auth -Dspring_datasource_url=%apollo_portal_db_url% -Dspring_datasource_username=%apollo_portal_db_username% -Dspring_datasource_password=%apollo_portal_db_password% %META_SERVERS_OPTS%


echo "==== building portal finished ===="


echo "==== starting to build client ===="


call mvn clean install -DskipTests -pl apollo-client -am %META_SERVERS_OPTS%


echo "==== building client finished ===="


pause
确定打包成功!
6.修改数据库表
修改apolloconfigdb 中的serverconfig 中的eureka注册中心地址:
http://192.168.220.83:30080/eureka/,http://192.168.220.85:30080/eureka/部署
以下部署涉及到Linux 服务器的操作步骤。
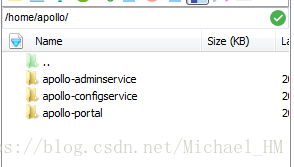
(1)新建目录
在linux上新建目录结构:
(2)上传文件
分别将打包好的文件。在/target文件夹中的 apollo-portal-0.11.0-github.zip、apollo-adminservice-0.11.0-github.zip、apollo-configservice-0.11.0-github.zip上传至相关文件夹中。
(3)解压
解压命令:
unzip apollo-xxxx-0.11.0-github.zip
分别解压apollo-configservice、apolllo-adminservice、apollo-portal
(4)启动
解压之后,可以看到有scripts目录
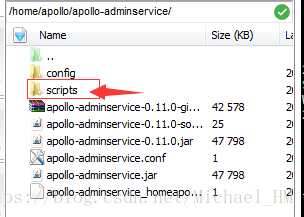
通过./startup.sh 运行脚本即可
运行顺序依次为:apollo-configservice——》apollo-adminservice——》apollo-portal
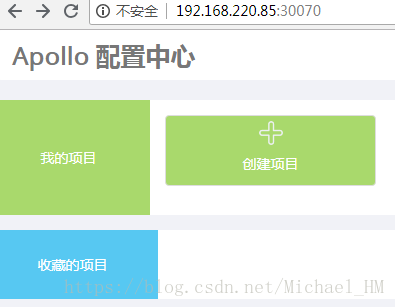
查看结果
在浏览器中输入:192.168.220.85:30070/ 即可看到
集群部署
另外一台192.168.220.83 部署跟192.168.220.85 步骤一样,只需要修改Ip地址即可,无需修改端口号。
输入192.168.220.85:30080可以看到:
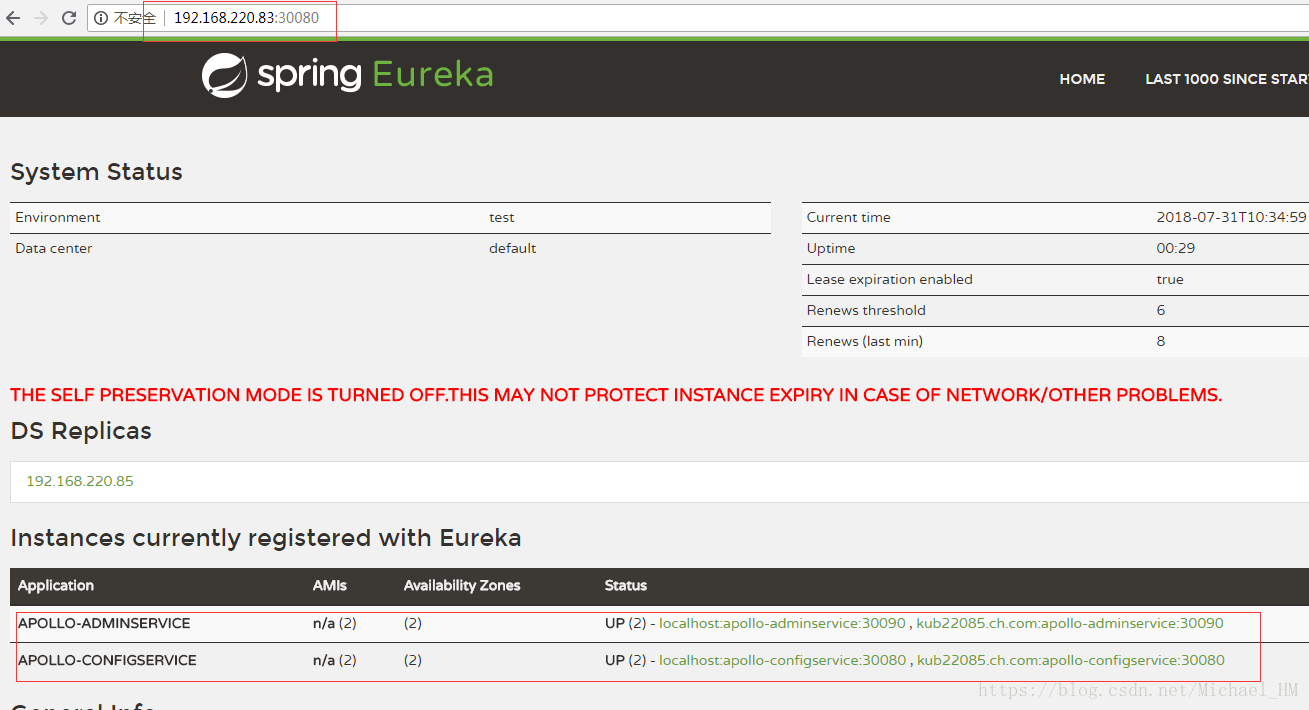
可以看到已经部署两台,并且成功了!
测试
1. 启动两台服务器端的apollo,客户端成功获取信息。
2.关掉其中一台apollo服务,重启客户端。客户端成功获取信息。
3.两台apollo服务都关停,删除本地缓存,重启客户端,客户端获取信息失败。
4.再次重启其中一台apollo服务,重启客户端,客户端再一次成功获取信息。