maven 父子关系
父项目中打包方式必须是pom 如 <packaging>pom</packaging>,父项目中使用<modules><module>msite-base</module></modules>指定子项目
子项目中使用 <parent>指定,子项目继承父项目的大部分属性
父项目
<project xmlns="http://maven.apache.org/POM/4.0.0" xmlns:xsi="http://www.w3.org/2001/XMLSchema-instance" xsi:schemaLocation="http://maven.apache.org/POM/4.0.0 http://maven.apache.org/xsd/maven-4.0.0.xsd">
< modelVersion>4.0.0</modelVersion>
< groupId>com.hlzt.msite</groupId>
< artifactId>msite</artifactId>
< version>0.0.1-SNAPSHOT</version>
< packaging>pom</packaging>
< name>msite</name>
< properties>
< msite.version>0.0.1-SNAPSHOT</msite.version>
< /properties>
< modules>
< module>msite-base</module>
< /modules>
< dependencyManagement>
< dependencies>
< dependency>
< groupId>com.hlzt.msite</groupId>
< artifactId>msite-base</artifactId>
< version>${msite.version}</version>
< /dependency>
< /dependencies>
< /dependencyManagement>
< /project>
子项目
<project xmlns="http://maven.apache.org/POM/4.0.0" xmlns:xsi="http://www.w3.org/2001/XMLSchema-instance"
	xsi:schemaLocation="http://maven.apache.org/POM/4.0.0 http://maven.apache.org/xsd/maven-4.0.0.xsd">
	<modelVersion>4.0.0</modelVersion>
	<parent>
		<groupId>com.hlzt.msite</groupId>
		<artifactId>msite</artifactId>
		<version>0.0.1-SNAPSHOT</version>
	</parent>
	<artifactId>msite-base</artifactId>
	<name>msite-base</name>
	<dependencies>

		<dependency>
			<groupId>org.apache.poi</groupId>
			<artifactId>poi-ooxml</artifactId>
		</dependency>
	</dependencies>
	<build>
		<plugins>

		</plugins>
	</build>

</project>
maven 指定打包方式类型(jar,war)和打包名称,
指定某些目录下打包后的文件名,排除某些目录,引入某些目录,过滤目录文件
一般我会在父项目中规定好打包方式,与打包目录,这样子项目中就会,同一规则去打包。
父项目

<project xmlns="http://maven.apache.org/POM/4.0.0" xmlns:xsi="http://www.w3.org/2001/XMLSchema-instance" xsi:schemaLocation="http://maven.apache.org/POM/4.0.0 http://maven.apache.org/xsd/maven-4.0.0.xsd">
	 <modelVersion>4.0.0</modelVersion>
  <groupId>maven_p</groupId>
  <artifactId>maven_p</artifactId>
  <version>0.0.1-SNAPSHOT</version>
  <name>maven_p</name>
  <packaging>pom</packaging>
  <description/>
  <properties>
    <project.build.sourceEncoding>UTF-8</project.build.sourceEncoding>
  </properties>
  <dependencies>

  </dependencies>
  <modules>
		<module>jetty_1</module>
		<module>jetty</module>
	</modules>
  <build>
    <plugins>
      	<plugin>
      	<!-- classifier元素用来帮助定义构件输出的一些附属构件。附属构件与主构件对应,比如主构件是 kimi-app-2.0.0.jar
      	该项目可能还会通过使用一些插件生成 如 kimi-app-2.0.0-javadoc.jar 、 kimi-app-2.0.0-sources.jar 这样两个附属构件。
      	这时候,javadoc,sources就是这两个附属构件的classifier,这样附属构件也就拥有了自己唯一的坐标。 -->

      	<!-- Maven的生命周期是抽象的,实际需要插件来完成任务,这一过程是通过将插件的目标(goal)绑定到生命周期的具体阶段(phase)来完成的。
      	如:将maven-compiler-plugin插件的compile目标绑定到default生命周期的compile阶段,完成项目的源代码编译: -->
	             <artifactId>maven-jar-plugin</artifactId>
	                <executions>
	                    <execution>
	                        <id>default-jar</id>
	                        <goals><goal>jar</goal></goals><!-- 打包的后缀 -->
	                        <phase>prepare-package</phase><!-- life的多个阶段 ,预打包-->
	                        <configuration>
	                            <includes><!-- 引入 路径-->
	                                <include>**/model/**</include>
	                            </includes>
	                        </configuration>
	                    </execution>
	                    <execution>
	                        <id>impl</id>
	                        <goals><goal>jar</goal></goals>
	                        <phase>prepare-package</phase>
	                        <configuration>
	                            <classifier>impl</classifier><!-- ***-impl.jar -->
								<excludes><!-- 排除 -->
									<exclude>**/model/**</exclude>
								</excludes>
	                            <includes><!-- 引入 -->
	                            	<include>**/impl/**</include>
	                            </includes>
	                        </configuration>
	                    </execution>
	                    <execution>
	                        <id>web</id>
	                        <goals><goal>jar</goal></goals>
	                        <phase>prepare-package</phase>
	                        <configuration>
	                            <classifier>web</classifier>
	                            <includes>
	                                <include>**/web/**</include>
	                            </includes>
								<excludes>
									<exclude>**/model/**</exclude>
								</excludes>
	                        </configuration>
	                    </execution>
	                </executions>
	            </plugin>
				<plugin>
				    <!-- 拷贝源文件  -->
					<groupId>org.apache.maven.plugins</groupId>
					<artifactId>maven-dependency-plugin</artifactId>
					<executions>
						<execution>
	              			<id>unpack-dependencies</id> <!-- 拷贝并解压到相应目录-->
	              			<phase>package</phase>
	               			<goals>
	                   			<goal>unpack-dependencies</goal>
	                		</goals>
	                		<configuration>
	                			<includeTypes>war</includeTypes><!-- 导入文件类型 -->
	   							<excludeTransitive>true</excludeTransitive>
								<overWriteSnapshots>true</overWriteSnapshots>
								<type>war</type>
		                 		<outputDirectory>  <!-- 解压 -->
		                     		${project.build.directory}/${project.artifactId}.war
		                  		</outputDirectory>
	                		</configuration>
	             		</execution>
					</executions>
				</plugin>
    </plugins>
  </build>

</project>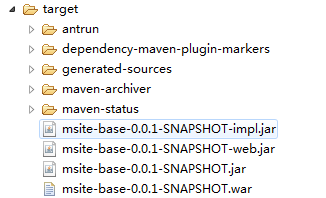
maven 的依赖
依赖值会把依赖包 dependency 和依赖的插件 plugins引入,不会把其他的属性引入,如打包方式就无法通过依赖引入,而要通过父子关系引入
<dependency>
			<groupId>com.hlzt.platform</groupId>
			<artifactId>platform-form</artifactId><!--引入依赖jar -->
		</dependency>
		<dependency>
			<groupId>com.hlzt.platform</groupId>
			<artifactId>platform-form</artifactId><!--引入依赖war -->
			<type>war</type>
		</dependency>
maven 的生命周期和插件绑定
一个完整的项目构建过程通常包括清理、编译、测试、打包、集成测试、验证、部 署等步骤,Maven从中抽取了一套完善的、易扩展的生命周期。Maven的生命周期是抽象的,其中的具体任务都交由插件来完成。Maven为大多数构建 任务编写并绑定了默认的插件,如针对编译的插件:maven-compiler-plugin。用户也可自行配置或编写插件。
1 . 三套生命周期
Maven定义了三套生命周期:clean、default、site,每个生命周期都包含了一些阶段(phase)。三套生命周期相互独立, 但各个生命周期中的phase却是有顺序的,且后面的phase依赖于前面的phase。执行某个phase时,其前面的phase会依顺序执行,但不会 触发另外两套生命周期中的任何phase。
1 . 1 clean生命周期
- pre-clean :执行清理前的工作;
- clean :清理上一次构建生成的所有文件;
- post-clean :执行清理后的工作
1 . 2 default生命周期
default生命周期是最核心的,它包含了构建项目时真正需要执行的所有步骤。
- validate
- initialize
- generate-sources
- process-sources
- generate-resources
- process-resources :复制和处理资源文件到target目录,准备打包;
- compile :编译项目的源代码;
- process-classes
- generate-test-sources
- process-test-sources
- generate-test-resources
- process-test-resources
- test-compile :编译测试源代码;
- process-test-classes
- test :运行测试代码;
- prepare-package
- package :打包成jar或者war或者其他格式的分发包;
- pre-integration-test
- integration-test
- post-integration-test
- verify
- install :将打好的包安装到本地仓库,供其他项目使用;
- deploy :将打好的包安装到远程仓库,供其他项目使用;
1 . 3 site生命周期
- pre-site
- site :生成项目的站点文档;
- post-site
- site-deploy :发布生成的站点文档
2 . Maven的插件
Maven的核心文件很小,主要的任务都是由插件来完成。定位到:%本地仓库%\org\apache\maven\plugins,可以看到一些下载好的插件:
Maven官网上有更详细的官方插件列表:
2 . 1 插件的目标(Plugin Goals)
一个插件通常可以完成多个任务,每一个任务就叫做插件的一个目标。如执行mvn install命令时,调用的插件和执行的插件目标如下:
每个插件都有哪些个目标,官方文档有更详细的说明:Maven Plugins
3 . 将插件绑定到生命周期
Maven的生命周期是抽象的,实际需要插件来完成任务,这一过程是通过将插件的目标(goal)绑定到生命周期的具体阶段(phase)来完成的。如:将maven-compiler-plugin插件的compile目标绑定到default生命周期的compile阶段,完成项目的源代码编译:
3 . 1 内置的绑定
Maven对一些生命周期的阶段(phase)默认绑定了插件目标,因为不同的项目有jar、war、pom等不同的打包方式,因此对应的有不同的绑定关系,其中针对default生命周期的jar包打包方式的绑定关系如下:
第二列中,冒号后面即是绑定的插件目标,冒号前面是插件的前缀(prefix),是配置和使用插件的一种简化方式。Plugin Prefix
3 . 2 自定义绑定
用户可以根据需要将任何插件目标绑定到任何生命周期的阶段,如:将maven-source-plugin的jar-no-fork目标绑定到default生命周期的package阶段,这样,以后在执行mvn package命令打包项目时,在package阶段之后会执行源代码打包,生成如:ehcache-core-2.5.0-sources.jar形式的源码包。

<build>
    <plugins>
        <plugin>
            <groupId>org.apache.maven.plugins</groupId>
            <artifactId>maven-source-plugin</artifactId>
            <version>2.2.1</version>
            <executions>
                <execution>
                    <id>attach-source</id>
                    <phase>package</phase><!-- 要绑定到的生命周期的阶段 -->
                    <goals>
                        <goal>jar-no-fork</goal><!-- 要绑定的插件的目标 -->
                    </goals>
                </execution>
            </executions>
        </plugin>
    </plugins>
    ……
</build>
4 . 配置插件
Maven插件高度易扩展,可以方便的进行自定义配置。如:配置maven-compiler-plugin插件编译源代码的JDK版本为1.7:
<plugin>
    <groupId>org.apache.maven.plugins</groupId>
    <artifactId>maven-compiler-plugin</artifactId>
    <configuration>
        <source>1.7</source>
        <target>1.7</target>
    </configuration>
</plugin>
也可以对插件的各个目标进行更具体的配置。Configuring Plug-ins
5 . 插件仓库
跟其他构件一样,插件也是根据坐标存储在Maven仓库中。超级POM中Maven配置的默认插件远程仓库如下:
<pluginRepositories>
    <pluginRepository>
      <id>central</id>
      <name>Central Repository</name>
      <url>http://repo.maven.apache.org/maven2</url>
      <layout>default</layout>
      <snapshots>
        <enabled>false</enabled>
      </snapshots>
      <releases>
        <updatePolicy>never</updatePolicy>
      </releases>
    </pluginRepository>
</pluginRepositories>
maven的聚合与继承
一、为什么要聚合?
随着技术的飞速发展和各类用户对软件的要求越来越高,软件本身也变得越来越复杂,然后软件设计人员开始采用各种方式进行开发,于是就有了我们的分层架构、分模块开发,来提高代码的清晰和重用。针对于这一特性,maven也给予了相应的配置。
情景分析一:
我们在开发过程中,创建了2个以上的模块,每个模块都是一个独立的maven project,在开始的时候我们可以独立的编译和测试运行每个模块,但是随着项目的不断变大和复杂化,我们期望能够使用简单的操作来完成编译等工作,这时Maven给出了聚合的配置方式。
所谓聚合,顾名思义,就是把多个模块或项目聚合到一起,我们可以建立一个专门负责聚合工作的Maven project --- aggregator。
建立该project的时候,我们要注意以下几点:
1.该aggregator本身也做为一个Maven项目,它必须有自己的POM
2.它的打包方式必须为: packaging
3.引入了新的元素:modules---module
4.版本:聚合模块的版本和被聚合模块版本一致
5.relative path:每个module的值都是一个当前POM的相对目录
6.目录名称:为了方便的快速定位内容,模块所处的目录应当与其artifactId一致(Maven约定而不是硬性要求),总之,模块所处的目录必须和<module>模块所处的目录</module>相一致。
7.习惯约定:为了方便构建,通常将聚合模块放在项目目录层的最顶层,其它聚合模块作为子目录存在。这样当我们打开项目的时候,第一个看到的就是聚合模块的POM
8.聚合模块减少的内容:聚合模块的内容仅仅是一个pom.xml文件,它不包含src/main/java、src/test/java等目录,因为它只是用来帮助其它模块构建的工具,本身并没有实质的内容。
9.聚合模块和子模块的目录:他们可以是父子类,也可以是平行结构,当然如果使用平行结构,那么聚合模块的POM也需要做出相应的更改。
二、为什么要继承?
做面向对象编程的人都会觉得这是一个没意义的问题,是的,继承就是避免重复,maven的继承也是这样,它还有一个好处就是让项目更加安全
情景分析二:我们在项目开发的过程中,可能多个模块独立开发,但是多个模块可能依赖相同的元素,比如说每个模块都需要Junit,使用spring的时候,其核心jar也必须都被引入,在编译的时候,maven-compiler-plugin插件也要被引入
如何配置继承:
1.说到继承肯定是一个父子结构,那么我们在aggregator中来创建一个parent project
2.<packaging>: 作为父模块的POM,其打包类型也必须为POM
3.结构:父模块只是为了帮助我们消除重复,所以它也不需要src/main/java、src/test/java等目录
4.新的元素:<parent> , 它是被用在子模块中的
5.<parent>元素的属性:<relativePath>: 表示父模块POM的相对路径,在构建的时候,Maven会先根据relativePath检查父POM,如果找不到,再从本地仓库查找
6.relativePath的默认值: ../pom.xml
7.子模块省略groupId和version: 使用了继承的子模块中可以不声明groupId和version, 子模块将隐式的继承父模块的这两个元素
三、可被继承的POM元素
groupId:项目组ID,项目坐标的核心元素
version: 项目版本, 项目坐标的核心元素
description: 项目的描述信息
organization: 项目的组织信息
inceptionYear: 项目的创始年份
url: 项目的URL地址
developers: 项目开发者信息
contributors: 项目的贡献者信息
distributionManagement: 项目的部署配置
issueManagement: 项目的缺陷跟踪系统信息
ciManagement: 项目的持续集成系统信息
scm: 项目的版本控制系统信息
mailingLists: 项目的邮件列表信息
properties: 自定义的maven属性
dependencies: 项目的依赖配置
dependencyManagement: 项目的依赖管理配置
repositories: 项目的仓库配置
build: 包括项目的源码目录配置、输出目录配置、插件配置、插件管理配置等
reporting: 包括项目的报告输出目录配置、报告插件配置等
四、maven的依赖管理
我们知道dependencies是可以被继承的,这个时候我们就想到让我们的发生了共用的依赖元素转移到parent中,这样我们又进一步的优化了配置。可是问题也随之而来,如果有一天我创建了一个新的模块,但是这个模块不需要这些parent的依赖,这时候如何处理?
是的,maven的依赖管理就是来解决这个问题的
增加一个新的元素:dependencyManagement
从上面的列表中我们发现dependencyManagement也是可以被继承的,这恰恰满足了我们的需要,它既能够让子模块继承到父模块的依赖配置,又能保证子模块依赖使用的灵活性
dependencyManagement的特性:在dependencyManagement中配置的元素既不会给parent引入依赖,也不会给它的子模块引入依赖,仅仅是它的配置是可继承的
最佳实践:
这时候我们就可以在父POM中声明这些依赖:
子模块的POM继承这些配置:子模块继承这些配置的时候,仍然要声明groupId和artifactId,表示当前配置是继承于父POM的,从而直接使用父POM的版本对应的资源
这个可以有效的避免多个子模块使用依赖版本不一致的情况,有助于降低依赖冲突的几率。注:只有子模块配置了继承的元素,才会真正的有效,否则maven是不会加载父模块中声明的元素。
五、Maven的插件管理
再增加一个新的元素:<pluginManagement>
这个元素和<dependencyManagement>相类似,它是用来进行插件管理的。
在我们项目开发的过程中,也会频繁的引入插件,所以解决这些复杂配置的方法就是使用插件管理
我们可以在父POM中做如下声明:
在子模块中,我们可以直接继承
我们会发现,继承的细节上和<dependencyManagement>几乎一样。
六、聚合与继承的总结
当我们明白聚合与继承的细节之后,我们会发现:
对于聚合模块来说,它知道有哪些被聚合的模块,而对于被聚合的模块来说,它们不知道被谁聚合了,也不知道它的存在
对于继承关系的父POM来说,它不知道自己被哪些子模块继承了,对于子POM来说,它必须知道自己的父POM是谁
在一些最佳实践中我们会发现:一个POM既是聚合POM,又是父POM,这么做主要是为了方便。
maven 插件之maven-dependency-plugin
maven-dependency-plugin是 处理与依赖相关的插件。它有很多可用的goal,大部分是和依赖构建、分析和解决相关的goal,这部分goal可以直接用maven的命令操作,例 如:mvn dependency:tree、mvn dependency:analyze;这类操作在平时的maven应用中很少会用到。这里主要介绍除此之外的、用得最多的几个操作:copy, copy-dependencies和它们对应的unpack, unpack-dependencies
首先声明插件:
- <build>
- <plugins>
- <plugin>
- <groupId>org.apache.maven.plugins</groupId>
- <artifactId>maven-dependency-plugin</artifactId>
- <version>2.8</version>
- </plugin>
- </plugins>
- </build>
- <build>
- <plugins>
- <plugin>
- <groupId>org.apache.maven.plugins</groupId>
- <artifactId>maven-dependency-plugin</artifactId>
- <version>2.8</version>
- </plugin>
- </plugins>
- </build>
copy 和 unpack
copy操作可以用来将某个(些)maven artifact(s)拷贝到某个目录下。添加phase和goal如下:
- <build>
- <plugins>
- <plugin>
- <groupId>org.apache.maven.plugins</groupId>
- <artifactId>maven-dependency-plugin</artifactId>
- <version>2.8</version>
- <executions>
- <execution>
- <phase>package</phase>
- <goals>
- <goal>copy</goal>
- </goals>
- </execution>
- </executions>
- </plugin>
- </plugins>
- </build>
然后就是配置,copy可以的配置的项比较多,详细的请参考:copy配置。下面是一些常用项说明:
Name Type Since Description| artifactItems | List | 1.0 | Collection of ArtifactItems to work on. (ArtifactItem contains groupId, artifactId, version, type, classifier, outputDirectory, destFileName and overWrite.) See Usage for details. |
| outputDirectory | File | 1.0 | Default output location used for mojo, unless overridden in ArtifactItem. Default value is: ${project.build.directory}/dependency. User property is: outputDirectory. |
| prependGroupId | boolean | 2.7 | Prepend artifact groupId during copy Default value is: false. User property is: mdep.prependGroupId. |
- prependGroupId: 用来指示拷出来的library名字需要不需要加上groupId,默认是不加
- outputDirectory: 用来指定拷出后Libraries的存放地
这里除了artifactItems没有默认值,需要指定外,所有其他的选项都可以被忽略:
- <configuration>
- <artifactItems>
- <artifactItem>
- <groupId>junit</groupId>
- <artifactId>junit</artifactId>
- <version>4.11</version>
- </artifactItem>
- </artifactItems>
- </configuration>
- <configuration>
- <artifactItems>
- <artifactItem>
- <groupId>junit</groupId>
- <artifactId>junit</artifactId>
- <version>4.11</version>
- </artifactItem>
- </artifactItems>
- </configuration>
如果想把它拷到lib目录下,可以如下配置:
- <configuration>
- <artifactItems>
- <artifactItem>
- <groupId>junit</groupId>
- <artifactId>junit</artifactId>
- <version>4.11</version>
- </artifactItem>
- </artifactItems>
- <outputDirectory>lib</outputDirectory>
- </configuration>
- <configuration>
- <artifactItems>
- <artifactItem>
- <groupId>junit</groupId>
- <artifactId>junit</artifactId>
- <version>4.11</version>
- </artifactItem>
- </artifactItems>
- <outputDirectory>lib</outputDirectory>
- </configuration>
- <configuration>
- <artifactItems>
- <artifactItem>
- <groupId>junit</groupId>
- <artifactId>junit</artifactId>
- <version>4.11</version>
- <outputDirectory>lib</outputDirectory>
- </artifactItem>
- </artifactItems>
- </configuration>
- <configuration>
- <artifactItems>
- <artifactItem>
- <groupId>junit</groupId>
- <artifactId>junit</artifactId>
- <version>4.11</version>
- <outputDirectory>lib</outputDirectory>
- </artifactItem>
- </artifactItems>
- </configuration>
- groupId
- artifactId
- version
- type
- classifier
- outputDirectory
- destFileName
- overWrite
同样的参数,artifactItem里的优先级更高,例如:
- <configuration>
- <artifactItems>
- <artifactItem>
- <groupId>junit</groupId>
- <artifactId>junit</artifactId>
- <version>4.11</version>
- </artifactItem>
- <artifactItem>
- <groupId>org.slf4j</groupId>
- <artifactId>slf4j-log4j12</artifactId>
- <version>1.7.7</version>
- <outputDirectory>lib2</outputDirectory>
- </artifactItem>
- </artifactItems>
- <outputDirectory>lib</outputDirectory>
- </configuration>
unpack和copy类似,只不过它会把拷来的包解开,例如:
- <executions>
- <execution>
- <phase>package</phase>
- <goals>
- <goal>unpack</goal>
- </goals>
- </execution>
- </executions>
- <configuration>
- <artifactItems>
- <artifactItem>
- <groupId>junit</groupId>
- <artifactId>junit</artifactId>
- <version>4.11</version>
- </artifactItem>
- <artifactItem>
- <groupId>org.slf4j</groupId>
- <artifactId>slf4j-log4j12</artifactId>
- <version>1.7.7</version>
- <outputDirectory>lib2</outputDirectory>
- </artifactItem>
- </artifactItems>
- <outputDirectory>lib</outputDirectory>
- </configuration>
copy-dependencies 和 unpack-dependencies
上面介绍的copy 和 unpack操作是由要拷某个包,这个包需要具体指定要拷哪个包,与当前工程的依赖没有关系。copy-dependencies和它有点类似,但是它是 用来拷当前工程的依赖包的,典型的,例如我们有一个web应用,当打成war包的时候,它所有的依赖也需要被打到应用中。
copy-dependencies的参数有很多,详细的可以参考:copy-dependencies Doc,但是几乎所有都有默认值。所以一个最简单的定义如下:
- <plugin>
- <groupId>org.apache.maven.plugins</groupId>
- <artifactId>maven-dependency-plugin</artifactId>
- <version>2.8</version>
- <executions>
- <execution>
- <phase>package</phase>
- <goals>
- <goal>copy-dependencies</goal>
- </goals>
- </execution>
- </executions>
- </plugin>
- <plugin>
- <groupId>org.apache.maven.plugins</groupId>
- <artifactId>maven-dependency-plugin</artifactId>
- <version>2.8</version>
- <executions>
- <execution>
- <phase>package</phase>
- <goals>
- <goal>copy-dependencies</goal>
- </goals>
- </execution>
- </executions>
- </plugin>
也可以使用outputDirectory指定存放在。另外,以下几个参数可以控制哪些依赖将被拷出(或排除):
Name Type Since Description| excludeArtifactIds | String | 2.0 | Comma separated list of Artifact names to exclude. User property is: excludeArtifactIds. |
| excludeClassifiers | String | 2.0 | Comma Separated list of Classifiers to exclude. Empty String indicates don't exclude anything (default). User property is: excludeClassifiers. |
| excludeGroupIds | String | 2.0 | Comma separated list of GroupId Names to exclude. User property is: excludeGroupIds. |
| excludeScope | String | 2.0 | Scope to exclude. An Empty string indicates no scopes (default). User property is: excludeScope. |
| excludeTransitive | boolean | 2.0 | If we should exclude transitive dependencies Default value is: false. User property is: excludeTransitive. |
| excludeTypes | String | 2.0 | Comma Separated list of Types to exclude. Empty String indicates don't exclude anything (default). User property is: excludeTypes. |
| includeArtifactIds | String | 2.0 | Comma separated list of Artifact names to include. User property is: includeArtifactIds. |
| includeClassifiers | String | 2.0 | Comma Separated list of Classifiers to include. Empty String indicates include everything (default). User property is: includeClassifiers. |
| includeGroupIds | String | 2.0 | Comma separated list of GroupIds to include. User property is: includeGroupIds. |
| includeScope | String | 2.0 | Scope to include. An Empty string indicates all scopes (default). The scopes being interpreted are the scopes as Maven sees them, not as specified in the pom. In summary:
User property is: includeScope. |
| includeTypes | String | 2.0 | Comma Separated list of Types to include. Empty String indicates include everything (default). User property is: includeTypes. |
例如当前工程有以下依赖:
- <dependencies>
- <dependency>
- <groupId>junit</groupId>
- <artifactId>junit</artifactId>
- <version>4.11</version>
- <scope>test</scope>
- </dependency>
- <dependency>
- <groupId>org.slf4j</groupId>
- <artifactId>slf4j-log4j12</artifactId>
- <version>1.7.7</version>
- <scope>test</scope>
- </dependency>
- <dependency>
- <groupId>org.apache.camel</groupId>
- <artifactId>camel-script</artifactId>
- <version>2.13.2</version>
- </dependency>
- <dependency>
- <groupId>org.apache.camel</groupId>
- <artifactId>camel-spring</artifactId>
- <version>2.13.2</version>
- </dependency>
- <dependency>
- <groupId>org.apache.camel</groupId>
- <artifactId>camel-xstream</artifactId>
- <version>2.13.2</version>
- </dependency>
- <dependency>
- <groupId>org.springframework</groupId>
- <artifactId>spring-jms</artifactId>
- <version>3.2.4.RELEASE</version>
- </dependency>
- <dependency>
- <groupId>org.springframework</groupId>
- <artifactId>spring-tx</artifactId>
- <version>3.2.4.RELEASE</version>
- </dependency>
- <dependency>
- <groupId>org.apache.activemq</groupId>
- <artifactId>activemq-all</artifactId>
- <version>5.10.0</version>
- </dependency>
- <dependency>
- <groupId>com.thoughtworks.xstream</groupId>
- <artifactId>xstream</artifactId>
- <version>1.4.7</version>
- </dependency>
- <dependency>
- <groupId>org.ogce</groupId>
- <artifactId>xpp3</artifactId>
- <version>1.1.6</version>
- </dependency>
- </dependencies>
- <plugin>
- <groupId>org.apache.maven.plugins</groupId>
- <artifactId>maven-dependency-plugin</artifactId>
- <version>2.8</version>
- <executions>
- <execution>
- <phase>package</phase>
- <goals>
- <goal>copy-dependencies</goal>
- </goals>
- </execution>
- </executions>
- <configuration>
- <includeScope>compile</includeScope>
- </configuration>
- </plugin>
Copied From: Dependencies Scopes
| scope/phase-> | compile | test | run | assembly |
| compile | U | U | U | U |
| provided | U | ! | ! | ! |
| runtime | ! | U | U | U |
| test | ! | U | ! | ! |
说明:最左侧是表示dependency的scope级别,顶行表示maven的阶段,可以看出:compile级别的dependency会在所有阶段都被使用。
要排除所有camel的依赖,如下:
- <configuration>
- <excludeGroupIds>org.apache.camel</excludeGroupIds>
- </configuration>
- <configuration>
- <excludeGroupIds>org.apache.camel</excludeGroupIds>
- </configuration>
- <configuration>
- <includeArtifactIds>camel-spring</includeArtifactIds>
- </configuration>
- <configuration>
- <includeArtifactIds>camel-spring</includeArtifactIds>
- </configuration>