一、需要的软件
Spring + spring mvc + tomcat + eclipse
软件 |
软件版本 |
eclipse |
Eclipse java ide:oxygen.3a release(4.7a) |
spring |
Srping-framework-4.01.release-dist |
tomcat |
Tomcat V7.0 |
jdk |
jdk-8u162-windows-x64 |
二、搭建过程
1、创建动态web工程

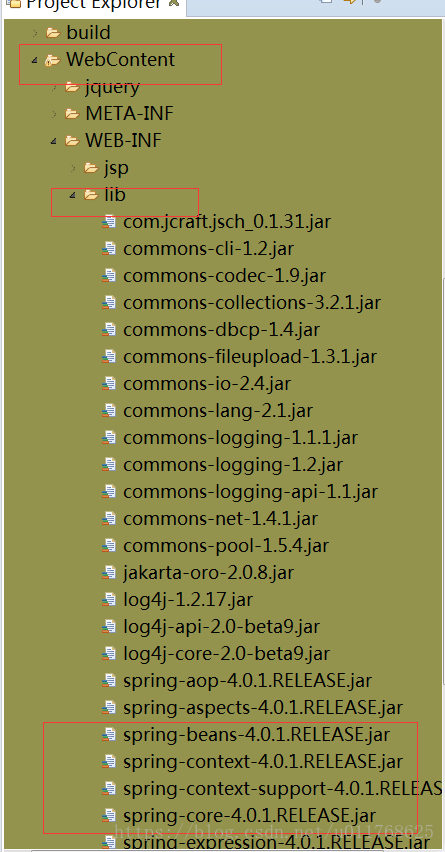
2、引入spring-4.0jar包
3、编辑及修改配置文件
3.1、在webConctent/WEB-INF下创建web.xml配置文件

配置如下:
<?xml version="1.0" encoding="UTF-8"?>
<web-app xmlns:xsi="http://www.w3.org/2001/XMLSchema-instance" xmlns="http://java.sun.com/xml/ns/javaee" xsi:schemaLocation="http://java.sun.com/xml/ns/javaee http://java.sun.com/xml/ns/javaee/web-app_2_5.xsd" version="2.5">
<display-name>spring</display-name>
<servlet>
<servlet-name>spring</servlet-name>
<servlet-class>org.springframework.web.servlet.DispatcherServlet</servlet-class>
<init-param>
<param-name>contextConfigLocation</param-name>
<param-value>/WEB-INF/spring-servlet.xml</param-value>
</init-param>
<load-on-startup>1</load-on-startup>
</servlet>
<servlet-mapping>
<servlet-name>spring</servlet-name>
<url-pattern>*.do</url-pattern>
</servlet-mapping>
<welcome-file-list>
<welcome-file>nlogin.jsp</welcome-file>
</welcome-file-list>
</web-app>
3.2、在webConctent/WEB-INF下创建spring-servlet.xml配置文件
配置如下:
<?xml version="1.0" encoding="UTF-8"?>
<beans xmlns="http://www.springframework.org/schema/beans"
xmlns:xsi="http://www.w3.org/2001/XMLSchema-instance"
xmlns:jee="http://www.springframework.org/schema/jee"
xmlns:util="http://www.springframework.org/schema/util"
xmlns:task="http://www.springframework.org/schema/task"
xmlns:p="http://www.springframework.org/schema/p"
xmlns:context="http://www.springframework.org/schema/context"
xmlns:tx="http://www.springframework.org/schema/tx"
xmlns:aop="http://www.springframework.org/schema/aop"
xmlns:mvc="http://www.springframework.org/schema/mvc"
xsi:schemaLocation="
http://www.springframework.org/schema/beans http://www.springframework.org/schema/beans/spring-beans-4.0.xsd
http://www.springframework.org/schema/util http://www.springframework.org/schema/util/spring-util-4.0.xsd
http://www.springframework.org/schema/task http://www.springframework.org/schema/task/spring-task-4.0.xsd
http://www.springframework.org/schema/jee http://www.springframework.org/schema/jee/spring-jee-4.0.xsd
http://www.springframework.org/schema/context http://www.springframework.org/schema/context/spring-context-4.0.xsd
http://www.springframework.org/schema/tx http://www.springframework.org/schema/tx/spring-tx-4.2.xsd
http://www.springframework.org/schema/aop http://www.springframework.org/schema/aop/spring-aop-4.0.xsd
http://www.springframework.org/schema/mvc
http://www.springframework.org/schema/mvc/spring-mvc-4.0.xsd">
<!-- 默认的注解映射的支持 -->
<mvc:annotation-driven />
<!--启用自动扫描 -->
<context:component-scan base-package="com.busi" />
<bean class="org.springframework.web.servlet.view.InternalResourceViewResolver">
<property name="prefix" value="/WEB-INF/jsp/" />
<property name="suffix" value=".jsp" />
</bean>
</beans>
注:web.xml中

与spring-servlet.xml中的spring的名称需要一致。
四、前后台代码编写及联调
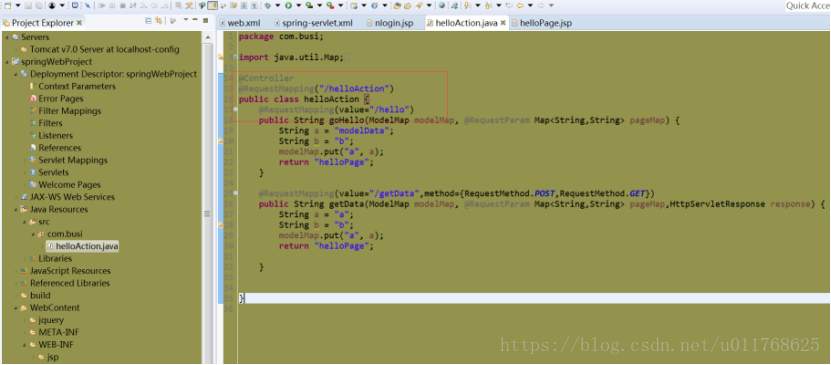
在springWebProject工程的java Resources/src下创建com.busi包(此包的名称与spring-servlet.xml中 自动扫描配置的base-package值一致。),在com.busi下创建helloAciton.java
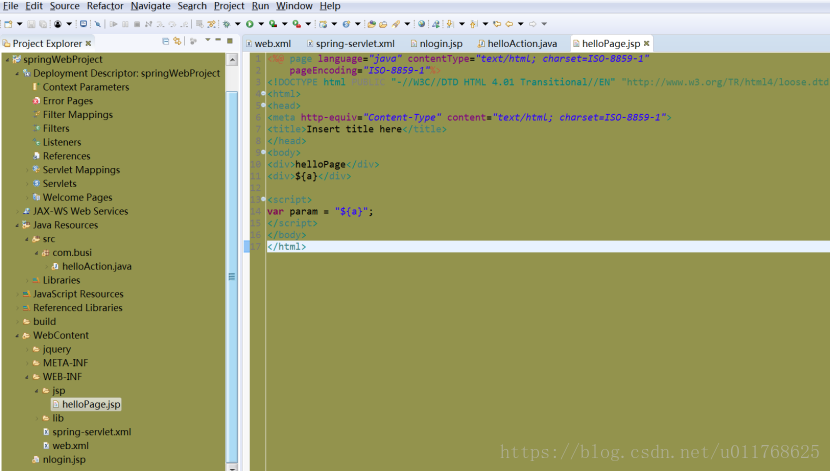
在WebContent下的WEB-INFxia下面创建jsp文件夹,在jsp下创建helloPage.jsp
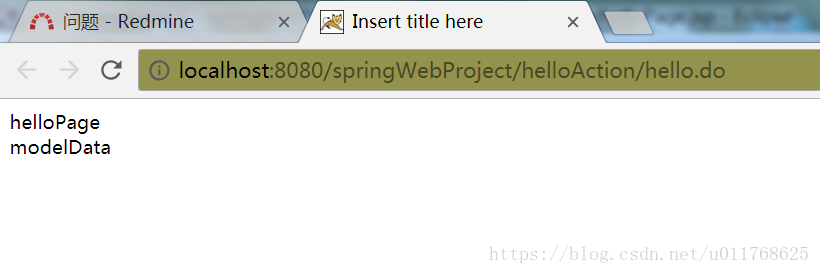
五.验证
启动工程,在浏览器中输入
http://localhost:8080/springWebProject/helloAction/hello.do
则显示页面如下: