Bean的初始化、销毁三种方式
(一)
1、先看第一种直接在BeanLifeCycle.xml中设置,init-method和destory-method两个方法
<?xml version="1.0" encoding="UTF-8"?>
<beans  xmlns="http://www.springframework.org/schema/beans"
        xmlns:xsi="http://www.w3.org/2001/XMLSchema-instance"
        xsi:schemaLocation="http://www.springframework.org/schema/beans
        http://www.springframework.org/schema/beans/spring-beans.xsd" >

        <bean id = "beanLifeCycle" class="com.yuna.cycle.BeanLifeCycle" init-method="start" destroy-method="stop"></bean>

 </beans>
2、我们新建一个BeanLifeCycle来实现这两个方法
public class BeanLifeCycle {

    public void start() {
        System.out.println("Bean start .");
    }

    public void stop() {
        System.out.println("Bean stop.");
    }
}
3、写个测试类TestBeanLiftCycle
public class TestBeanLiftCycle extends UnitTestBase {
public TestBeanLiftCycle() {
super("classpath:BeanLifeCycle.xml");
}
@Test
public void testSetingBean() {
super.getBean("beanLifeCycle");
}
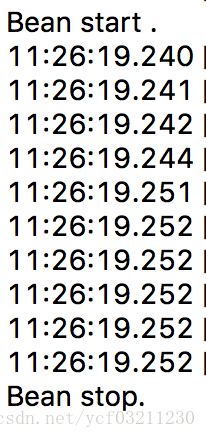
}可以看到打印的结果
(二)
1、新建BeanCycleImpl类实现InitializingBean,DisposableBean接口,并实现相关destroy()和afterPropertiesSet()方法
public class BeanCycleImpl implements InitializingBean,DisposableBean {

    @Override
    public void destroy() throws Exception {
        System.out.println("bean destroy");

    }

    @Override
    public void afterPropertiesSet() throws Exception {
        System.out.println("bean afterPropertiesSet");

    }

}
2、将BeanLifeCycle.xml文件修改如下
<?xml version="1.0" encoding="UTF-8"?>
<beans  xmlns="http://www.springframework.org/schema/beans"
        xmlns:xsi="http://www.w3.org/2001/XMLSchema-instance"
        xsi:schemaLocation="http://www.springframework.org/schema/beans
        http://www.springframework.org/schema/beans/spring-beans.xsd" >

        <!-- 方式一:直接在bean里设置属性  init-method 和 destroy-method-->
       <!--  <bean id = "beanLifeCycle" class="com.yuna.cycle.BeanLifeCycle" init-method="start" destroy-method="stop"></bean> -->

        <!-- 方式二:在BeanCycleImpl类中实现InitializingBean,DisposableBean接口 -->
        <bean id = "BeanCycleImpl" class="com.yuna.cycle.BeanCycleImpl" ></bean>
 </beans>
3、在测试TestBeanLiftCycle类中添加测试方法
@Test
    public void testBeanImpl() {
        super.getBean("BeanCycleImpl");
    }
4、运行打印的结果如下
bean afterPropertiesSet

bean destroy
(三)
1、修改BeanLifeCycle.xml的相关属性
<?xml version="1.0" encoding="UTF-8"?>
<beans  xmlns="http://www.springframework.org/schema/beans"
        xmlns:xsi="http://www.w3.org/2001/XMLSchema-instance"
        xsi:schemaLocation="http://www.springframework.org/schema/beans
        http://www.springframework.org/schema/beans/spring-beans.xsd"
          default-init-method="defautInit" default-destroy-method="defaultDestroy"
        >

        <!-- 方式三:在beans中设置相关的属性 :default-init-method和default-destroy-method-->
          <bean id = "BeanDefaultCycle" class="com.yuna.cycle.BeanDefaultImpl" ></bean>

        <!-- 方式一:直接在bean里设置属性  init-method 和 destroy-method-->
       <!--  <bean id = "beanLifeCycle" class="com.yuna.cycle.BeanLifeCycle" init-method="start" destroy-method="stop"></bean> -->

        <!-- 方式二:在BeanCycleImpl类中实现InitializingBean,DisposableBean接口 -->
        <!-- <bean id = "BeanCycleImpl" class="com.yuna.cycle.BeanCycleImpl" ></bean> -->
 </beans>
2、新建相关类BeanDefaultImpl,新增相关两个方法
public class BeanDefaultImpl {

    public void defautInit() {
        System.out.println("Bean defautInit .");
    }

    public void defaultDestroy() {
        System.out.println("Bean defaultDestroy.");
    }

}
3、在测试类中新增测试方法
@Test
    public void testBeanDefaultImpl() {
        super.getBean("BeanDefaultCycle");
    }
4、可以看到打印结果如下:
Bean defautInit .

Bean defaultDestroy.