Linux Distribution:Ubuntu 14.04.4
HBase:1.3.0
JDK:1.7.0_80
一,下载、安装HBase
在官网可以找到清华的镜像资源http://mirrors.tuna.tsinghua.edu.cn/apache/hbase/,其他的资源下载速度非常慢
下载最新的1.3.0版本,之后解压即可
root@ubuntu:/home/sean# tar -xzf hbase-1.3.0-bin.tar.gz
root@ubuntu:/home/sean# cd hbase-1.3.0
二,修改HBase配置
root@ubuntu:/home/sean/hbase-1.3.0# cd conf1,修改HBase使用的JDK
root@sean:/home/sean/hbase-1.3.0/conf# vi hbase-env.sh
添加如下配置
export JAVA_HOME=/home/sean/jdk1.7.0_802,修改HBase的配置文件(单机启动)
root@sean:/home/sean/hbase-1.3.0/conf# vi hbase-site.xml添加如下配置(HBase和Zookeeper的数据文件保存位置)
<configuration>
  <property>
    <name>hbase.rootdir</name>
    <value>file:///home/sean/hbaseSingle/hbaseData</value>
  </property>
  <property>
    <name>hbase.zookeeper.property.dataDir</name>
    <value>/home/sean/hbaseSingle/zookeeperData</value>
  </property>
</configuration>
三,修改系统配置
root@sean:/home/sean/hbase-1.3.0/conf# hostname
sean
修改hosts文件
这一步十分重要,如果不修改,将导致Java客户端卡主,既不报错,也不执行,最终超时,应该是源代码之中使用了各种DNS正解、反解
修改前文件内容如下(需要注意Ubuntu中主机名对应的IP地址为127.0.1.1)
root@sean:/home/sean/hbase-1.3.0/conf# cat /etc/hosts
127.0.0.1	localhost
127.0.1.1	sean

# The following lines are desirable for IPv6 capable hosts
::1     ip6-localhost ip6-loopback
fe00::0 ip6-localnet
ff00::0 ip6-mcastprefix
ff02::1 ip6-allnodes
ff02::2 ip6-allrouters
修改后文件内容如下
127.0.0.1	localhost
192.168.137.128       sean

# The following lines are desirable for IPv6 capable hosts
#::1     ip6-localhost ip6-loopback
#fe00::0 ip6-localnet
#ff00::0 ip6-mcastprefix
#ff02::1 ip6-allnodes
#ff02::2 ip6-allrouters
四,启动HBase
特别需要注意的是start-hbase.sh的第51行有些问题
if [ "$distMode" == 'false' ]应该修改为
if [ "$distMode" = 'false' ]启动结果如下
root@sean:/home/sean/hbase-1.3.0/conf# cd ../bin
root@sean:/home/sean/hbase-1.3.0/bin# sh start-hbase.sh
starting master, logging to /home/sean/hbase-1.3.0/bin/../logs/hbase-root-master-sean.out
五,验证HBase启动成功
首先查看Java进程
root@ubuntu:/home/sean/hbase-1.3.0/bin# jps
2498 Jps
2111 HMaster
由于使用单机方式启动,所以只有一个Java进程
root@ubuntu:/home/sean/hbase-1.3.0/bin# netstat -anp | grep java | grep LISTEN
tcp6       0      0 :::42303                :::*                    LISTEN      2111/java
tcp6       0      0 192.168.239.129:42563   :::*                    LISTEN      2111/java
tcp6       0      0 192.168.239.129:46053   :::*                    LISTEN      2111/java
tcp6       0      0 :::2181                 :::*                    LISTEN      2111/java
tcp6       0      0 :::16010                :::*                    LISTEN      2111/java
其中2181是Hbase内置Zookeeper的监听端口
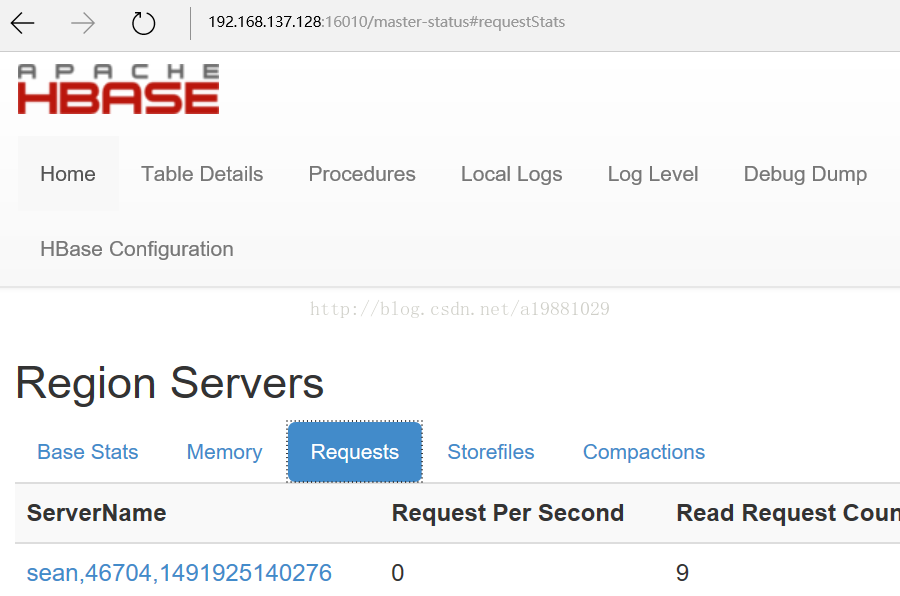
16010是Web GUI的监听端口,可通过http://192.168.137.128:16010查看Hbase的状态
使用HBase Shell创建一张名为test的表
root@ubuntu:/home/sean/hbase-1.3.0/bin# ./hbase shell
Type "exit<RETURN>" to leave the HBase Shell
Version 1.3.0, re359c76e8d9fd0d67396456f92bcbad9ecd7a710, Tue Jan  3 05:31:38 MSK 2017

hbase(main):001:0> list
TABLE
0 row(s) in 0.3770 seconds

=> []
hbase(main):002:0> create 'test','cf'
0 row(s) in 1.4130 seconds

=> Hbase::Table - test
hbase(main):003:0> list
TABLE
test
1 row(s) in 0.0320 seconds

=> ["test"]
六,HBase Java客户端
在使用客户端之前也必须修改本地hosts文件
由于本地系统为win10,hosts文件路径为C:\Windows\System32\drivers\etc\hosts
添加内容如下
192.168.137.128 seanPOM文件中添加如下依赖
<dependency>
    <groupId>org.apache.hbase</groupId>
    <artifactId>hbase-client</artifactId>
    <version>1.3.0</version>
</dependency>
1,创建表
package com.sean;

import org.apache.hadoop.conf.Configuration;
import org.apache.hadoop.hbase.*;
import org.apache.hadoop.hbase.client.*;

public class Client
{
    public static void main( String[] args )
    {
        // 配置,单机环境只需指定Zookeeper地址
        Configuration conf = HBaseConfiguration.create();
        conf.set("hbase.zookeeper.quorum", "192.168.137.128");

        try {
            Connection conn = ConnectionFactory.createConnection(conf);
            Admin admin = conn.getAdmin();

            TableName tableName = TableName.valueOf("testtable");

            // 如果表已经存在则删除旧表
            if(admin.tableExists(tableName)){
                // 首先disable表,disable 'testtable'
                admin.disableTable(tableName);
                // 然后删除表,drop 'testtable'
                admin.deleteTable(tableName);
                System.out.println("table exists,delete first!");
            }

            // 创建新表
            HTableDescriptor hTableDescriptor = new HTableDescriptor(tableName);
            hTableDescriptor.addFamily(new HColumnDescriptor("cf1"));
            hTableDescriptor.addFamily(new HColumnDescriptor("cf2"));
            admin.createTable(hTableDescriptor);

        } catch (Exception e){
            System.out.println(e.getMessage());
            e.printStackTrace();
        }
        System.out.println("operation is over");
    }
}
结果如下
hbase(main):006:0> list
TABLE
testtable
1 row(s) in 0.0120 seconds

=> ["testtable"]
2,插入数据
package com.sean;

import org.apache.hadoop.conf.Configuration;
import org.apache.hadoop.hbase.HBaseConfiguration;
import org.apache.hadoop.hbase.TableName;
import org.apache.hadoop.hbase.client.HTable;
import org.apache.hadoop.hbase.client.Put;
import org.apache.hadoop.hbase.util.Bytes;

import java.io.IOException;
import java.util.LinkedList;
import java.util.List;

public class Insert
{
    public static void main( String[] args )
    {
        // 配置,单机环境只需指定Zookeeper地址
        Configuration conf = HBaseConfiguration.create();
        conf.set("hbase.zookeeper.quorum", "192.168.137.128");

        HTable table = null;
        try {
            TableName tableName = TableName.valueOf("testtable");
            table = new HTable(conf,tableName);

            // 单行插入
            Put put1 = new Put(Bytes.toBytes("row1"));
            put1.addColumn(Bytes.toBytes("cf1"), Bytes.toBytes("qual"), Bytes.toBytes("val1"));
            put1.addColumn(Bytes.toBytes("cf2"), Bytes.toBytes("qual"), Bytes.toBytes("val1"));
            table.put(put1);

            // 多行插入
            List<Put> putList = new LinkedList<Put>();

            Put put2 = new Put(Bytes.toBytes("row2"));
            put2.addColumn(Bytes.toBytes("cf1"), Bytes.toBytes("qual"), Bytes.toBytes("val2"));
            putList.add(put2);

            Put put3 = new Put(Bytes.toBytes("row3"));
            put3.addColumn(Bytes.toBytes("cf1"), Bytes.toBytes("qual"), Bytes.toBytes("val3"));
            putList.add(put3);

            table.put(putList);

            // 多行插入,并使用客户端写缓存
            table.setAutoFlush(false,true);
            putList = new LinkedList<Put>();

            Put put4 = new Put(Bytes.toBytes("row4"));
            put4.addColumn(Bytes.toBytes("cf1"), Bytes.toBytes("qual"), Bytes.toBytes("val4"));
            putList.add(put4);

            Put put5 = new Put(Bytes.toBytes("row5"));
            put5.addColumn(Bytes.toBytes("cf1"), Bytes.toBytes("qual"), Bytes.toBytes("val5"));
            putList.add(put5);

            table.put(putList);
            table.flushCommits();

            // 使用batch接口批量插入数据,batch接口是同步接口,不会使用客户端写缓存
            putList = new LinkedList<Put>();

            Put put6 = new Put(Bytes.toBytes("row6"));
            put6.addColumn(Bytes.toBytes("cf1"), Bytes.toBytes("qual"), Bytes.toBytes("val6"));
            putList.add(put6);

            Put put7 = new Put(Bytes.toBytes("row7"));
            put7.addColumn(Bytes.toBytes("cf1"), Bytes.toBytes("qual"), Bytes.toBytes("val7"));
            putList.add(put7);

            Object[] results = new Object[putList.size()];
            table.batch(putList,results);
            for(Object obj : results)
                System.out.println(obj);

            // 检查后插入,特别需要注意的是,check和put必须是同一行,即加锁必须针对同一行
            Put put8 = new Put(Bytes.toBytes("row8"));
            put8.addColumn(Bytes.toBytes("cf1"), Bytes.toBytes("qual"), Bytes.toBytes("val8"));
            Boolean result = table.checkAndPut(Bytes.toBytes("row8"),Bytes.toBytes("cf1"),
                    Bytes.toBytes("qual"),null,put8);
            System.out.println(result);
        } catch (Exception e){
            System.out.println(e.getMessage());
            e.printStackTrace();
        } finally {
            if(table != null)
                try {
                    table.close();
                } catch (IOException e) {
                    e.printStackTrace();
                }
            System.out.println("operation is over");
        }
    }
}
控制台输出如下,要注意的是使用batch接口时,put和delete操作成功后返回的是空
keyvalues=NONE
keyvalues=NONE
true
operation is over
执行结果如下
hbase(main):031:0> scan 'testtable'
ROW                   COLUMN+CELL
 row1                 column=cf1:qual, timestamp=1492921227642, value=val1
 row1                 column=cf2:qual, timestamp=1492921227642, value=val1
 row2                 column=cf1:qual, timestamp=1492921227658, value=val2
 row3                 column=cf1:qual, timestamp=1492921227658, value=val3
 row4                 column=cf1:qual, timestamp=1492921227661, value=val4
 row5                 column=cf1:qual, timestamp=1492921227661, value=val5
 row6                 column=cf1:qual, timestamp=1492921227663, value=val6
 row7                 column=cf1:qual, timestamp=1492921227663, value=val7
 row8                 column=cf1:qual, timestamp=1492917063146, value=val8
8 row(s) in 0.0280 seconds
3,查询数据
package com.sean;

import org.apache.hadoop.conf.Configuration;
import org.apache.hadoop.hbase.HBaseConfiguration;
import org.apache.hadoop.hbase.TableName;
import org.apache.hadoop.hbase.client.*;
import org.apache.hadoop.hbase.util.Bytes;

import java.io.IOException;
import java.util.LinkedList;
import java.util.List;

public class Query
{
    public static void main( String[] args )
    {
        // 配置,单机环境只需指定Zookeeper地址
        Configuration conf = HBaseConfiguration.create();
        conf.set("hbase.zookeeper.quorum", "192.168.137.128");

        HTable table = null;
        try {
            TableName tableName = TableName.valueOf("testtable");
            table = new HTable(conf,tableName);

            // 单行查询
            Get get1 = new Get(Bytes.toBytes("row1"));
//            可以设置查询的版本数,但是首先列族必须支持保存多版本(默认仅保存1个版本)
//            describe 'testtable'    // 查看保存版本数
//            alter 'testtable',{name=>'cf1',versions=>10}    // 修改保存版本数
//            get1.setMaxVersions(10);

            Result result1 = table.get(get1);
            System.out.println(result1.toString());

            // 多行查询
            System.out.println("----");
            List<Get> list = new LinkedList<Get>();

            Get get2 = new Get(Bytes.toBytes("row1"))
                    .addFamily(Bytes.toBytes("cf1"));
            list.add(get2);

            Get get3 = new Get(Bytes.toBytes("row1"))
                    .addColumn(Bytes.toBytes("cf2"), Bytes.toBytes("qual"));
            list.add(get3);

            Get get4 = new Get(Bytes.toBytes("row99"));
            list.add(get4);

            Result[] result2 = table.get(list);
            for(Result result : result2)
                System.out.println(result);

            // 使用batch接口批量查询
            System.out.println("----");
            list = new LinkedList<Get>();

            Get get5 = new Get(Bytes.toBytes("row4"));
            list.add(get5);

            Get get6 = new Get(Bytes.toBytes("row5"))
                    .addFamily(Bytes.toBytes("cf_not_exist"));
            list.add(get6);

            Object[] result3 = new Object[list.size()];
            try {
                table.batch(list, result3);
            } catch (Exception e){
                // do nothing
            }
            for(Object obj : result3) {
                if(obj instanceof Exception)
                    System.out.println(obj.getClass().getName());
                else
                    System.out.println(obj.toString());
            }

            // 查询指定行或指定行的前一行,如果都没有,返回null
            System.out.println("----");

            Result result4 = table.getRowOrBefore(Bytes.toBytes("row3"),Bytes.toBytes("cf1"));
            System.out.println(result4.toString());

            Result result5 = table.getRowOrBefore(Bytes.toBytes("row99"),Bytes.toBytes("cf1"));
            System.out.println(result5.toString());

            Result result6 = table.getRowOrBefore(Bytes.toBytes("a"),Bytes.toBytes("cf1"));
            if(result6 != null)
                System.out.println(result6.toString());
            else
                System.out.println("is null");

            // 使用Scan扫描表
            System.out.println("----");
//            设置表级别的扫描器缓存
//            table.setScannerCaching(4);

            Scan scan = new Scan();
            scan.addFamily(Bytes.toBytes("cf1"));
            // 起始行包含在结果之内,结束行不包含在结果之内
            scan.setStartRow(Bytes.toBytes("row1"));
            scan.setStopRow(Bytes.toBytes("row8"));
            // 设置扫描级别的扫描器缓存(优先级高于表级)
            // 设置scanner每一次从服务器查询的行数
            // 如果不设置扫描缓存,每一行查询都将使用独立的rpc请求
            scan.setCaching(4);// 总共7行数据只需发起2次rpc请求即可拿到全部数据
            // 设置每次取回的列数
            scan.setBatch(1);

            ResultScanner scanner = table.getScanner(scan);
            for(Result result : scanner){
                System.out.println(result);
            }
            scanner.close();
        } catch (Exception e){
            System.out.println(e.getMessage());
            e.printStackTrace();
        } finally {
            if(table != null)
                try {
                    table.close();
                } catch (IOException e) {
                    e.printStackTrace();
                }
            System.out.println("operation is over");
        }
    }
}
控制台输出如下
keyvalues={row1/cf1:qual/1492944856216/Put/vlen=4/seqid=0, row1/cf2:qual/1492944856216/Put/vlen=4/seqid=0}
----
keyvalues={row1/cf1:qual/1492944856216/Put/vlen=4/seqid=0}
keyvalues={row1/cf2:qual/1492944856216/Put/vlen=4/seqid=0}
keyvalues=NONE
----
keyvalues={row4/cf1:qual/1492944856238/Put/vlen=4/seqid=0}
org.apache.hadoop.hbase.regionserver.NoSuchColumnFamilyException
----
keyvalues={row3/cf1:qual/1492944856236/Put/vlen=4/seqid=0}
keyvalues={row8/cf1:qual/1492917063146/Put/vlen=4/seqid=0}
is null
----
keyvalues={row1/cf1:qual/1492944856216/Put/vlen=4/seqid=0}
keyvalues={row2/cf1:qual/1492944856236/Put/vlen=4/seqid=0}
keyvalues={row3/cf1:qual/1492944856236/Put/vlen=4/seqid=0}
keyvalues={row4/cf1:qual/1492944856238/Put/vlen=4/seqid=0}
keyvalues={row5/cf1:qual/1492944856238/Put/vlen=4/seqid=0}
keyvalues={row6/cf1:qual/1492944856239/Put/vlen=4/seqid=0}
keyvalues={row7/cf1:qual/1492944856239/Put/vlen=4/seqid=0}
operation is over
4,删除数据
package com.sean;

import org.apache.hadoop.conf.Configuration;
import org.apache.hadoop.hbase.HBaseConfiguration;
import org.apache.hadoop.hbase.TableName;
import org.apache.hadoop.hbase.client.Delete;
import org.apache.hadoop.hbase.client.HTable;
import org.apache.hadoop.hbase.util.Bytes;

import java.io.IOException;
import java.util.LinkedList;
import java.util.List;

public class Del
{
    public static void main( String[] args )
    {
        // 配置,单机环境只需指定Zookeeper地址
        Configuration conf = HBaseConfiguration.create();
        conf.set("hbase.zookeeper.quorum", "192.168.137.128");

        HTable table = null;
        try {
            TableName tableName = TableName.valueOf("testtable");
            table = new HTable(conf,tableName);

            // 单行删除
            Delete delete1 = new Delete(Bytes.toBytes("row1"));
            delete1.addFamily(Bytes.toBytes("cf2"));
            table.delete(delete1);

            // 批量删除
            List<Delete> delList = new LinkedList<Delete>();

            Delete delete2 = new Delete(Bytes.toBytes("row2"));
            delList.add(delete2);

            Delete delete3 = new Delete(Bytes.toBytes("row3"));
            delList.add(delete3);

            table.delete(delList);

            // 使用batch接口批量数据,
            delList = new LinkedList<Delete>();

            Delete delete4 = new Delete(Bytes.toBytes("row4"));
            delList.add(delete4);

            Delete delete5 = new Delete(Bytes.toBytes("row99"));
            delList.add(delete5);

            Object[] results = new Object[delList.size()];
            table.batch(delList,results);
            for(Object obj : results)
                System.out.println(obj);

            // 检查后删除
            Delete delete6 = new Delete(Bytes.toBytes("row6"));
            table.checkAndDelete(Bytes.toBytes("row6"),Bytes.toBytes("cf1")
                ,Bytes.toBytes("qual"),Bytes.toBytes("val6"),delete6);
        } catch (Exception e){
            System.out.println(e.getMessage());
            e.printStackTrace();
        } finally {
            if(table != null)
                try {
                    table.close();
                } catch (IOException e) {
                    e.printStackTrace();
                }
            System.out.println("operation is over");
        }
    }
}
执行结果如下
hbase(main):055:0> scan 'testtable'
ROW                   COLUMN+CELL
 row1                 column=cf1:qual, timestamp=1492946751365, value=val1
 row5                 column=cf1:qual, timestamp=1492946751378, value=val5
 row7                 column=cf1:qual, timestamp=1492946751380, value=val7
 row8                 column=cf1:qual, timestamp=1492917063146, value=val8
4 row(s) in 0.0230 seconds