一、环境
Linux操作系统:centos6.9
安装mysql版本: 5.6
二、安装步骤
1、检查和卸载centos原有的mysql
① 输入以下命令查看centos自带的mysql
[root@VM_0_11_centos ~]# rpm -qa | grep mysql
mysql-libs-5.1.73-8.el6_8.x86_64
复制 mysql-libs-5.1.73-8.el6_8.x86_64
② 输入命令 删除 mysql-libs-5.1.73-8.el6_8.x86_64
[root@VM_0_11_centos ~]# rpm -e --nodeps mysql-libs-5.1.73-8.el6_8.x86_64
[root@VM_0_11_centos ~]#
2、下载mysql5.6 的rpm包
① mysql 官网下载地址: https://dev.mysql.com/get/Downloads/MySQL-5.6/MySQL-5.6.40-1.el6.x86_64.rpm-bundle.tar
② 复制上面链接,在linux命令窗口输入,然后等待下载完成
[root@VM_0_11_centos ~]# wget https://dev.mysql.com/get/Downloads/MySQL-5.6/MySQL-5.6.40-1.el6.x86_64.rpm-bundle.tar3、解压tar文件 MySQL-5.6.40-1.el6.x86_64.rpm-bundle.tar
[root@VM_0_11_centos ~]# tar -xvf MySQL-5.6.40-1.el6.x86_64.rpm-bundle.tar
MySQL-shared-compat-5.6.40-1.el6.x86_64.rpm
MySQL-client-5.6.40-1.el6.x86_64.rpm
MySQL-embedded-5.6.40-1.el6.x86_64.rpm
MySQL-test-5.6.40-1.el6.x86_64.rpm
MySQL-server-5.6.40-1.el6.x86_64.rpm
MySQL-shared-5.6.40-1.el6.x86_64.rpm
MySQL-devel-5.6.40-1.el6.x86_64.rpm
4、 安装服务端
[root@VM_0_11_centos ~]# rpm -ivh MySQL-server-5.6.40-1.el6.x86_64.rpm5、 安装客户端
[root@VM_0_11_centos ~]# rpm -ivh MySQL-client-5.6.40-1.el6.x86_64.rpm三、配置mysql
1、 启动mysql服务
[root@VM_0_11_centos ~]# service mysql start
Starting MySQL.Logging to '/var/lib/mysql/VM_0_11_centos.err'.
 SUCCESS!
2、 查看mysql随机生成的默认密码
[root@VM_0_11_centos ~]# cat /root/.mysql_secret
3、使用刚刚查询出来的密码登录mysql
[root@VM_0_11_centos ~]# mysql -u root -p4、 设置新的mysql登录密码
mysql> set password = password('yazhishaw');
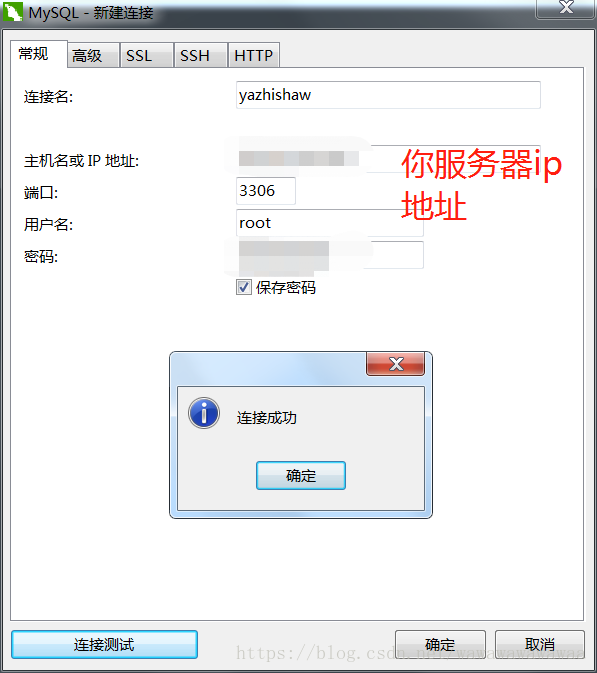
Query OK, 0 rows affected (0.00 sec)5、 开启mysql远程登录的权限
mysql> grant all privileges on *.* to 'root' @'%' identified by 'yazhishaw';
Query OK, 0 rows affected (0.00 sec)

mysql> flush privileges;
Query OK, 0 rows affected (0.00 sec)
6、退出mysql客户端,设置开机自动启动mysql服务
mysql> exit;
Bye
[root@VM_0_11_centos ~]# chkconfig --add mysql
[root@VM_0_11_centos ~]# chkconfig mysql on四、 开放linux的对外访问端口3306(mysql的默认端口)
[root@VM_0_11_centos ~]# /sbin/iptables -I INPUT -p tcp --dport 3306 -j ACCEPT
[root@VM_0_11_centos ~]# /etc/rc.d/init.d/iptables save
iptables: Saving firewall rules to /etc/sysconfig/iptables: [  OK  ]
(PS: 如果是购买的腾讯云、阿里云之类的服务器需要在控制台上设置安全组开放3306)
五、 设置mysql数据库的编码为utf8mb4
1、查找mysql配置文件my.cnf
[root@VM_0_11_centos ~]# find / -name my.cnf
/usr/my.cnf
2、 编辑mysql配置文件my.cnf 打开上面路径
[root@VM_0_11_centos ~]# vi /usr/my.cnf3、修改配置文件内容,没有的添加上去

[client]
default-character-set = utf8mb4
[mysql]
default-character-set = utf8mb4
[mysqld]
character-set-client-handshake = FALSE
character-set-server = utf8mb4
collation-server = utf8mb4_unicode_ci
init_connect='SET NAMES utf8mb4'
4、 修改后保存配置文件,重启mysql服务器
[root@VM_0_11_centos ~]# service mysql restart
Shutting down MySQL.... SUCCESS!
Starting MySQL. SUCCESS!