1、进入Linux的图形界面
如果有安装图形界面的话,直接在输入命令
init 5
进入oracle用户
su - oracle
2、上传软件包并安装,按照顺序解压软件包
wget http://192.168.10.11/linux.x64_11gR2_database_1of2.zip
wget http://192.168.10.11/linux.x64_11gR2_database_2of2.zip

unzip linux.x64_11gR2_database_1of2.zip
unzip linux.x64_11gR2_database_2of2.zip
运行下载界面
cd database
./runInstaller
3、询问用户是否要接收oracle更新信息,取消更新

4、选择只下载数据库软件,后面单独安装数据库实例

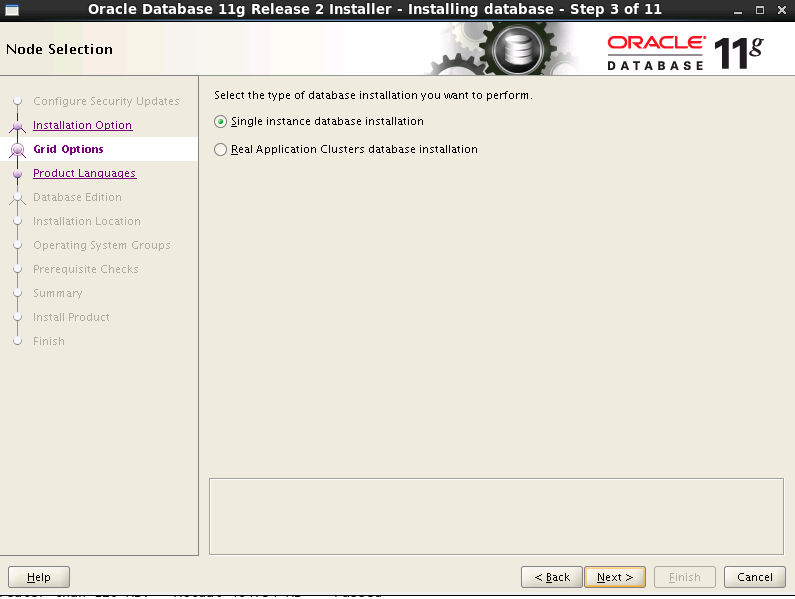
5、选择单实例数据库安装
6、选择语言,默认英语

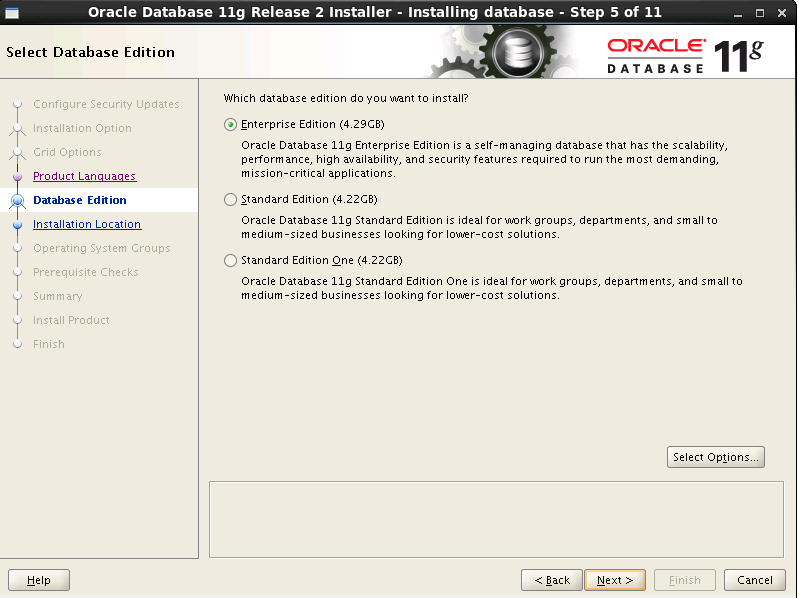
7、选择企业版
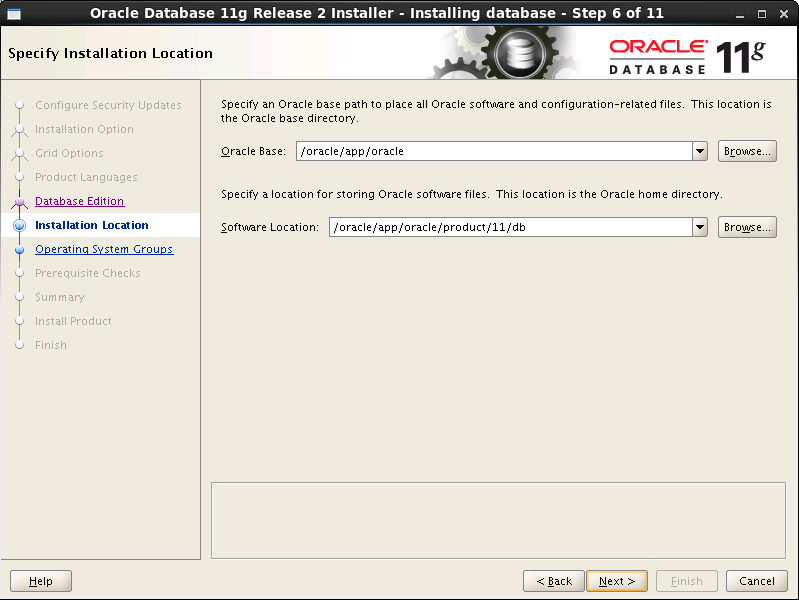
8、根据环境变量设置,自动配置安装路径
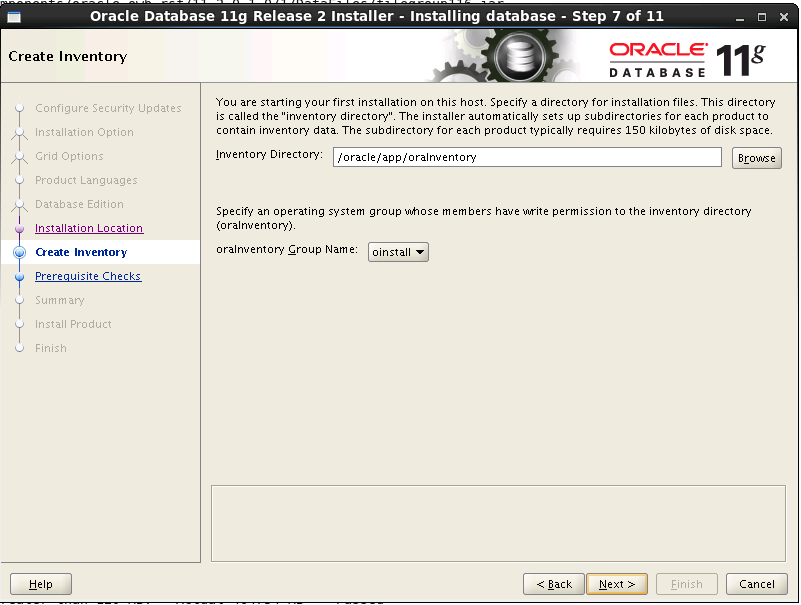
9、根据环境变量设置,自动配置库存
10、选择用户组

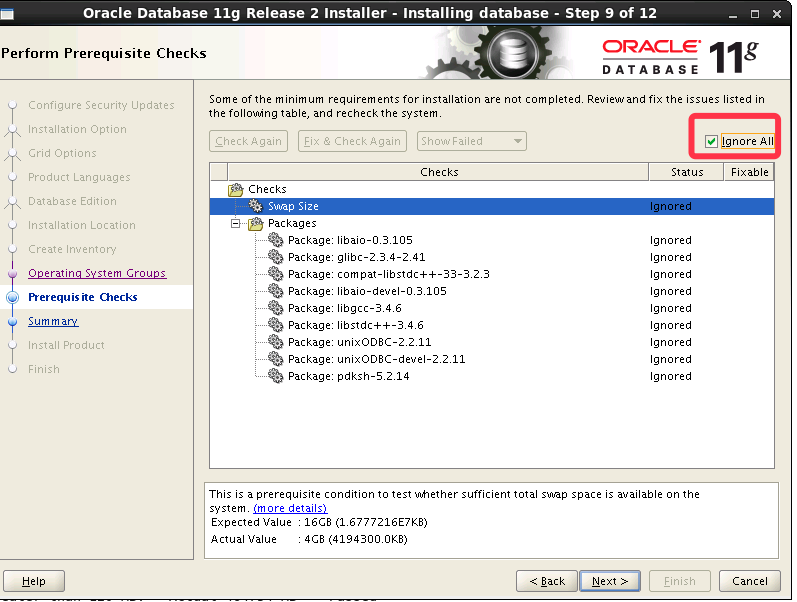
11、忽略问题
12、选择完成finish

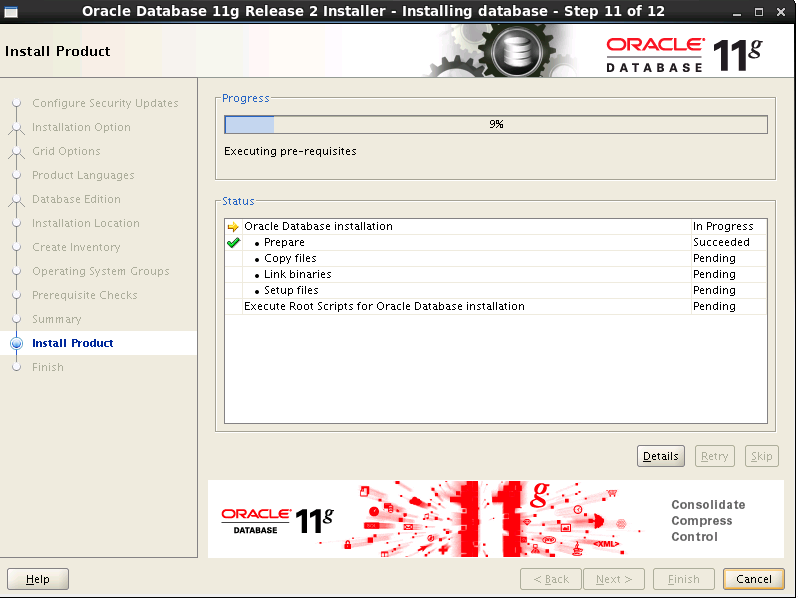
13、安装进行中
14、以root的权限运行初始化脚本

[root@oracle01 mnt]# sh /oracle/app/oraInventory/orainstRoot.sh
Changing permissions of /oracle/app/oraInventory.
Adding read,write permissions for group.
Removing read,write,execute permissions for world.

Changing groupname of /oracle/app/oraInventory to oinstall.
The execution of the script is complete.
[root@oracle01 mnt]# sh /oracle/app/oracle/product/11/db/root.sh
Running Oracle 11g root.sh script...

The following environment variables are set as:
    ORACLE_OWNER= oracle
    ORACLE_HOME=  /oracle/app/oracle/product/11/db

Enter the full pathname of the local bin directory: [/usr/local/bin]: 回车
   Copying dbhome to /usr/local/bin ...
   Copying oraenv to /usr/local/bin ...
   Copying coraenv to /usr/local/bin ...


Creating /etc/oratab file...
Entries will be added to the /etc/oratab file as needed by
Database Configuration Assistant when a database is created
Finished running generic part of root.sh script.
Now product-specific root actions will be performed.
Finished product-specific root actions.
[root@oracle01 mnt]#
15、安装完成,选择关闭
