一、安装Maven3.5.4
1.百度搜索并下载 apache-maven-3.5.4-bin.zip.
下载地址:http://www.softpedia.com/get/Programming/Other-Programming-Files/Apache-Maven.shtml
2.解压到任意目录下
解压既可使用,解压路径随便都可以,只要你喜欢。这里放在:K:\apache-maven-3.5.4
3.创建未来下载jar包存放的路径
在K:\apache-maven-3.5.4 目录下创建一个存储未来下载的jar的文件夹: m2,路径为:K:\apache-maven-3.5.4 \m2
4.复制配置文件
将maven的配置文件settings.xml从K:\apache-maven-3.5.4\conf目录COPY到 K:\apache-maven-3.5.4
5.修改复制后的配置文件
修改新COPY的配置文件,添加:
<localRepository>K:\apache-maven-3.5.4\m2</localRepository>
设定jar仓库本地目录。如下所示:
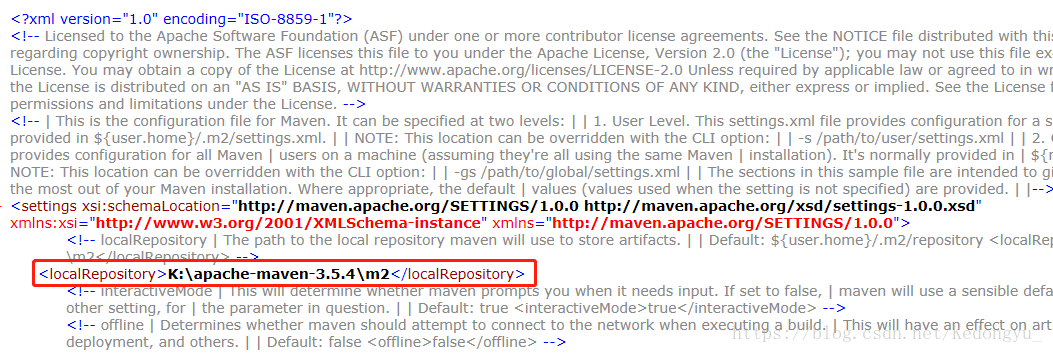
保存即可。
二、ecplise下配置Maven
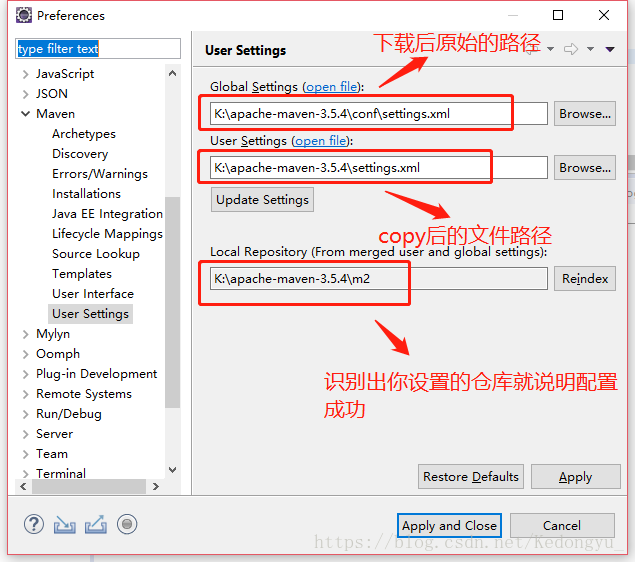
1.打开eclipse-window-preferences下,在Maven标签下的User Settings 项目进行以下配置。
2.创建Maven项目,点击new-Maven Project.
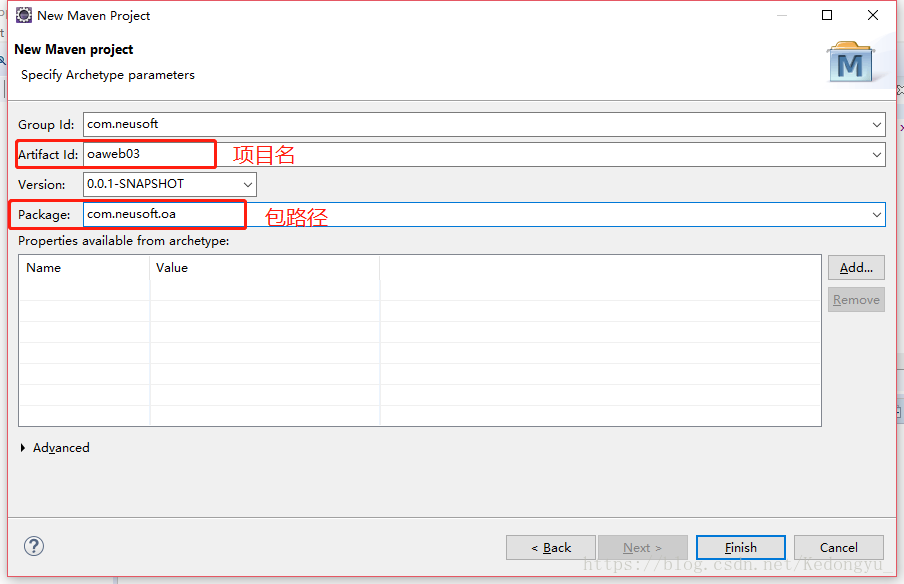
3.点击next,选择1.0版本,next
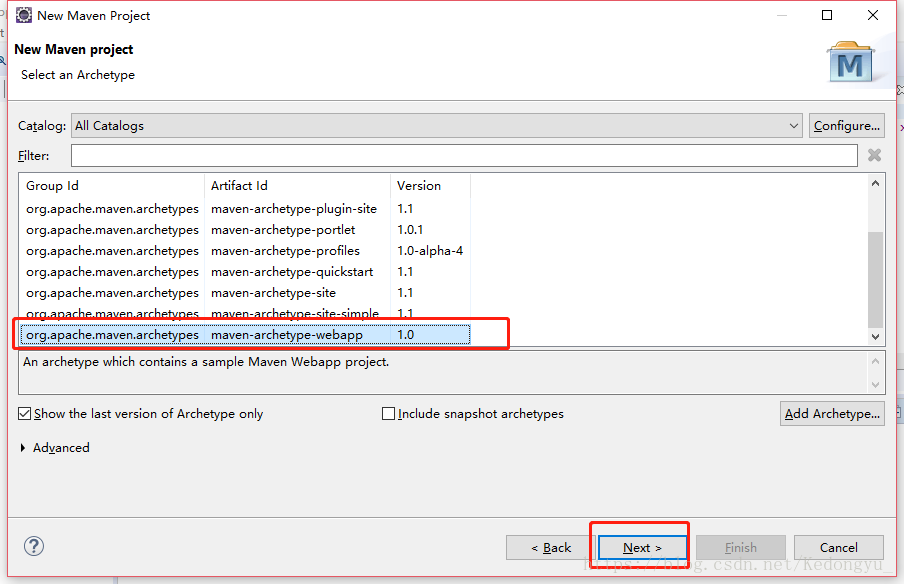
4.finish,等待创建。
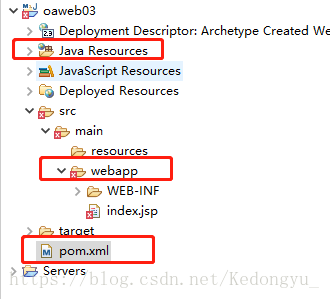
三、修改Maven项目配置
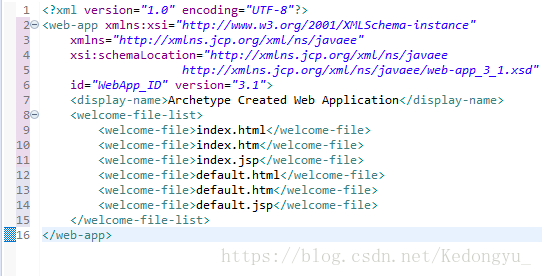
1.由于Maven本身原因,创建后的web.xml版本是2.3的
将web.xml下的内容换成3.1的内容。
原内容:

替换成:
<?xml version="1.0" encoding="UTF-8"?>
<web-app xmlns:xsi="http://www.w3.org/2001/XMLSchema-instance" xmlns="http://xmlns.jcp.org/xml/ns/javaee" xsi:schemaLocation="http://xmlns.jcp.org/xml/ns/javaee http://xmlns.jcp.org/xml/ns/javaee/web-app_3_1.xsd" id="WebApp_ID" version="3.1">
<display-name>Archetype Created Web Application</display-name>
<welcome-file-list>
<welcome-file>index.html</welcome-file>
<welcome-file>index.htm</welcome-file>
<welcome-file>index.jsp</welcome-file>
<welcome-file>default.html</welcome-file>
<welcome-file>default.htm</welcome-file>
<welcome-file>default.jsp</welcome-file>
</welcome-file-list>
</web-app>
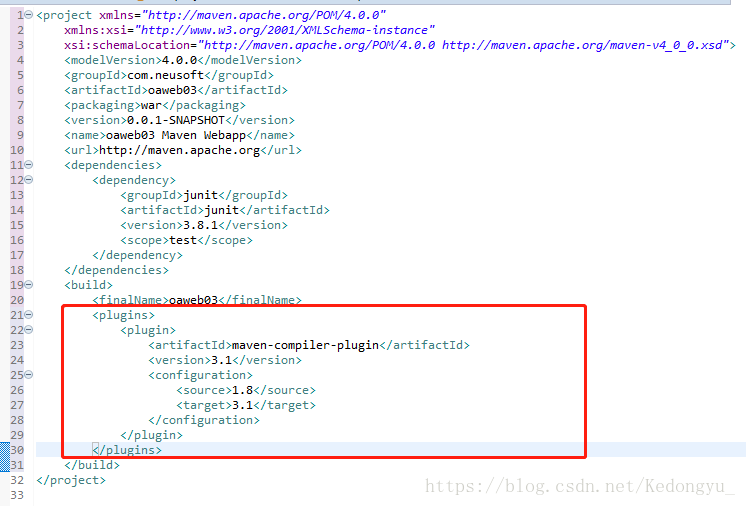
2.修改pom.xml文件
<build>标签下添加下列内容:
<plugins>
<plugin>
<artifactId>maven-compiler-plugin</artifactId>
<version>3.1</version>
<configuration>
<source>1.8</source>
<target>3.1</target>
</configuration>
</plugin>
</plugins>
其中<soure>标签中改为你本机上jdk版本,<target>改为web.xml所使用的版本。
如下图:
3.打开项目根目录下的.setting 下的org.eclipse.wst.common.project.facet.core.xml
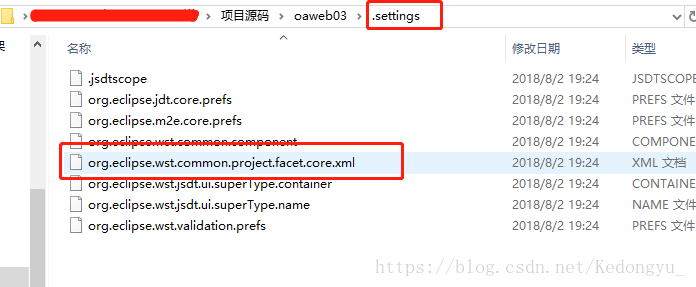
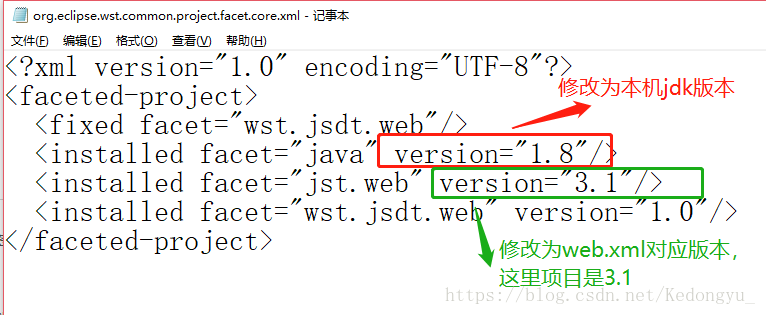
修改如上图,保存即可。
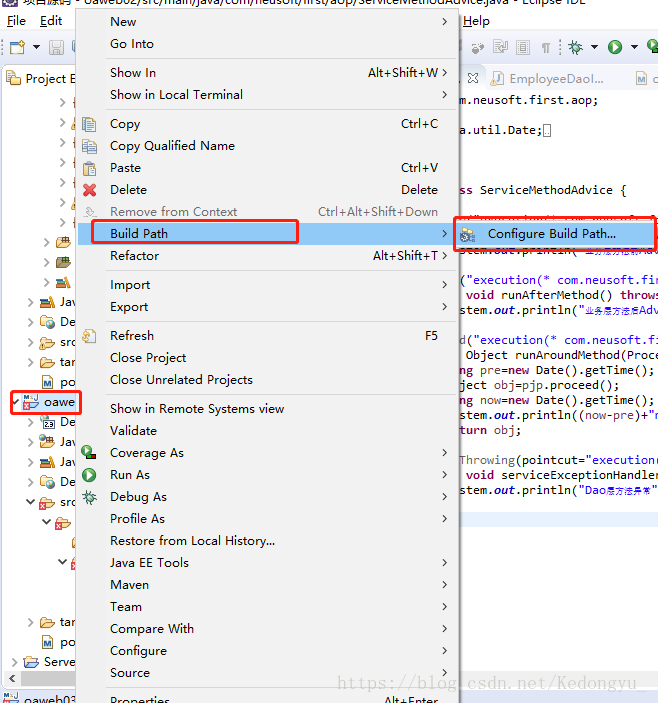
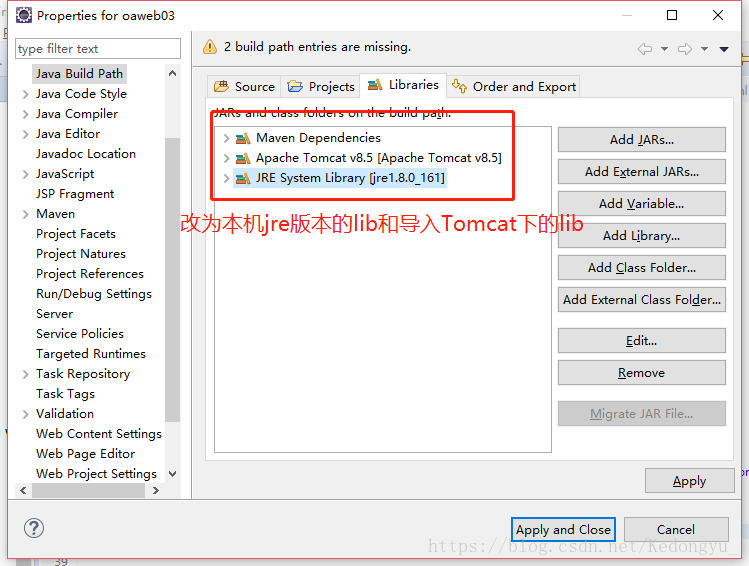
4.替换Maven项目里的库包,打开构建路径配置,右击项目-Build Path-如下图
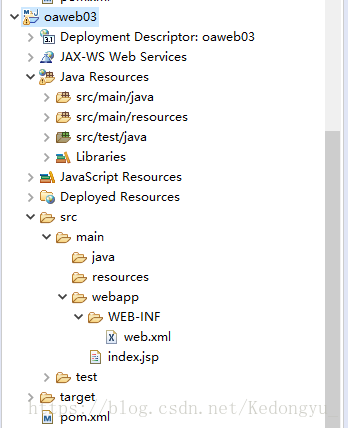
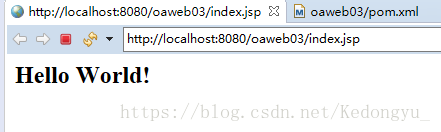
三、完成
所有的错误都不见了,成功运行项目。