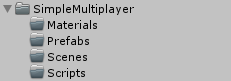
1.创建文件夹:
2.创建一个空物体,添加如下组件:
Network Manager(网络管理组件):
Network Manager HUD(提供一个UI):
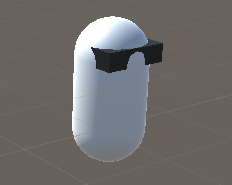
3.创建如下模型,并设置为预制体:
给预制体添加组件:NetWork Identity
4.把预制体提供给网络组件:
将预制体拖拽至:Network Manager - Spawn Info - Player Prefab
5.让玩家移动:
以下脚本编辑好后拖拽至预制体上
using System.Collections;
using System.Collections.Generic;
using UnityEngine;

public class PlayerController : MonoBehaviour
{
    // 水平旋转
    private float x;
    // 垂直移动
    private float z;

    void Start ()
    {

    }

    void Update ()
    {
        x = Input.GetAxis ("Horizontal") * Time.deltaTime * 150.0f;
        z = Input.GetAxis ("Vertical") * Time.deltaTime * 3.0f;

        // 旋转
        transform.Rotate (0, x, 0);
        transform.Translate (0, 0, z);
    }
}
6.运行发现问题:客户端与服务器同时移动,移动不同步
7.修改脚本 PlayerController
using System.Collections;
using System.Collections.Generic;
using UnityEngine;
using UnityEngine.Networking;

public class PlayerController : NetworkBehaviour
{
    // 水平旋转
    private float x;
    // 垂直移动
    private float z;

    void Start ()
    {

    }

    void Update ()
    {
        // 如果不是本地玩家,就跳出该方法
        // 加入游戏后 network manager 会标记本地玩家
        if (!isLocalPlayer) {
            return;
        }
        x = Input.GetAxis ("Horizontal") * Time.deltaTime * 150.0f;
        z = Input.GetAxis ("Vertical") * Time.deltaTime * 3.0f;

        // 旋转
        transform.Rotate (0, x, 0);
        transform.Translate (0, 0, z);
    }
}
添加组件:
Network Transform:
9.使本地角色看起来更特殊:
修改脚本 PlayerController
using System.Collections;
using System.Collections.Generic;
using UnityEngine;
using UnityEngine.Networking;

public class PlayerController : NetworkBehaviour
{
    // 水平旋转
    private float x;
    // 垂直移动
    private float z;

    void Start ()
    {

    }

    void Update ()
    {
        // 如果不是本地玩家,就跳出该方法
        // 加入游戏后 network manager 会标记本地玩家
        if (!isLocalPlayer) {
            return;
        }
        x = Input.GetAxis ("Horizontal") * Time.deltaTime * 150.0f;
        z = Input.GetAxis ("Vertical") * Time.deltaTime * 3.0f;

        // 旋转
        transform.Rotate (0, x, 0);
        transform.Translate (0, 0, z);
    }

    public override void OnStartLocalPlayer ()
    {
        // 调用父类中该虚方法
        base.OnStartLocalPlayer ();
        GetComponent<MeshRenderer> ().material.color = Color.blue;
    }
}
10.制作子弹:
制作子弹预制体
修改Player预制体:添加 炮管、子弹发射位置、给脚本中的公共变量赋值。
更新脚本 PlayerController
using System.Collections;
using System.Collections.Generic;
using UnityEngine;
using UnityEngine.Networking;

public class PlayerController : NetworkBehaviour
{
    // 水平旋转
    private float x;
    // 垂直移动
    private float z;

    // 子弹
    public GameObject bulletPrefab;
    // 子弹生成位置
    public Transform bullerSpawn;

    void Start ()
    {

    }

    void Update ()
    {
        // 如果不是本地玩家,就跳出该方法
        // 加入游戏后 network manager 会标记本地玩家
        if (!isLocalPlayer) {
            return;
        }
        x = Input.GetAxis ("Horizontal") * Time.deltaTime * 150.0f;
        z = Input.GetAxis ("Vertical") * Time.deltaTime * 3.0f;

        // 旋转
        transform.Rotate (0, x, 0);
        transform.Translate (0, 0, z);

        // 发射子弹
        if (Input.GetKeyDown (KeyCode.Space)) {
            Fire ();
        }
    }

    public override void OnStartLocalPlayer ()
    {
        // 调用父类中该虚方法
        base.OnStartLocalPlayer ();
        GetComponent<MeshRenderer> ().material.color = Color.blue;
    }

    private void Fire ()
    {
        print ("发射子弹");
        // 生成子弹
        GameObject bullet = Instantiate<GameObject> (bulletPrefab, bullerSpawn.position, bullerSpawn.rotation);
        // 子弹飞行
        bullet.gameObject.GetComponent<Rigidbody> ().velocity = bullet.transform.forward * 6.0f;

        Destroy (bullet, 5.0f);
    }
}
11.给子弹 Bullet 预制体添加组件:Network Manager
让服务产生子弹的方法:
①.将子弹预制体拖拽到Network Manager - Registered Spawnable Prefabs
②.在脚本中生成子弹的方法前面加上 特性[Command]