1.html
<!--最终的图片容器-->
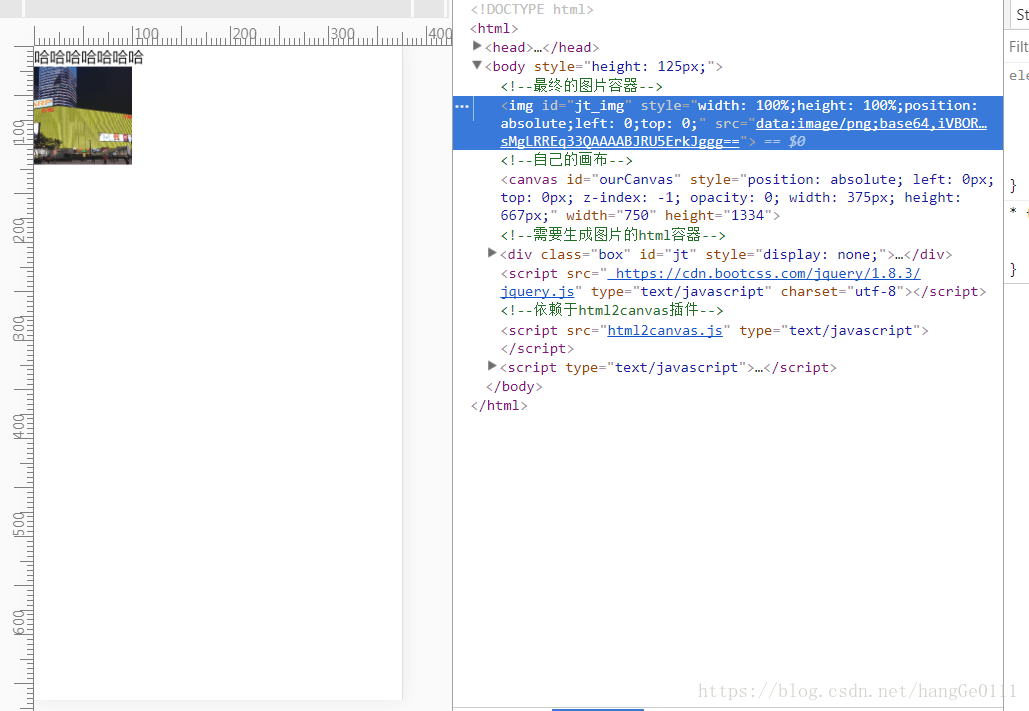
<img id="jt_img" style="width: 100%;height: 100%;position: absolute;left: 0;top: 0;"/>
<!--自己的画布-->
<canvas id="ourCanvas" style="position: absolute; left: 0;top:0; z-index: -1; opacity: 0"></canvas>
<!--需要生成图片的html容器-->
<div class="box" id="jt">
<p>哈哈哈哈哈哈哈</p>
<img src="1.png" style="width: 100px;height: 100px;"/>
</div>2.js
<script src=" https://cdn.bootcss.com/jquery/1.8.3/jquery.js" type="text/javascript" charset="utf-8"></script>
<!--依赖于html2canvas插件-->
<script src="html2canvas.js" type="text/javascript"></script>
<script type="text/javascript">
	//截图
	var canvas = document.getElementById("ourCanvas");
	var width = $(window).width(); //获取dom 宽度
	var height = $(window).height(); //获取dom 高度
	var scale = 2;//需要做倍数转化,否则画面会糊掉

	function InitCanvas() {
		canvas.width = width * scale;
		canvas.height = height * scale;
		canvas.style.width = width + "px";
		canvas.style.height = height + "px";
		var context = canvas.getContext("2d");
		context.scale(scale, scale); //然后将画布缩放,将图像放大两倍画到画布上
	}
	//初始化画布
	InitCanvas();

	$("body").css("height", document.body.clientHeight + "px");

	setTimeout(function() {
		setTimeout(function() {

			html2canvas($("#jt")[0], {
				scale: scale, // 添加的scale 参数
				canvas: canvas, //自定义 canvas
				width: width, //dom 原始宽度
				height: height,
				useCORS: true // 【重要】开启跨域配置

			}).then(function(canvas) {
				$("#jt").hide();
				imgData = canvas.toDataURL("image/jpg");
				$("#jt_img").attr("src", imgData);

			});
		}, 500);
	}, 500);
</script>
3.效果(感觉孩纸蛮酷的)
4.几点说明
①只是js插件,请前往官方地址下载
地址一:https://github.com/niklasvh/html2canvas