上一篇文章,大致分享了Exchange 2019的新功能和我测试Exchange 2019的大致环境介绍。下面具体分享安装过程。总体来说Exchange 2019在WIndows server core上安装比之前的版本安装简单很多,无需在安装之前用Powershell命令安装一堆IIS组件。
一、准备服务器
安装Exchange 服务器之前需要安装服务器操作系统,然后配置服务器IP地址、网关、DNS和开启远程桌面。
配置IP地址New-NetIPAddress -InterfaceIndex 6 -IPAddress 192.168.12.123 -PrefixLength 24 -DefaultGateway 192.168.12.100
配置DNSSet-DNSClientServerAddress -InterfaceIndex 6 -ServerAddress "192.168.12.121"
启用远程桌面cscript C:\Windows\System32\Scregedit.wsf /ar 0
 这些配置我不再多说。由于是WIndows Core服务器所有的操作都是在命令模式下进行。(具体可以参考:https://blogs.technet.microsoft.com/exchange/2018/07/26/deploy-exchange-server-2019-on-windows-server-core/)
   *由于我测试的虚拟机是Azure虚拟机,我配置了子网和DNS信息,Azure虚拟机安装完成后自动将IP地址、网关和DNS都配置好了。*
二、安装必要组件
前面已经说了在Windows server 2016 core和WIndows Server 2019 core系统安装所需的组件情况。本文主要是在WIndows server 2016 Core上安装。
1、服务器加域
启动WIndows server 2016 core后,直接在dos命令模式下输入:start Powershell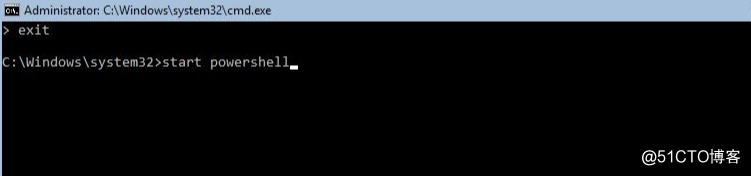
使用命令:Add-Computer -DomainName Itservice.vip -NewName ex2019 -DomainCredential itservice\administrator

加域成功后,使用命令Restart-Computer -force重启服务器。
2、安装必备组件
我再测试过程中,我是先在一台Windows server 2016 GUI服务器上将所有安装介质和组件下载下来,然后通过网络复制方式,copy到Windows server 2016 core上。由于在cmd命令模式下不支持UNC路径,所以必须切换到Powershell上才可以访问UNC路径。具体的文件复制方法如下截图。

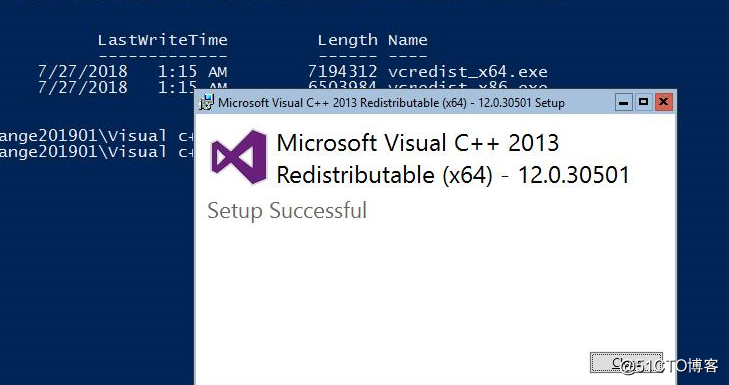
1)、安装Visual C++ Redistributable Packages for Visual Studio 2013
安装Visual C++ Redistributable Packages for Visual Studio 2013无需重启。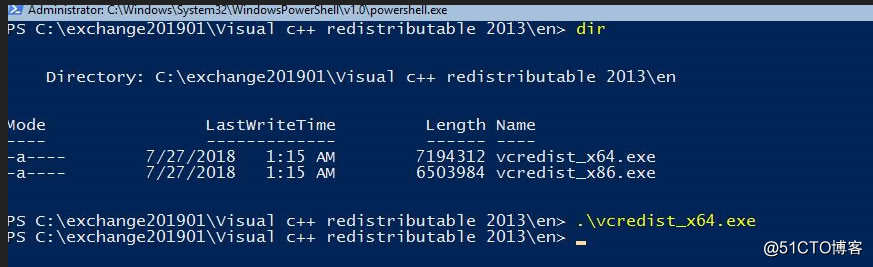
2)、安装桌面体验组件
在安装UCMA之前,需要首先安装桌面体验组件,并且按照桌面体验完成后,需要重启服务器。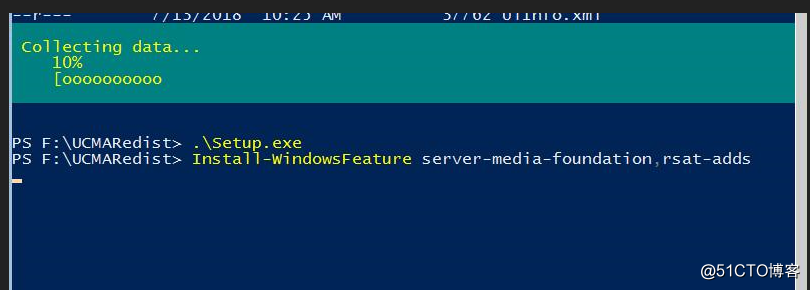
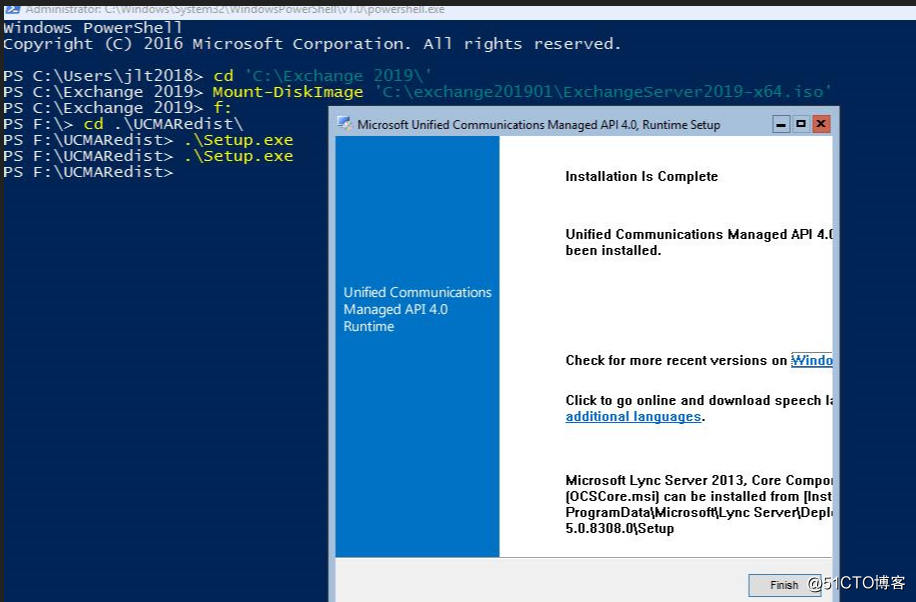
3)、安装UCMA
在Powershell中使用命令:Mount-DiskImage c:\<FolderPath>\ExchangeServer2019-x64.iso将Exchange 2019安装ISO装入到虚拟光驱中。进入到UCMARedist目录,运行Setup.exe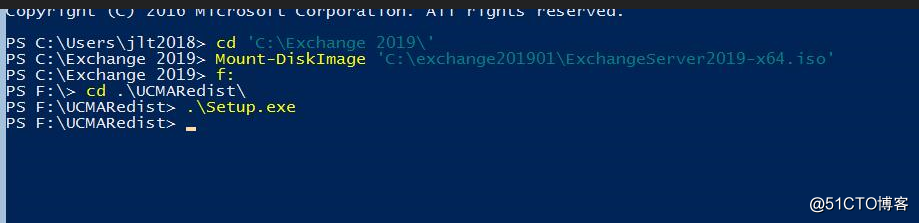
4)、安装.net 4.7.1
使用命令:.\NDP471-KB4033342-x86-x64-AllOS-ENU.exe /q /log c:\exchange201901\net_4_7.txt
静默安装.net 4.7.1。
由于是静默安装,想要知道.net 4.7.1是否安装完成。可以使用命令:start notepad c:\exchange201901\net_4_7.txt,查看日志文件最后的内容。安装.net 4.7.1完成后,服务器会自动重启。
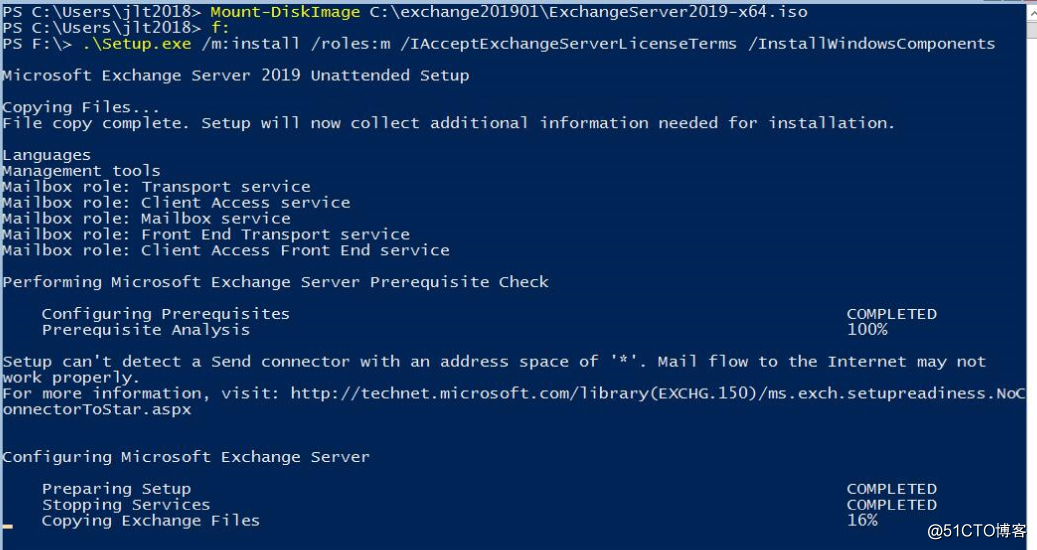
3、安装Exchang 2019
使用命令:.\Setup.exe /m:install /roles:m /IAcceptExchangeServerLicenseTerms /InstallWindowsComponents
我大致安装了一个多小时才安装完成。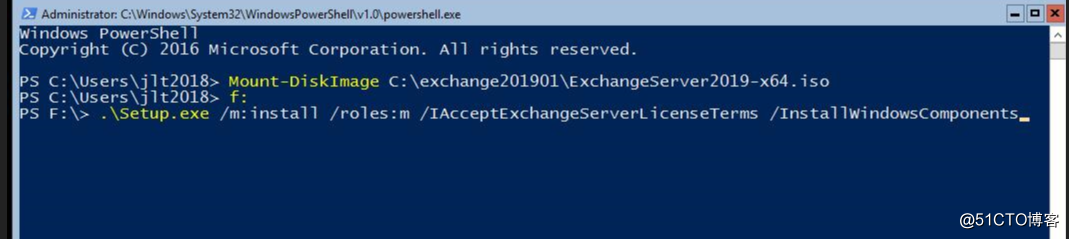
4、管理Exchange 2019
安装完成后,如果不想用命令模式去管理Exchange 2019,可以使用WEB网页ECP管理中心去管理。如果要使用Exchange Powershell去管理服务器,可以通过两种方式启动Exchange 2019 Powershell;
1)、在Powershell中输入命令:lauchems
2)、在Powershell中输入命令:Add-pssnapin -name *exchange*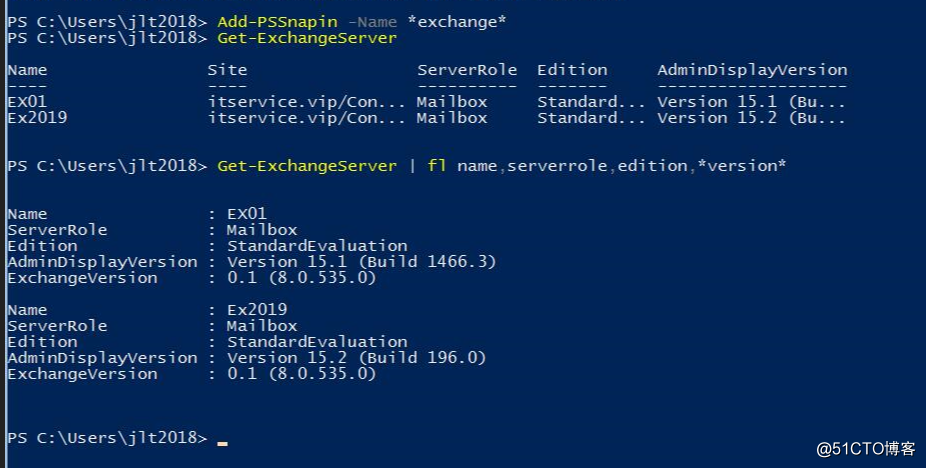
至此Exchange 2019预览版安装完成。
Exchange server 2019的版本号为Version 15.2(Build 196.0),大版本号依然是15.x,所以大致功能与Exchange 2013相差不大。