终于来到mybatis的最后一刻了……
本来想配置二级缓存的,想想就算了,直接用一个比较简洁的搭框架教程~
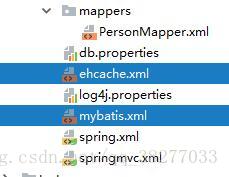
目录
参考http://www.mybatis.org/spring/

对应的适配包对应不同的sprimg的版本
Spring版本:4.0以上
数据源:dbcp
mybaits版本:3.4.1
踩雷的地方
1.jar包,各种jar包……
2.jsp页面的jstl
<%@taglib prefix="c" uri="http://java.sun.com/jsp/jstl/core" %>红字保持可以用dts里自行添加uri
3.配置文件分开了,分别是applicationContex.xml负责全局但也是spring方的配置,springmvc是负责控制跳转的
4.命名空间的导入(踩雷无数……如果发现有点不对,一定要好好核对所有配置文件的头部!!!!)
开始了。
新建maven工程,
不要选择任何东西,直接下一步,所有东西自己配
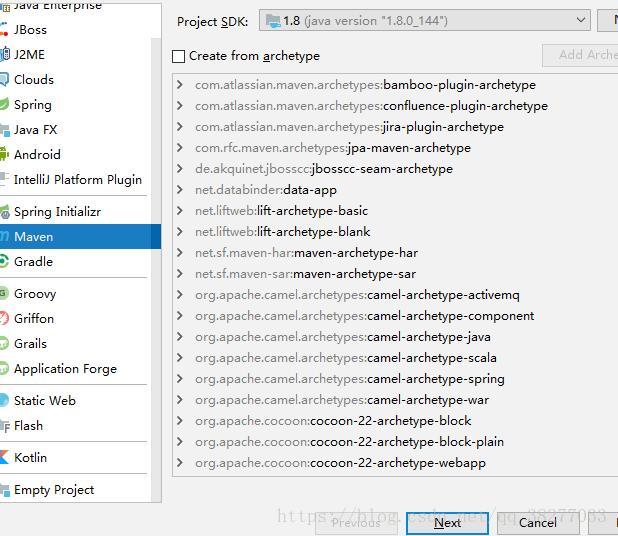

一直下一步即可。
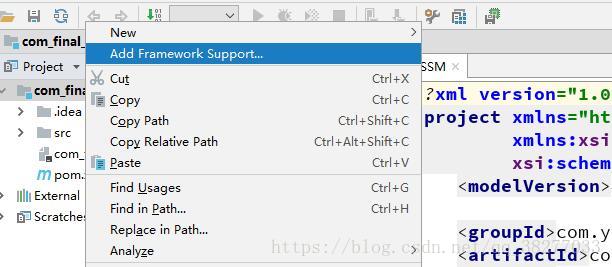
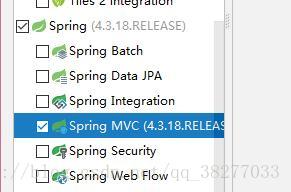
添加框架支持

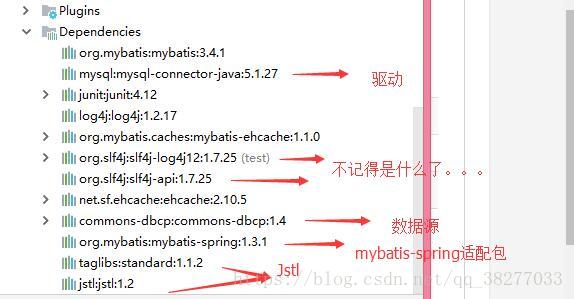
添加依赖
<?xml version="1.0" encoding="UTF-8"?>
<project xmlns="http://maven.apache.org/POM/4.0.0"
xmlns:xsi="http://www.w3.org/2001/XMLSchema-instance"
xsi:schemaLocation="http://maven.apache.org/POM/4.0.0 http://maven.apache.org/xsd/maven-4.0.0.xsd">
<modelVersion>4.0.0</modelVersion>
<groupId>com.yiki.ssm</groupId>
<artifactId>yiki_test_ssm</artifactId>
<version>1.0-SNAPSHOT</version>
<dependencies>
<dependency>
<groupId>org.mybatis</groupId>
<artifactId>mybatis</artifactId>
<version>3.4.1</version>
</dependency>
<!-- https://mvnrepository.com/artifact/mysql/mysql-connector-java -->
<dependency>
<groupId>mysql</groupId>
<artifactId>mysql-connector-java</artifactId>
<version>5.1.27</version>
</dependency>
<dependency>
<groupId>junit</groupId>
<artifactId>junit</artifactId>
<version>RELEASE</version>
<scope>compile</scope>
</dependency>
<!-- https://mvnrepository.com/artifact/log4j/log4j -->
<dependency>
<groupId>log4j</groupId>
<artifactId>log4j</artifactId>
<version>1.2.17</version>
</dependency>
<!--Ehcache-->
<!-- https://mvnrepository.com/artifact/org.mybatis.caches/mybatis-ehcache -->
<dependency>
<groupId>org.mybatis.caches</groupId>
<artifactId>mybatis-ehcache</artifactId>
<version>1.1.0</version>
</dependency>
<!-- https://mvnrepository.com/artifact/org.slf4j/slf4j-log4j12 -->
<dependency>
<groupId>org.slf4j</groupId>
<artifactId>slf4j-log4j12</artifactId>
<version>1.7.25</version>
<scope>test</scope>
</dependency>
<!-- https://mvnrepository.com/artifact/org.slf4j/slf4j-api -->
<dependency>
<groupId>org.slf4j</groupId>
<artifactId>slf4j-api</artifactId>
<version>1.7.25</version>
</dependency>
<!-- https://mvnrepository.com/artifact/net.sf.ehcache/ehcache -->
<dependency>
<groupId>net.sf.ehcache</groupId>
<artifactId>ehcache</artifactId>
<version>2.10.5</version>
</dependency>
<!-- https://mvnrepository.com/artifact/commons-dbcp/commons-dbcp -->
<dependency>
<groupId>commons-dbcp</groupId>
<artifactId>commons-dbcp</artifactId>
<version>1.4</version>
</dependency>
<!-- https://mvnrepository.com/artifact/org.mybatis/mybatis-spring -->
<dependency>
<groupId>org.mybatis</groupId>
<artifactId>mybatis-spring</artifactId>
<version>1.3.1</version>
</dependency>
<!-- https://mvnrepository.com/artifact/taglibs/standard -->
<dependency>
<groupId>taglibs</groupId>
<artifactId>standard</artifactId>
<version>1.1.2</version>
</dependency>
<!-- https://mvnrepository.com/artifact/jstl/jstl -->
<dependency>
<groupId>jstl</groupId>
<artifactId>jstl</artifactId>
<version>1.2</version>
</dependency>
</dependencies>
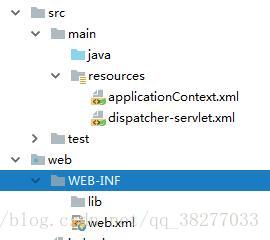
</project>在webinf下新建lib包放jar,并且按照传统把除了web.xml外的配置文件移动到resources文件夹里
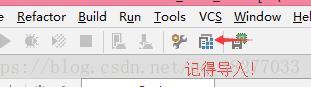
到图示的地方--》导包配环境,
导之前最好把maven工程的生命周期刷新下才会出现更多的包
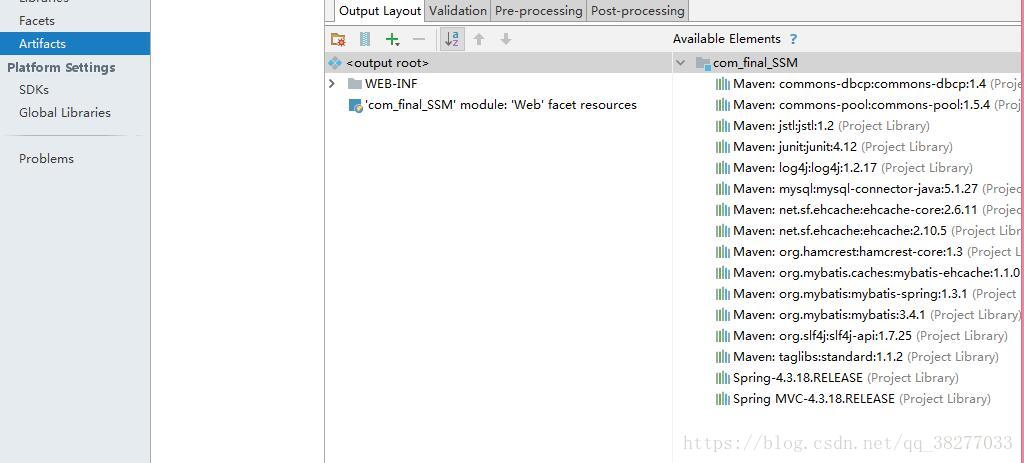
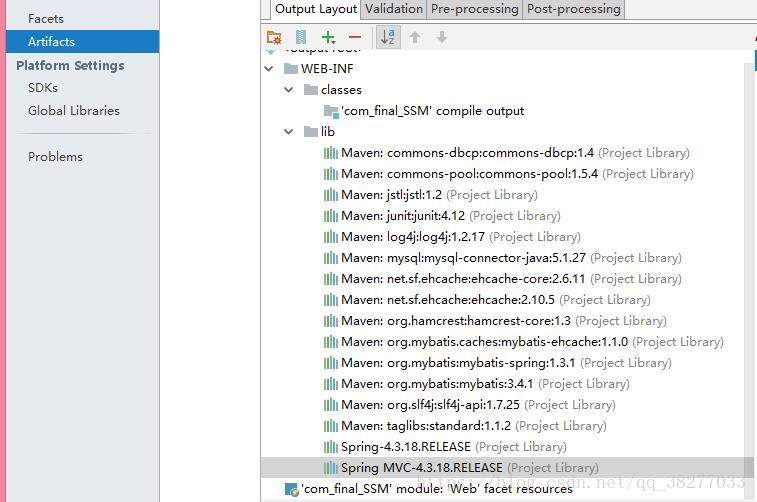
一开始是这样的,右边的包一直双击,就会自动加入到lib里了
先不着急写配置
先来把一些包和类建立起来
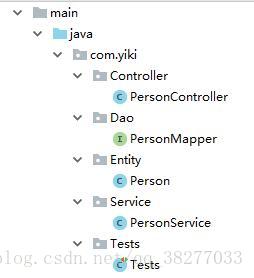
控制层
package com.yiki.Controller;
import com.yiki.Service.PersonService;
import org.springframework.beans.factory.annotation.Autowired;
import org.springframework.stereotype.Controller;
import org.springframework.web.bind.annotation.RequestMapping;

import java.util.Map;

@Controller
public class PersonController {

 @Autowired
 PersonService service;

 @RequestMapping("/quer")
 public String quer(Map<String,Object> map) {
  map.put("all",service.getAll());
  System.out.println(service.getAll());
  return "succ";
 }

}
package com.yiki.Service;

import com.yiki.Dao.PersonMapper;
import com.yiki.Entity.Person;
import org.springframework.beans.factory.annotation.Autowired;
import org.springframework.stereotype.Service;
import org.springframework.transaction.annotation.Transactional;

import java.util.List;

@Service
@Transactional
public class PersonService {

 @Autowired
 private PersonMapper mapper;

 public Person getPersonById(Integer id){

  return mapper.getPersonById(id);

 }

 public List<Person> getAll(){

  return mapper.getAll();
 }

}
package com.yiki.Entity;

import java.io.Serializable;

public class Person implements Serializable {

 private Integer id;
 private String name;
 private String email;

 public Person(Integer id, String name, String email) {
  this.id = id;
  this.name = name;
  this.email = email;
 }

 public Person() {
 }

 public Person(String name, String email) {
  this.name = name;
  this.email = email;
 }

 public Integer getId() {
  return id;
 }

 public void setId(Integer id) {
  this.id = id;
 }

 public String getName() {
  return name;
 }

 public void setName(String name) {
  this.name = name;
 }

 public String getEmail() {
  return email;
 }

 public void setEmail(String email) {
  this.email = email;
 }
}
业务层
package com.yiki.Tests;

import com.yiki.Service.PersonService;
import org.junit.Test;
import org.springframework.context.ApplicationContext;
import org.springframework.context.support.ClassPathXmlApplicationContext;

import java.io.IOException;

public class Tests {

 PersonService service;

 @Test
 public void test() throws IOException {
  ApplicationContext cxt = new ClassPathXmlApplicationContext("applicationContext.xml");
  service = (PersonService) cxt.getBean("personService");

  System.out.println(service.getAll());

 }
}
mybaits的dao接口
package com.yiki.Dao;

import com.yiki.Entity.Person;

import java.util.List;

public interface PersonMapper {

 public Person getPersonById(Integer id);
 public List<Person> getAll();

}
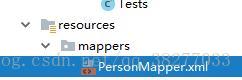
mybatis的mapper
放在resources下的新建的文件夹mappers里
<?xml version="1.0" encoding="UTF-8" ?>
<!DOCTYPE mapper
        PUBLIC "-//mybatis.org//DTD Mapper 3.0//EN"
        "http://mybatis.org/dtd/mybatis-3-mapper.dtd">

<mapper namespace="com.yiki.Dao.PersonMapper">

    <select id="getAll" resultType="com.yiki.Entity.Person">
        select * from person
    </select>


</mapper>
编写配置文件
mybaits文件(保留一些有用项,因为要和spring整合,很多东西可以写在spring的配置文件里
<?xml version="1.0" encoding="UTF-8" ?>
<!DOCTYPE configuration
        PUBLIC "-//mybatis.org//DTD Config 3.0//EN"
        "http://mybatis.org/dtd/mybatis-3-config.dtd">
<!--dtd是约束文件,起提示作用-->

<!--配置文件开始:要按照顺序依次写-->
<configuration>

    <!--设置项:对mybatis的一些配置
    【mapUnderscoreToCamelCase】自动开启驼峰命名字段
    -->
    <settings>
        <setting name="mapUnderscoreToCamelCase" value="true"/>
        <!--设置打印信息,不然看不到sql-->
        <setting name="logImpl" value="STDOUT_LOGGING"/>
        <!--延时加载,并且要禁用全部加载-->
        <setting name="lazyLoadingEnabled" value="true"/>
        <setting name="aggressiveLazyLoading" value="false"/>

        <!--配置二级缓存-->
        <setting name="cacheEnabled" value="true"/>
    </settings>


    <databaseIdProvider type="DB_VENDOR">
        <!--给数据库厂商起别名-->
        <property name="MySQL" value="mysql"/>
        <property name="Oracle" value="oracle"/>
        <property name="SQL Server" value="sqlserver"/>
    </databaseIdProvider>


</configuration>
web.xml
这个文件真正控制配置文件的逻辑,因为我把spring和springmvc两个分开了,所以我还是改改名字方便管理
applicationContext.xml-->spring.xml
dispatcher-servlet----springmvc.xml
注意<context-param>和dispatcher各自引用的配置文件是不同的,并且都要加上classpath
<?xml version="1.0" encoding="UTF-8"?>
<web-app xmlns="http://xmlns.jcp.org/xml/ns/javaee"
         xmlns:xsi="http://www.w3.org/2001/XMLSchema-instance"
         xsi:schemaLocation="http://xmlns.jcp.org/xml/ns/javaee http://xmlns.jcp.org/xml/ns/javaee/web-app_4_0.xsd"
         version="4.0">
    <!-- 放行静态资源 -->
    <servlet-mapping>
        <servlet-name>default</servlet-name>
        <url-pattern>*.css</url-pattern>
        <url-pattern>*.js</url-pattern>
        <url-pattern>*.html</url-pattern>
    </servlet-mapping>

    <!--Spring配置-->
    <context-param>
        <param-name>contextConfigLocation</param-name>
        <param-value>classpath:spring.xml</param-value>
    </context-param>

    <listener>
        <listener-class>org.springframework.web.context.ContextLoaderListener</listener-class>
    </listener>

    <!--springmvc配置-->
    <servlet>
        <servlet-name>dispatcher</servlet-name>
        <servlet-class>org.springframework.web.servlet.DispatcherServlet</servlet-class>
        <init-param>
            <param-name>contextConfigLocation</param-name>
            <param-value>classpath:springmvc.xml</param-value>
        </init-param>
        <load-on-startup>1</load-on-startup>
    </servlet>
    <servlet-mapping>
        <servlet-name>dispatcher</servlet-name>
        <url-pattern>/</url-pattern>
    </servlet-mapping>

    <!-- 配置过滤器 作用是把Post请求转换为delete和put -->
    <filter>
        <filter-name>HiddenHttpMethodFilter</filter-name>
        <filter-class>org.springframework.web.filter.HiddenHttpMethodFilter</filter-class>
    </filter>

    <filter-mapping>
        <filter-name>HiddenHttpMethodFilter</filter-name>
        <url-pattern>/*</url-pattern>
    </filter-mapping>


    <!-- 解决Post中文乱码 -->
    <filter>
        <filter-name>CharacterEncodingFilter</filter-name>
        <filter-class>org.springframework.web.filter.CharacterEncodingFilter</filter-class>
        <init-param>
            <param-name>encoding</param-name>
            <param-value>utf-8</param-value>
        </init-param>
    </filter>
    <filter-mapping>
        <filter-name>CharacterEncodingFilter</filter-name>
        <url-pattern>/*</url-pattern>
    </filter-mapping>


</web-app>
spring.xml
<?xml version="1.0" encoding="UTF-8"?>
<beans xmlns="http://www.springframework.org/schema/beans"
       xmlns:xsi="http://www.w3.org/2001/XMLSchema-instance"
       xmlns:context="http://www.springframework.org/schema/context"
       xmlns:tx="http://www.springframework.org/schema/tx"
       xmlns:mybatis-spring="http://mybatis.org/schema/mybatis-spring"
       xsi:schemaLocation="
       http://www.springframework.org/schema/beans
       http://www.springframework.org/schema/beans/spring-beans-3.0.xsd
       http://mybatis.org/schema/mybatis-spring
       http://mybatis.org/schema/mybatis-spring.xsd
       http://www.springframework.org/schema/beans
       http://www.springframework.org/schema/beans/spring-beans-4.0.xsd
       http://www.springframework.org/schema/context
       http://www.springframework.org/schema/context/spring-context-4.0.xsd
       http://www.springframework.org/schema/tx
       http://www.springframework.org/schema/tx/spring-tx-4.0.xsd">


    <!--这个文件是对mybatis,和数据源的整合
    AutoWied可以自动注入mapper并且事务管理PersonMapper.xml
    -->

    <!-- 自动扫描的包 -->
    <context:component-scan base-package="com.yiki.*"/>
    <!-- 可以使用注解是注入 -->
    <context:annotation-config/>


    <!-- 数据源 -->
    <context:property-placeholder location="classpath:db.properties"/>
    <bean id="dataSource" class="org.apache.commons.dbcp.BasicDataSource"
          destroy-method="close">
        <property name="driverClassName" value="${jdbc.driver}"/>
        <property name="url"
                  value="${jdbc.url}"/>
        <property name="username" value="${jdbc.username}"/>
        <property name="password" value="${jdbc.password}"/>
    </bean>

    <!-- 事务管理器 -->
    <bean id="txManager"
          class="org.springframework.jdbc.datasource.DataSourceTransactionManager">
        <property name="dataSource" ref="dataSource"/>
    </bean>

    <!--开启基于注解的事务-->
    <tx:annotation-driven transaction-manager="txManager"/>

    <!--开始整合mybatis-->

    <!--创建工厂:这里可以引用很多mybatis配置文件的东西-->
    <bean id="sqlSessionFactory" class="org.mybatis.spring.SqlSessionFactoryBean">
        <property name="dataSource" ref="dataSource"/>
        <property name="configLocation" value="classpath:mybatis.xml"/>
        <property name="mapperLocations" value="classpath*:mappers/*.xml"/>
    </bean>

    <!--扫描所有dao接口可以Mapper自动注入,注意用这个标签要引入对的名称空间约束-->
    <mybatis-spring:scan base-package="com.yiki.Dao"/>

</beans><?xml version="1.0" encoding="UTF-8"?>
<beans xmlns="http://www.springframework.org/schema/beans"
       xmlns:xsi="http://www.w3.org/2001/XMLSchema-instance"
       xmlns:context="http://www.springframework.org/schema/context"
       xmlns:tx="http://www.springframework.org/schema/tx"
       xmlns:mybatis-spring="http://mybatis.org/schema/mybatis-spring"
       xsi:schemaLocation="
       http://www.springframework.org/schema/beans
       http://www.springframework.org/schema/beans/spring-beans-3.0.xsd
       http://mybatis.org/schema/mybatis-spring
       http://mybatis.org/schema/mybatis-spring.xsd
       http://www.springframework.org/schema/beans
       http://www.springframework.org/schema/beans/spring-beans-4.0.xsd
       http://www.springframework.org/schema/context
       http://www.springframework.org/schema/context/spring-context-4.0.xsd
       http://www.springframework.org/schema/tx
       http://www.springframework.org/schema/tx/spring-tx-4.0.xsd">


    <!--这个文件是对mybatis,和数据源的整合
    AutoWied可以自动注入mapper并且事务管理PersonMapper.xml
    -->

    <!-- 自动扫描的包 -->
    <context:component-scan base-package="com.yiki.*"/>
    <!-- 可以使用注解是注入 -->
    <context:annotation-config/>


    <!-- 数据源 -->
    <context:property-placeholder location="classpath:db.properties"/>
    <bean id="dataSource" class="org.apache.commons.dbcp.BasicDataSource"
          destroy-method="close">
        <property name="driverClassName" value="${jdbc.driver}"/>
        <property name="url"
                  value="${jdbc.url}"/>
        <property name="username" value="${jdbc.username}"/>
        <property name="password" value="${jdbc.password}"/>
    </bean>

    <!-- 事务管理器 -->
    <bean id="txManager"
          class="org.springframework.jdbc.datasource.DataSourceTransactionManager">
        <property name="dataSource" ref="dataSource"/>
    </bean>

    <!--开启基于注解的事务-->
    <tx:annotation-driven transaction-manager="txManager"/>

    <!--开始整合mybatis-->

    <!--创建工厂:这里可以引用很多mybatis配置文件的东西-->
    <bean id="sqlSessionFactory" class="org.mybatis.spring.SqlSessionFactoryBean">
        <property name="dataSource" ref="dataSource"/>
        <property name="configLocation" value="classpath:mybatis.xml"/>
        <property name="mapperLocations" value="classpath*:mappers/*.xml"/>
    </bean>

    <!--扫描所有dao接口可以Mapper自动注入,注意用这个标签要引入对的名称空间约束-->
    <mybatis-spring:scan base-package="com.yiki.Dao"/>

</beans>
springmvc.xml
<?xml version="1.0" encoding="UTF-8"?>
<beans xmlns="http://www.springframework.org/schema/beans"
xmlns:xsi="http://www.w3.org/2001/XMLSchema-instance"
xmlns:context="http://www.springframework.org/schema/context"
xmlns:mvc="http://www.springframework.org/schema/mvc"
xsi:schemaLocation="http://www.springframework.org/schema/beans
http://www.springframework.org/schema/beans/spring-beans-4.0.xsd
http://www.springframework.org/schema/context
http://www.springframework.org/schema/context/spring-context-4.0.xsd
http://www.springframework.org/schema/mvc
http://www.springframework.org/schema/mvc/spring-mvc-4.0.xsd">
<!--此文件仅管理控制层:负责跳转的-->
<!-- 自动扫描的包 -->
<context:component-scan base-package="com.yiki.Controller"/>
<!-- 可以使用注解是注入 -->
<context:annotation-config/>
<mvc:annotation-driven/>
<!--正确处理静态资源-->
<mvc:default-servlet-handler/>
<!-- 配置视图解析器:如何把handler方法解析为实际物理视图 -->
<bean
class="org.springframework.web.servlet.view.InternalResourceViewResolver"
id="internalResourceViewResolver">
<!-- 前缀 -->
<property name="prefix" value="/WEB-INF/view/"/>
<!-- 后缀 -->
<property name="suffix" value=".jsp"/>
</bean>
<!-- 配置视图解析器 ,使用视图的名字来解析视图,order可以定义视图优先级 -->
<bean
class="org.springframework.web.servlet.view.BeanNameViewResolver">
<property name="order" value="100"/>
</bean>
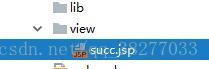
</beans>为了实现跳转,建立跳转页面,在webinf下新建view层和succ.jsp
index.jsp写上
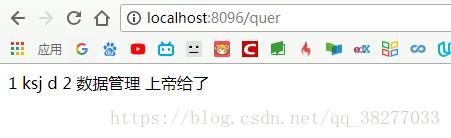
<a href="quer">查询</a>配置tomacat
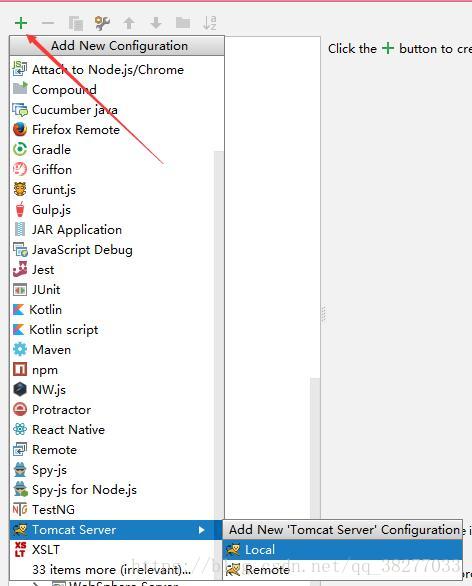
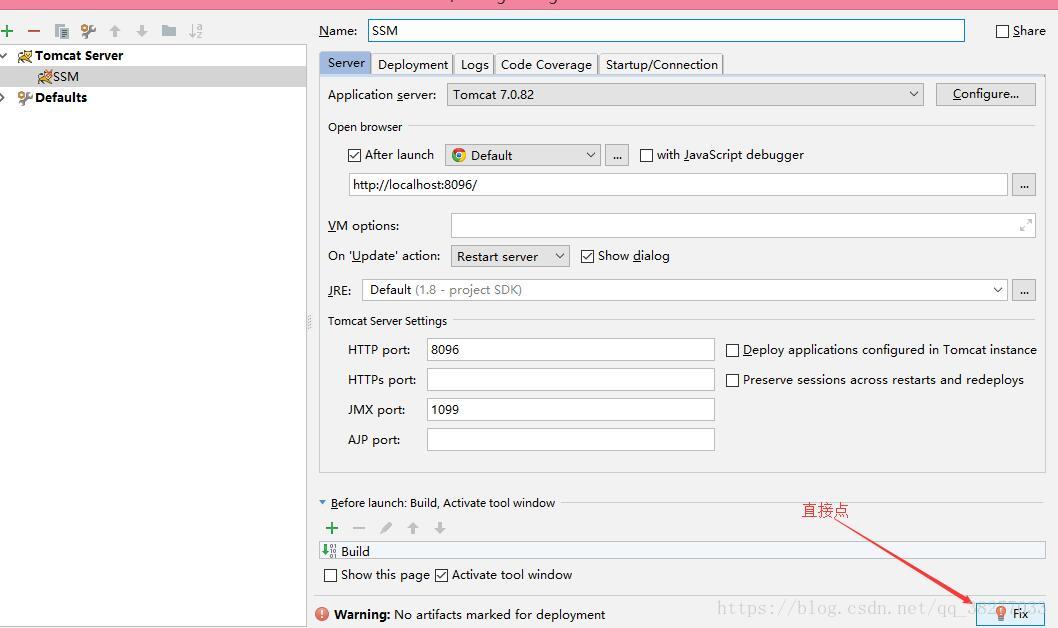
至此,跑起来
其他:配置二级缓存
mybatis的setting里开启二级缓存(略)
ehcache.xml
<?xml version="1.0" encoding="UTF-8"?>
<ehcache xmlns:xsi="http://www.w3.org/2001/XMLSchema-instance"
         xsi:noNamespaceSchemaLocation="http://ehcache.org/ehcache.xsd">

    <!-- 默认缓存配置 -->
    <diskStore path="D:\ehcache"/>

    <defaultCache
            maxElementsInMemory="10000"
            eternal="false"
            timeToIdleSeconds="120"
            timeToLiveSeconds="120"
            overflowToDisk="true"

    />


</ehcache>
在需要添加缓存的Mapper里添加缓存框架
    <!--使用第三方缓存框架 -->
    <cache type="org.mybatis.caches.ehcache.EhcacheCache"/>
变为
<?xml version="1.0" encoding="UTF-8" ?>
<!DOCTYPE mapper
        PUBLIC "-//mybatis.org//DTD Mapper 3.0//EN"
        "http://mybatis.org/dtd/mybatis-3-mapper.dtd">

<mapper namespace="com.yiki.Dao.PersonMapper">

    <!--使用第三方缓存框架 -->
    <cache type="org.mybatis.caches.ehcache.EhcacheCache"/>

    <select id="getAll" resultType="com.yiki.Entity.Person">
        select * from person
    </select>


</mapper>
重复点击查询,如果只发一条sql,代表缓存成功~