该文章通过使用mybatis,spring以及mybatis整合spring的简单技术实现一个对数据库进行增删改查的简单操作,
项目结构如下所示:
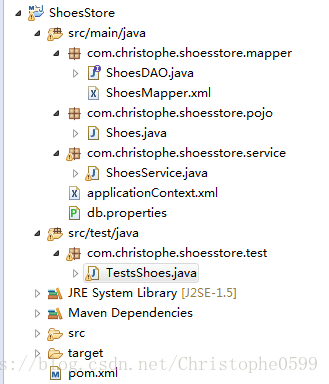
一、新建一个基于Maven的项目(不用web项目)
二、创建数据库与表
创建表的sql脚本如下:
CREATE TABLE `shoes` (
  `id` int(11) NOT NULL AUTO_INCREMENT COMMENT '编号',
  `price` decimal(10,2) DEFAULT NULL COMMENT '价格',
`name` varchar(100) NOT NULL COMMENT '鞋名',
  `color` varchar(100) NOT NULL COMMENT '配色',
  PRIMARY KEY (`id`),
  UNIQUE KEY `name` (`name`)
) ENGINE=InnoDB AUTO_INCREMENT=7 DEFAULT CHARSET=utf8;
三、添加依赖包
pom.xml文件如下:
<project xmlns="http://maven.apache.org/POM/4.0.0" xmlns:xsi="http://www.w3.org/2001/XMLSchema-instance"
	xsi:schemaLocation="http://maven.apache.org/POM/4.0.0 http://maven.apache.org/xsd/maven-4.0.0.xsd">
	<modelVersion>4.0.0</modelVersion>
	<groupId>com.zhangguo</groupId>
	<artifactId>BookStore</artifactId>
	<version>0.0.1</version>
	<packaging>jar</packaging>

	<properties>
		<project.build.sourceEncoding>UTF-8</project.build.sourceEncoding>
		<spring.version>4.3.0.RELEASE</spring.version>
	</properties>

	<dependencies>
		<!--Spring框架核心库 -->
		<dependency>
			<groupId>org.springframework</groupId>
			<artifactId>spring-context</artifactId>
			<version>${spring.version}</version>
		</dependency>
		<!-- aspectJ AOP 织入器 -->
		<dependency>
			<groupId>org.aspectj</groupId>
			<artifactId>aspectjweaver</artifactId>
			<version>1.8.9</version>
		</dependency>
		<!-- Spring Web -->
		<dependency>
			<groupId>org.springframework</groupId>
			<artifactId>spring-web</artifactId>
			<version>${spring.version}</version>
		</dependency>
		<!--mybatis-spring适配器 -->
		<dependency>
			<groupId>org.mybatis</groupId>
			<artifactId>mybatis-spring</artifactId>
			<version>1.3.0</version>
		</dependency>
		<!--Spring java数据库访问包,在本例中主要用于提供数据源 -->
		<dependency>
			<groupId>org.springframework</groupId>
			<artifactId>spring-jdbc</artifactId>
			<version>${spring.version}</version>
		</dependency>
		<!--mysql数据库驱动 -->
		<dependency>
			<groupId>mysql</groupId>
			<artifactId>mysql-connector-java</artifactId>
			<version>5.1.38</version>
		</dependency>
		<!--log4j日志包 -->
		<dependency>
			<groupId>org.apache.logging.log4j</groupId>
			<artifactId>log4j-core</artifactId>
			<version>2.6.1</version>
		</dependency>
		<!-- mybatis ORM框架 -->
		<dependency>
			<groupId>org.mybatis</groupId>
			<artifactId>mybatis</artifactId>
			<version>3.4.1</version>
		</dependency>
		<!-- JUnit单元测试工具 -->
		<dependency>
			<groupId>junit</groupId>
			<artifactId>junit</artifactId>
			<version>4.10</version>
		</dependency>
		<!--c3p0 连接池 -->
		<dependency>
			<groupId>c3p0</groupId>
			<artifactId>c3p0</artifactId>
			<version>0.9.1.2</version>
		</dependency>
		<!-- jstl -->
		<dependency>
			<groupId>javax.servlet</groupId>
			<artifactId>jstl</artifactId>
			<version>1.2</version>
		</dependency>
	</dependencies>
</project>
如果是第一次依赖相关的包,则需要下载时间,请耐心等待
四、新建POJO实体层
package com.christophe.shoesstore.pojo;
/***
*
* @author:Christophe0599
*
*/

public class Shoes {
	private int id;
	private int price;
	private String name;
	private String color;

	public int getId() {
		return id;
	}

	public void setId(int id) {
		this.id = id;
	}

	public int getPrice() {
		return price;
	}

	public void setPrice(int price) {
		this.price = price;
	}

	public String getName() {
		return name;
	}

	public void setName(String name) {
		this.name = name;
	}

	public String getColor() {
		return color;
	}

	public void setColor(String color) {
		this.color = color;
	}

	public Shoes(int id,int price,String name,String color){
		this.id=id;
		this.price=price;
		this.name=name;
		this.color=color;
	}

	public Shoes(){

	}

	public String toString(){
		return "编号 :"+id+"价格 :"+price+"鞋名 :"+name+"配色 :"+color;
	}

}
五、新建MyBatis SQL映射层
package com.christophe.shoesstore.mapper;
import java.util.List;
import org.apache.ibatis.annotations.Param;
import com.christophe.shoesstore.pojo.Shoes;
/***
*
* @author:Christophe
*
*/
public interface ShoesDAO {
	//获取所有鞋子
	public List<Shoes> getAllShoes();
	//根据id获取鞋子信息
	public Shoes getShoesById(@Param("id") int id);
	//根据id删除鞋子
	public int deleteShoes(int id);
	//添加鞋子
	public int addShoes(Shoes newshoes);
}
为MyBatis ORM创建的映射文件ShoesMapper.xml
<?xml version="1.0" encoding="UTF-8"?>
<!DOCTYPE mapper PUBLIC "-//mybatis.org//DTD Mapper 3.0//EN" "http://mybatis.org/dtd/mybatis-3-mapper.dtd">
<!--命名空间应该是对应接口的包名+接口名 -->
<mapper namespace="com.christophe.shoesstore.mapper.ShoesDAO">
<!--id应该是接口中的方法,结果类型如没有配置别名则应该使用全名称 -->
	<!--查询所有 -->
	<select id="getAllShoes" resultType="Shoes">
		select id,price,name,color from shoes
	</select>
	<!-- 查询-->
	<select id="getShoesById" resultType="Shoes" >
	    select id,price,name,color from shoes where id=#{id}
	</select>
	<!-- 增加 -->
	<insert id="addShoes">
	insert into shoes(id,price,name,color)
		values(#{id},#{price},#{name},#{color})
	</insert>
	<!-- 删除 -->
	<delete id="deleteShoes">
		delete from books where id=#{id}
	</delete>
</mapper>
六、完成Spring整合MyBatis配置
在源代码的根目录下新建 db.properties文件,用于存放数据库连接信息,文件内容如下:
#mysql jdbc
jdbc.driver=com.mysql.jdbc.Driver
//自己数据库的连接,建议使用navicat
jdbc.url=jdbc:mysql://
//数据库的用户名和密码
jdbc.uid=
jdbc.pwd=
根目录下新建 applicationContext.xml文件,用于整合MyBatis与Spring,该文件是整个项目的控制中心,非常关键,具体的内容如下:
<?xml version="1.0" encoding="UTF-8"?>
<beans xmlns="http://www.springframework.org/schema/beans"
	xmlns:xsi="http://www.w3.org/2001/XMLSchema-instance"
	xmlns:p="http://www.springframework.org/schema/p"
	xmlns:aop="http://www.springframework.org/schema/aop"
	xmlns:context="http://www.springframework.org/schema/context"
	xmlns:tx="http://www.springframework.org/schema/tx"
	xsi:schemaLocation="http://www.springframework.org/schema/beans
        http://www.springframework.org/schema/beans/spring-beans.xsd
        http://www.springframework.org/schema/context
        http://www.springframework.org/schema/context/spring-context-4.3.xsd
        http://www.springframework.org/schema/aop
        http://www.springframework.org/schema/aop/spring-aop-4.3.xsd
        http://www.springframework.org/schema/tx
        http://www.springframework.org/schema/tx/spring-tx-4.3.xsd">

	<!--1 引入属性文件,在配置中占位使用 -->
	<context:property-placeholder location="classpath*:db.properties" />

	<!--2 配置C3P0数据源 -->
	<bean id="datasource" class="com.mchange.v2.c3p0.ComboPooledDataSource" destroy-method="close">
		<!--驱动类名 -->
		<property name="driverClass" value="${jdbc.driver}" />
		<!-- url -->
		<property name="jdbcUrl" value="${jdbc.url}" />
		<!-- 用户名 -->
		<property name="user" value="${jdbc.uid}" />
		<!-- 密码 -->
		<property name="password" value="${jdbc.pwd}" />
		<!-- 当连接池中的连接耗尽的时候c3p0一次同时获取的连接数  -->
		<property name="acquireIncrement" value="5"></property>
		<!-- 初始连接池大小 -->
		<property name="initialPoolSize" value="10"></property>
		<!-- 连接池中连接最小个数 -->
		<property name="minPoolSize" value="5"></property>
		<!-- 连接池中连接最大个数 -->
		<property name="maxPoolSize" value="20"></property>
	</bean>

	<!--3 会话工厂bean sqlSessionFactoryBean -->
	<bean id="sqlSessionFactory" class="org.mybatis.spring.SqlSessionFactoryBean">
	    <!-- 数据源 -->
	    <property name="dataSource" ref="datasource"></property>
	    <!-- 别名 -->
	    <property name="typeAliasesPackage" value="com.christophe.shoesstore.pojo"></property>
	    <!-- sql映射文件路径 -->
	    <property name="mapperLocations" value="classpath*:com/christophe/shoesstore/mapper/*Mapper.xml"></property>
	</bean>

	<!--4 自动扫描对象关系映射 -->
	<bean class="org.mybatis.spring.mapper.MapperScannerConfigurer">
	    <!--指定会话工厂,如果当前上下文中只定义了一个则该属性可省去 -->
	    <property name="sqlSessionFactoryBeanName" value="sqlSessionFactory"></property>
	    <!-- 指定要自动扫描接口的基础包,实现接口 -->
	    <property name="basePackage" value="com.christophe.shoesstore.mapper"></property>
	</bean>

	<!--5 声明式事务管理 -->
	<!--定义事物管理器,由spring管理事务 -->
	<bean id="transactionManager" class="org.springframework.jdbc.datasource.DataSourceTransactionManager">
	    <property name="dataSource" ref="datasource"></property>
	</bean>
	<!--支持注解驱动的事务管理,指定事务管理器 -->
	<tx:annotation-driven transaction-manager="transactionManager"/>

	<!--6 容器自动扫描IOC组件  -->
	<context:component-scan base-package="com.christophe.shoesstore"></context:component-scan>

	<!--7 aspectj支持自动代理实现AOP功能 -->
	<aop:aspectj-autoproxy proxy-target-class="true"></aop:aspectj-autoproxy>
</beans>
七、创建服务层
创建ShoesService服务类,完成鞋子管理业务,有些项目中也叫业务层
package com.christophe.shoesstore.service;

import java.util.List;

import javax.annotation.Resource;

import org.apache.ibatis.annotations.Param;
import org.springframework.stereotype.Service;
import com.christophe.shoesstore.mapper.ShoesDAO;
import com.christophe.shoesstore.pojo.Shoes;

/***
*
* @author:Christophe0599
*
*/

@Service
public class ShoesService {

	@Resource
	ShoesDAO shoesdao;

	public List<Shoes> getAllShoes(){
		return shoesdao.getAllShoes();
	}

	public Shoes getShoesById( int id){
		return shoesdao.getShoesById(id);
	}

	public int deleteShoes(int id){
		return shoesdao.deleteShoes(id);
	}

	public int addShoes(Shoes newshoes) throws Exception{
		if(newshoes.getName()==null||newshoes.getName().equals("")){
			throw new Exception("鞋名必须不为空");
		  }
		return shoesdao.addShoes(newshoes);
	}
}
八、JUnit测试服务类
package com.christophe.shoesstore.test;
import static org.junit.Assert.assertNotNull;
import java.util.List;
import org.junit.BeforeClass;
import org.junit.Test;
import org.springframework.context.ApplicationContext;
import org.springframework.context.support.ClassPathXmlApplicationContext;
import com.christophe.shoesstore.pojo.Shoes;
import com.christophe.shoesstore.service.ShoesService;
/***
*
* @author:Christophe0599
*
*/
public class TestsShoes {
static ShoesService shoesservice;
@BeforeClass
public static void before(){
ApplicationContext ctx = new ClassPathXmlApplicationContext("applicationContext.xml");
shoesservice = ctx.getBean(ShoesService.class);
}
@Test
public void testGetAllBooks() {
List<Shoes> shoes=shoesservice.getAllShoes();
assertNotNull(shoes);
for (Shoes tmp:shoes) {
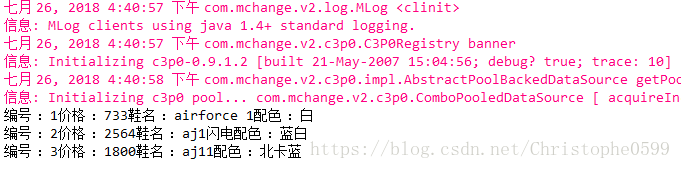
System.out.println(tmp.toString());
}
}到此为止就是仅在后端的一个mybatis和spring整合的简单实例,最终输出结果如下:
ps.此实例仅在后端实现,下一次将在web环境下搭载整合实例