一、到阿里云生成Access Key和Access Key Secret。


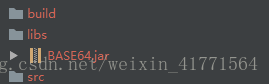
二、添加.jar包
三、编辑页面,
<?xml version="1.0" encoding="utf-8"?>
<LinearLayout xmlns:android="http://schemas.android.com/apk/res/android"
    xmlns:app="http://schemas.android.com/apk/res-auto"
    xmlns:tools="http://schemas.android.com/tools"
    android:layout_width="match_parent"
    android:layout_height="match_parent"
    android:layout_marginLeft="20dp"
    android:orientation="vertical"
    tools:context="com.xdj.anew.MainActivity">

    <ImageView
        android:id="@+id/image"
        android:layout_width="80dp"
        android:layout_height="80dp"
        android:src="@mipmap/ic_launcher" />

    <TextView
        android:id="@+id/txt1"
        android:layout_width="wrap_content"
        android:layout_height="wrap_content"
        android:text="上传身份证" />

    <ImageView
        android:id="@+id/image2"
        android:layout_width="80dp"
        android:layout_height="80dp"
        android:layout_marginTop="10dp"
        android:src="@mipmap/ic_launcher" />

    <TextView
        android:id="@+id/txt"
        android:layout_width="wrap_content"
        android:layout_height="wrap_content"
        android:layout_marginTop="20dp"
        android:text="人脸验证" />
    <TextView
        android:id="@+id/verify"
        android:layout_width="wrap_content"
        android:layout_height="wrap_content"
        android:layout_marginTop="20dp"
        android:text="开始验证"/>

</LinearLayout>
四、选择图片(分别选择相册)
 @Override
    public void onClick(View view) {
        switch (view.getId()) {
            case R.id.txt://相机
//                startCamera();
                openCamera(this);
                break;
            case R.id.txt1://相册
                gallery();
                break;
            case R.id.verify:

                getVerify();
                break;
        }
    }
/**
* 从相册获取
*/
public void gallery() {
// 激活系统图库,选择一张图片
Intent intent = new Intent(Intent.ACTION_PICK);
intent.setType("image/*");
// 开启一个带有返回值的Activity,请求码为PHOTO_REQUEST_GALLERY
startActivityForResult(intent, RESULT_CAMERA_IMAGE);
}写一个相机类进行调用
public class CameraUtil {
    public static File tempFile;
    public static final int PHOTO_REQUEST_CAREMA = 3;// 拍照
    public static final int CAPTURE_VIDEO_ACTIVITY_REQUEST_CODE = 2;// 拍摄视频
    public static Uri uri_;

    /**
     * 打开相机拍照
     *
     * @param activity
     */
    public static void openCamera(Activity activity) {
        //獲取系統版本
        int currentapiVersion = android.os.Build.VERSION.SDK_INT;
        // 激活相机
        Intent intent = new Intent(MediaStore.ACTION_IMAGE_CAPTURE);
        // 判断存储卡是否可以用,可用进行存储
        if (hasSdcard()) {
            SimpleDateFormat timeStampFormat = new SimpleDateFormat(
                    "yyyy_MM_dd_HH_mm_ss");
            String filename = timeStampFormat.format(new Date());
            tempFile = new File(Environment.getExternalStorageDirectory(),
                    filename + ".jpg");
            if (currentapiVersion < 24) {
                // 从文件中创建uri
                uri_ = Uri.fromFile(tempFile);
                intent.putExtra(MediaStore.EXTRA_OUTPUT, uri_);
            } else {
                //兼容android7.0 使用共享文件的形式
                ContentValues contentValues = new ContentValues(1);
                contentValues.put(MediaStore.Images.Media.DATA, tempFile.getAbsolutePath());
                uri_ = activity.getApplication().getContentResolver().insert(MediaStore.Images.Media.EXTERNAL_CONTENT_URI, contentValues);
                intent.putExtra(MediaStore.EXTRA_OUTPUT, uri_);
                Log.d("sjc", "uriuri>>>"+ uri_);
            }
        }
        // 开启一个带有返回值的Activity,请求码为PHOTO_REQUEST_CAREMA
        activity.startActivityForResult(intent, PHOTO_REQUEST_CAREMA);
    }


    /**
     * 打开相机录像
     */
    public static void startToVideo(Activity activity) {
        //獲取系統版本
        int currentapiVersion = android.os.Build.VERSION.SDK_INT;
        Uri fileUri = null;
        File file = null;
        Intent intent = new Intent(MediaStore.ACTION_VIDEO_CAPTURE);
        try {
            file = createMediaFile();
            if (file.exists()) {
                fileUri = Uri.fromFile(file); // create a file to save the video
            }
        } catch (IOException e) {
            e.printStackTrace();
        }
        if (currentapiVersion < 24) {
            intent.putExtra(MediaStore.EXTRA_OUTPUT, fileUri);  // set the image file name
            intent.putExtra(MediaStore.EXTRA_VIDEO_QUALITY, 1); // set the video image quality to high
        } else {
            //兼容android7.0
            ContentValues contentValues = new ContentValues(1);
            contentValues.put(MediaStore.Images.Media.DATA, file.getAbsolutePath());
            Uri uri = activity.getApplication().getContentResolver().insert(MediaStore.Images.Media.EXTERNAL_CONTENT_URI, contentValues);
            intent.putExtra(MediaStore.EXTRA_OUTPUT, uri);
        }
        // start the Video Capture Intent
        activity.startActivityForResult(intent, CAPTURE_VIDEO_ACTIVITY_REQUEST_CODE);
    }

    /*
   * 判断sdcard是否被挂载
   */
    public static boolean hasSdcard() {
        return Environment.getExternalStorageState().equals(
                Environment.MEDIA_MOUNTED);
    }

    /**
     * 创建保存录制得到的视频文件
     *
     * @return
     * @throws IOException
     */
    public static File createMediaFile() throws IOException {
        if (hasSdcard()) {
            File mediaStorageDir = new File(Environment.getExternalStoragePublicDirectory(
                    Environment.DIRECTORY_MOVIES), "CameraVideos");
            if (!mediaStorageDir.exists()) {
                if (!mediaStorageDir.mkdirs()) {
                    return null;
                }
            }
            // Create an image file name
            String timeStamp = new SimpleDateFormat("yyyyMMdd_HHmmss").format(new Date());
            String imageFileName = "VID_" + timeStamp;
            String suffix = ".mp4";
            File mediaFile = new File(mediaStorageDir + File.separator + imageFileName + suffix);
            return mediaFile;
        }
        return null;
    }
}
五、在activity进行图片回调接收,并显示
 @Override
    protected void onActivityResult(int requestCode, int resultCode, Intent data) {
        super.onActivityResult(requestCode, resultCode, data);
        if (resultCode != RESULT_OK) {
            return;
        }

        if (requestCode == RESULT_CAMERA_IMAGE) {
            // 从相册返回的数据
            if (data != null) {
                // 得到图片的全路径
                uri = data.getData();
                image.setImageURI(uri);
            }
        }
         if (requestCode == PHOTO_REQUEST_CAREMA) {
            //照的相片
             try {
                 //图片解析成Bitmap对象
                 mBitmap = BitmapFactory.decodeStream(
                         getContentResolver().openInputStream(uri_));
                 image2.setImageBitmap(mBitmap);

             } catch (FileNotFoundException e) {
                 e.printStackTrace();
             }
        }
    }
六、抄下官方写好的请求头 :
:
public class AESDecode {/** 计算MD5+BASE64*/public static String MD5Base64(String s) {if (s == null)return null;String encodeStr = "";byte[] utfBytes = s.getBytes();MessageDigest mdTemp;try {mdTemp = MessageDigest.getInstance("MD5");mdTemp.update(utfBytes);byte[] md5Bytes = mdTemp.digest();BASE64Encoder b64Encoder = new BASE64Encoder();encodeStr = b64Encoder.encode(md5Bytes);} catch (Exception e) {throw new Error("Failed to generate MD5 : " + e.getMessage());}return encodeStr;}/** 计算 HMAC-SHA1*/public static String HMACSha1(String data, String key) {String result;try {SecretKeySpec signingKey = new SecretKeySpec(key.getBytes(), "HmacSHA1");Mac mac = Mac.getInstance("HmacSHA1");mac.init(signingKey);byte[] rawHmac = mac.doFinal(data.getBytes());result = (new BASE64Encoder()).encode(rawHmac);} catch (Exception e) {throw new Error("Failed to generate HMAC : " + e.getMessage());}return result;}/** 等同于javaScript中的 new Date().toUTCString();*/public static String toGMTString(Date date) {SimpleDateFormat df = new SimpleDateFormat("E, dd MMM yyyy HH:mm:ss z", Locale.UK);df.setTimeZone(new java.util.SimpleTimeZone(0, "GMT"));return df.format(date);}/** 发送POST请求*/public static String sendPost(String url, String body, String ak_id, String ak_secret) throws Exception {PrintWriter out = null;BufferedReader in = null;String result = "";int statusCode = 200;try {URL realUrl = new URL(url);/** http header 参数*/String method = "POST";String accept = "application/json";String content_type = "application/json";String path = realUrl.getFile();String date = toGMTString(new Date());// 1.对body做MD5+BASE64加密String bodyMd5 = MD5Base64(body);String stringToSign = method + "\n" + accept + "\n" + bodyMd5 + "\n" + content_type + "\n" + date + "\n"+ path;// 2.计算 HMAC-SHA1String signature = HMACSha1(stringToSign, ak_secret);// 3.得到 authorization headerString authHeader = "Dataplus " + ak_id + ":" + signature;// 打开和URL之间的连接URLConnection conn = realUrl.openConnection();// 设置通用的请求属性conn.setRequestProperty("accept", accept);conn.setRequestProperty("content-type", content_type);conn.setRequestProperty("date", date);conn.setRequestProperty("Authorization", authHeader);// 发送POST请求必须设置如下两行conn.setDoOutput(true);conn.setDoInput(true);// 获取URLConnection对象对应的输出流out = new PrintWriter(conn.getOutputStream());// 发送请求参数out.print(body);// flush输出流的缓冲out.flush();// 定义BufferedReader输入流来读取URL的响应statusCode = ((HttpURLConnection)conn).getResponseCode();if(statusCode != 200) {in = new BufferedReader(new InputStreamReader(((HttpURLConnection)conn).getErrorStream()));} else {in = new BufferedReader(new InputStreamReader(conn.getInputStream()));}String line;while ((line = in.readLine()) != null) {result += line;}} catch (Exception e) {e.printStackTrace();} finally {try {if (out != null) {out.close();}if (in != null) {in.close();}} catch (IOException ex) {ex.printStackTrace();}}if (statusCode != 200) {throw new IOException("\nHttp StatusCode: "+ statusCode + "\nErrorMessage: " + result);}return result;}/** GET请求*/public static String sendGet(String url, String ak_id, String ak_secret) throws Exception {String result = "";BufferedReader in = null;int statusCode = 200;try {URL realUrl = new URL(url);/** http header 参数*/String method = "GET";String accept = "application/json";String content_type = "application/json";String path = realUrl.getFile();String date = toGMTString(new Date());// 1.对body做MD5+BASE64加密// String bodyMd5 = MD5Base64(body);String stringToSign = method + "\n" + accept + "\n" + "" + "\n" + content_type + "\n" + date + "\n" + path;// 2.计算 HMAC-SHA1String signature = HMACSha1(stringToSign, ak_secret);// 3.得到 authorization headerString authHeader = "Dataplus " + ak_id + ":" + signature;// 打开和URL之间的连接URLConnection connection = realUrl.openConnection();// 设置通用的请求属性connection.setRequestProperty("accept", accept);connection.setRequestProperty("content-type", content_type);connection.setRequestProperty("date", date);connection.setRequestProperty("Authorization", authHeader);connection.setRequestProperty("Connection", "keep-alive");// 建立实际的连接connection.connect();// 定义 BufferedReader输入流来读取URL的响应statusCode = ((HttpURLConnection)connection).getResponseCode();if(statusCode != 200) {in = new BufferedReader(new InputStreamReader(((HttpURLConnection)connection).getErrorStream()));} else {in = new BufferedReader(new InputStreamReader(connection.getInputStream()));}String line;while ((line = in.readLine()) != null) {result += line;}} catch (Exception e) {e.printStackTrace();} finally {try {if (in != null) {in.close();}} catch (Exception e) {e.printStackTrace();}}if (statusCode != 200) {throw new IOException("\nHttp StatusCode: "+ statusCode + "\nErrorMessage: " + result);}return result;}public static void main(String[] args) throws Exception {// 发送POST请求示例String ak_id1 = "NMV.............5jv"; //用户akString ak_secret1 = "Fgs...............3zu"; // 用户ak_secret//根据需求修改为https://dtplus-cn-shanghai.data.aliyuncs.com/face/verify(人脸对比)String url = "https://shujuapi.aliyun.com/org_code/service_code/api_name";// String body = "{\"type\":1,\"content_1\": \"" + photo1 + "\", \"content_2\":\"" + photo2 + "\"}"; //photo1 为图片base64格式String body = "{\"param1\": \"xxx\", \"param2\":\"xxx\"}";System.out.println("response body:" + sendPost(url, body, ak_id, ak_secret));// 发送GET请求String ak_id1 = "NMV.............5jv"; //用户akString ak_secret1 = "Fgs...............3zu"; // 用户ak_secretString url1 = "https://shujuapi.aliyun.com/org_code/service_code/api_name?param1=xxx¶m2=xxx";System.out.println("response body:" + sendGet(url1, ak_id1, ak_secret1));}}
七、请求网络对面相似度
ps:图片uri转base64:
photo1 = ImageUtils.bitmapToString(getPath(uri));
photo2 = ImageUtils.bitmapToString(getPath(uri_));
public class ImageUtils {
// 根据路径获得图片并压缩,返回bitmap用于显示
public static Bitmap getSmallBitmap(String filePath) {
final BitmapFactory.Options options = new BitmapFactory.Options();
options.inJustDecodeBounds = true;
BitmapFactory.decodeFile(filePath, options);
// Calculate inSampleSize
options.inSampleSize = calculateInSampleSize(options, 480, 800);
// Decode bitmap with inSampleSize set
options.inJustDecodeBounds = false;
return BitmapFactory.decodeFile(filePath, options);
}
//计算图片的缩放值
public static int calculateInSampleSize(BitmapFactory.Options options,int reqWidth, int reqHeight) {
final int height = options.outHeight;
final int width = options.outWidth;
int inSampleSize = 1;
if (height > reqHeight || width > reqWidth) {
final int heightRatio = Math.round((float) height/ (float) reqHeight);
final int widthRatio = Math.round((float) width / (float) reqWidth);
inSampleSize = heightRatio < widthRatio ? heightRatio : widthRatio;
}
return inSampleSize;
}
//把bitmap转换成String
public static String bitmapToString(String filePath) {
Bitmap bm = getSmallBitmap(filePath);
ByteArrayOutputStream baos = new ByteArrayOutputStream();
//1.5M的压缩后在100Kb以内,测试得值,压缩后的大小=94486字节,压缩后的大小=74473字节
//这里的JPEG 如果换成PNG,那么压缩的就有600kB这样
bm.compress(Bitmap.CompressFormat.JPEG, 40, baos);
byte[] b = baos.toByteArray();
Log.d("d", "压缩后的大小=" + b.length);
return Base64.encodeToString(b, Base64.DEFAULT);
}
}
private String getPath(Uri uri) {
    String[] projection = {MediaStore.Video.Media.DATA};
    Cursor cursor = managedQuery(uri, projection, null, null, null);
    int column_index = cursor
            .getColumnIndexOrThrow(MediaStore.Audio.Media.DATA);
    cursor.moveToFirst();
    return cursor.getString(column_index);
}
请求网络进行图片对比
private boolean getVerify() {
        new Thread(new Runnable() {
            @Override
            public void run() {
                try {
                    photo1 = ImageUtils.bitmapToString(getPath(uri));
                    photo2 = ImageUtils.bitmapToString(getPath(uri_));
                    String body = "{\"type\":1,\"content_1\": \"" + photo1 + "\", \"content_2\":\"" + photo2 + "\"}";
                    final String s = sendPost(url, body, ak_id, ak_secret);
                    //解析result
                     final Bean jsonObject = JSON.parseObject(s, Bean.class);
                    runOnUiThread(new Runnable() {
                        @Override
                        public void run() {
                            if (jsonObject.getConfidence() > 80){
                                Toast.makeText(MainActivity.this,"验证成功",Toast.LENGTH_SHORT).show();
                            }else {
                                Toast.makeText(MainActivity.this,"验证失败",Toast.LENGTH_SHORT).show();
                            }
                        }
                    });

                } catch (final Exception e) {
                    e.printStackTrace();
                    runOnUiThread(new Runnable() {
                        @Override
                        public void run() {
                            Log.v("sjc——", e.toString());
                            Toast.makeText(MainActivity.this, "对比失败>"+e, Toast.LENGTH_SHORT).show();
                        }
                    });

                }
            }
        }).start();
        return true;
    }
解析 返回数据可以用 FastJson 方便好用。
八、 注意 相机的请求权限,直接使用uri是不行的,经网上各种查阅,可以使用provider,在manifest 中注册provider
<provider
            android:name="android.support.v4.content.FileProvider"
            android:authorities="包名.fileprovider"
            android:exported="false"
            android:grantUriPermissions="true"
            >
            <meta-data
                android:name="android.support.FILE_PROVIDER_PATHS"
                android:resource="@xml/file_paths"
                />
        </provider>
res目录下新建xml文件夹,并新建文件file_paths(文件名可以随便取),主要是里边的配置
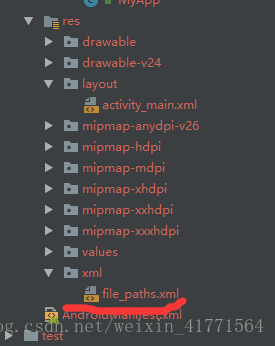
file_paths文件内容如下
<?xml version="1.0" encoding="utf-8"?>
<paths xmlns:android="http://schemas.android.com/apk/res/android">
    <external-path path="pasth" name="camera_photos" />
    <external-path name="my_images" path="Android/data/com.example.wmz.network/files/Pictures/" />
    <external-path name="images" path="Pictures/" />
    <external-path name="dcim" path="DCIM/" />
</paths>
本次项目用jar包:
