1. Gitlab服务器更新
(1). 使用SSH登陆Gitlab服务器
(2). 停止后端的unicorn服务器
[root@c720141 ~]# gitlab-ctl stop unicorn
ok: down: unicorn: 0s, normally up
(3). 停止后端的job 服务器。
[root@c720141 ~]# gitlab-ctl stop sidekiq
ok: down: sidekiq: 0s, normally up
(4). 升级前先做好备份,防止升级失败好回滚。
[root@c720141 ~]# gitlab-rake gitlab:backup:create
Dumping database ...
Dumping PostgreSQL database gitlabhq_production ... [DONE]
done
Dumping repositories ...
  * root/super-git ... [DONE]
  * root/super-git.wiki ...  [DONE]
done
Dumping uploads ...
done
Dumping builds ...
done
Dumping artifacts ...
done
Dumping pages ...
done
Dumping lfs objects ...
done
Dumping container registry images ...
[DISABLED]
Creating backup archive: 1529996730_2018_06_26_11.0.1_gitlab_backup.tar ... done
Uploading backup archive to remote storage  ... skipped
Deleting tmp directories ... done
done
done
done
done
done
done
done
Deleting old backups ... skipping
(5)从该地址下载最新包。
https://about.gitlab.com/downloads/
(6)按介绍过的安装步骤正常安装就可以了。
2. Gitlab服务器备份与恢复
(1). 备份
在/etc/gitlab/gitlab.rb中描述了备份位置。详细信息见如下 :
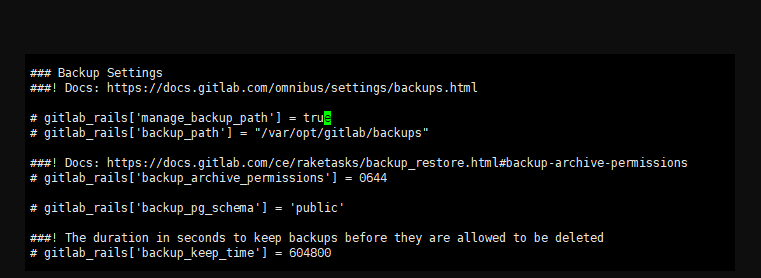
把上面的备份相关配置注释给去掉,去根据情况更改适合自己的位置。
– 修改完成后,执行以下命令让服务器生效。
gitlab-ctl reconfigure
– 执行备份命令:
gitlab-rake gitlab:backup:create
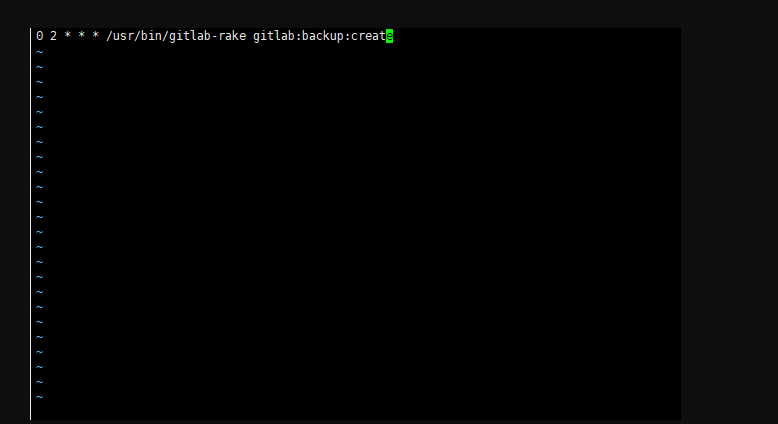
– 自动备份(通过linux自带的crontab进行自动备份)
crontabe -e
(2). 还原
##### - 停止相关的服务
[root@c720141 ~]# gitlab-ctl stop unicorn
ok: down: unicorn: 0s, normally up
[root@c720141 ~]# gitlab-ctl stop sidekiq
ok: down: sidekiq: 0s, normally up
##### - 执行还原
[root@c720141 backups]# gitlab-rake gitlab:backup:restore BACKUP=/var/opt/gitlab/backups/1530000374_2018_06_26_11.0.1
##### - 启动gitlab服务器
[root@c720141 backups]#gitlab-ctl start
3. 导入现有的库
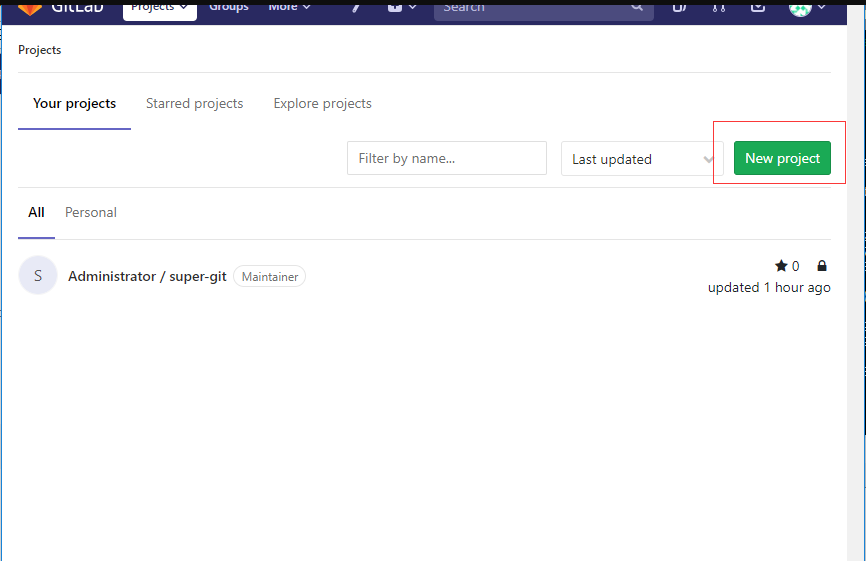
(1)登陆GitLab服务器
(2)点击【New Project】
(3)根据需要,在下面红色框中填入适当信息。
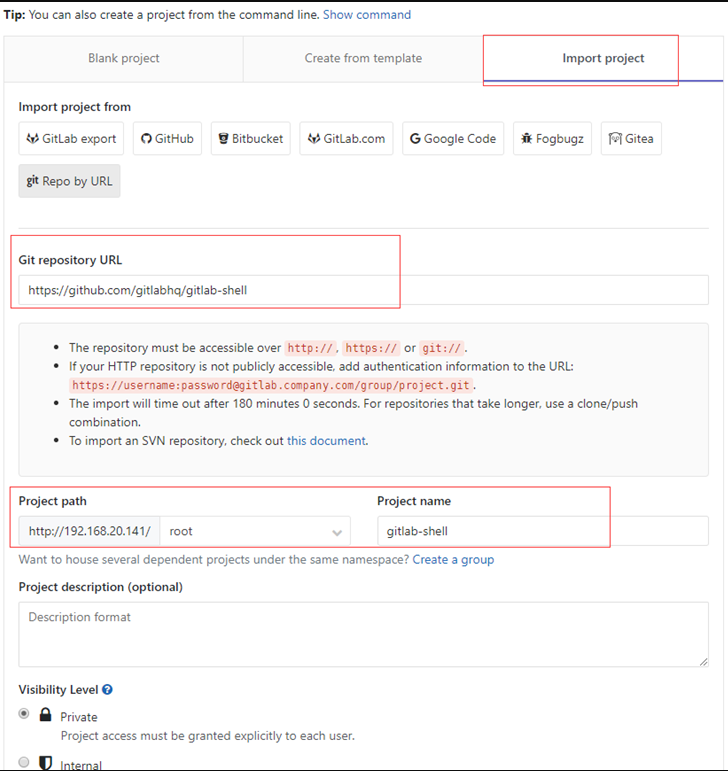
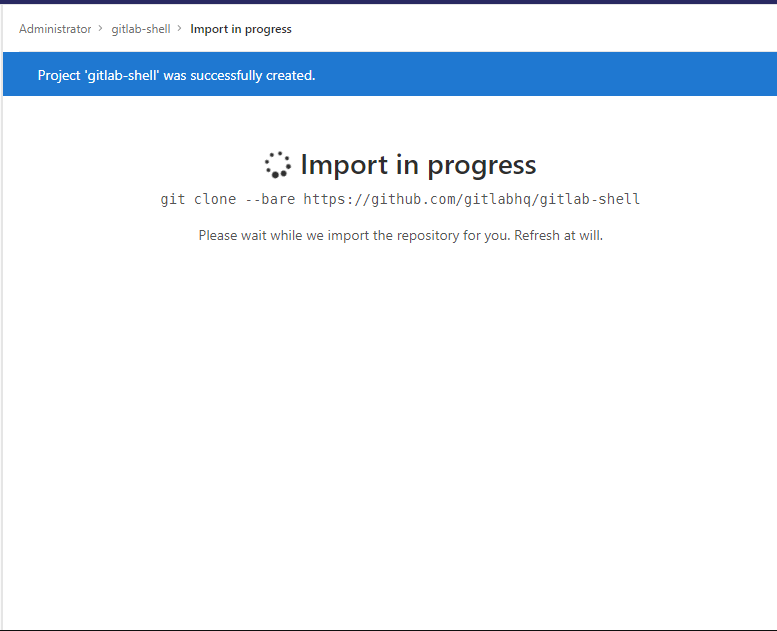
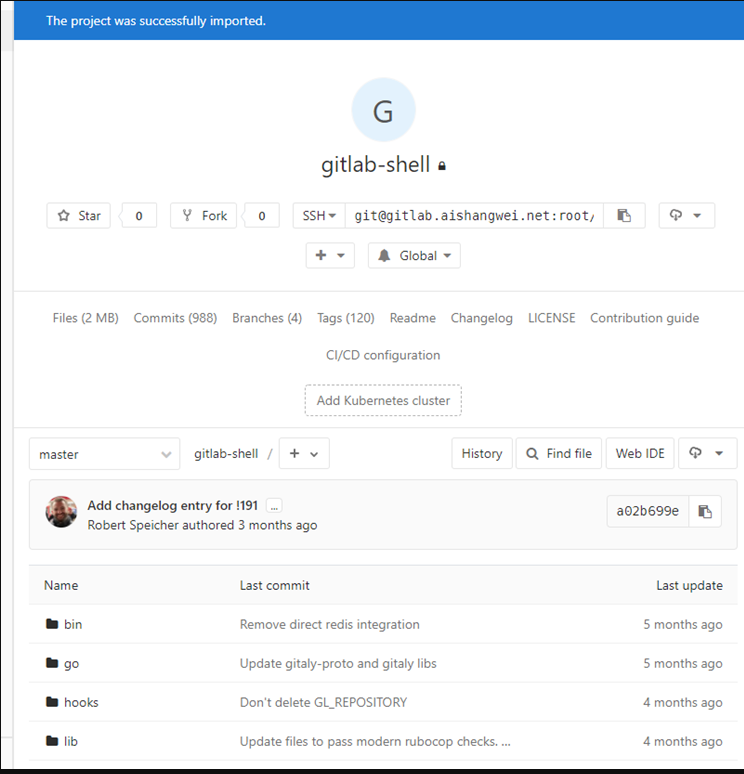
(4)导入情况如下所示