1、准备
- 开发环境搭建,参见《Cordova系列之开发环境搭建(windows)》
- 进入工程目录,删除browser Platform,添加Android Platform
cordova platform rm browser
cordova platform add android
D:\cordova\helloworld>cordova platform add android
Adding android project...
Running command: cmd "/s /c "C:\Users\user\.cordova\lib\npm_cache\cordova-androi
d\4.1.1\package\bin\create.bat D:\cordova\helloworld\platforms\android io.cordov
a.hellocordova HelloCordova --cli""
Creating Cordova project for the Android platform:
Path: platforms\android
Package: io.cordova.hellocordova
Name: HelloCordova
Activity: MainActivity
Android target: android-22
Copying template files...
Android project created with cordova-android@4.1.1
Installing "cordova-plugin-whitelist" for android
This plugin is only applicable for versions of cordova-android greater than 4.0.
If you have a previous platform version, you do *not* need this plugin since th
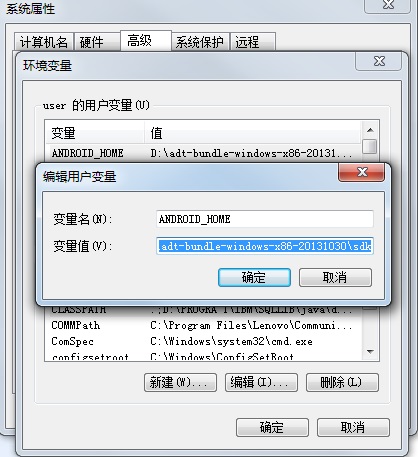
e whitelist will be built in.注意:Cordova会使用ANDROID_HOME环境变量来寻找SDK,如无此环境变量则无法构建Android工程,所以需在系统高级设置中添加ANDROID_HOME为SDK所在目录
2、添加一个已发布的Plugin
在开发自己的Plugin之前,建议可先添加已发布的Plugin作为参考,以下为添加device的命令及其输出
cordova plugin add org.apache.cordova.device
D:\cordova\helloworld>cordova plugin add org.apache.cordova.device
Notice: org.apache.cordova.device has been automatically converted to cordova-pl
ugin-device and fetched from npm. This is due to our old plugins registry shutti
ng down.
Fetching plugin "cordova-plugin-device" via npm
Installing "cordova-plugin-device" for android
3、构建第一个Plugin
测试Plugin采用Cordova官网的Echo示例,为了能更容易理解各文件和函数之间的关系,在其基础上做了一些改造。
说明:本例所有文件都存放在D:\cordova目录下,其中D:\cordova\helloworld为Cordova工程目录;D:\cordova\PluginWorkSpace\cordova-plugin-echo为示例Plugin目录。
- 步骤1:创建Plugin工作目录以及相关文件
在示例Plugin目录(D:\cordova\PluginWorkSpace\cordova-plugin-echo)下建立文件结构
  .
│  plugin.xml
├─src
│  └─android
│          MyEcho.java
└─www
myecho.js- 步骤2:编辑plugin.xml
<?xml version="1.0" encoding="UTF-8"?>
<plugin xmlns="http://apache.org/cordova/ns/plugins/1.0"
    xmlns:rim="http://www.blackberry.com/ns/widgets"
    xmlns:android="http://schemas.android.com/apk/res/android"
    id="cordova-plugin-myecho"
    version="0.0.1">
    <name>MyEcho Plugin</name>
    <description>Cordova MyEcho Plugin</description>
    <author>J.T</author>
    <license>Apache 2.0</license>

    <js-module src="www/myecho.js" name="MyEcho">
        <clobbers target="myecho1" />
        <clobbers target="myecho2" />
    </js-module>

    <!-- android -->
    <platform name="android">
        <config-file target="res/xml/config.xml" parent="/*">
            <feature name="MyEcho" >
                <param name="android-package" value="org.JT.cordova.myecho.MyEcho" />
            </feature>
        </config-file>

        <source-file src="src/android/MyEcho.java" target-dir="src/org/JT/cordova/myecho" />
    </platform>
</plugin>- 步骤3:编辑myecho.js
var exec = require('cordova/exec');

exports.myecho1 = function(str, successCallback) {
    exec(successCallback, function(err){
            successCallback('Nothing to echo1');
        }, "MyEcho", "echo1", [str]);
};

exports.myecho2 = function(str, successCallback) {
    exec(successCallback, function(err){
            successCallback('Nothing to echo2');
        }, "MyEcho", "echo2", [str]);
};- 步骤4:编辑MyEcho.java
package org.JT.cordova.myecho;
import org.apache.cordova.CallbackContext;
import org.apache.cordova.CordovaPlugin;
import org.json.JSONArray;
import org.json.JSONException;
public class MyEcho extends CordovaPlugin {
/**
* Executes the request and returns PluginResult.
*
* @param action The action to execute.
* @param args JSONArry of arguments for the plugin.
* @param callbackContext The callback id used when calling back into JavaScript.
* @return True if the action was valid, false if not.
*/
public boolean execute(String action, JSONArray args, CallbackContext callbackContext) throws JSONException {
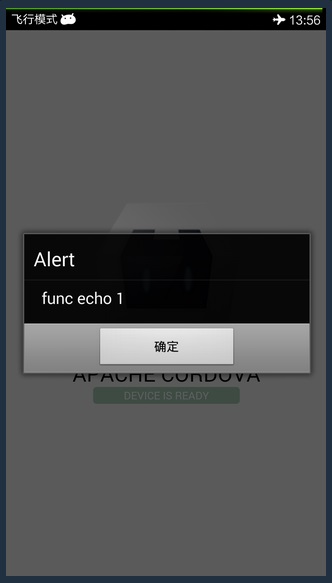
if ("echo1".equals(action)) {
callbackContext.success("func echo 1");
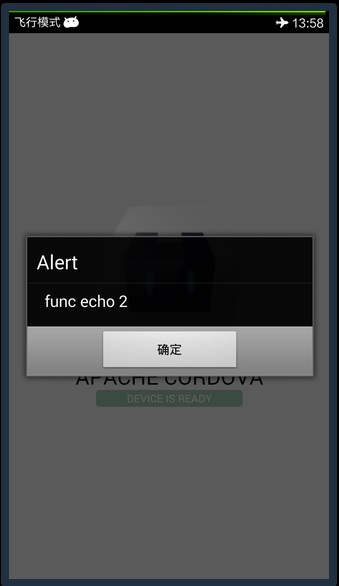
}else if ("echo2".equals(action)) {
callbackContext.success("func echo 2");
}
else {
return false;
}
return true;
}
}步骤5:添加Plugin到工程
D:\cordova\helloworld>cordova plugin add ../PluginWorkSpace/cordova-plugin-echo
显示如下
Installing "cordova-plugin-myecho" for android步骤6:编译apk安装到手机运行
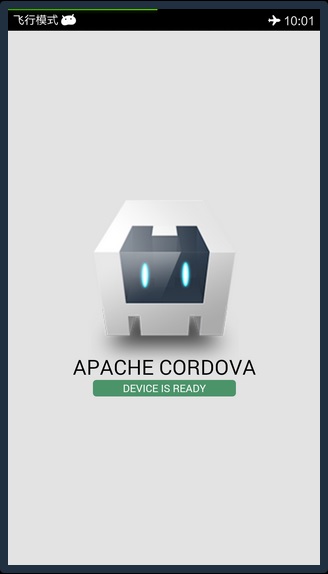
注意:如果没有显示“DEVICE IS READY”,一般是由于我们的Plugin有问题导致的,如果是js有问题可以通过GapDebug工具的console查看具体错误。
4 测试Plugin
为了调用Plugin的函数,对Android工程中的assets/www/js/index.js进行修改
/*
 * Licensed to the Apache Software Foundation (ASF) under one
 * or more contributor license agreements.  See the NOTICE file
 * distributed with this work for additional information
 * regarding copyright ownership.  The ASF licenses this file
 * to you under the Apache License, Version 2.0 (the
 * "License"); you may not use this file except in compliance
 * with the License.  You may obtain a copy of the License at
 *
 * http://www.apache.org/licenses/LICENSE-2.0
 *
 * Unless required by applicable law or agreed to in writing,
 * software distributed under the License is distributed on an
 * "AS IS" BASIS, WITHOUT WARRANTIES OR CONDITIONS OF ANY
 * KIND, either express or implied.  See the License for the
 * specific language governing permissions and limitations
 * under the License.
 */
var app = {
    // Application Constructor
    initialize: function() {
        this.bindEvents();
    },
    // Bind Event Listeners
    //
    // Bind any events that are required on startup. Common events are:
    // 'load', 'deviceready', 'offline', and 'online'.
    bindEvents: function() {
        document.addEventListener('deviceready', this.onDeviceReady, false);
        //添加一个事件回调,用于验证Plugin调用
        document.addEventListener('deviceready',function(){
            var myecho = cordova.require("cordova-plugin-myecho.MyEcho");
            myecho.myecho1('hi', function(message){alert(message)});
            myecho.myecho2('hi', function(message){alert(message)});
        },false);
    },
    // deviceready Event Handler
    //
    // The scope of 'this' is the event. In order to call the 'receivedEvent'
    // function, we must explicitly call 'app.receivedEvent(...);'
    onDeviceReady: function() {
        app.receivedEvent('deviceready');
    },
    // Update DOM on a Received Event
    receivedEvent: function(id) {
        var parentElement = document.getElementById(id);
        var listeningElement = parentElement.querySelector('.listening');
        var receivedElement = parentElement.querySelector('.received');

        listeningElement.setAttribute('style', 'display:none;');
        receivedElement.setAttribute('style', 'display:block;');

        console.log('Received Event: ' + id);
    }
};

app.initialize();
在手机上启动应用,显示如下