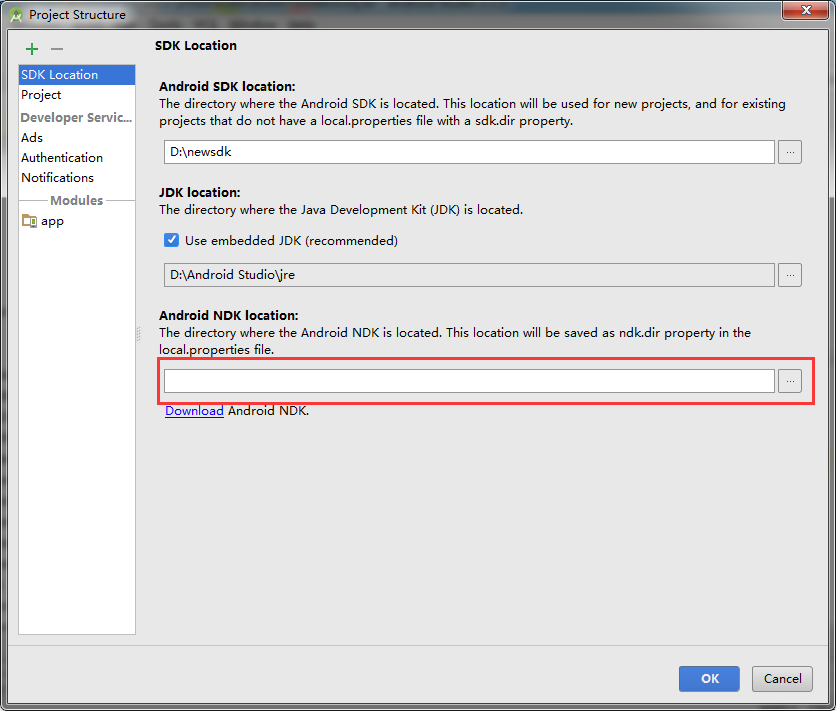
1,下载ndk,这个百度一找一大堆,不用说
1.1,忘了这一步,还要设置项目的ndk路径
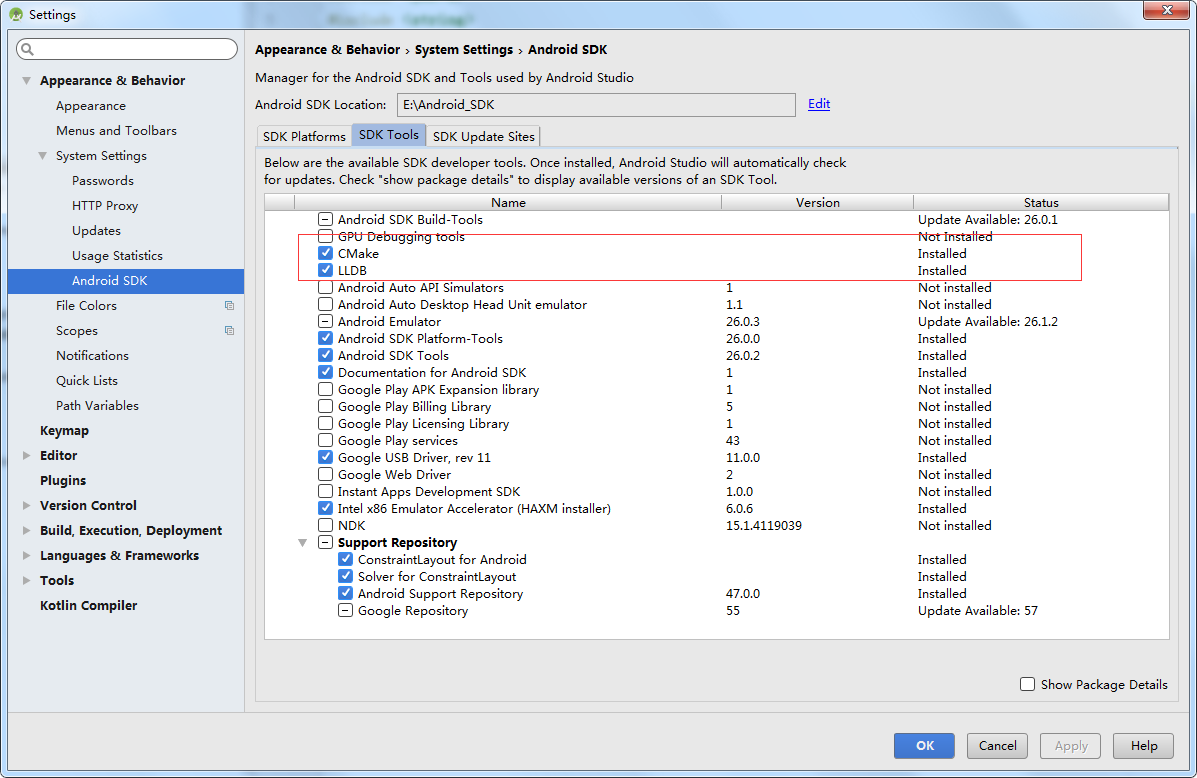
2,在android studio下载这2个工具CMake,LLDB.ctrl+alt+s,打开设置.选择Appearen...->System Settings->Android SDK->SDK Tools可以找到
3, 新项目->android studio必须2.2以上,在创建项目的时候直接勾选include c++即可到了这里自己看MainActivity和native-cpp也应该看得懂,没必要继续看下去
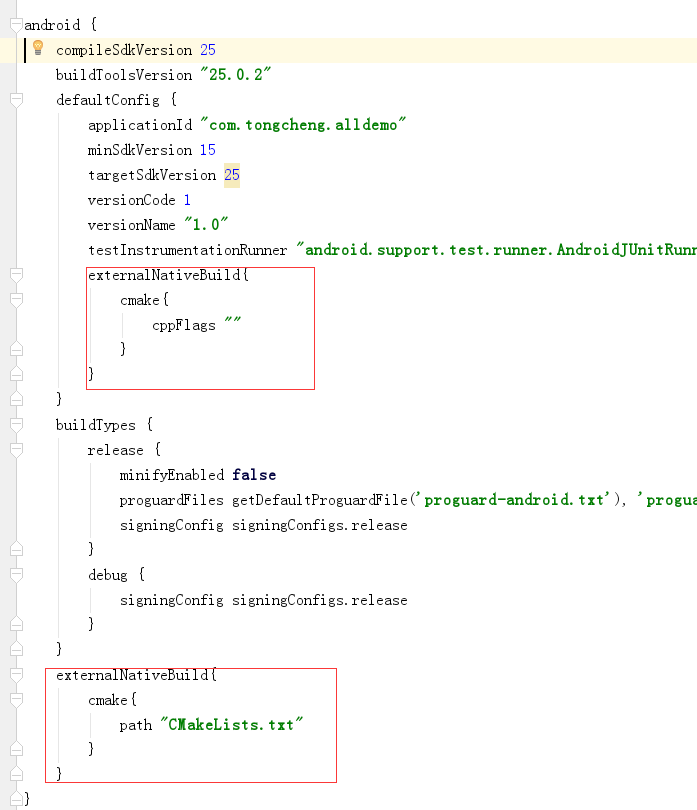
老项目->在项目的根目录创建CMakeLists.txt,然后app级别的gralde配置
 externalNativeBuild{
            cmake{
                cppFlags ""
            }
        }
externalNativeBuild{
cmake{
path "CMakeLists.txt"
}
}# For more information about using CMake with Android Studio, read the
# documentation: https://d.android.com/studio/projects/add-native-code.html
# Sets the minimum version of CMake required to build the native library.
cmake_minimum_required(VERSION 3.4.1)
# Creates and names a library, sets it as either STATIC
# or SHARED, and provides the relative paths to its source code.
# You can define multiple libraries, and CMake builds them for you.
# Gradle automatically packages shared libraries with your APK.
add_library( # Sets the name of the library.
native-lib
# Sets the library as a shared library.
SHARED
# Provides a relative path to your source file(s).
src/main/cpp/native-lib.cpp )
# Searches for a specified prebuilt library and stores the path as a
# variable. Because CMake includes system libraries in the search path by
# default, you only need to specify the name of the public NDK library
# you want to add. CMake verifies that the library exists before
# completing its build.
find_library( # Sets the name of the path variable.
log-lib
# Specifies the name of the NDK library that
# you want CMake to locate.
log )
# Specifies libraries CMake should link to your target library. You
# can link multiple libraries, such as libraries you define in this
# build script, prebuilt third-party libraries, or system libraries.
target_link_libraries( # Specifies the target library.
native-lib
# Links the target library to the log library
# included in the NDK.
${log-lib} )5,在native-lib.cpp文件写这样的代码
#include <jni.h>
#include <string>

extern "C"
JNIEXPORT jstring JNICALL
Java_com_tongcheng_alldemo_activity_CmakeActivity_stringFromJNI(
        JNIEnv *env,
        jobject /* this */) {
    std::string hello = "Hello from C++";
    return env->NewStringUTF(hello.c_str());
}
这里解释一下上面的代码.JNIEXPORT 后面的是返回类型.Java_后面的是要引用的类的全限定名,在CmakeActivity_后面的是该方法的名称
在CmakeActivity里面的代码
 static {
        System.loadLibrary("native-lib");
    }
    public native String stringFromJNI();
6,解释一下CMakeLists文件的代码,这个里面的语法我不懂,需要具体学习的自行百度,我只是现学现卖.
当我们添加新的cpp文件的时候需要添加一下代码
add_library( # Sets the name of the library.
             native-lib

             # Sets the library as a shared library.
             SHARED

             # Provides a relative path to your source file(s).
             src/main/cpp/native-lib.cpp )
             add_library( # Sets the name of the library.
                          Constance#这个应该就是System.loadLibrary load的那个cpp文件的名称

                          # Sets the library as a shared library.
                          SHARED

                          # Provides a relative path to your source file(s).
                          src/main/cpp/Constance.cpp )#这个是文件的名称
目前还不知道kotlin怎么使用jni,网上大概查了一些,感觉挺复杂的


