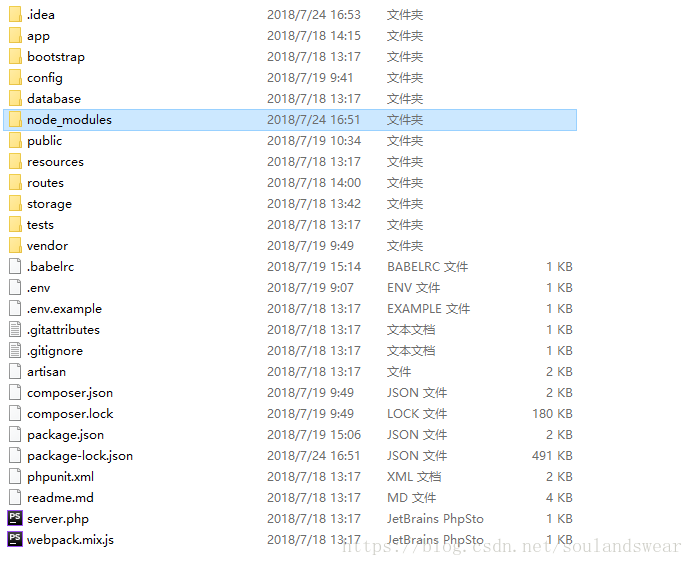
目前项目是使用的vue+laravel来写的,其中laravel和vue分别放了一个目录,但是这样有个问题,那就是vue需要经常更新,不然运行项目会经常出现各种问题,这里就看了看laravel的文档,才知道还有Mix这个组件,进行编译前后端资源。下载完成后的目录和laravel是一样的,只是在根目录下面有一个node_models目录。
安装:
安装Node,首先要确保自己的电脑上面有安装Node。
使用:node -v 和 npm -v查看是否有版本号,有即表示有安装Node,否则需要安装Node。
cdn.jsdelivr.net/npm/vue,下载最新的Node。
接下来就需要安装Laravel Mix,首先安装Laravel项目:composer create-project --prefer-dist laravel/laravel blog 这里项目的名字叫blog 。
安装成功后,进入安装目录。
安装前端依赖:npm install(这里可以选择淘宝镜像)
使用例子:
修改 routes/web.php 文件为:
Route::get('/',function(){

return view('index');
});
新建一个Hello.vue文件
在 resources/assets/js/components 目录下新建 Hello.vue 文件
<template>
    <div>
        <h1>Hello, Larvuent!</h1>
        <p class="hello">{{ msg }}</p>
    </div>
</template>

<script>
export default {
    data() {
        return {
            msg: 'This is a Laravel with Vue and Element Demo.'
        }
    }
}
</script>

<style>
.hello {
    font-size: 2em;
    color: green;
}
</style>
修改 app.js 文件
修改 resources/assets/js/app.js 文件
require('./bootstrap');

window.Vue = require('vue');

// Vue.component('example', require('./components/Example.vue')); // 注释掉
import Hello from './components/Hello.vue'; // 引入Hello 组件

const app = new Vue({
    el: '#app',
    render: h => h(Hello)
});
新建 Laravel 视图文件,和 Vue 交互
在 resources/views 目录下新建 index.blade.php 文件
<!doctype html>
<html lang="en">
<head>
<meta charset="UTF-8">
<title>Larvuent</title>
</head>
<body>
<div id="app"></div>
<script src="{{ mix('js/app.js') }}"></script>
</body>
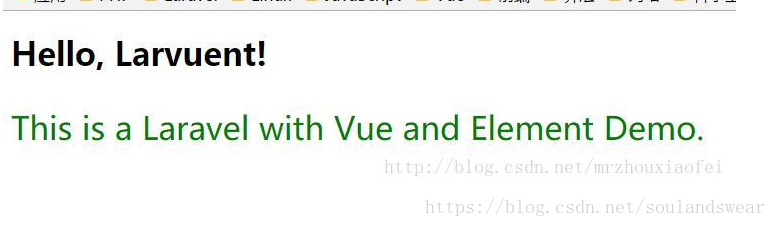
</html>编译:运行 npm run dev
提示编译成功,并访问页面:输入http://192.168.1.112
显示如下表示成功:
现在已经完成vue+laravel了,还需要引入element.
npm i element-ui -S 即可引入element
修改 resources/assets/js/app.js 文件
import Hello from './components/Hello.vue'; // 引入Hello 组件
import ElementUI from 'element-ui';
import 'element-ui/lib/theme-default/index.css';
Vue.use(ElementUI);
修改Hello.vue,使用element组件。
<template>
    <div>
        <h1>Hello, Larvuent!</h1>
        <el-button @click="visible = true">按钮</el-button>
        <el-dialog v-model="visible">
            <p>欢迎使用 Element</p>
        </el-dialog>
    </div>
</template>

<script>
export default {
    data() {
        return {
            visible: false
        }
    }
}
</script>

<style>
.hello {
    font-size: 2em;
    color: green;
}
</style>
再次运行npm run dev 进行编译前端资源。然后访问页面如下:

这里修改了一个vue文件就要重新编译一次,很麻烦,所有可以运行 npm run watch 就可以不需要再次编译了,每次修改过后的代码自动就会编译。
这里还有一个很重要的问题,那就是很多人参照以上的步骤会报错,并不会出现正常的页面。
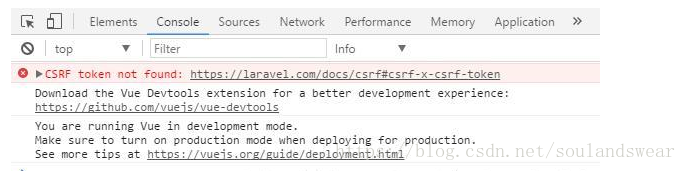
很多人都会出现这样的问题。
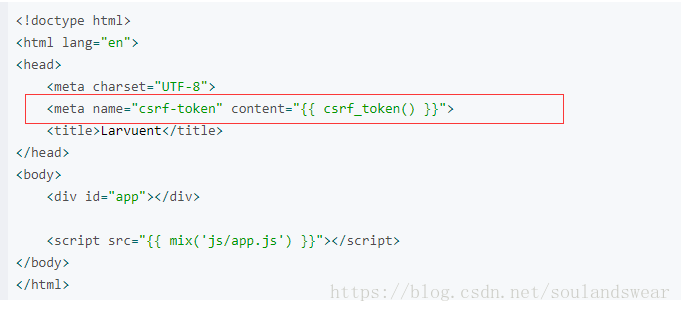
所有需要在index页面加一个header头,就可以了。
修 改 resources/views/index.blade.php 文件为
目前都只是最基本的使用,大型项目是需要使用vue路由的。所有这里需要安装路由。
运行 npm install vue-router --save-dev 安装路由。
配置:
在 resources/assets/js 目录下新建目录 router ,同时在 router 目录下新建 index.js 文件
import Vue from 'vue';
import VueRouter from 'vue-router';
Vue.use(VueRouter);

export default new VueRouter({
    saveScrollPosition: true,
    routes: [
        {
            name: 'hello',
            path: '/hello',
            component: resolve => void(require(['../components/Hello.vue'], resolve))
        }
    ]
});
在 resources/assets/js 目录下新建 App.vue 文件
<template>
    <div>
        <h1>Hello, {{ msg }}!</h1>
        <router-view></router-view> <!--路由引入的组件将在这里被渲染-->
    </div>
</template>

<script>
export default {
    data() {
        return {
            msg: 'Vue'
        }
    }
}
</script>

<style>
</style>
修改 resources/assets/js/app.js 文件为
// import Hello from './components/Hello.vue';
import App from './App.vue';
import ElementUI from 'element-ui';
import 'element-ui/lib/theme-default/index.css';
Vue.use(ElementUI);

import router from './router/index.js';

const app = new Vue({
    el: '#app',
    router,
    render: h => h(App)
});
重新编译。