转自: https://blog.csdn.net/white_ice/article/details/56665875
1.选择建立maven project项目
点击 new——other——maven project,点击next。

2.选择项目路径,使用默认的路径:Use default Workspace and location

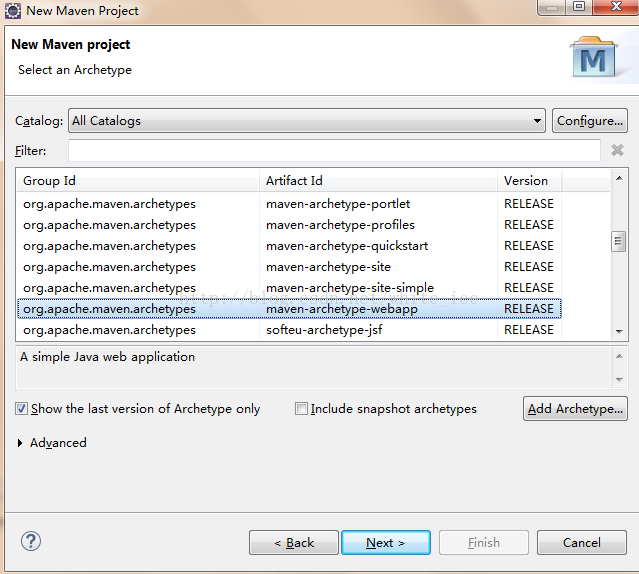
3.选择项目类型,选择maven-archetype-webapp类型。
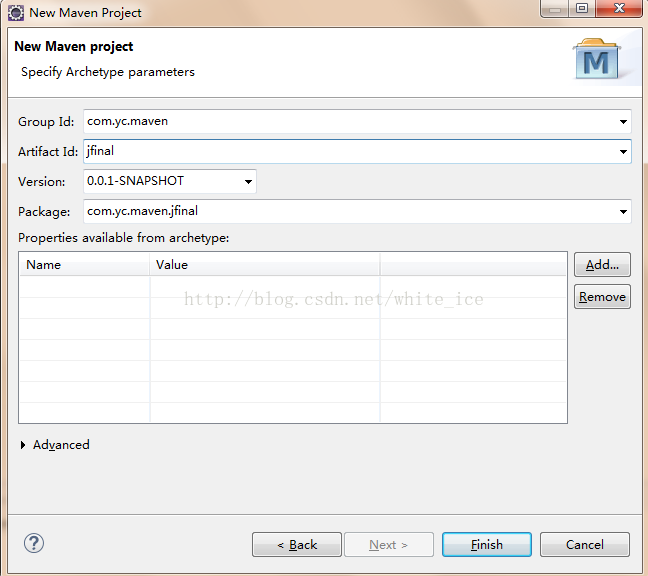
4.输入groupId、artifactId、version、package(会默认给你一个package,不写也可以)、点击finish。
5.若出现如下错误:
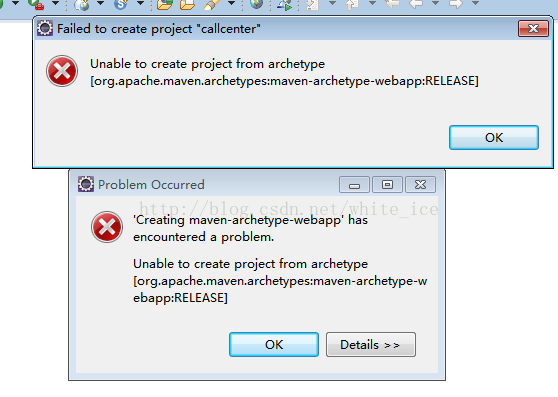
在cmd中使用 mvn archetype:generate重新运行一下,然后重启eclipse即可解决。
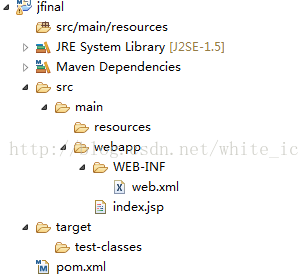
6.刚建好的文件结构如图所示:
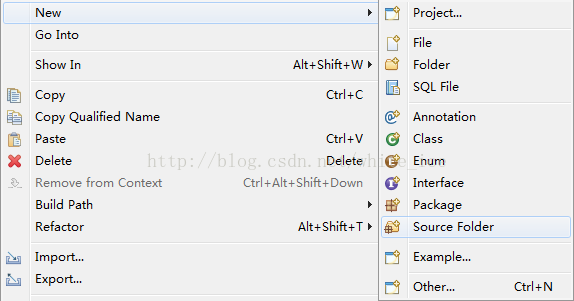
7.配置项目,需要添加三个source folder,分别是src/main/java src/test/java src/test/resources. 注意此处应该new--
Source folder
8,更改class 路径,右键点击项目,java-build path--source,双击Output folder:选择路径
src/main/java, src/main/resources 选择target/classes
src/test/java, src/test/resources 选择target/test-classes;
同时可以order and export更改文件夹显示顺序、更改项目jdk

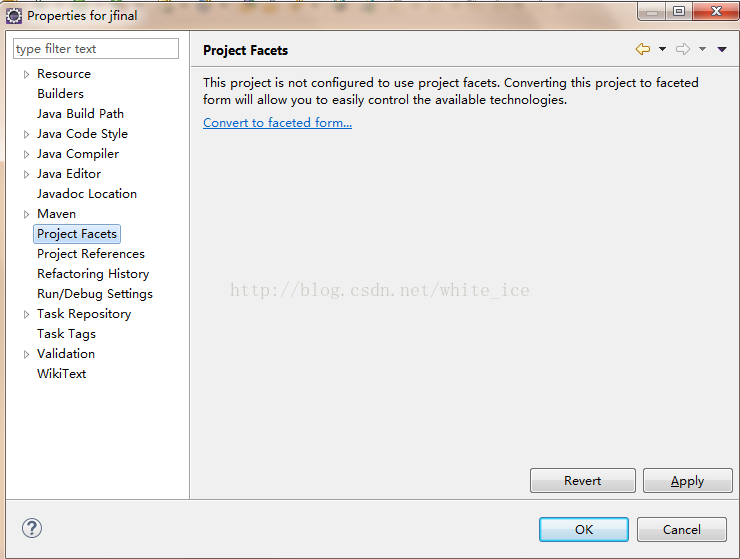
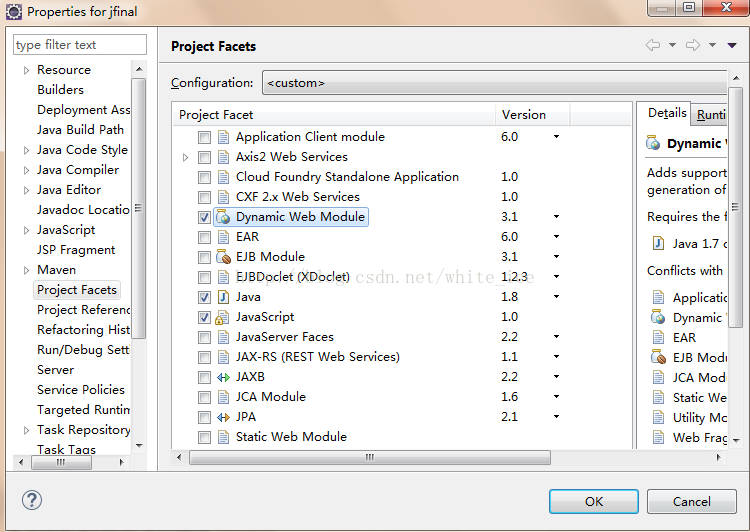
9.将项目改成Dynamic Web项目,右键项目,选择Project Facets,点击Convert to faceted from。。。
10.我使用的jdk1.8,配置如下:
11.配置完后我这边有报错:
The superclass "javax.servlet.http.HttpServlet" was not found on the Java Build Path
解决方法:在错误的项目上单击右键》build path》configure build path》add library》server runtime》
apache tomcat x》点击ok
12.完成后此时项目结构树应该增加了webContent文件夹,将webcontent下的两个文件夹cope到src/main/webapp
下合并,并且删除webContent文件夹,完成后如图所示:

13.右键点击项目,以此点击Properties》Deployment Assembly,如图所示:
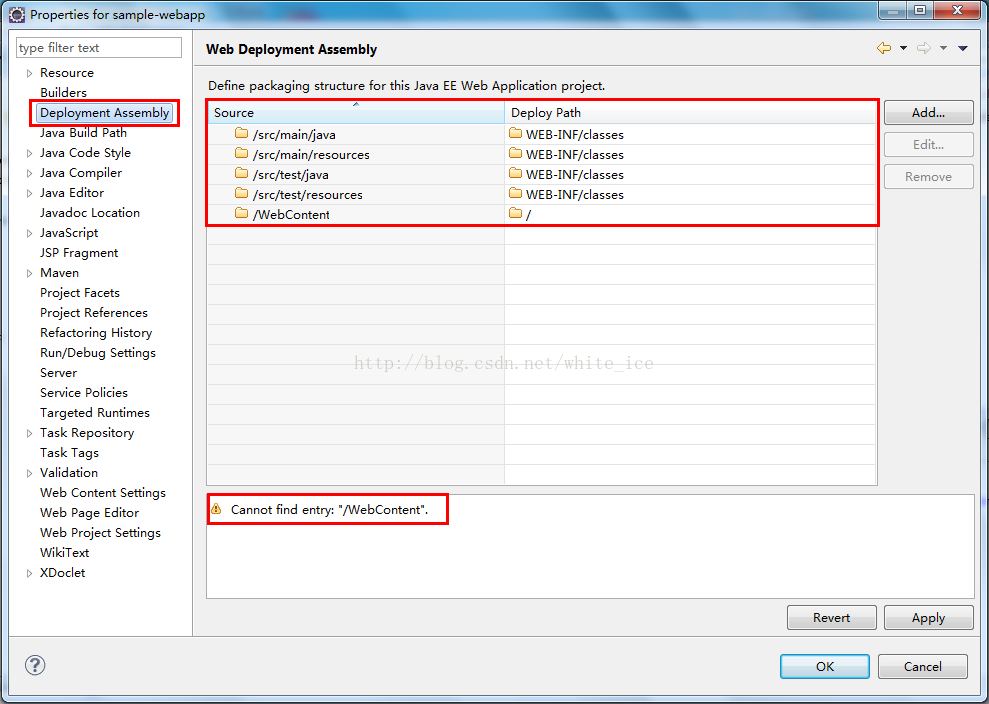
通过remove删掉src/test/java, src/test/resources, /webContent,并且通过add添加webapp与maven依赖如下图所示,

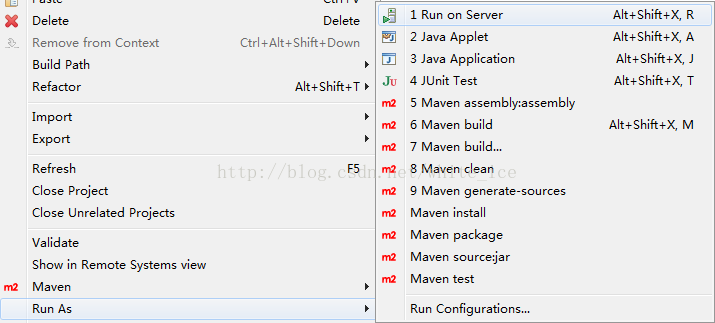
14.将项目添加到server中运行
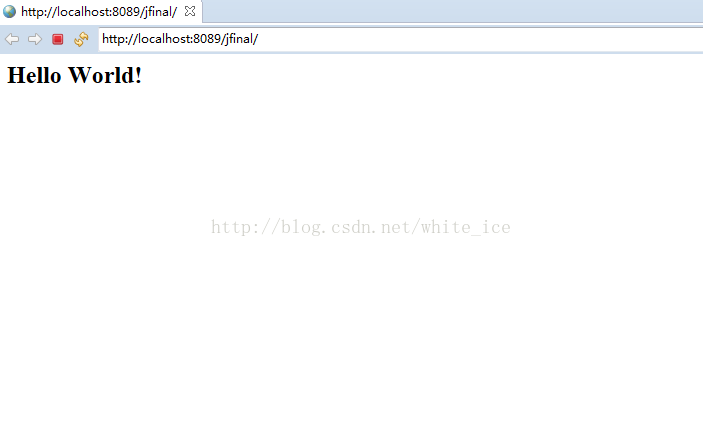
完。